
We’re in the process of serializing the Deeper Modes of Expression bonus chapter from our book Creating Motion Graphics with After Effects into a set of 12 posts here on PVC. As you work with Position values and expressions, you will run into the problem of what the Position value really means: Is it a position relative to the layer (such as an effect point), is it a position relative to a parent layer, or is it a position relative to the overall comp (sometimes referred to as “world space”)?
Fortunately, After Effects has a number of layer space transform methods designed to help you move between these different definitions of Position. These are described in the online Help (press F1 to open). Most are straightforward, but there are a few useful transformations that need some extra thought.
From Comp Space
In our first example, we have a crosshair object moving around in comp space. As it passes over the musical instrument layers in this comp, we want a Distort > Spherize effect to move through these layers. However, Spherize’s effect point Center of Sphere has position values relative to the layer it is applied to – not to the overall comp. This is further complicated by the fact the musical objects have been scaled as well.
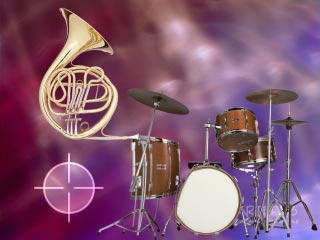 The image at left shows what can go wrong: We’ve linked Sphere’s Center of Sphere effect point to the Position of the crosshair – compare their values in the Timeline panel; they are the same. However, the effects don’t line up with the crosshair as they are in different spaces: In this image, the crosshair is nowhere near the french horn or drumkit, yet both ar distorted as if the crosshair (and the linked Sphere effect) was over them. What we need to do is translate from the crosshair’s position in the comp, to the local space the Spherize effect is using.
 In this second image at left, we’ve used the expression method fromComp(point) (where point = the Position of the crosshair). This causes the Spherize effect’s Center of Sphere values to be offset properly, taking the Scale and Position of their own layers into account. (Objects courtesy Getty Images/Instrumentals; background courtesy Artbeats/Light Illusions.)
If the layers are in 3D space, you need to use a different expression that takes this additional twist into account. In this case, you need to use the method fromCompToSurface(point) to “project” the position of the layer being followed onto the layer that has the effect applied. (By the way, the illusion breaks down somewhat if you add a camera to the comp and fly it around, as that adds another complication to the transformation.)
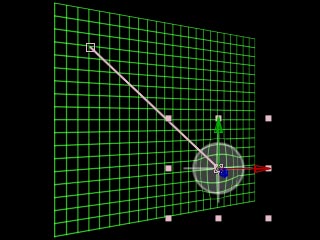
The fromCompToSurface(point) expression aligns an effect point on a layer in 3D space with the Position of another layer in the comp.

To Comp Space
What if you need to do the opposite: translate from an effect’s local position relative to a layer, out to a position value that relates to the comp? You guessed it: You need to use the toComp expression. The trick here is that you need to be careful about which layer toComp is translating from…
In the next example below, we have a large image that we’ve scaled down and are panning across the comp. This image has Effect > Distort > Twirl applied, which is also animating through the layer, keyframed to follow some of the contours present in the image. The effect’s Twirl Center value is relative to this scaled and panning layer – not to the comp. Now we want a second layer in the comp to track the Twirl Center.


A Twirl effect has been animated through a large panning still. To make the wheel track its position in the comp, we used the toComp method. Background courtesy Digital Vision/Music Mix.
If you use the toComp method directly on the wheel layer which we want to follow the Twirl effect, as it stands it will incorrectly assume it has to translate the wheel’s coordinates (since that is the layer it is applied to) into comp space, rather than the photo’s. Therefore, you need an additional reference to tell toComp that it is supposed to be looking at a different layer:
master_layer = thisComp.layer(“photo”);
master_layer.toComp(master_layer.effect(“Twirl”).param(“Twirl Center”))
In general, prefixing expression methods with the name of an alternate layer is a useful technique to get them to calculate values based on other layers. If you find this additional level of indirection too confusing, there is another way: Write the expression for an Effect > Expression Controls > Point Control applied to the master layer, then use the pick whip to connect the Position of the slave layer to this Point Control. This is demonstrated below:

Chasing Children
When you parent one layer to another, its Position is now relative to the parent’s upper-left corner – a bit indirect! The toComp expression method is useful for translating a child’s Position (or technically, the location of its Anchor Point) back into an overall comp coordinate.
This final example shows this technique put to use. Here, we have created a pair of two-link robot arms using parenting, and attached a null object to the tip of each arm. To find out the position of this tip in comp space, as above we applied a Point control to the null, then wrote the following expression for that Point control: toComp(anchorPoint).
We then added a comp-sized solid on top, with a lightning effect applied, and used the pick whip to attach the start and end Point of the lightning to the Point controls added to each null.
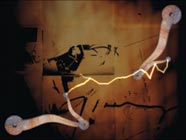
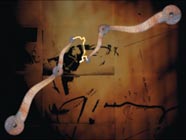
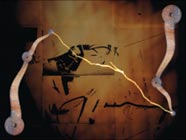
Each of these robot arms is the result of a parenting chain. Using toComp translates the position of the null objects at their tips back to comp space, so that the lightning’s effect points can follow them. Background courtesy Digital Vision/Naked & Scared.
Note that if for some reason the layer with the Lightning effect was not the same size as the comp, or was rotated or misaligned, its space transformations would be different from the comp’s. To compensate for these transgressions, we would just need to type fromComp(, pick whip to our aforementioned Point Controls, add a ) (close parenthesis) at the end, and all would be right again. The resulting expression is shown below:

Next Installment: Comp, Footage, and Layer Attributes
In the next installment, we’ll discuss Comp, Footage, and Layer Attributes: techniques for automatically finding the size and frame rate of comps and layers, plus perform time format conversions. Until then…
The content contained in Creating Motion Graphics with After Effects – as well as the CMG Blogs and CMG Keyframes posts on ProVideoCoalition – are copyright Crish Design, except where otherwise attributed.

Filmtools
Filmmakers go-to destination for pre-production, production & post production equipment!
Shop Now


