It’s no secret that Canon 5Ds are everywhere. They’ve shot music videos, short films, commercials and more Vimeo videos than anyone can imagine. One place where I haven’t heard about a lot of usage (as of yet anyway) is in multicamera concert production. There’s very real reasons why you wouldn’t want to use any small-form-factor DSLRs (with no gen lock, timecode input or external monitoring) in a multicam production. But that doesn’t mean that they can’t get the job done.

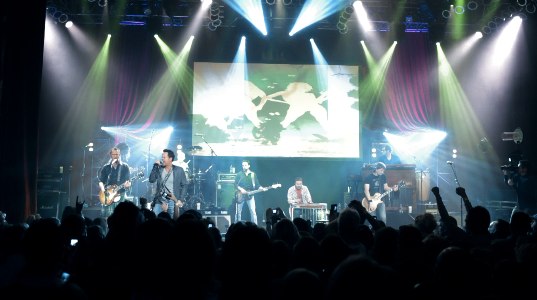
A frame grab of the full stage at the House of Blues in Chicago.
I recently had the pleasure of editing a 5D-shot multicamera concert. While I had worked with a lot of 5D footage in a lot of different projects this was the first true multicam show using the 5Ds. Multicam can mean a lot of things these days but to me it’s a live concert or show type environment where the cameras are all jam synced together receiving a common timecode. There’s usually a director in the truck calling the shots, all of the camera operators have headsets to communicate with the director, all cameras are recorded remotely and there’s some kind of line cut on tape at the end. That’s not the kind of mulitcam show we did with the 5Ds.

There were several factors that played into the director’s decision to shoot 5D. As a very early adopter of the camera, he and the show’s director of photography, Rhet Bear, shot what I believe was one of the first music videos on the camera, Katie Armiger, “Trail of Lies.” We all knew the capabilities of the camera itself to capture an amazing image but there was the question of how it would perform in a live concert situation. But Shepherd explains that his experience with the format as well as a specific style he was looking for made the Canon DSLRs an obvious choice: “I’ve worked with Gary for over a decade now, so i’m pretty familiar with the look and the vibe he expects from his video projects. The loose, hand-held feel of the Canon 5D was perfect to capture the energy of his live show. We’ve used the 5Ds for many music videos in the past year, so the post process didn’t scare me. It’s different, but not really any harder than a traditional shoot. If this was 5 years ago, we would have shot the whole show on bolex’s and handheld film cameras. Thankfully, the new DSLR technology allows us to simulate that feel, in HD, without loading 100′ daylight spools every 4 minutes!”
Considerations
The first consideration was probably budgetary. Live concert production can be expensive. Traditionally you have quite a large crew with a production truck that’s the central hub where all of the feeds from the cameras are recorded to tape. The director, technical director and a number of other crew members live and breathe in that truck for quite a while during rehearsals and as the show goes to tape. Obviously, if you are shooting a concert or multicam show live to air you have no choice but a concert like the Gary Allan show would get a proper post production schedule with plenty of time to edit, make changes and color correct. Cut all of that expensive overhead out and you’ve got a bunch of camera guys stationed around a venue, ready to shoot a show. But those cameras are all self-contained units with no link to the other cameras.
That brought up the second consideration: there was no way to jamsync timecode to all of the cameras or to remotely record the output. This wasn’t necessarily a problem as I’ve worked with Stephen on a number of these types of shoots over the years. All the cameras would record locally to compact flash cards and all of the camera ops would shoot for more of a zone type of coverage so, in theory, you don’t have everyone recording the same thing all at once and be left with no choices in the edit. Live shows can be very unpredictable so there’s always a safety camera or two positioned around a venue recording a master shot or two that’s the fail-safe if no zone camera is usable. Of course the more zone cameras you add to the mix the more chance of always having a usable angle. A line cut was not needed either as the show was to be cut from scratch. I’ve always felt a line cut was a bit limiting as an editor anyway since, time and budget permitting, I like to study all the angles and find the best stuff.
The third consideration was more the cool-factor of the cameras and the knowledge that if shot right they could record a great image. I don’t mean great from the standpoint that it is a 1920×1080 progressive image but more that the 5D’s image sensor could bring an aesthetic to the image and the entire shoot you might not get from smaller chip cameras traditionally used for multicamera concerts. There were the obvious things like the 5D’s shallow depth of field that we knew could be achieved without the need to be on a long lens as well as an overall more filmic look to the 5D that made using these cameras quite exciting. But I think there were less obvious things that we saw as we got into post. The low light capabilities of the camera meant the stage lighting was more traditional for a concert performance and less for a television shoot. And just the way the camera captured cones of light above and around the stage felt unique.
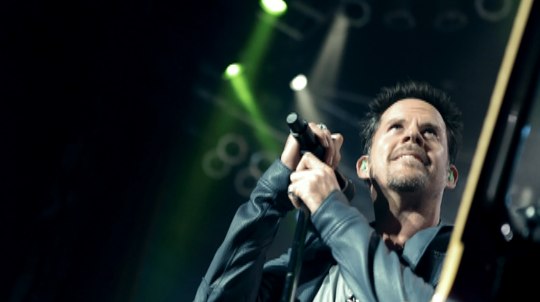
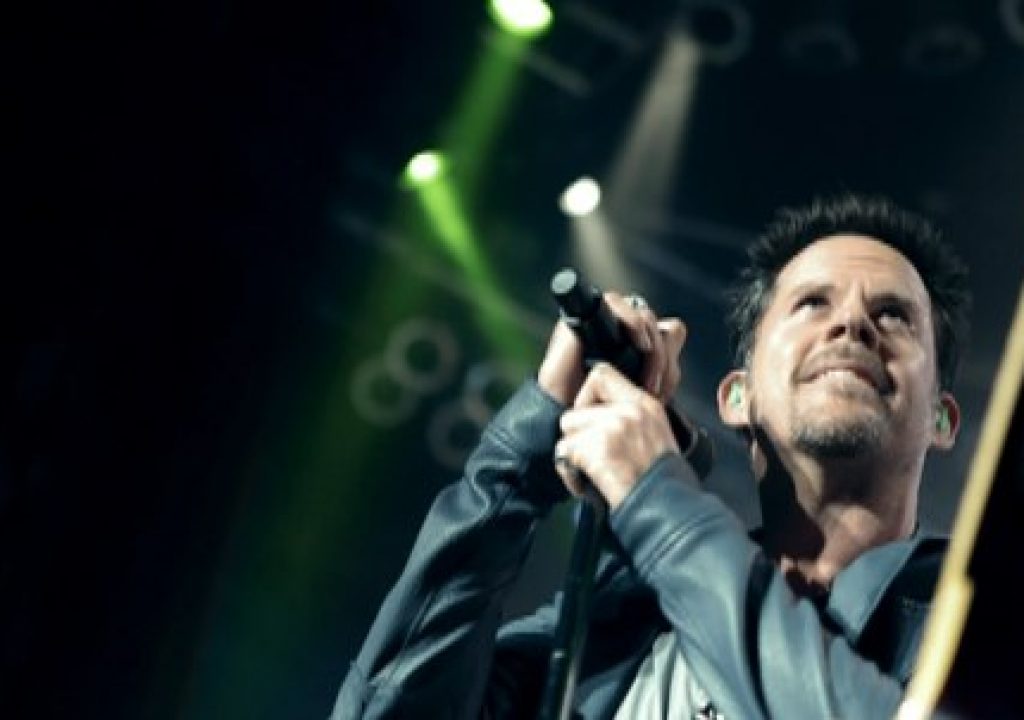
I really like how the 5Ds captured the stage lighting
Of course there were the potential downsides as well. Would the H.264 compression wreak havoc on the image in wide shots and the more busy onstage images? Would the camera’s small size and weight cause problems with the handheld nature of the shoot and make the viewer sea sick? Would the rolling shutter cause too much jello-cam and render a lot of footage unusable? Would the image from the different camera bodies match enough that they could be color corrected into a coherent look without falling apart? Would be camera ops be able to focus properly considering the camera’s form factor and the constant movement on the stage?
Production
The show itself was shot with 7 5Ds. 3 were stationary cameras capturing a wider shot of the stage. The other 4 were handheld: 2 in front of the stage and 2 on either side that could move behind as well. The handheld and focus questions were two that were answered early on. Being this was more of a rock n roll style show it was decided that handheld-type movement was something we could embrace. Add to that the shallow depth of field and rack focusing capabilities and you have a large part of the style of the show. There was also one RED camera used that experienced some technical problems and didn’t record the entire show. To make up for that missing angle a single 5D recorded a different show on a different night. Add to all this the band’s short rehearsal that was covered with 6 cameras and I had 15 angles at the most to choose from at any given time in the show; 7 at the least. The DP had a custom setting for all the 5D’s that gave maximum range for color correction, which basically lowers the contrast and turns off the sharpness. Even though the camera shoots to a highly compressed H.264 file we knew from other 5D work that there would probably be enough latitude to, at the very least, color correct to match the cameras. With two 16gig CF cards and an extra battery in hand per camera, the show went off without a hitch. This was one pass through the entire show. No stopping the concert for camera problems, no repeating of songs for more angles. As Gary says himself, there are no do-overs in a live show:
One of my favorite sound bites from Gary with an example of the before and after color grading.
As for the single RED camera used, DP Rhet Bear explains why that decision was made: “At the last minute we decided to add a RED ONE for our hero closeup, a decision I now regret, since we weren’t staffed to support the camera. The camera had some issues during the first couple songs and ended up only covering a portion of the show. We had added the RED partly because we were trying something new shooting an entire show on the Canon 5D’s and we felt the RED would be easier for focus and monitoring for our closeup. But after seeing the show finished we wouldn’t make the same choice again. Instead we would have placed a 5D or 7D with a 70-200 or 400mm to capture that angle which is basically what we did the following night in Houston when I re-shot what the RED camera had missed. The Canons performed beautifully, especially since we were in a controlled environment, and gave us the freedom to have more cameras with more energy for less money than if we had shot with a standard HD flypackage.”
I’m not sure if the malfunctioning RED was the Canon gods looking unfavorably upon the use of the single RED or the RED gods making a statement against the Canons. With the pickup shoot in Houston, the band wore the same outfits and performed a similar show. Lighting ended up being a bit different but our colorist was able to match it pretty well. If you look closely your may see a little continuity mismatch in sweat on some of the band’s clothing.
The other great angles the camera crew captured were during the rehearsal for the show. They were able to get up on the stage and grab some nice closeups of the entire band. Time was limited so they only shot a verse and chorus of each song but the rehearsal footage is featured prominently through the whole show. It was a real lifesaver.
Next up: Transcoding, editing and color grading
Transcoding the footage for edit
With over 20 hours of H.264 clips it was quite a daunting task to convert the footage to Apple ProRes for editing. Two Mac Pros, running Compressor, working over a weekend were able to get the job done. I was able to use the VNC protocol to keep tabs on the batches that were running on my machine at work as well as transcode on my Mac Pro at home. This is the place where a ProRes hardware accelerator card would have been very welcome, if such a card existed. All the footage was converted to Apple ProRes 422 and the show cut at full resolution so there was not traditional “online” stage at the end. With these compressed codecs the offline / online world is blurred these days. Right after the ProRes conversion and before we began the actual edit, two complete backups were made of the edit footage and kept at different locations for safekeeping.
Editing
One exception to this rule was with the song “Today.” We learned early into the edit that this song was to be released as a music video. This wasn’t known during the production of the show. If it had been then production could have possibly shot the song several times to give us more footage to work with. A music video might be seen many times by fans both on the Internet and on television but the live show will probably be watched by most people only once. To make matters worse we were short one camera during the performance of Today due to the RED being down. The decision was made to really toss continuity out the window and just grab the best of everything. After a couple of initial passes through the song I passed that edit off to the director to dig a bit deeper as I continued on with the edit of the show. In the end the video was approved, color graded and began climbing the charts of both GAC and CMT.
The sync map of the entire concert
Once clips were all converted the entire show was built into a sync map and off I went to editing. By building a sync map it’s easy to subclip out a single song to cut. You often don’t cut or even finish the show with songs in the order they were performed and this show was no exception. The entire concert didn’t go into the GAC show (the broadcast is only one hour) so by taking the time to build the sync map it’ll be easy to go back into the show at a later date and pull songs (or the entire show) if the label wants to edit the entire concert.
While the show is more about the music there are several interview pieces that bookend some segments. Gary doesn’t really do a lot of interviews so the director wanted to place him in a comfortable environment. A tattoo artist was coming by to touch up Gary’s ink so they decided to shoot the interview during this session. My initial reaction was horror when I saw the footage since the sound of the tattoo gun is so loud and so prominent. But this decision really put the artist in a comfortable position and he opened up well during the interview. I was letting the technical editor inside of me trump the content editor. The audio mix toned down the sound of the tattoo gun just a bit. In the end I think the tattoo interview adds a lot to the overall vibe of the show.
Once we were rolling on the edit it went off without a hitch. Audio was continuing to mix throughout the edit. When they would complete a mix they would send a song or two at a time to cut into the show. While the board mix was acceptable for the offline it really lends a different feel to the show when you get a good mix and it caused me to change the edit just a bit. After picture lock, OMF files were made and Digital Audio Post then mixed the entire show and sent 48K Wave files for final layback.
Color Grading
A before and after image of the color grading
After picture lock the edit was laid to HDCAM SR. Next we went to color grading on our DaVinci 2K Plus. Filmworkers Nashville colorist Rodney Williams drew upon his years of experience grading multicam shows to tackle this new format.
“I was excited to work on one of the very first DSLR multi-camera concerts. However, I was initially concerned about some inherent challenges of the format in this environment, such as its narrow exposure range and heavy compression. When acquiring images digitally, you generally want to expose for the highlights, being sure not to over expose the image and lose detail in the brighter areas. At the same time you want to maintain detail in the shadows. I think of the contrast ratio of the 5D as similar to reversal film stock” explained Rodney who has millions of feet of film color grading under hit belt.
“A balanced lighting setup makes all the difference with this format. Unfortunately you do not have that luxury when lighting for a live concert. Your lighting ratios are usually extremely dynamic from the brightest to the darkest of the image area. To balance out the lighting ratios, they used smoke throughout the concert. The smoke disburses light into the darker areas, creating a more flat and balanced exposure. We went for a look that had a slightly de-saturated, cool, steel blue wash, while maintaining flesh tones and rich contrast. At times the smoke became heavy (this is always the case when using smoke) which leaves the picture washed out. When the atmosphere became too heavy and flat, I created a luminance key channel to effect only the darkest portions of the frame, allowing me to keep contrast in the blacks and maintain detail in the shadows. With many compressed digital formats this technique can create noise and grain if applied too heavy. The 5D images held up better than I ever expected. Overall I was very impressed with the format and final result.”
A before and after still of one of the RED shots. The RED files were processed with very flat settings to allow the most latitude in color grading.
With color grading done and the audio mix complete I reinjested the show in standard definition for audio layback and application of the graphics package. We chose to keep the graphics to a minimum. I felt a little sad to finish the GAC show in standard definition when we knew we had such a good looking HD image but that’s what delivery required. I hope the broadcast compression won’t wreak too much havoc on the final image. Of course we did keep a final, clean HD master of the show.
Next up: A few issues and wrap up
Issues
It’s hard to point out any limitations or issues that cropped up as a result of shooting 5Ds as opposed to a higher end camera system when we were so happy with the final product. “Higher end” is such a relative term because if you look at some of the images captured during this show I would argue that they are quite unique and stand with a lot of other live shows. There aren’t sweeping boom shots floating across the crowd or super-smooth Steadicam or dolly shots that run the length of the stage but that’s not the feel the director was going for according to Shepherd. “I’ve been working with Gary for over 10 years, and I wanted a different look, I wanted this show to be raw, sexy and portray Gary, his band and most importantly the music, accurately”.
While the House of Blues in Chicago is a good sized venue for a club-type atmosphere, to me the show feels more gritty and energetic than many live concerts I’ve seen. More importantly it feels quite intimate which is not always the easiest thing to achieve with a live concert in a venue of any real size. Due to the nature of the camera ops working on their own without the director calling the shots, there are a few times where I had to default to a wide shot when I would have preferred a tighter shot of something happening on-stage, but I would say that was rare.
Rolling shutter wasn’t much of an issue with motion. I can think of only a few shots that I wanted to use but chose not to due to the skewing in the image. The place where rolling shutter did show its face was in the still camera flashes coming from the audience. They are everywhere and instead of capturing a full frame bright white flash like the viewer is used to it captures an odd half frame of white or occasional light streak:
A still camera flash ends up in only part of the frame.
These were two nearly consecutive frames when two cameras went off very close together.
Here’s hoping that some over zealous quality control engineer doesn’t decide this is unacceptable for broadcast at the last minute. We did have a dub house send a master back on another 5D job claiming hits throughout the program on a live music video. Sorry, until someone creates the rolling shutter camera flash-fixer plug-in it’s either live with it or spend a lot of time in After Effects fixing it frame by frame.
One other problem that I had to deal with were the beer can logos that would often pop up in the crowd. Since this show was going to broadcast these logos had to be blurred out. And since the crowd was often dancing and moving their hands the logos didn’t stay still. A typical region blur filter in FCP would have require some extensive keyframing to follow the motion so it was the perfect place for Imagineer System’s mocha for Final Cut. mocha is a planar motion tracking application, meaning it doesn’t track a single point like a point tracker but rather entire planes in the frame. I gave it a test run in an earlier post and as someone who doesn’t do a lot of visual effects it’s pretty cool to see it work.
The process involved exporting a shot, opening it in mocha, defining the area that needed blurring and letting mocha track that motion. I then exported the data using mocha shape. mocha shape is a plug-in for FCP that provides the ability to directly import rotoscoping or shape data from mocha into it’s own FCP sequence. This was done on a per shot basis so then it was a matter of blurring the roto that was imported from mocha, which was just beer logo. From there I feathered the edges a bit and ended up with a nice, and more importantly unobtrusive, blur.
A before and after example of one of the beer can logo blurs.
Wrap
At the end of the post-production we all sat back, watched the show and really liked what we saw. I’m not sure of the final budget but you can bet it was considerably less than a traditional multicam show. Tom Forrest, executive producer, president of Taillight TV and a veteran of many live concerts and television programs summed it up well when discussing this type of new technology: “Its important for Taillight to stay up with the technological advancements as they happen and is not afraid to work in new formats. The Canon 5D has allowed us to deliver better looking projects faster and cheaper.”
During the edit I mostly enjoyed finding some unique angles, looks and framings. I’ve posted stills throughout the article of some of my favorites. As camera technology continues to advance it will be possible to do more with even less. Canon has announced a March delivery date for the long rumored firmware update to the 5D that will finally allow frame rates other than 30p. They also have delivered the 7D and the new Digital Rebel 2Ti that promises decent DSLR video at an even more affordable price. Maybe someday Nikon and Sony will catch up with good video in their DSLRs. And there’s always RED’s Scarlet waiting in the wings that might deliver everything in one package. As an editor, I really don’t care what the production is shot on as long as it’s appropriate for the story that is trying to be told and can actually be posted in a proper way.
Catch the show on GAC
If you want to catch the Gary Allan: Live From the House of Blues show in its entirety it premieres this Saturday, March 6 at 10:00 pm eastern. If you miss that airing there’s 4 other airdates as well listed on the GAC website. Set your DVRs!


