Introduction: Why Edit in Motion?
Many motion graphics projects are built around a video edit which is then enhanced with effects, titling, and graphical treatments. Think of a the structure of a typical car commercial: a series of wide and close-up beauty shots of a vehicle intercut with interior shots, a close up on the happy driver, and perhaps a closing wide shot of the car driving away. This series of cuts is then augmented with color treatments, speed changes, and graphical elements in combination with animated text layers.
You could build the foundational video edit in Final Cut Pro, and then send the sequence to Motion to apply effects, graphics and titling. But you have the option of building your whole project from scratch directly in Motion – it lets you perform a variety of editing operations that you might normally make in Final Cut Pro. Some of these edits work much as they do in Final Cut Pro, and some are quite a bit different – but once you learn them, you’ll have another workflow option at your finger tips.
Let’s be perfectly clearn: if you are going to need to do a lot of fine trimming – J-cuts and L-cuts, asymmetrical trims, dynamic trimming, or looping playback while trimming – then you are better served starting in Final Cut Pro. But for basic editing and trimming, even ripple editing and slipping, Motion is up to the task. Let’s look at few examples where you might want to use Motion to do your video editing, see how Motion works differently from editing in Final Cut Pro, and cover some tips and tricks to working efficiently.
The Rough Edit
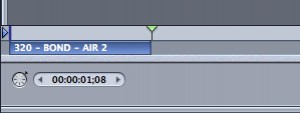
Motion’s Timeline is hidden by default, and for good reason: you don’t need it for many editing operations, thanks to the mini-Timeline located at the bottom of the Canvas. The blue triangles represent In and Out points for the play range (the range of the project that gets cached to RAM and played back when you press Play or the spacebar), and should not be confused with sequence In and Out points in Final Cut Pro, which determine where clips gets placed with certain edit operations.

When you add a clip to a Motion project, you don’t first set in and out points on your clip like you would in Final Cut, nor do you set in and out points in the Timeline. Entire clips are automatically added to the current playhead location (a setting that can be changed to “Start of project” in Preferences), and if you need to trim the media, you do so after it’s in the composition.
Although you can drag your clips from the File Browser to the Canvas and use the Dynamic Guides to center them, I prefer clicking the Import button at the top of the File Browser – it’s faster and automatically centers the clips for you.
Here are the steps to quickly build your story foundation with clips that don’t need trimming:
- Press command-1 to select the File Browser and select any clip to start. Then, use the arrow keys to browse through clips and preview them. Click Import to place your first clip in the Canvas at the start of the project.
- Motion does not automatically move the playhead to the end of the edited clip like Final Cut Pro. To do so, first click on the Canvas to make it the active window (or press Command-`), then press Shift-O to move the playhead to the Out point of the selected clip. Now you are parked on the last frame of the clip – and you want to be on the first frame of the clip you are about to add – so press the right arrow once to move the playhead one frame to the right.
- There is no step 3. Just repeat the first two steps for each subsequent clip.
The basic editing process takes a few more steps than you’d use in Final Cut Pro, but when you are just adding a few clips, it can be more efficient to work directly in Motion.
Trimming
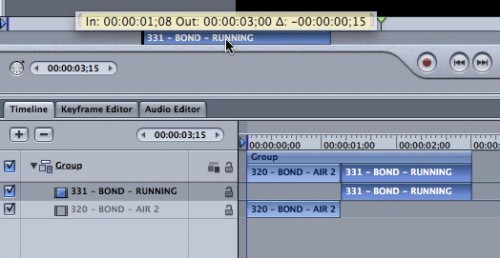
If you need to trim a clip after adding it to the Canvas, you simply drag either end of the bar in the mini-Timeline. Or, move the playhead to the point you want the new In point or Out point, and press I or O, respectively. Note that trimming an In-point doesn’t perform a ripple edit, so after trimming, you’ll need to drag the clip to the left. If you hold down the Shift key while dragging, the clip will snap to other clips it encounters, the playhead, or the beginning of the project. To see the relationship of the clip you are dragging to other clips in the Timeline, press F6 to open the Timing pane and check out the Timeline tab while you drag the clip.
Using these keyboard shortcuts, you can quickly edit together a series of clips to form the building blocks for your motion graphics project.
You may now be wondering: what about ripple edits? Roll edits? Slips and slides? Or split edits? What about playing around the edit point as you trim? While you can perform some of operations in Motion, if you need access to the full complement of trimming tools you should first do your edit in Final Cut Pro. Then, use the Send to Motion Project command to bring your fine-tuned edit into Motion for the rest of your work. But for more straight-forward editing tasks, Motion works quite well. And, it can handle some more specialized editing tasks as well.
The Sequential Edit
Here’s an example where a little preparation can make for a very fast edit.
If your media is already trimmed to the correct length and all you want to do is edit the clips into the timeline one after the other, Motion has a great way to do just that, all in one shot. For example, let’s say you have a series of 6 video clips, each exactly 5 seconds long, for a 30 second spot.
The first thing to do is to name or number your clips sequentially at the start of each clip name – for example, 01_Car_wide.mov, 02_Car_cu.mov. You can use numbers or letters; the key is that they sort by name in the order you want to see them in the timeline.
Motion will allow you to edit all of your clips into your project at once. The key is to select them all in the File Browser, then drag them to mini-Timeline – but don’t let go just yet, or the clips will be added with a composite edit (all stacked on top of each other). Rather, wait a beat for the drop menu, which gives you the option to choose Sequential.
This option will add your clips one after the other, just as if you had dragged them from the Browser to the Canvas Edit Overlay in Final Cut Pro. You can see the clips lined up in the mini-Timeline and in the full Timeline (press F6 to open the Timing pane and select the Timeline tab if it’s not already forward).
This method works great for a series of images as well as for video. If you are working with still images, go to Motion’s Preferences (under the Motion menu), and in the Project section, change the Default Layer Duration to Custom and enter the number of frames or seconds you want to see each still.
Notice that we were able to do this edit directly in the mini-Timeline – we only used the full Timeline to check it out the result. But the full Timeline opens up several other editing possibilities – which we’ll explore in depth in Part 2. So stay tuned!


