In Part 1, we looked at how Final Cut Pro users can perform some basic editing operations in Motion, including rough editing, trimming, and a sequential edit. All of these edits can be performed using just the mini-Timeline. But by opening up the full Timeline, you can perform additional edits, like insert, overwrite, and ripple edits. You can even slip clips in Motion. Let’s see how.
Motion’s Timeline
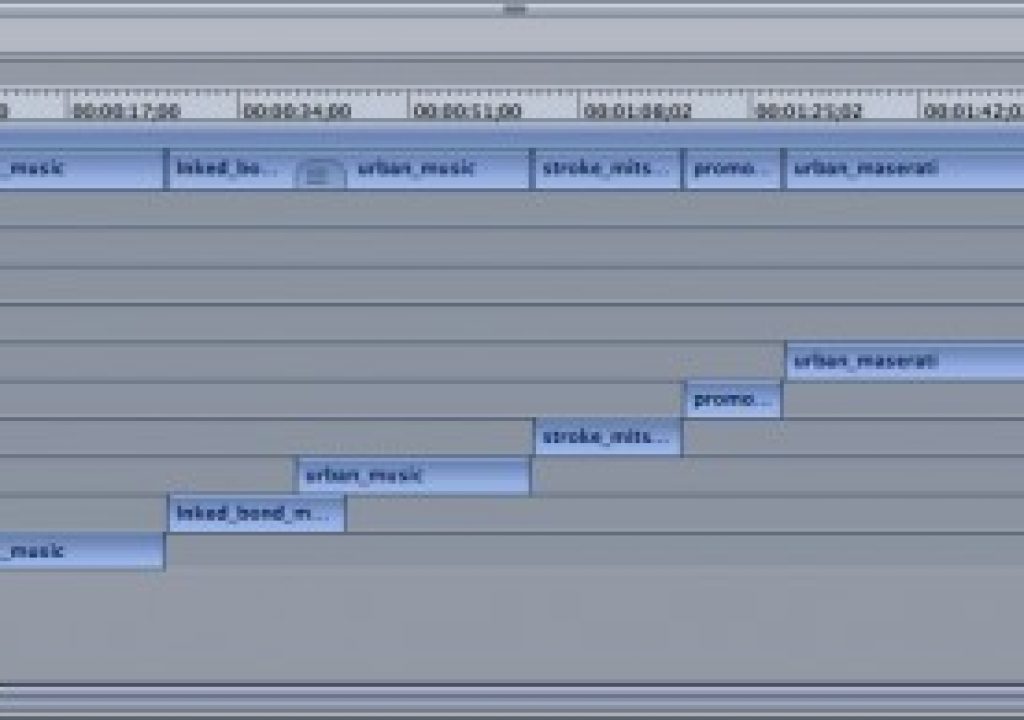
Since we are comparing these editing operations in Motion to the same tasks in Final Cut Pro, let’s start by looking at Motion’s Timeline – because it’s quite a different animal. Motion’s Timeline (open it by clicking the Timing icon in the toolbar or pressing F6, then select the Timeline tab if it’s not already forward) is designed primarily for compositing rather than editing. Therefore, every time you add a new object to your composition (for example, a video clip, graphic, text, generator, shape, or particle emitter), it forms its own layer. So a series of clips appear as a staircase.

This is in marked contrast to Final Cut Pro, where you can put as many clips as you want on the same track in a sequence. Because of this difference, Motion’s Timeline can get very tall.
Every layer in Motion is contained in a group – sort of like a nest in Final Cut. In the Timeline, the track for the group seems to contain another copy of the layers that are in the group. This “doubling up” can be confusing at first, but its actually very useful because a group doesn’t need to be open in order to select and edit layers that it contains.

With the group closed (accomplished by clicking the disclosure triangle to the left of the group name), you can still see all the contents of the group – and even see where layers overlap. So you can often keep your groups closed while you work, which allows you to see much more of your project in the Timeline. You can trim layers by dragging their edges at the group level; and you can edit additional clips directly into the group.
Insert and Overwrite Edits
If you are cutting stills to music or other cues that may not be evenly spaced, or if you are using video clips that need to be trimmed, a simple sequential edit isn’t going to cut it – you’ll need to edit each clip into the project one by one, and possibly trim them as you go. Motion lets you perform insert and overwrite edits by dragging and dropping clips to the Timeline, much as you might you use the Canvas Edit Overlay in Final Cut Pro.
One example where this process works nicely is timing straight cuts of graphics or clips to a music track.
First, import your audio and set markers at the appropriate frames by playing the project and tapping the M key – just like you would do in Final Cut Pro. If you do this without the audio being selected, you’ll set project markers (as opposed to clip markers), which can be seen in the Timeline even when the audio layer is not visible.

Then, with the playhead back home, import your first clip. If it’s video, the entire clip will be visible. If it’s a still image, its duration is determined in Motion > Preferences.

Move the playhead to the next marker (drag with the Shift key pressed to snap to it, or press Command-right arrow). Now, if you were to simply import the next graphic or drag it to the Canvas, it would come in as a Composite edit, which means it will be placed on top of the first clip – and the first clip continues underneath.

But another edit choice here would be an Overwrite edit, which deletes all clips below the new clip, exactly like an overwrite edit in Final Cut Pro. To do this, drag the clip to the marker (you’ll see a solid black vertical line), wait a beat, and choose Overwrite from the drop down menu.

The first clip is deleted during the frames of the second clip.

The first clips gets split into two because it extends beyond the second clip – notice how Motion puts the second half of the first clip on its own new layer. We’ll take care of this extra bit by overwriting the next clip (the third clip) at the next marker.

Let’s say you now decide that your next clip (the fourth clip) should go before the one you just added instead of after it.
Using the same procedure, drag the new clip to the Timeline to the same marker, wait a beat, and this time choose Insert.

This time, the other clips are pushed down to make room for the new clip.

Note that if you have other layers or groups in your project at the insertion point, the edit operation will split all of every layer and group into two – one on either side of the edit. Sometimes this is ok, but sometimes, you may need to do some extra clean-up work (for example, in the case of cameras, you would create a second camera that you’d likely want to delete and the extend the original camera across the edit).
When building motion graphics composites, the default composite mode is usually what you want. But when you are laying in your foundational video or graphic elements that tell your story, the Overwrite and Insert modes can be quite handy.
The Slip Edit
The Slip tool in Final Cut Pro is one of my favorite tools that I find myself using all the time – it allows me to change the content of a clip without changing its duration or location in the sequence.
Since In and Out points on a clip in Motion are set only after you’ve added it to the project, slipping can be a powerful way to adjust the content of a clip after you’ve trimmed it (remember, you can only slip a clip to the extent that it has extra media, or handles, beyond its In and Out points).
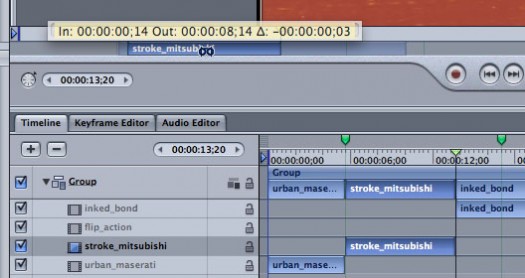
To slip a clip in Motion, simply hold down the Option key and then drag on it either in the mini-Timeline or in the Timeline.

You’ll see a ghosted image of the handles as you slip, and the Canvas will show you the content currently under the playhead. If your intention is to change the ending frame, press Shift-O before slipping to move the playhead to the last frame of the clip (its Out point). Conversely, if you are slipping to change the first frame, press Shift-I before slipping to move the playhead to the first frame of the clip (its In point).
The Ripple Edit
Motion has a powerful tool for taking out parts of a project and closing the resulting gap, or inserting extra frames into a project – essentially, creating a ripple edit.
Let’s say you’ve edited together a series of video clips, but then discover your project needs to be 2 seconds shorter. You decide the best way to handle this is to take 2 seconds off the beginning of the third clip – in other words, you want to ripple edit the head of the clip so that all the clips following it move up by two seconds.
In the Timeline, set a marker on the clip at the point to which you want to trim. Now hold down the Command and Option keys, and drag in the ruler area – starting at the beginning of the clip, and stopping at the marker. The blue highlighted area is called a region. If you don’t place it exactly where you want, you can drag either side to expand or contract it, or drag in the middle to slide it left or right.

Now that you’ve created a region, go to the Edit menu and choose Ripple Delete.

The region is deleted and everything to the right moves over to fill the gap (you can delete without filling the gap – which in FCP you might call a lift – by selecting Delete from the Edit menu). Note also that the group has been split with the first clip in the lower group and the rest in the new Group “Video 1” above. You can avoid this “splitting” behavior by deselecting the group before performing the ripple delete.
First, undo the ripple delete, and redraw your region. Then, Command-click on the group section of the region to deselect it.

With the group now removed from the region, when now you perform the ripple delete, just the clip is deleted and the group is not split.

Now let’s say that instead of removing time, you wanted to add two seconds to the head of the third clip (assuming it has enough handle to do so), simply choose Edit > Insert Time after setting the same region and deselecting the group.

You can now drag out the head of the clip to fill the newly created gap.
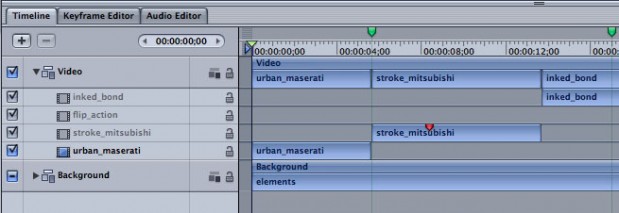
The added step of deselecting elements to remove them from the region is very helpful if you have other elements in your project. For example, here’s a background group added in.

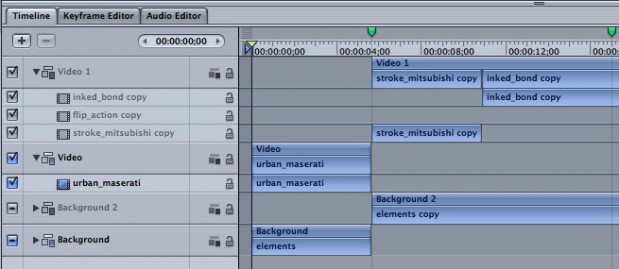
If you set your region and ripple delete, you’ll end up with this:

Both groups end up split, and you have many more layers to deal with.
To avoid splitting the background as wells as the video group, after setting your region, Command-click on each group directly in the highlighted area to remove them from the region.

Now when you ripple delete, only the video clips are affected.

Conclusion
If you have a lot of fine trimming work to do for a motion graphics project, use Final Cut Pro to do your edit, then send the sequence (or selected clips) to Motion for the rest of your work. But if you are simply building a sequence of clips or stills as a foundation for a motion graphics project, Motion has the editing tools to allow you to build your project from start to finish, including inserts, overwrites, trimming, slipping, and ripple edits. Try them all out, and have fun working in Motion.

Filmtools
Filmmakers go-to destination for pre-production, production & post production equipment!
Shop Now


