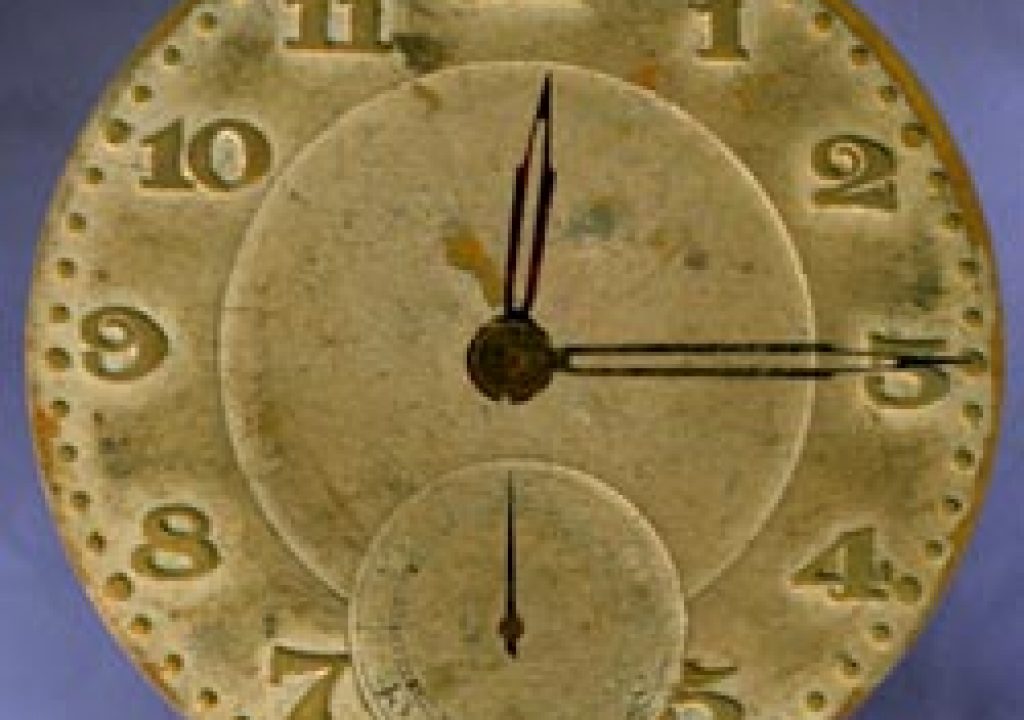
One common use of expressions is to set up automatic relationships between layers, such as having a minute hand rotate 60 times a fast as the hour hand, and the second hand rotate 60 times as fast as the minute hand. Rather than have to keyframe – and edit – three layers, you can keyframe just one layer and have the others follow automatically.
In a recent column we discussed the Parenting feature that was originally introduced in After Effects version 5. Parenting is an excellent way to group objects together, or to have one already-animating object also follow another.
Expressions offer a different approach to making one object do what another does, yielding even more control. Many right-brain artists are scared off by expressions, as they do involve math and programming (very left-brain activities), but learning just the most basic form of expressions will help alleviate a lot of tedium while working on a project – they’re like having a sharp, unpaid intern!
An Expression of Value
If you wanted to animate something in After Effects – be it the position of a layer, or a parameter of an effect – you had to use keyframes. A keyframe states “this is the value of this parameter at this point in time.”
Expressions are an addition to – and in many cases, a replacement for – keyframes: Rather than give an explicit value for a parameter, they are instructions to go get that value from somewhere else. As a result, you will find yourself applying keyframes to fewer objects, and using Expressions to “borrow” keyframe values to help control other layers as well. The “somewhere else” an Expression gets its value can be as simple as the exact same parameter from another layer or effect, or as complicated as the result of clever JavaScript programming.
It is useful to compare and contrast Expressions to Parenting and Precomposing. Parenting imposes the transformations applied to one layer (scale, position, rotation) onto another layer in the same comp, all in one step. However, Parenting does not take into account transparency, nor any effects. Precomposing allows you to alter opacity and apply effects to a nested (grouped) set of layers, but the problem is that those layers are in their own composition – not the one you’re currently working in. This can slow you down when trying to tweak the individual elements of a complex animation.
The coolest thing about Expressions is that they are always “live”: If you created an expression so one layer’s rotation followed another layer’s rotation, as soon as you change the master’s rotation, your slaved layer would automatically follow along with no keyframes to delete and re-build.
The second coolest thing is that Expressions are very selective: You can apply them to any single parameter you choose.
Third is that an Expression can reference virtually any other parameter you want in an entire project: an identical value from another layer, a completely different value from another layer or effect, and even a parameter from a layer in an entirely different composition in the same project.
Express Yourself
Expressions are easy to create and apply. In many cases, After Effects will write the Expression automatically; you literally just have to point at what you want it to do.
Say you wanted one layer to rotate the same as another layer. The first step is to expose the Rotation parameters for both layers in the Timeline panel. Then select the Rotation parameter for the layer to be slaved (“expressed”), and select the menu item Animation > Add Expression or Option+click (Alt+click under Windows) on its animation stopwatch. A new line will appear underneath that says “Expression: Rotation”, and next to it in the timeline will appear the phrase transform.rotation (see below). This is the world’s simplest (and perhaps least useful) Expression: “my rotation equals my rotation”.

When an expression is first applied, it defaults to following itself (in this case it says “my rotation equals my rotation”) until you use the pickwhip or otherwise edit the script.
There are two additional clues that an expression is now in force for this parameter:
- The parameter’s value will change color (in After Effects CS3, from blue to red).
- There will be a button with an equals sign; this indicates “this parameter equals the result of an expression.”
To change this Expression to mean “my rotation equals that other layer’s rotation”, click on the pickwhip tool that appears on the Expression line – it looks like a small spiral. Drag this pickwhip to the Rotation value for your master layer.


To assign an expression, select the pickwhip and drag it to the master value (top), release the pickwhip to see the new script (above), and press Return to accept it. You can also edit the script before hitting Return to add additional code or simple mathematical instructions such as +, -, *, /.
Let go, and a new Expression will be written:
thisComp.layer(“master layer’s name”).transform.rotation
Press Enter to tell After Effects to accept the new Expression. If you were to now edit or keyframe the master layer’s rotation, the newly-expressed layer will obediently follow.
It’s possible for a non-programmer to read an Expression; just look for the periods to help break it into understandable chunks. It also sometimes helps to read it backwards. This particular script says: “I equal the transform parameter rotation, of a layer called “master” (or whatever that layer’s name is), that resides in this comp.”
It’s almost as easy to modify an expression as it is to have After Effects write one for you; elementary math is often all that is required. Say you want this slaved layer to rotate twice as fast as the master layer. All you have to do is select the Expression, move the cursor to the end, type * 2 and press Enter. If you want it to rotate one and a half times as fast, but in the opposite direction, type * -1.5.
A number of applications should immediately spring to mind: on a clock, the second hand would rotate 60 times as fast as the minute hand; the minute hand would rotate 12 times as fast as the hour hand.
next page: some advanced tips
Slightly More Advanced
Expressions are a great help for coordinating animations. However, they are also very useful for coordinating effects or creating other types of master/slave relationships.
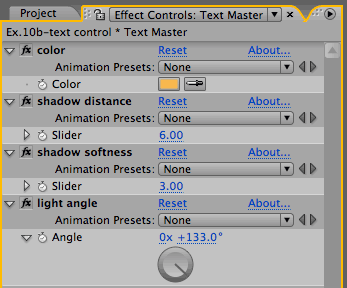
We like to use Expressions to set up master colors for a design. The trick is defining the color of a layer by using an effect that has a color swatch you can animate – for example, Fill, Path Text, Stroke, or Tint. You can then create Expressions to link one color swatch to another, using exactly the same technique as for Rotation above. The master parameter for an Expression can be a layer that appears in the final render, or a dummy layer such as a Null Object or Solid. Expressions can even bridge across comps, so you can set up one “master color” composition and link layers in all your working comps back to it.
A particularly powerful option is to use a special set of effects called Expression Controls with expressions. Expression Controls don’t alter an image by themselves; they provide user interface elements such as sliders and dials that you can then pickwhip expressions to. This makes it easy to see what’s going on. You can also keyframe these controls, allowing you to animate the parameters inside an expression.
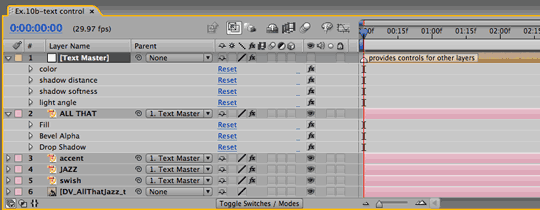
A common technique to organize complex compositions is to apply Expression Controls to a null object layer, and to pick whip parameters from other layers (such as effects applied to those layers) to follow these Expression Controls. That way, you can edit parameters on one master layer, and a bunch of slave layers will follow. This is especially useful for tweaking a color palette for a design.
Expressions can be linked between dissimilar parameters. For example, a popular text trick is to animate the tracking of a line of type to adjust how far apart the characters are spaced, and to make them blurrier as this space increases. This would normally require coordinating two sets of keyframes: one set for tracking, and one for blur. However, you can instead link an Expression for the blur amount to follow the tracking amount. If you want a tracking value of 10 to correspond to a blur value of 1, simply tack / 10 onto the end of the script to divide by ten.
Expressions themselves are just text files – you can copy and paste them to a word processor or scrapbook utility, or email them to others. Another great trick is to select a parameter or effect with an expression applied, and use Animation > Save Animation Preset to store away an expression for later use. Indeed, many of the Animation Presets provided by Adobe make clever use of expressions.
How can you tell if an expression has been applied to a layer? Select it and type EE (two Es in quick succession) to reveal them. Selecting a layer and typing U will also reveal all expressions as well as keyframes applied to a layer.
If you want to dive deeper into Expressions, the manual and online help does an good job explaining them. We wrote a pair of extensive chapters on expressions in our book Creating Motion Graphics with After Effects. There are also some excellent web sites out there which explain expressions, such as MotionScript and AEnhancers. As you get deeper into writing your own expressions, you may eventually want to get a JavaScript book such as Javascript – A Beginner’s Guide by John Pollock (that’s the one we use).
After Effect also has a few tools to make life easier, such as a popup menu (to the right of the pickwhip) with the most common Expression components already spelled out for you (shown below).
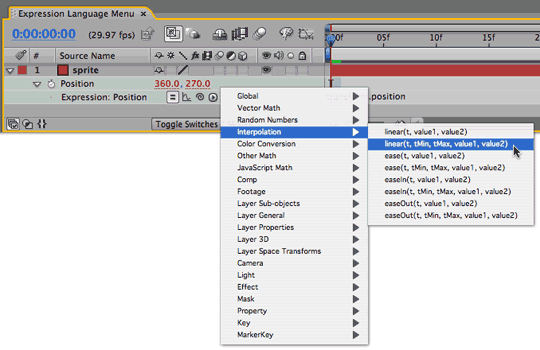
There are a few gotchas with Expressions. The biggest one is they are very sensitive to precise layer names. If you copy and paste expressions between layers, or change a master layer’s name, you’re going to have to edit the Expression to fix it. Another is that they only apply to one parameter at a time; if you want to make all the parameters of one effect follow another, you have to link up an Expression for every parameter that differs from the default value. However, the time spent creating them will be more than repaid during the course of a project.
The content contained in our books, videos, blogs, and articles for other sites are all copyright Crish Design, except where otherwise attributed.

Filmtools
Filmmakers go-to destination for pre-production, production & post production equipment!
Shop Now