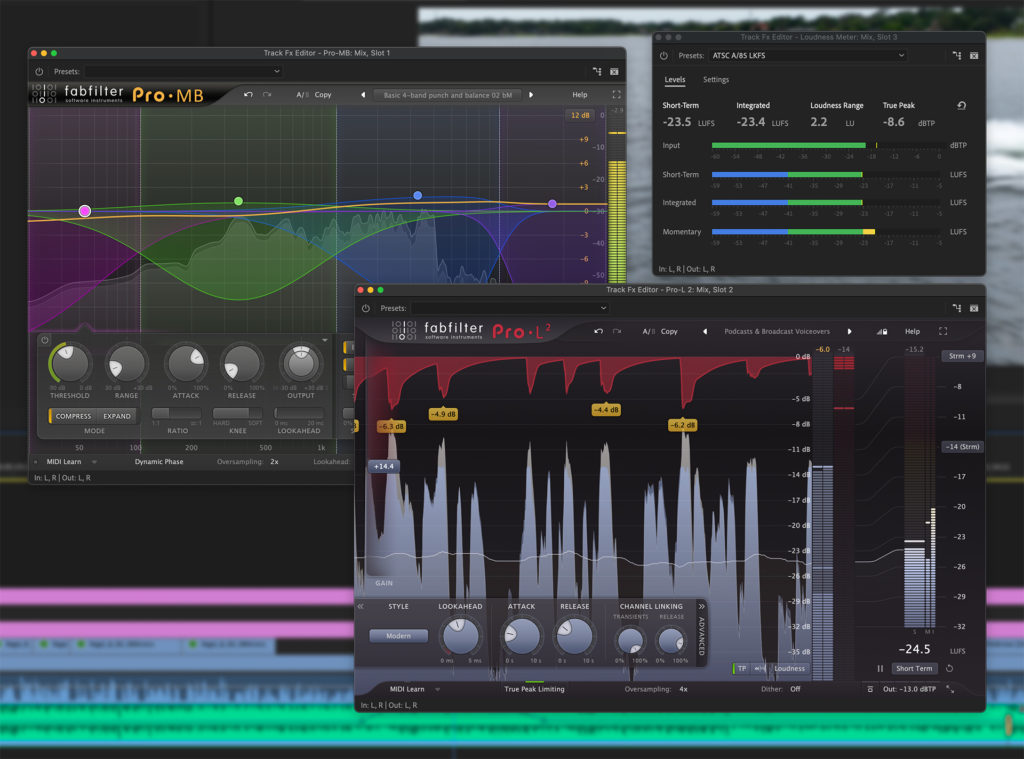
Audio mixing is a second thought for many editors. On projects with a higher budget, the final mix is often sent out-of-house or across the hall to an audio mixer or studio. But for many editors delivering local commercials, corporate marketing presentations, web videos, or social media content, the final mix comes down to what they do within their editing application. So it helps to understand the basics of mixing and mastering.
Modern audio delivery specs are designed to comply with averaged (integrated) loudness standards measured in LUFS (loudness units full scale). Those vary from one service, platform, or network to the next. A common rule-of-thumb is -14 LUFS for most web-based streamers and -23 LUFS for broadcast. Personally, I stick to the -23 average even for web video deliveries, since -14 is intended for commercial music.
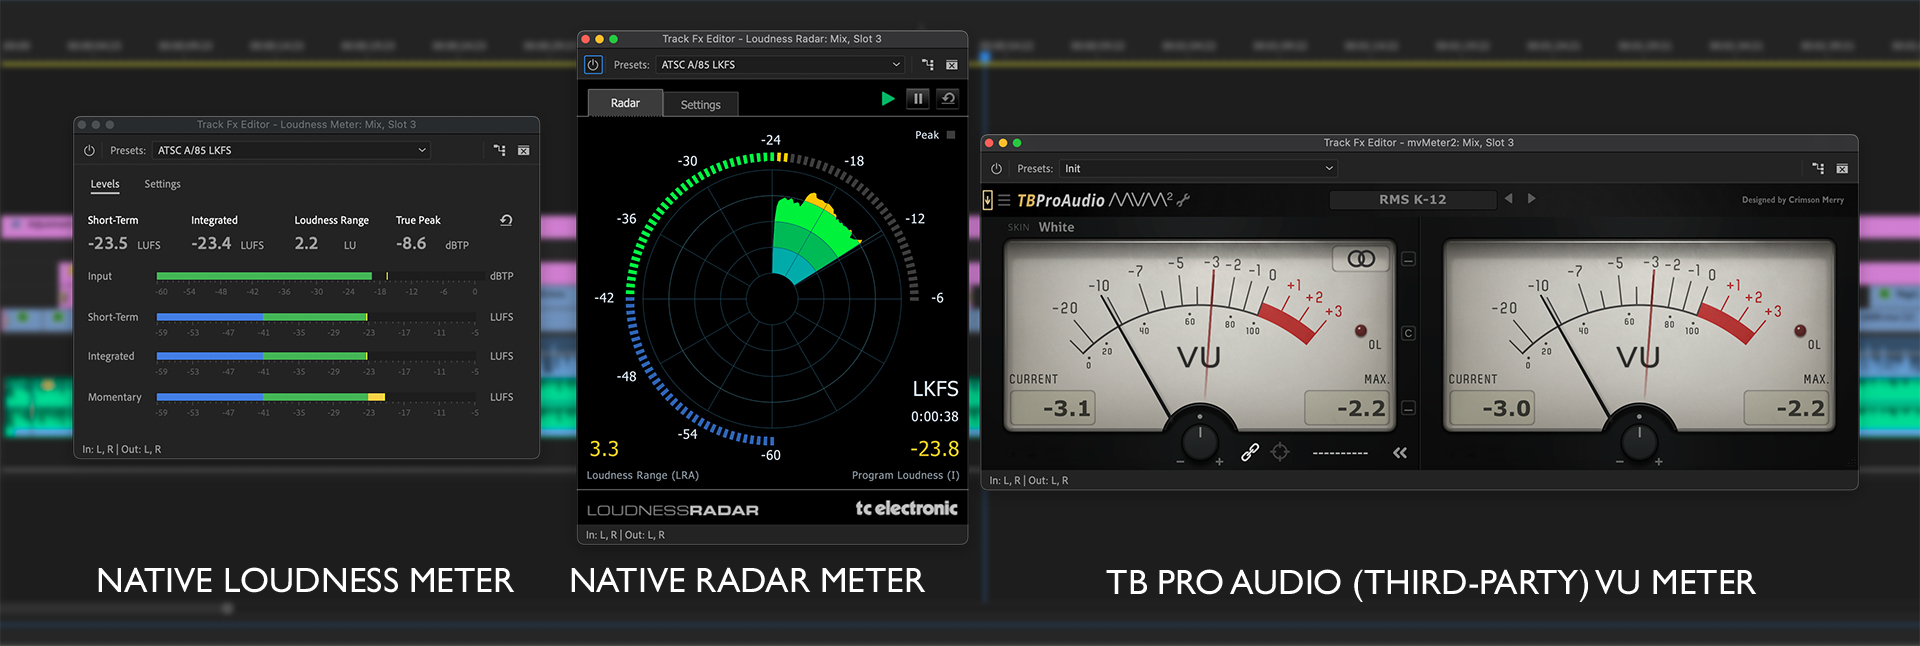
Most NLE software today includes some type of metering plug-in that can measure LUFS values. I’ll refer to Premiere Pro for much of this discussion, however the tools and methods will apply to most audio and video editing applications. In Premiere, you can measure LUFS with either the loudness meter or Radar meter plugins. If you prefer VU meters, then the free plug-in from TBProAudio is a solid choice.
The last step in any mix is the mastering stage. In its simplest form this boils down to compression and limiting. This is just as necessary with any video as it is with a hit record. In the case of Premiere Pro, once you have the mix nicely balanced, then move to the mix track in the track mixer panel and apply these effects. For me, that’s usually a multiband compressor, a limiter, and the loudness meter – in that order.
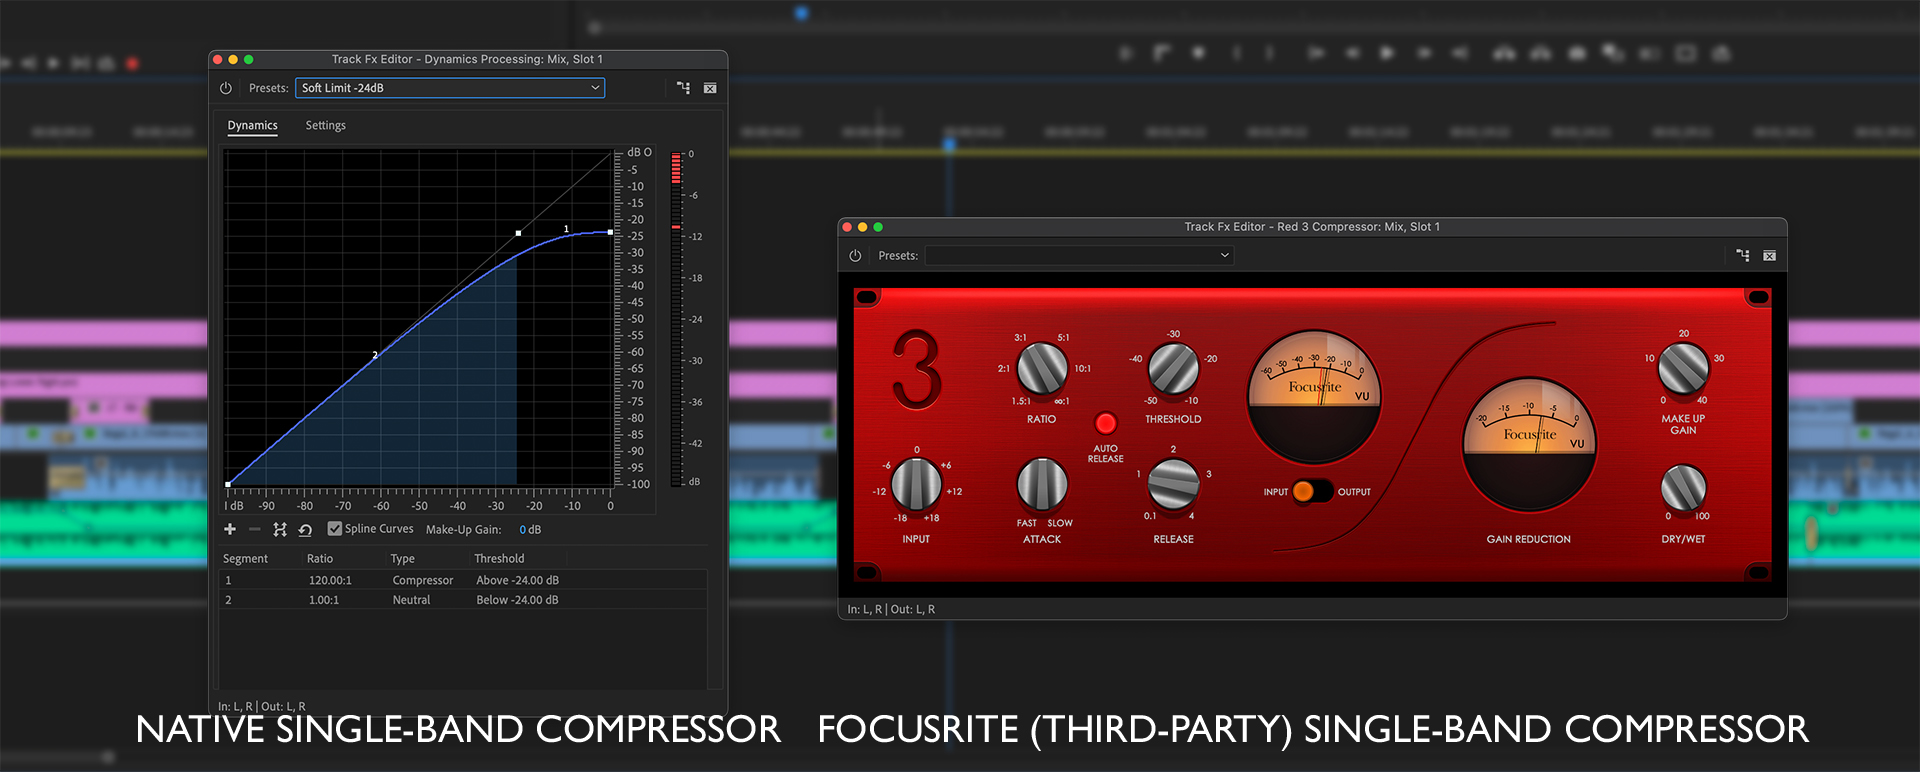
Compressors are designed to constrain the dynamic range of your mix. They commonly have four main adjustment values: attack (how quickly it reacts), release (how soon it lets go of the signal), threshold (the dB value at which the compressor kicks in), and ratio (the change in output above the threshold). A ratio of 4:1 means that with 4 dB of input above the threshold, you’ll get 1 dB out. Depending on the hardware unit or software plug-in, there may also be input, output, and make-up gain controls. The reason to add a limiter plug-in after the compressor in Premiere Pro (or any other application) is to catch any transients or peaks that make it through the compressor.
There are many great compressor plug-ins, but the downside is that a single-band compressor will react to the entire signal. If you used a piece of driving music, then some frequency ranges will trigger the compressor more than others. For instance, a driving bass guitar or kick drum. Depending on the settings, this can cause the compressor to audibly pump more than you wanted. If you use a multiband compressor instead of a simpler, single-band compressor, then you can split the signal into several frequency ranges and control each separately.
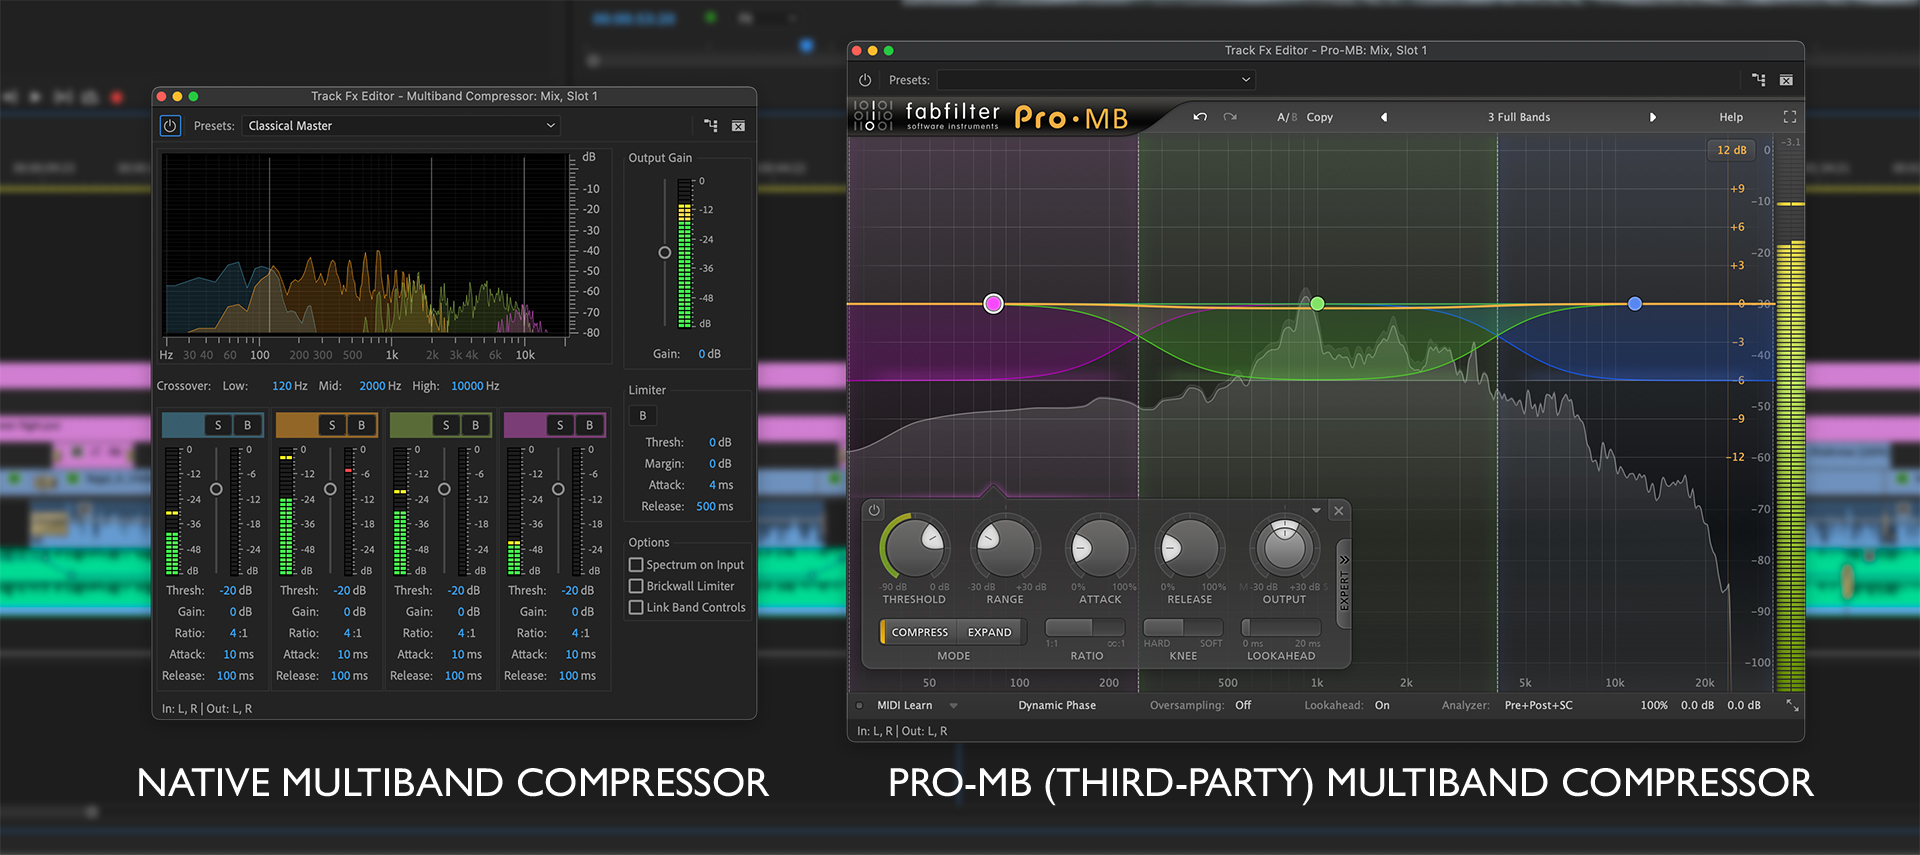
FabFilter Pro-MB Multiband Compressor
Adobe includes a decent set of native compressors and limiters. But, they are not as versatile as many third-party products on the market. When it comes to other developers, I’m a big fan of FabFilter Software Instruments. They make a range of audio plug-ins, which sound great and feature intuitive, easy-to-use interfaces. VST, VST3, Audio Units, AAX Native, and AudioSuite formats (both 64-bit and 32-bit) can be installed. So they work in all of the standard NLE or DAW applications.
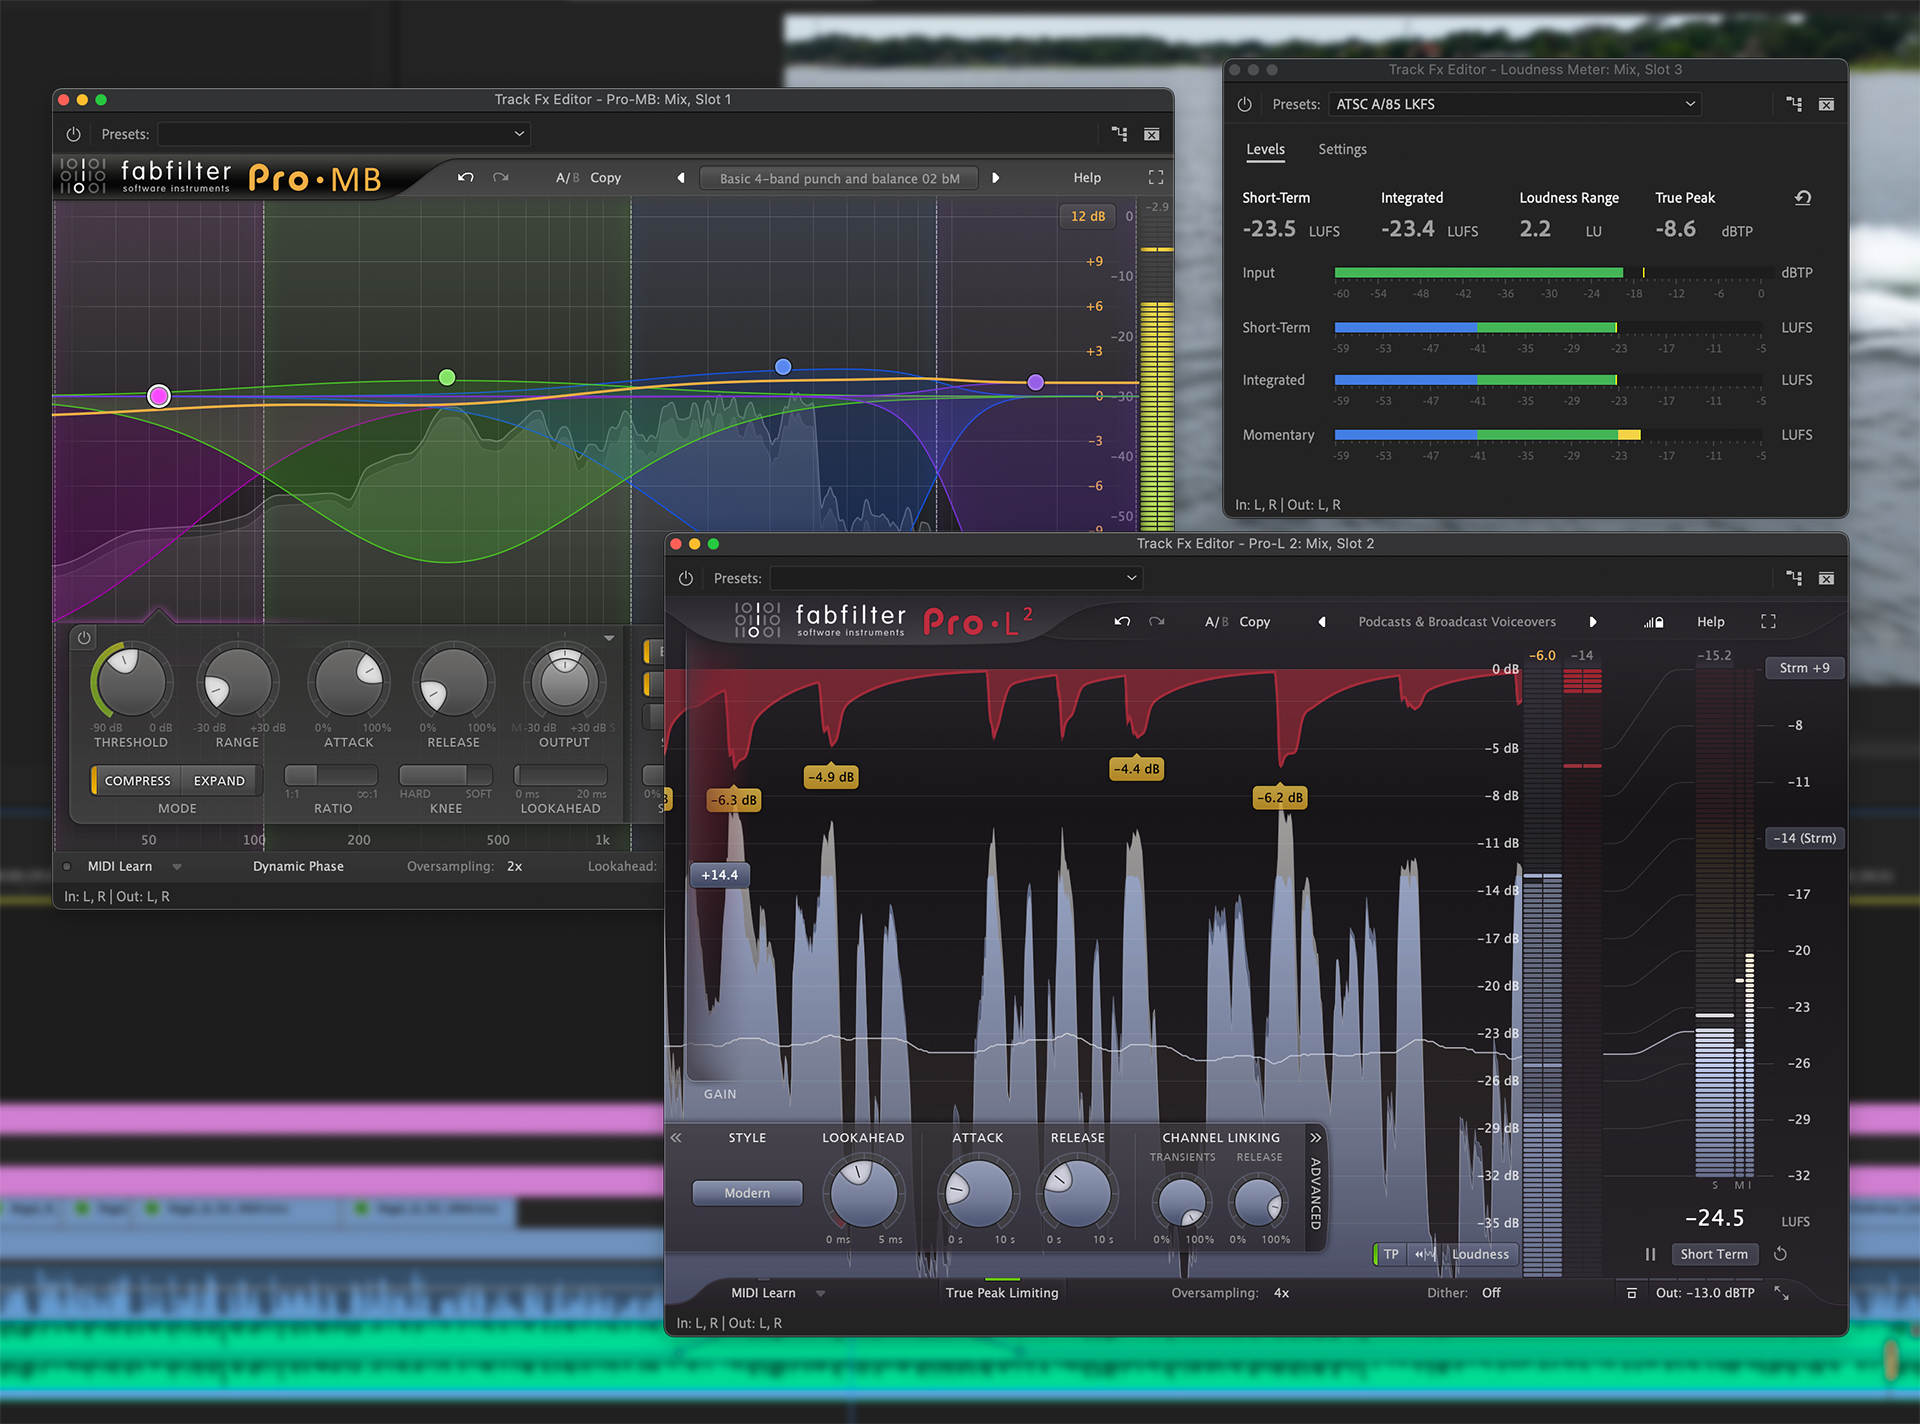
In this scenario, the first plug-in to add onto the mix track (or “2-bus” in audio parlance) would be the FabFilter Pro-MB multiband compressor. The Pro-MB functions like a combination of an EQ, a compressor, and an expander. You can split the signal from one to six adjustable bands and each can be soloed or muted. The crossover points between bands can be snapped to each other, or split to work as independent ranges. Each crossover slope can be adjusted. Since extreme changes at the crossovers can introduce phase anomalies, Pro-MB includes three phase modes – linear, minimal, and dynamic (default).
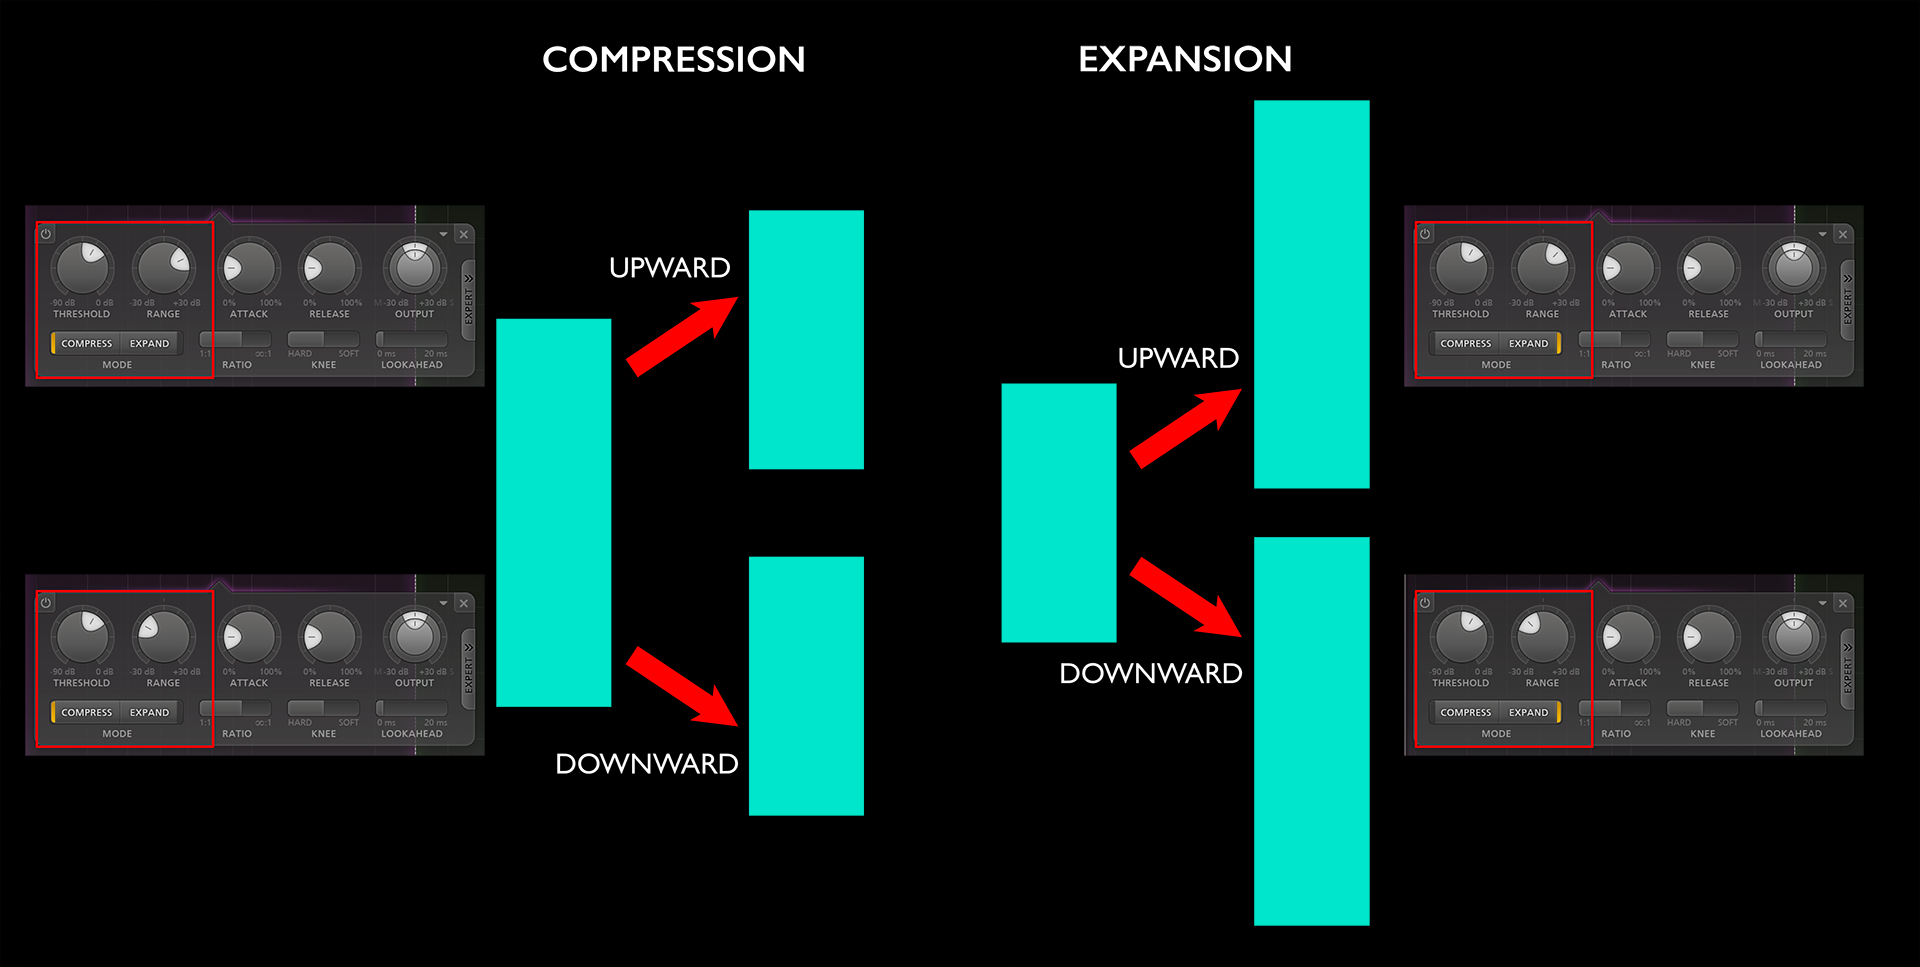
The Pro-MB offers four compression modes: upward and downward compression, plus upward and downward expansion. Compression squeezes a larger range of dynamics into a smaller space. If you compress with a negative range value then the compressed signal is lowered in volume. This is the way you typically see a compressor work. Upward compression (a positive range value) adds gain to the compressed section pushing the level up. The expansion mode takes a smaller dynamic range and expands it. If you use a negative range, the expanded section will be lowered, thus increasing the perceived dynamics around the threshold. A positive value will add gain if the signal drops below the threshold.
This may sound rather complex if you don’t mix audio every day, but it’s really quite intuitive, thanks to the graphical display and built-in analyzer. The Pro-MB comes with a healthy set of presets and you can start out with a simplified approach. In fact, even some mastering engineers stick to just three bands.
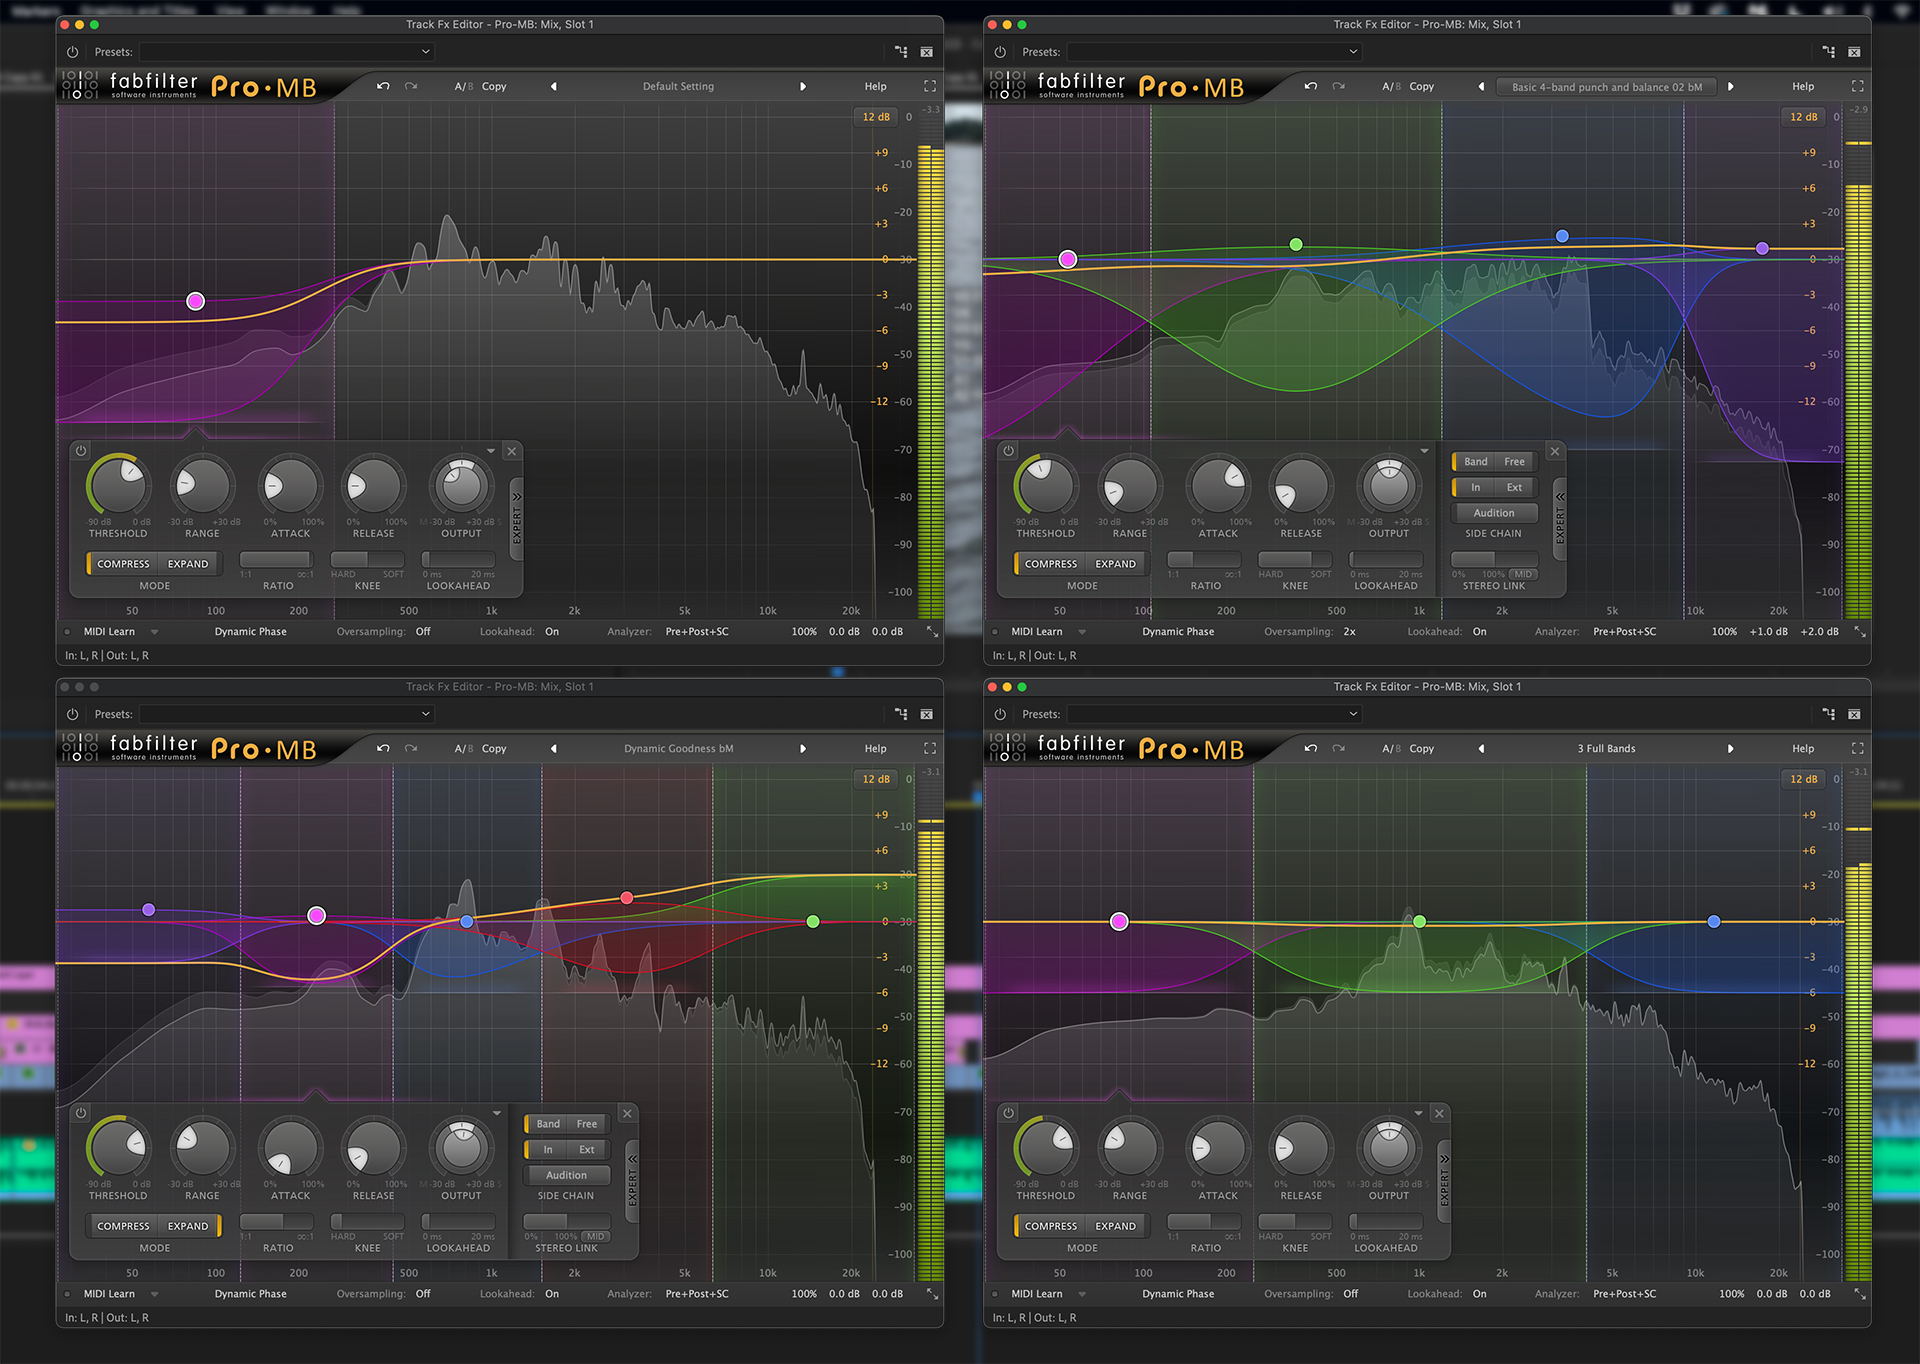
Like an EQ, you can isolate frequencies and do a filter sweep to hone in on the range you’d like to adjust. Solo a band and grab the the dot at the center of that region. Move it up or down (changes the output gain), left or right (changes the frequency range), while listening to the audio. Then, dial in the width of the band and lower the dot to attenuate that frequency range. Doing this with multiple bands enables you to sculpt your mix for the best possible results.
Of course, there’s plenty more that you can dive into, but these features are of more interest to mixers working on music projects. For example, expand the control panel by clicking the expert tab to reveal mid/side controls. You can also use Pro-MB on individual tracks, such as dialogue. Let’s say you need to get rid of some low-end in a voice-over recording. Apply the plug-in to that track. Set it for just a single band, extend the left boundary to the edge and now this band gives you a shelf control. Adjust your settings to compress and attenuate the low frequencies. As you can see, the Pro-MB can be a Swiss Army Knife for many audio situations.
FabFilter Pro-L2 Limiter
Back to the mix bus. The last processing step is to add a limiter. My preferred tool is the FabFilter Pro-L2. This is intended to catch peaks that get through the compression step. It’s also where you would usually make final level changes. The Pro-L2 includes built-in metering, so you can easily see if you are meeting the target LUFS range. Set it to true peak detection, set your maximum output, and then adjust the gain and attack/release values. There are several style modes, which alter the roll-off as the signal approaches the point when you hit the limit. The safe mode is best in a broadcast environment. The analyzer displays how the signal is being limited.
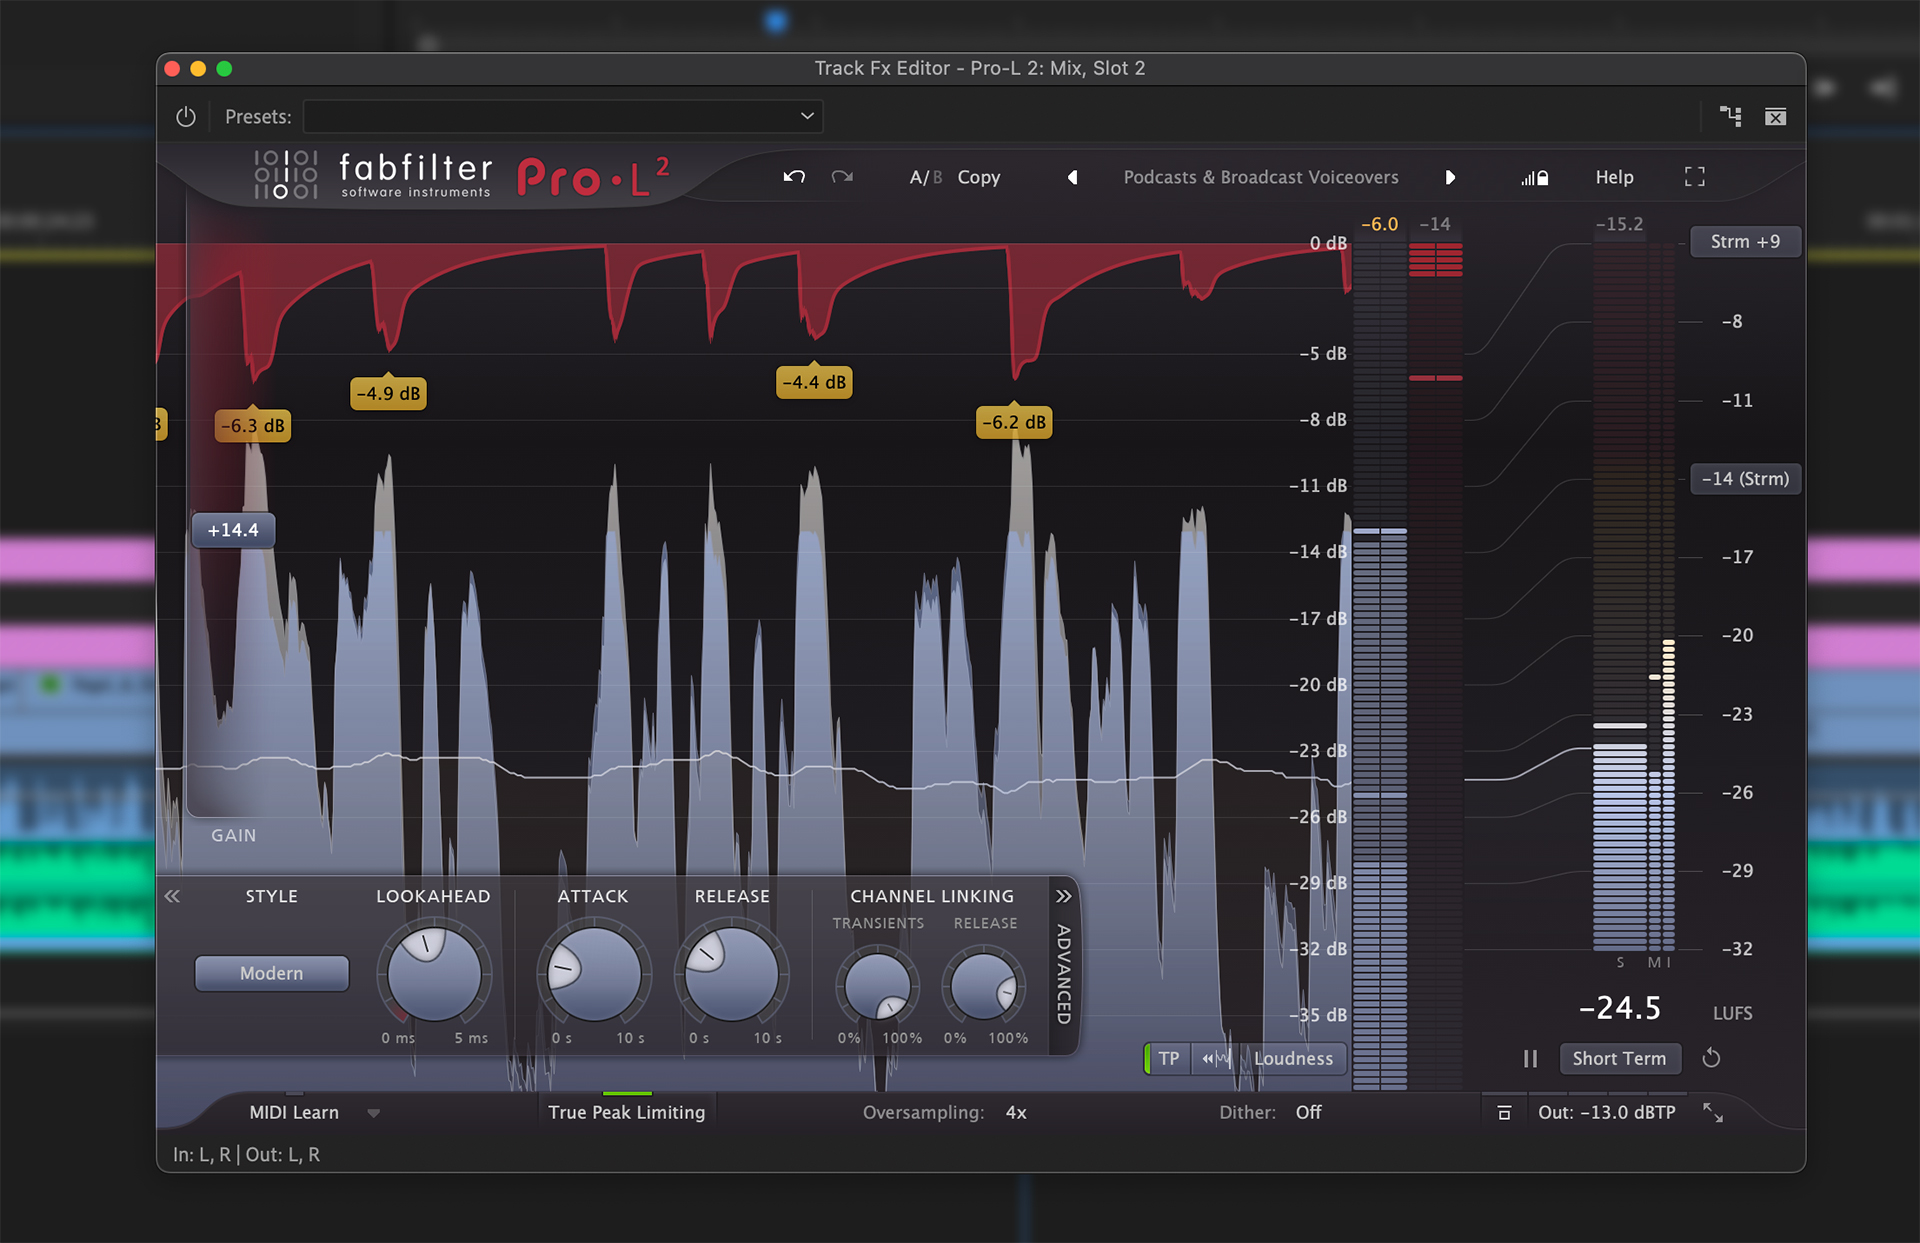
Both of these plug-ins sound great, even with heavy adjustments. They also include lookahead and oversampling. Most of the time you won’t hear much difference. Depending the complexity of the mix and the horsepower of your computer, heavy oversampling can impact performance. I’m running a 2020 iMac and haven’t experienced any issues whatsoever.
Neither of these tools is a substitute for correctly mixing your clips and tracks. The intent is just to sculpt the final sound. When working a mix you’ll want the right processing balance between compression and limiting. So it’s best to do the bulk with Pro-MB and then stick to final tweaks with Pro-L2.
One last thought. If you need to hand off your project files to a client or another editor, then plug-in compatibility might be of concern. My recommended solution is simply to bounce out a WAV or AIF file of the mix with this processing applied. Import that file back into your project. Copy the sequence, strip off all audio and place the mix file back onto track one. Now you have a compatible deliverable that includes your final mix.

Filmtools
Filmmakers go-to destination for pre-production, production & post production equipment!
Shop Now