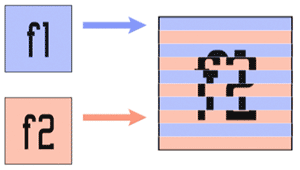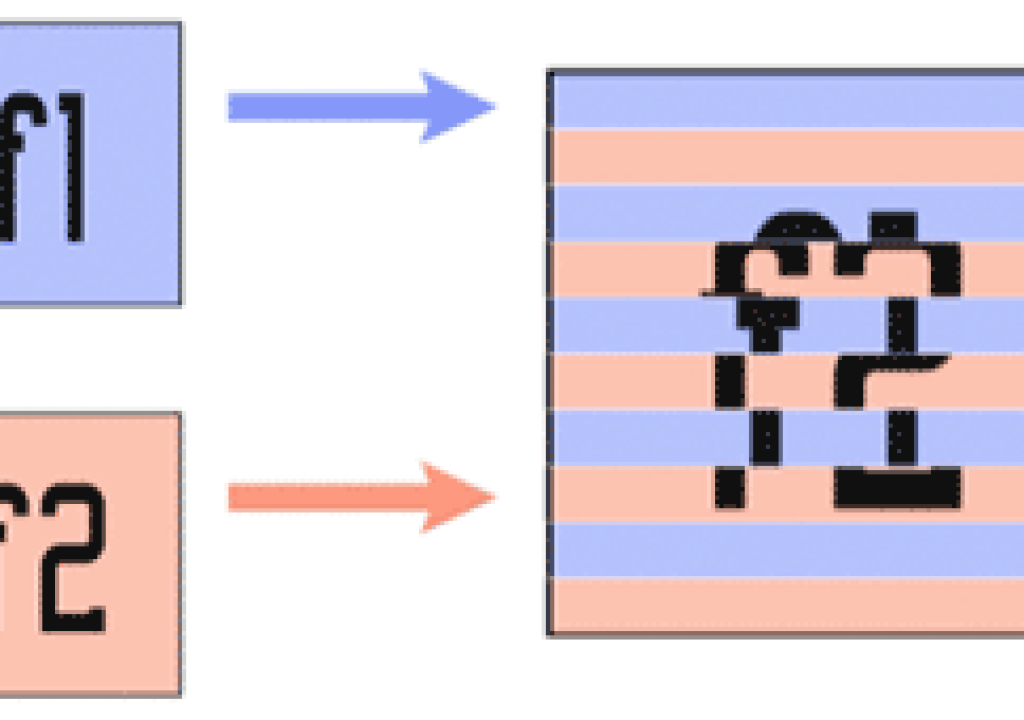
If you thought most NTSC video ran at 29.97 frames per second, that's only half the story – literally. It actually runs at a speed of 59.94 fields rather than 29.97 frames per second (fps), with pairs of fields “interlaced” to form a complete frame (see the illustration at left). When you shoot footage with your camcorder, it does not record whole video frames unless you are explicitly in a special mode known as “progressive scan.” Instead, most of the time it captures one field, then a second field, and lays these fields down in a linear fashion to tape.{C}

Likewise a television monitor plays back an interlaced video frame in two passes: It draws every other scan line on its way down, and when it's done, it returns to the top 1/59.94th of a second later and fills in the missing lines to complete one interlaced video frame.
Inside the computer, your video playback hardware determines the order of the fields when it encodes a full frame digital image into an analog signal during playback. It's therefore important to render the digital frames with the field order expected by your hardware. In Adobe After Effects, the options are referred to as Upper or Lower Field First. (Some systems also user “Odd” and “Even” field first, but this is dangerous method to rely on as some systems start counting at 0 – an even number – while others start counting at 1 – an odd number.) Generally:
- HD is upper field first
- DV (PAL or NTSC) is lower field first
- standard definition D1 PAL is upper field first
- standard definition D1 NTSC is usually (but not always) lower field first
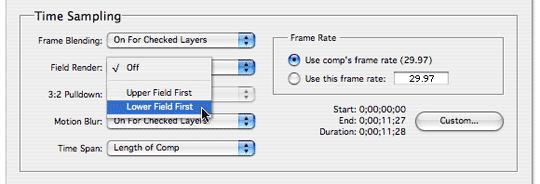
If you are uncertain (or simply don't believe us), to determine your playback system's field order, run through this simple test: Animate a fast moving still image at the system's optimum resolution (i.e. 720 x 480), and render the comp using “Upper Field First” from the Field Render popup (an example from After Effects is shown below). Render the comp again as “Lower Field First” and play back both movies through your hardware. The version that looks noticeably smoother is using the correct field order for your hardware.

To output a field-rendered animation in After Effects, select the correct field order from the Field Render popup in the Render Settings dialog. Other programs have similar settings for the sequences or timelines.
Field Rendering in Progress
When you field render an animation in After Effects, you'll notice that it makes two render passes for each frame, before it compresses and writes an interlaced frame to disk. So when rendering an Lower Field First movie:
- After Effects starts at 00:00L (the L stands for Lower Field) and figures out what all the layers look like at this starting point (i.e., their position, scale, opacity, effects, etc.). This frame is then set aside for a moment in RAM.
- Next it advances the composition 1/59.94th of a second (i.e., a position between 00:00 and 00:01), and renders frame 00:00U (or Upper Field) after again figuring out what all the animated layers would look like at this point in time.
- Now, since you specified “Field Render: Lower Field First”, After Effects keeps all the odd lines from 00:00L (for Field 1), and all the even lines from 00:00U (for Field 2), interlaces them, and saves the image to disk as frame 00:00. The resulting interlaced movie would be “lower field first” since the lower field belongs to an earlier point in time than the upper field.
Degrees of Separation
When After Effects imports an interlaced movie, it may default to treating the video as if it were non-interlaced (i.e., the entire frame belongs to the same point in time). If you then use this source in a composition and scale or rotate the layer, you'll most likely mix information from two points in time. Even if you field-render on output, a mixture of two different fields from the source movie would end up on each field in the output movie. The result is a shuddering mess, often referred to by the highly technical term “field mush.”
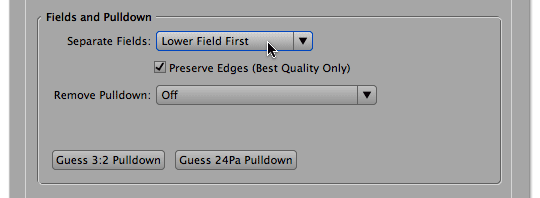
To avoid field mush, every time you import an interlaced movie, make sure its fields are separated in the correct order. In After Effects, select the footage in the Project panel, open File > Main > Interpret Footage, and use the Separate Fields popup as show below. This tells After Effects to separate each frame into two separate fields and space them 1/59.94th of a second apart. Then it constructs a full frame out of each field which is displayed in the Comp window. (Later versions of After Effects sport a Preserve Edges option which does a better job of interpolating fields to reconstruct frames; we always enable this.)

Set the field order for interlaced source movies in the Interpret Footage dialog box. Provided you field render your final output, both fields will be sent to their respective fields in the output movie.
Now when you Field Render your animation, interlaced source footage will be processed correctly (i.e., information from the first temporal field of the source will end up on the first field of the output movie, and pixels from the second field of the source will be routed to the second field on output).
Before you can Separate Fields of course, you'll need to know whether the source is Upper Field First or Lower Field First . If you're not sure of the field order, guess Upper Field First and then open the movie by holding Option on Mac (Alt on Windows) and double-clicking it in the Project panel; this will open it in a special Footage panel that shows you the clip after it has been processed by the Interpret Footage dialog. Here, After Effects will display each field (interpolated to a full frame).


If you guessed the field order wrong, motion will seem to stagger two steps forward/one step back as you move through the fields – look at the rider in relation to the audience to follow the progression of motion. If you see this type of staggered motion in other footage, it means someone processed the footage with the fields reversed.


If you set the field order correctly, motion will progress smoothly as you step through the fields. Footage courtesy Artbeats.
Press Page Down to step through the fields. If the guess was correct, as you play the movie a moving object would make steady progress; if you guessed wrong, the object will appear to stagger back and forth as the fields play out of order. (You can be fooled by checking for field order in the Comp panel, as only one field from each frame is displayed in a 29.97 fps Comp.)
Tips for the Battle Field
- When treating multiple clips, save time by Separating Fields for the first movie only. In After Effects, select this clip in the Project panel, select File > Interpret Footage > Remember Interpretation, marquee all the other clips and use File > Interpret Footage > Apply Interpretation.
- When using a video frame grab as a still image, in Photoshop run the Video > De-interlace filter, which permanently throws away one of the fields and replaces the now-missing pixels with an interpolation of the other field. If you don't de-interlace and there is prominent interlacing in the frame grab, the image will appear to flicker as both fields play back and forth.
- Don't apply the Separate Fields option to photos, text, and non-interlaced movies.
- If interlaced video footage is intended for playback on a computer monitor (for multimedia or the web), you'll need to de-interlace the source. To do this in After Effects, Separate Fields as usual (see above), but when you render set Field Render > Off. This will take only the first field from each frame of the source movie, and interpolate the single field out to a full frame (as with Photoshop's De-interlace filter).
-
For the highest quality, when converting a 720×480 interlaced movie to 320×240 non-interlaced for the web, don't just render a 720×480 comp at Half Resolution. Instead, after Separating the Fields, either scale the movie to fit a 320×240 comp, or render at 720×480 and scale the output to 320×240 in the Output Module (as shown below).

-
Because field rendering requires a full-size frame, you should not field render movies that are less than full frame. Even if you use hardware zoom to make 320×240 fill the screen on playback, each “field” would be zoomed up to occupy two scan lines.
- Most 3D programs are unable to field-render an animation, but you can get the same effect by rendering the 3D animation at 60 frames per second. (However, unless objects are moving quite quickly, it may not be worth doubling the 3D rendering time.) When you import this 60 fps movie, Conform the sequence to 59.94 fps in the Interpret Footage dialog, place in a 29.97 fps Comp and field render on output. After Effects will retrieve one 3D frame per video field.
-
Importing a 29.97 or 30 fps animation and processing it through After Effects with field rendering turned on will not give you an “interlaced” movie. If After Effects doesn't have the necessary data to work with (i.e., one distinct image per field), the result will be no different from the source.<.li>
- When prerendering layers for reuse in After Effects, render full frame animations with fields, and Separate Fields on re-import. If the layers are small and will later be moved around (as in a looping sprite), for the highest quality render at 59.94 fps and no fields, so that on re-import you have one clean image per field.
- For best results when reversing the field order of an interlaced QuickTime movie: import the movie into After Effects but don't Separate Fields; center the clip in a comp that's the same size and duration; move it down one pixel and render again at 29.97 fps, with no field rendering. This moves each field down one scan line, so the odd field become even, and the even field becomes odd.
Postscript
This article was originally written in 1998, and was updated in 2008 (640×480 upper-field-first capture cards were the norm back then; today we're using DV, D1, and HDV which have different frame sizes and field orders).
Between these two dates, we've created other articles and videos that also go over fields and interlacing in detail:
- We've written a free article for Artbeats.com on managing interlaced footage (download here – 542k PDF).
- Our books After Effects Apprentice (Chapter 5 plus the Appendix) and Creating Motion Graphics 4th Edition (Chapter 39) also discuss handling interlaced footage. Click here for more detail on these books.
- We've created a ~50 minute video training module that goes over numerous permutations of working with interlaced and progressive scan source material. It is available through Lynda.com's Online Training Library. If you aren't already a Lynda.com subscriber, click here to get a free 7-day pass on us.
-
Before we started writing books, we created a 4+ hour video that went over universal gotchas such as dealing with alpha channels, fields, frame rates, pulldown, aspect ratios (including anamorphic widescreen), and 3D/video workflow issues. Most of the information is still highly relevant, as the video standards haven't changed – and neither have the misunderstandings that surround them! Click here to learn more about VideoSyncrasies: The Motion Graphics Problem Solver
.
The content contained in our books, videos, blogs, and articles for other sites are all copyright Crish Design, except where otherwise attributed.

Filmtools
Filmmakers go-to destination for pre-production, production & post production equipment!
Shop Now


