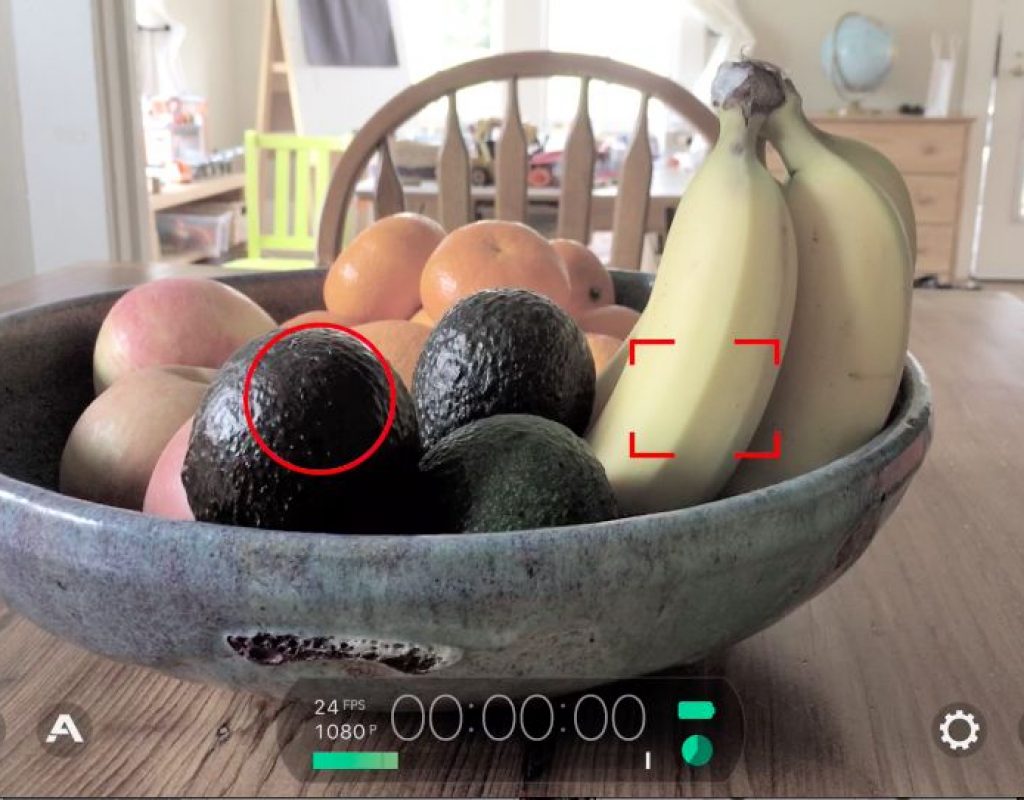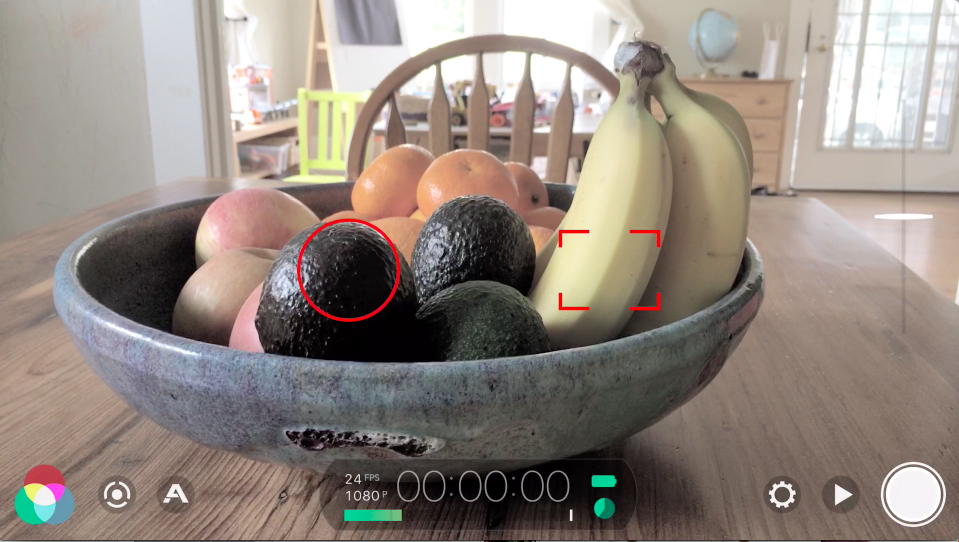
FiLMiC Pro (US$14.99) has been the de facto video camera app for mobile filmmaking for awhile. Mostly because of its robust feature set which includes manual control of iris, white balance and focus, as well as a 50 megabit and 100 megabit codec to reduce the amount image compression in video files.
Today, FiLMiC Pro 6 hits the app store and it’s a fairly big revamp. The bombshell news is that with v6 and an iPhone 7 /7+ (sorry only A10 processors) you can buy the “Cinematographer’s Kit” (in-app optional purchase for US$9.99) which gives you an incredible new Color/ Tone/ Color Behavior tool called the “Imaging Panel”. This is something every iPhone Filmmaker will want, and not just for shooting log.
There may or may not be an update in the near future where A9 devices will also get the Imaging Panel. I have been using the beta for the last couple of months on an A9 processor (iPhone 6S+) but the developers were finding too many lockouts for certain combinations of parameters on anything slower than the A10. So today it’s the iPhone 7/7+ only, but who knows what the next update will bring?
Welcome to Your Iron Man H.U.D. Future
When you launch Filmic, you’ll see a very spare interface. One that allows you to hit record and start filming immediately. The app remembers whatever the last settings were. The first new feature is the very cool on-screen Iron Man-esque “heads-up display” style arc-sliding UI that controls exposure, iso/shutter speed, focus and zoom. In my experience these were really touchy with some noticeable lag, but I was on a beta running on an A9 processor. You have to practice to to nail a focus-pull or a subtle exposure correction while shooting. Or use the “Pull-to-point” function that let’s you set two marks and execute an automated focus or zoom pull.
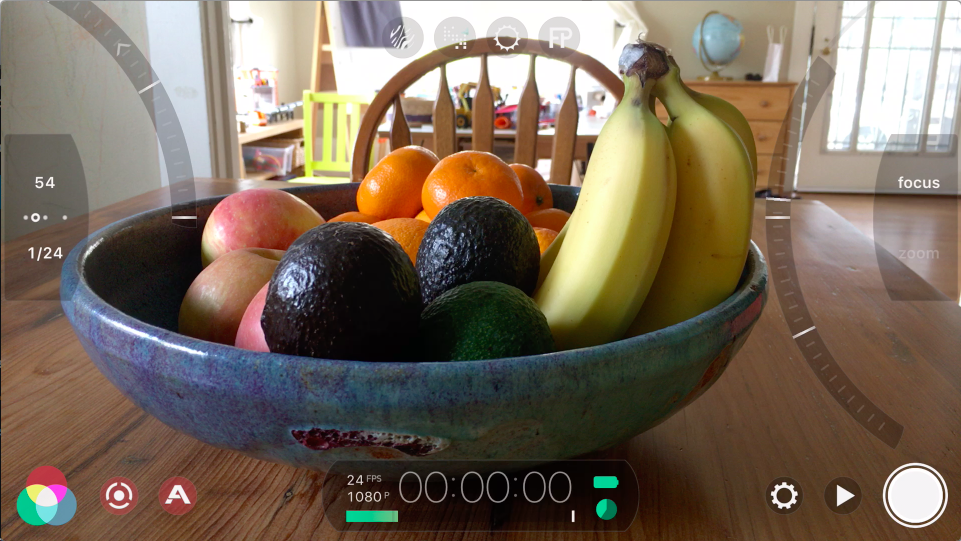
And of course, the point/ set and tap/ lock function for exposure and focus are still there for doing it the way you’ve always done it. Bottom line, the slider controls are new and cool and will certainly get a lot of fans.
New in this version are some more ways to set and lock ISO and shutter speed.
There’s a toggle that lets you assign an ISO range: 23-46, 46-92, 92-184, 184-368 and 368-736. Select an ISO range and then tap the ISO and Filmic locks it in. Change exposure and you’ll change the shutter speed. It works the other way to: lock in a shutter speed, say 1/48th, and ISO will ramp up and down when you change exposure. If you lock neither shutter or ISO, then it will remain in a “reciprocal” mode and change shutter and iso dynamically as exposure values change.
This was one of the more confusing tools for me to use, since there’s no actual ISO, shutter or iris to adjust. My preference is to shoot 1/48th when shooting 24 frame and I would prefer to see the shutter speed tied to frame rate. But that’s me.
On the right side of the UI are controls for focus and zoom. The slider control works for changing values in both, you just have to toggle between “Zoom” and “Focus”. Unlike the exposure controls, there are no numbers for zoom or focus values. And of course the zoom is just a digital scaling of the image.
What would be cool to see is a simple double-tap on “zoom” while in focus mode to have the image pop to maximum zoom, so users could set focus, call it a “focus-assist” mode.
Analytics Tools
There are really great on-screen help tools to make sure you are hitting the sweet spot in terms of exposure and focus.
First up are Zebras for shadows and highlights, which you can just tap right up top to enable. Blue tells you when you’re too dark and red tells you when, and where, you’re too hot.
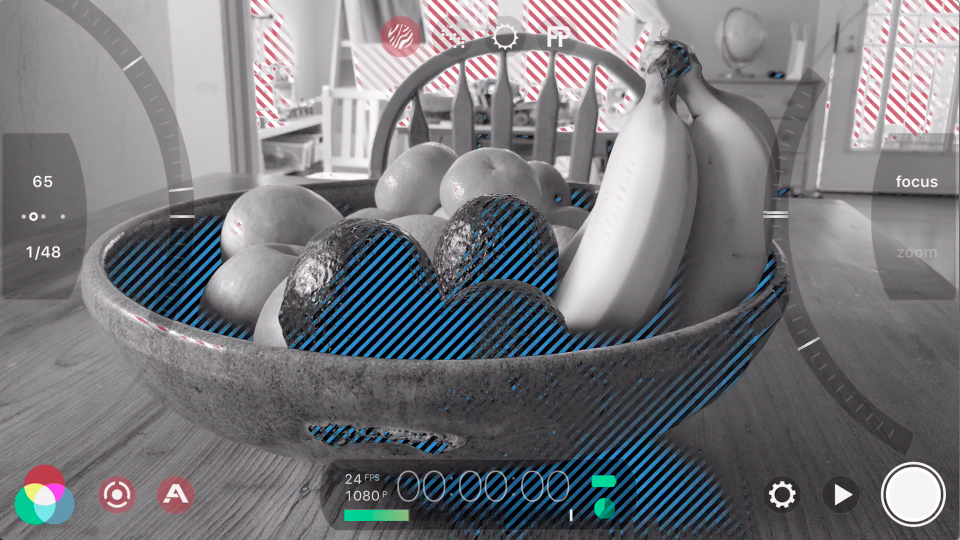
If the Zebras aren’t enough, there’s a Clipping Mode. It paints the under exposed values blue and hot spots red.
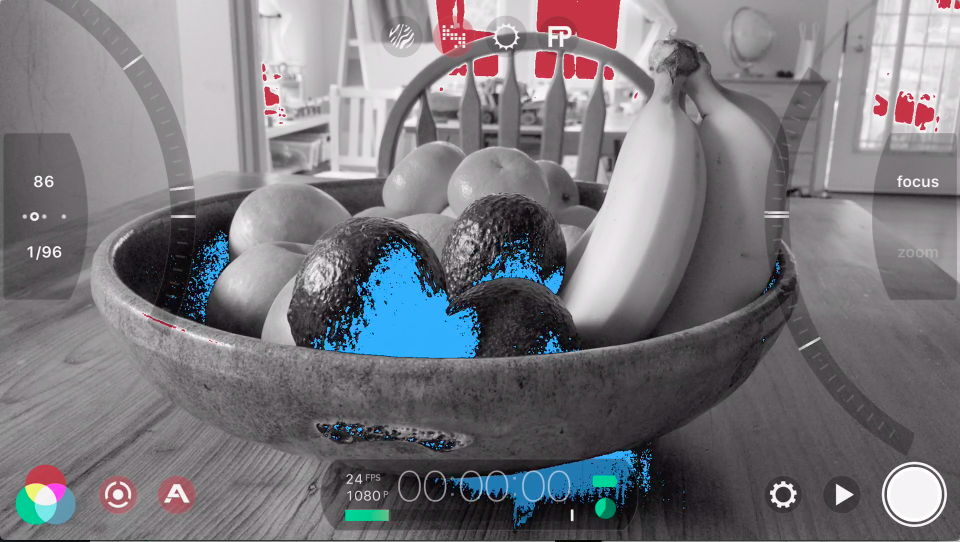
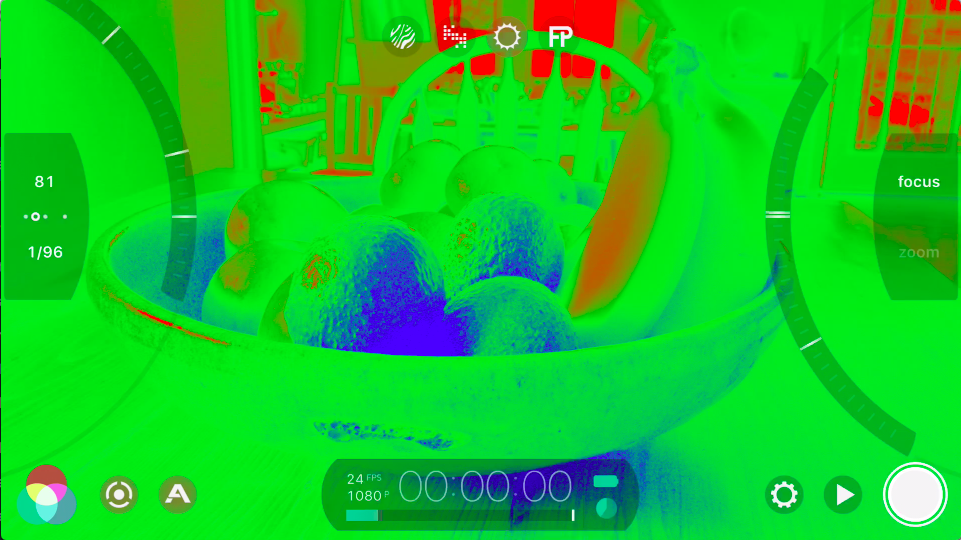
For a very clear exposure map of your image, there’s a full-on false color tool here that takes filming in a psychedelic new direction. Just remember that “green is good”.
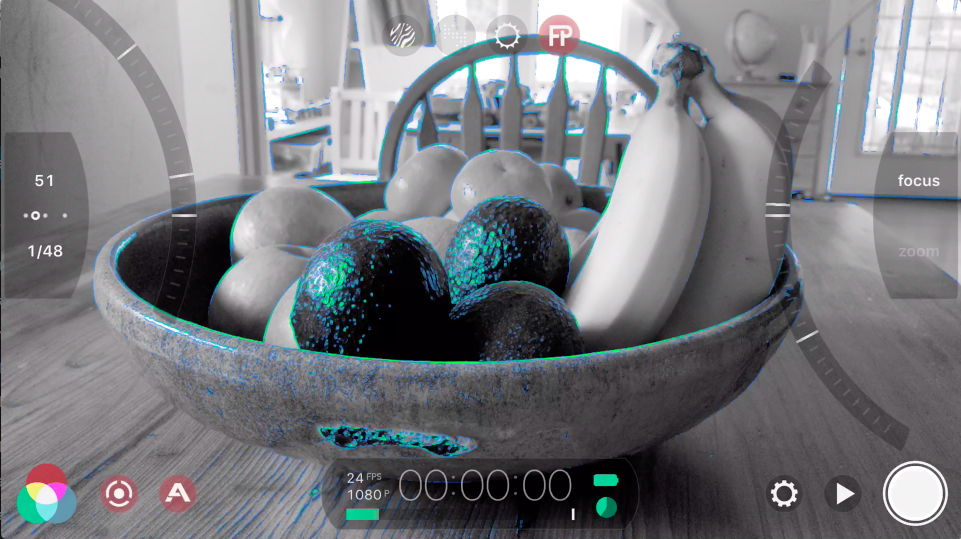
Of course these are on-screen tools, they don’t show up in what you record, just in case you weren’t clear. The FP button on the top gives you Focus Peaking. Which is way more handy than I would have imagined. Focus on the iPhone is hard considering that it’s a wide angle lens, so you assume that everything is in focus, but it’s not. It’s easy to blow your focus, especially if you are trying something daring like a rack mid-shot. This focus peaking tool is pretty brilliant and one of those things that you can’t really shoot without once you’ve used it.
And a Mini WFM
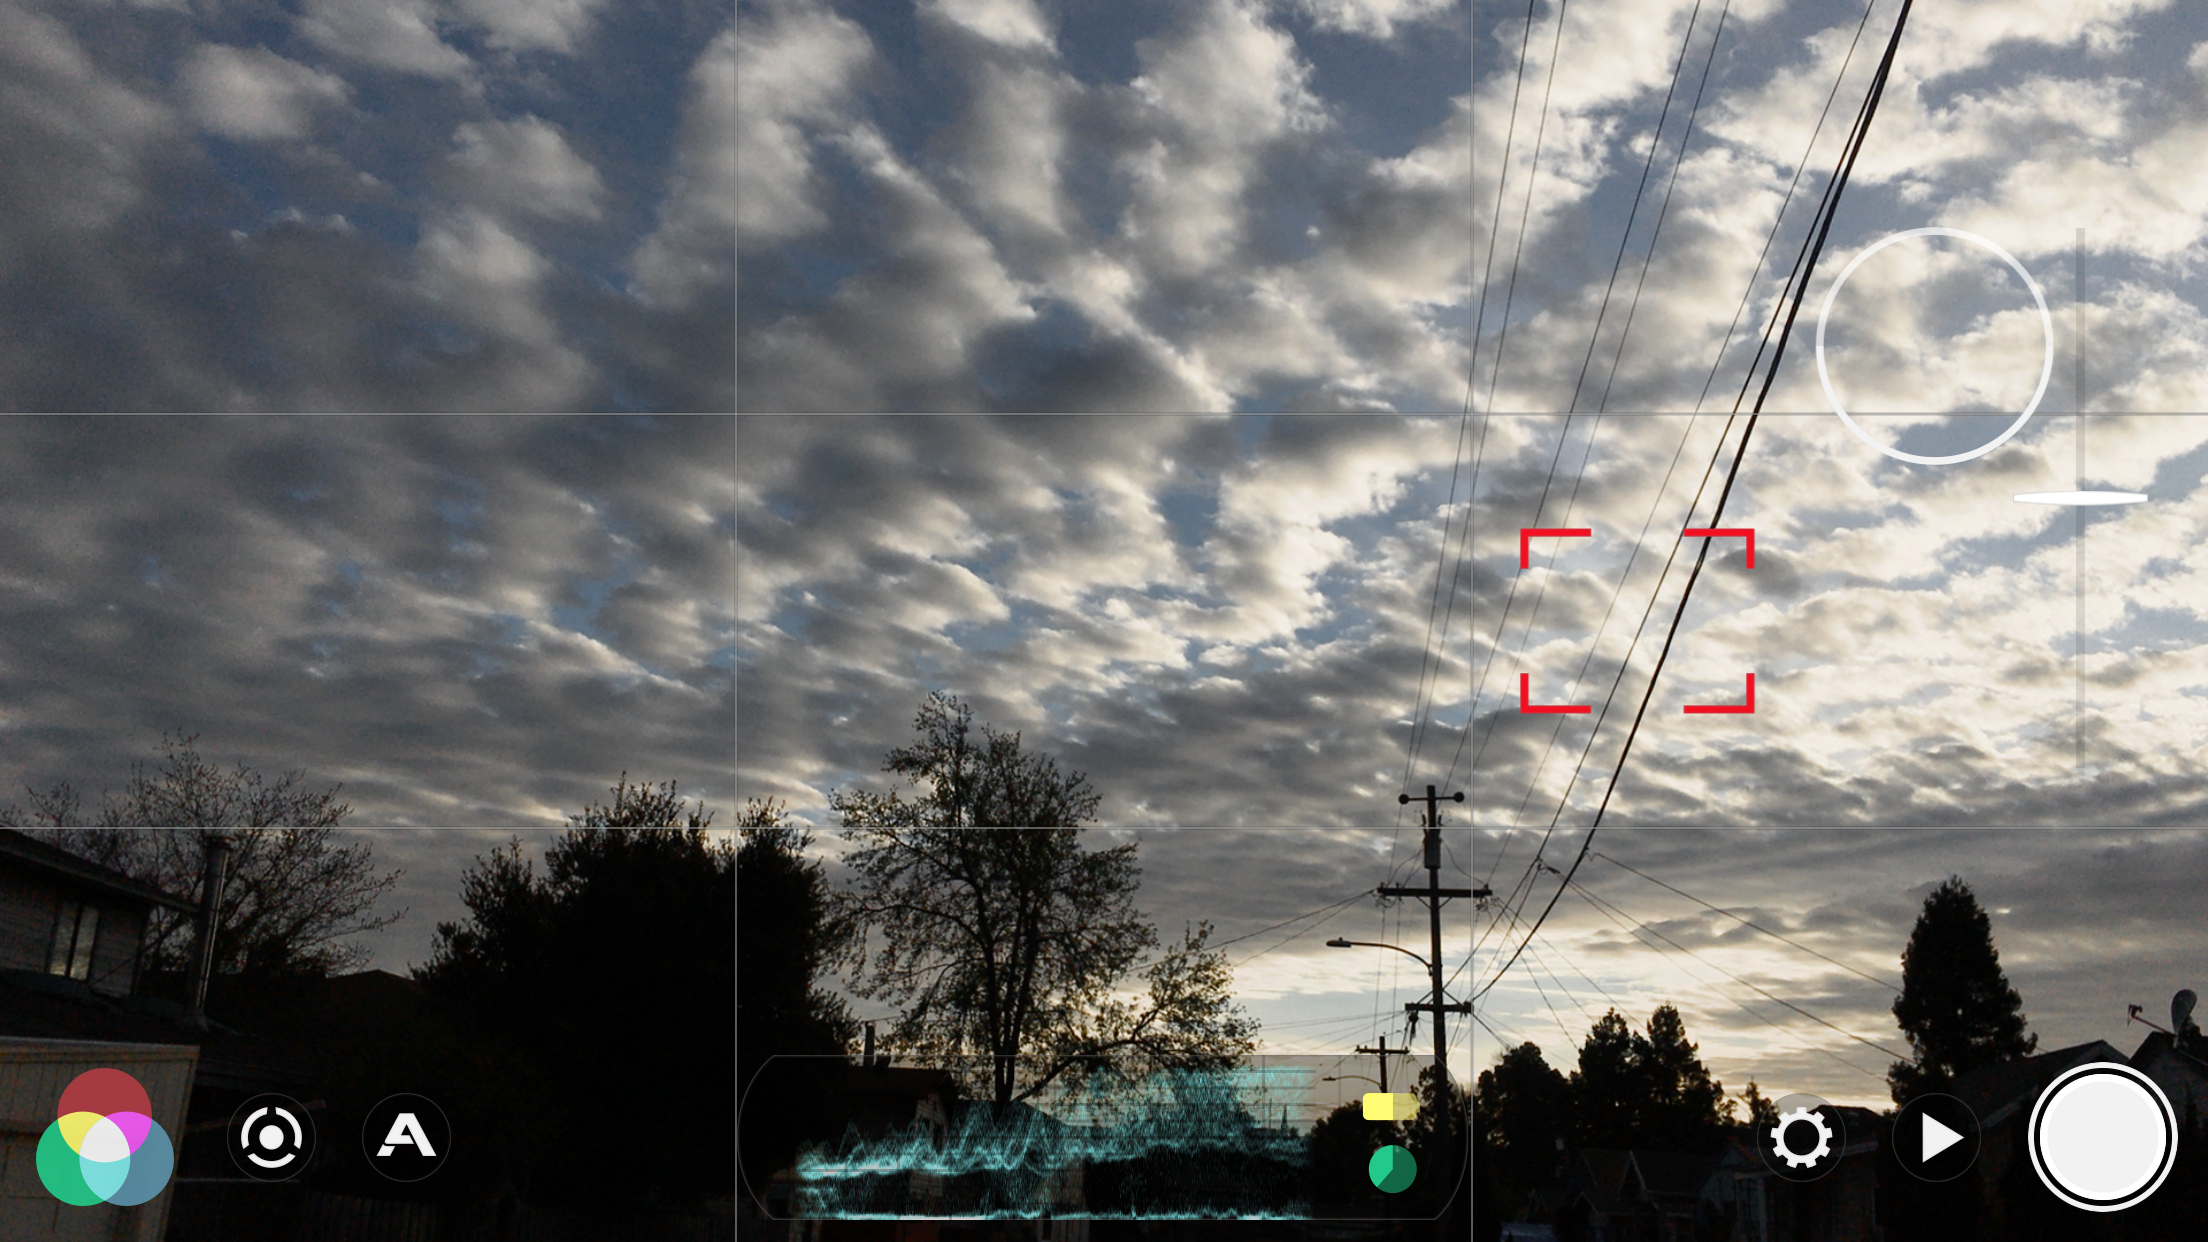
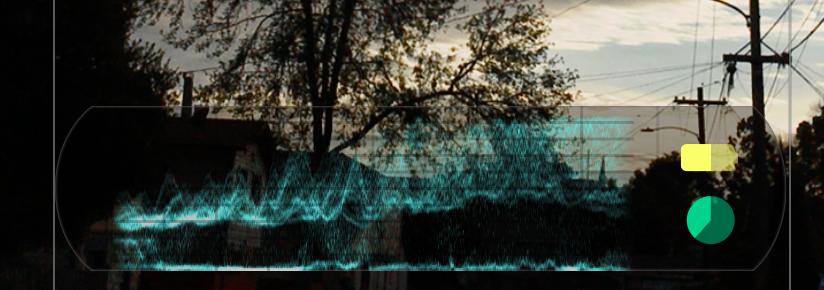
Even with all the great image analytics, sometimes you just want a Waveform Monitor. Tap the TC counter to cycle through histogram, RGB histogram and a Waveform monitor. This is new and very cool.
Resolution/ Frame Rate/ Compression
Resolution and frame rates are user defined, you can shoot from 540 to 4K, and 1 frame to 240. There are limits of course, 4k maxes out at 30, 1080 maxes out at 120, and 720 maxes out at 240. Compression varies from “Economy” to 100 m/bit. But 100 mbit only available for UHD formats. HD maxes out at Filmic Extreme which is 50 mbit.
Log and the Color Panel
When you click the little RGB Venn diagram on the bottom left of the UI, you get a whole crazy new world of color manipulation. This is the jewel of the update — a color engine Filmic calls the “Imaging Panel”.
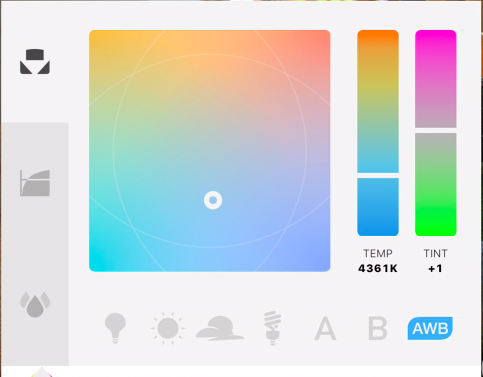
Yes, there is a log setting that let’s you shoot in the ever popular “desaturated gray” of log encoded video (more about that later) but there are also tools to dynamically set color temperature and tint, along with sliders for vibrance, saturation, noise reduction, black point, gamma and white point. The kind of tools that a DIT would use to create a custom color profile on a high-end camera.
There are four built-in preset gamma profiles to work with: Natural, Vibrant, Flat and Log.
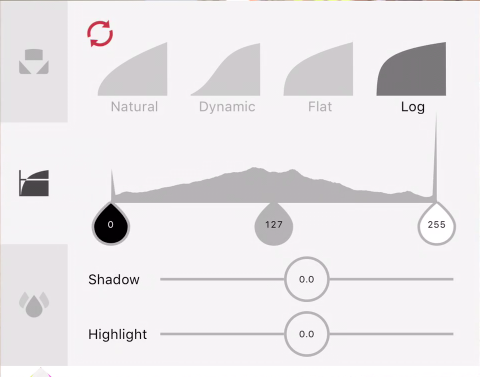
Natural is the default Rec. 709 profile that does what a standard display-centric profile should do: make a pleasing image with about 7-8 stops of latitude.
Dynamic is another Rec. 709 flavor aimed at pumping saturation and blowing out highlights while preserving shadow detail.
If you’ve ever shot with a DSLR, you probably downloaded and shot with some version of a Flat profile. This is the same thing: a preset aimed at preserving some detail in the highlights and shadows while also limiting saturation to protect color channels from blowing out. The flat profile footage is tweaked back to a more pleasing image in post with some basic color correction. It is a tried and true workflow designed to minimize loss of image detail inherent in shooting Rec. 709 video.
Flat profiles never gave you an additional 2-3 stops like log video, they kept you from losing color detail by preventing you from blowing color channels. With a flat profile, you can sometimes recover some detail in highlights or in shadows, stuff that would have been crushed under the regular Rec. 709 S-curve.
The Question of Log
Log is different. Log comes from the world of film negatives and telecines. It was a strategy to preserve the specific kind of way that celluloid recorded image exposure could translate into the linear world of video. Turns out the strategy works well for digitally captured images too.
Log means taking the raw image data off the sensor and encoding as much exposure and color information into the video. The goal is to postpone most of the image processing until post-production, where a colorist can decide what to throw out and what to leave in, in order to display a pleasing Rec. 709 image in the linear world of video displays.
This is possible because camera manufacturers build the sensors and circuits that convert raw sensor data into video, so the option of providing log is up to Canon, Sony, et al. iPhone camera app-makers don’t have access to the raw sensor data, rather everyone is handed the same Rec 709, 4:2:0, 8-bit video as an h.264 (mpeg4) file. There are tools in the SDK to dial in frame rate, compression and size, so developers can offer up some customization. Thus far, color space and raw sensor data have been off-limits. So how on Earth is Filmic Pro 6 pulling this off?
According to Filmic Inc, they are not simply slapping on an aggressive log-like flat profile, but they are in fact creating a much more robust image format that captures more information than any other video profile. The fact that my phone’s battery is drained with alarming speed, as well as the heat generated while shooting leads me to believe they have figured something out about log on the iPhone. In their White Paper addendum in the v6 Manual, they say:
“What is the purpose of a logarithmic remapper for low-bit-depth video? If there is an intention to correct or modify mobile-originated footage in post production, the raw data must be reorganized protectively before encoding. When footage is exposed properly, Filmic Log can preserve almost the entire tonal range of the raw buffer in the encoded medium.”
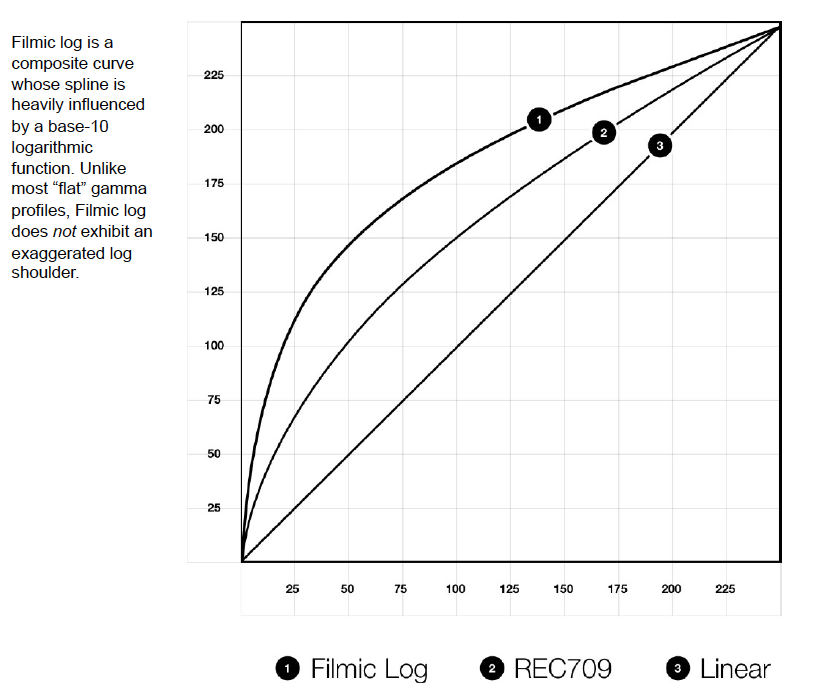
Of course the proof is in the gray log pudding.
My non-scientific tests conducted during the beta phase of Filmic Pro 6’s development leads me to the conclusion that whatever process they’ve developed delivers about one extra stop of exposure compared to shooting Natural or Flat. Contrast this with the typical 2-3 additional stops gained when shooting S-Log, Arri Log or C-log. This is an apple (inc) and oranges question, right?
Large sensors capture a greater range of latitude and color to begin with. There is nothing to compare Filmic’s implementation of log with. There are no other camera phone’s shooting this way, is an extra stop is all anyone will ever get?
I don’t know, but it begs the question, “Is an extra stop of exposure worth all the downstream hassle of shooting log in the first place?”
When you commit to shooting log on your phone, you are:
1) Committing to a color grading session somewhere in your post pipeline. Whether you do that while converting to Pro Res for editing, or you wait until picture lock.
2) Shortening the amount of shooting time because of the excessive draw on your battery. You can add a battery pack but I worry that with as much heat as my iPhone generated, going too long will mean a possible thermal shutdown. Not awesome on a shoot.
3) Monitoring your shoot with a flat gray muddy image. Shooting log on bigger cameras usually means somewhere someone is running a monitor with a display LUT so you can see it as Rec. 709, maybe even with a roughed-in grade to give a feel for what the final video will look like. Focus is most likely being pulled by an AC, or there’s at least more than the operator thinking about the image. Bottom line, log needs a crew, most iPhone productions don’t have that.
In the end, shooting and grading Filmic Natural or Filmic Flat video is pretty close to what I get if I shoot and grade Filmic Log. The extra stop is about the only advantage, and then it’s not always obvious how much of an improvement it is. Overall, the final graded picture quality is pretty similar, log or non-log.
Conclusion
The good news is that there’s log on the iPhone, and it’s the real deal. This isn’t just a “log-look” applied to the existing Rec. 709 video coming out of the camera layer in iOS. There are patents filed and a white paper detailing just how Filmic is handling this. And whatever they are doing is a battery sucking camera heating amount of processing. Adam Wilt and I were joking that camera rental houses will start offering an iLog Combo Kit where you rent a stack of fully charged iPhone 7’s to make your short film.
Log video on the iPhone is going to get attention, there will be camps for and against it. And it is really cool, even with it’s limitations, but it is that color engine, the “Imaging Panel” with savable presets that is shockingly new and never-before-seen.
Imagine developing a series of customized, in-camera looks for the different parts of your show, and then simply loading them up as you need them. Media management is still the same so you can tag, select and upload (to the cloud) clips, directly from inside the app. You don’t have to sync your phone to your laptop, you can simply select clips and save to DropBox, Google Drive or iCloud.
For me, this means shooting and uploading to a Media Encoder CC Watch folder in iCloud. My watch folder automatically converts clips from h.264 to ProRes which I prefer to work with in post. So my iPhone with Filmic Pro 6, linked to the cloud, suddenly becomes my camera, my DIT, my card wrangler and my assistant editor all in one.
You can shoot log, or flat, and wait to sit in with a colorist to finish the show. Or, you could lean in to the strengths of mobile-filmmaking: collapsed production to post pipe-line; always-on cloud connection (time to get an unlimited data plan); and an easy path for exhibition on-line. Visit your laptop or desktop for the edit session and sound mix, but build the look in-camera.
The release of Filmic Pro 6 is more than an upgrade, it is a reboot of an already solid camera app. New on-screen slider controls combined with zebras and focus peaking make shooting a lot easier. Add in a fully-realized in-camera color engine with presets and Filmic Pro v6 stays the best app for mobile filmmaking by far.

Filmtools
Filmmakers go-to destination for pre-production, production & post production equipment!
Shop Now