Apple promised Final Cut Pro 10.7 before the end of November and they delivered with an update right at the end of the month. We knew what was coming as attendees of the Final Cut Pro Summit got a sneak peek that they were able to share with the world.
The bullet point list of this update is pretty good:
- Automatically scroll the timeline to keep your clips in view under the playhead during playback.
- Increase editing efficiency by combining a selected group of connected clips into a connected storyline.
- View both video and audio role colors to easily see the organization of the timeline at a glance.
- See improved results when using the Object Tracker’s all-new machine-learning model to analyze the movement of faces and other objects on Mac computers with Apple silicon.
- Use the enhanced Reveal in Browser feature to easily locate a clip in the browser without losing your selected Keyword Collection or Smart Collection.
- Export HEVC and H.264 files faster by simultaneously processing video segments across available media engines (requires macOS Sonoma or later and a Mac with Apple M1 Max, M1 Ultra, M2 Max, M2 Ultra, or M3 Max).
I could dive into the features a bit deeper but our friends at Ripple Training did the best walkthrough that I’ve seen so we’ll let them take it.
While I’m not a user of the scrolling timeline in any NLE that I use I have to agree with Ripple in that Apple’s implementation is much smoother than the other NLEs. They did think it through a bit better than most. I don’t know if this is true or not but using the scrolling timeline in the other NLEs feels like it taxes the resources of the system noticeably more than having it turned off. So that’s one reason I don’t use it. While I haven’t been able to run a big job through FCP 10.7 yet and really get to know the scrolling timeline, just giving it a play feels like it can keep up well.
The biggest surprise to me was the last bullet point above: Export HEVC and H.264 files faster by simultaneously processing video segments across available media engines.
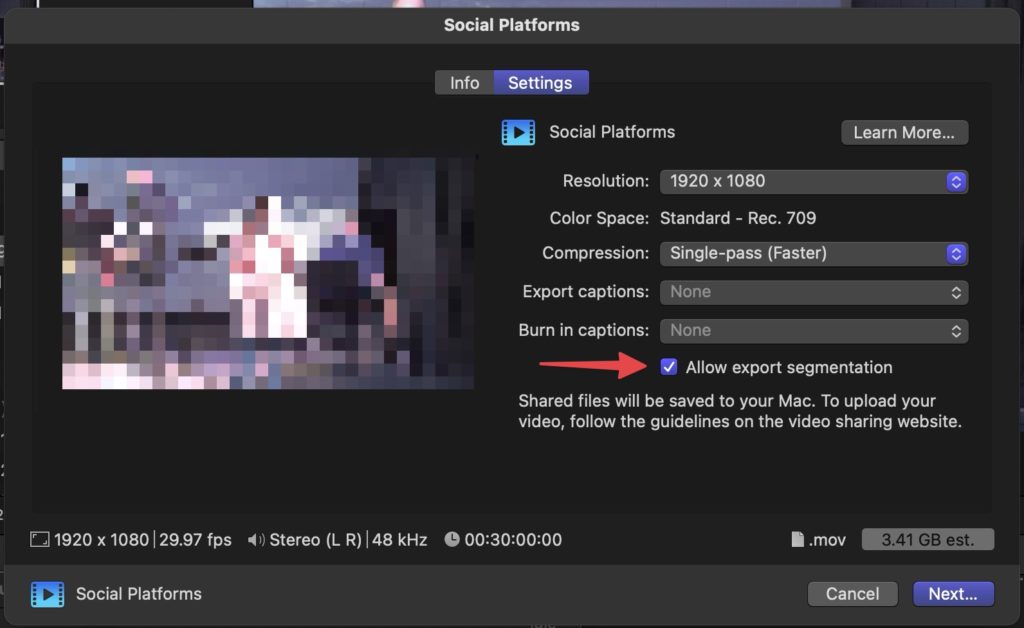
Anything that can make the time suck of outputting faster is all right by me. As the Apple silicon Macs have continued to advance I’ve wondered how NLE makers will keep capitalizing on what they can do. It looks like Allow export segmentation is one way Apple is doing it in Final Cut Pro.
If your output format supports it then export segmentation is just a click away when you export an edit.

This segmentation is only available for select formats and might be grayed out if it isn’t supported or not there if on an unsupported Mac. Apple has a whole support page about this new option called Speed up exports with simultaneous processing in Final Cut Pro for Mac. There’s not a ton of detail, but since this is restricted to the higher-end M-series chips I wondered out loud on Twitter if this is directly related to the media engines that are integrated into the M-chips.
yes, that’s exactly how it works.
— Ripple Training Inc. (@RippleTraining) November 30, 2023
But messing around with this new option it seems it is indeed dedicated to H.264 and HEVC exports as this option isn’t available on ProRes outputs. That is a disappointment as the M-chips have dedicated ProRes encoders as well as dedicated “video encode engines.” Seems this should be possible with ProRes as well? Maybe that’ll get added in a future update.
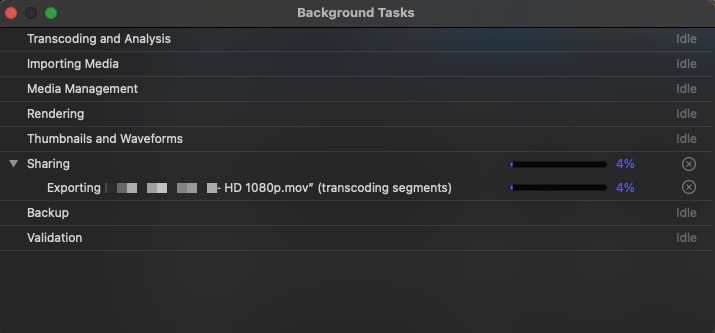
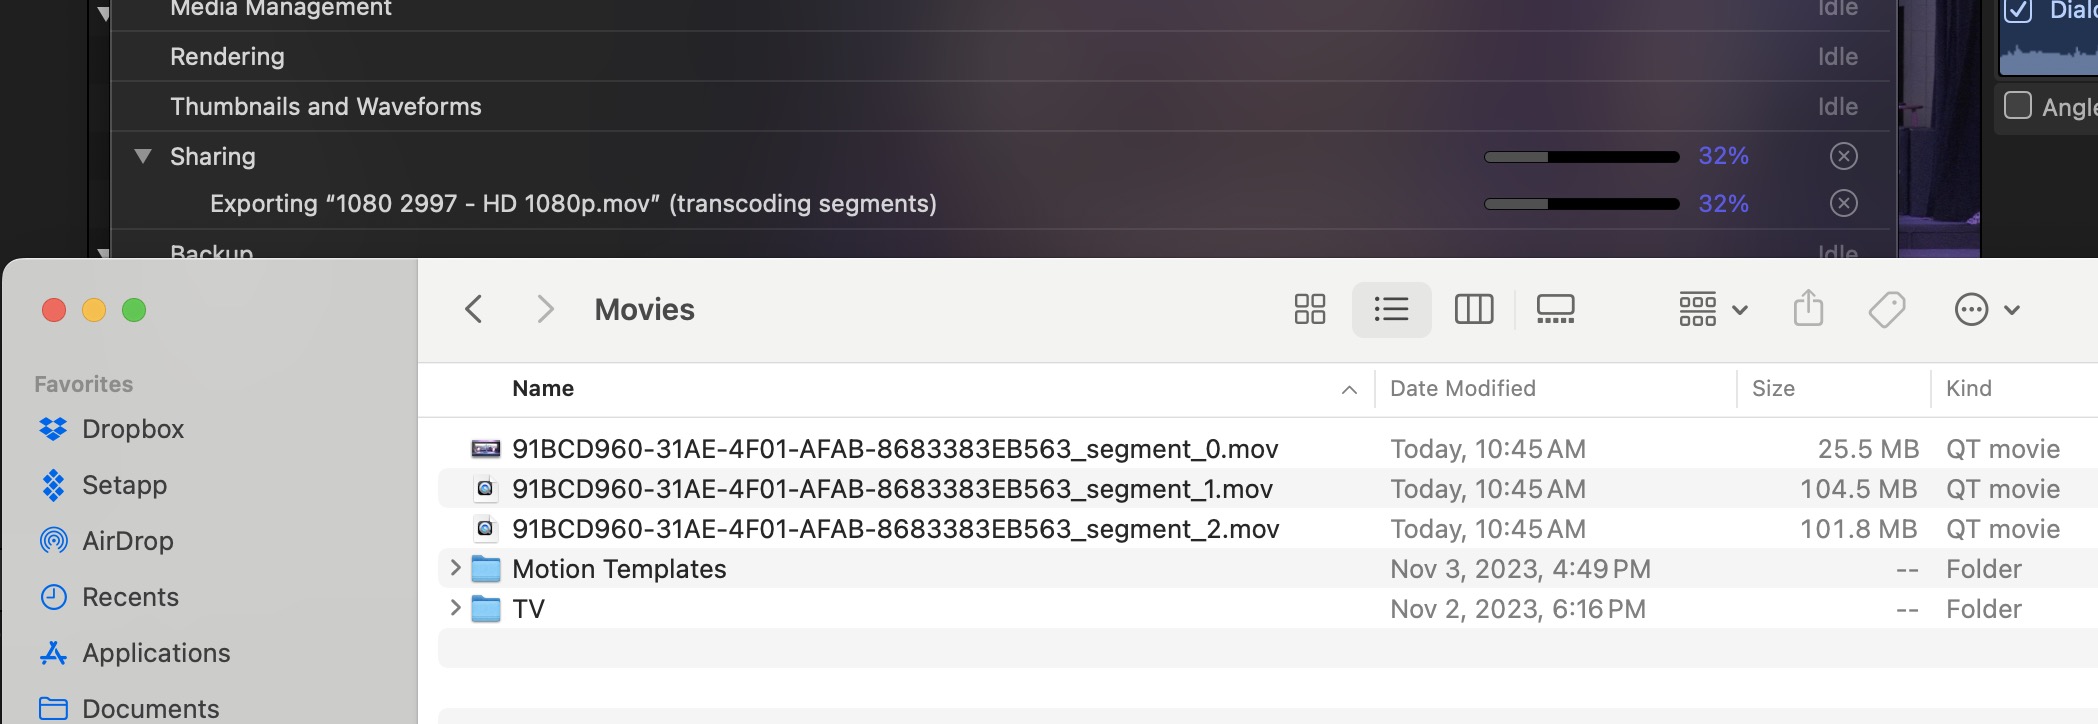
Since I haven’t found a tool that can monitor those dedicated encode engines it’s hard to see exactly what is happening but you can kinda see. 
The Background Tasks window will tell you when you’re transcoding in segments.

And you can see the different segments writing to your output destination.
As a quick test, I gave the export times a test on a half-hour Final Cut Pro edit. It was mostly 4K source media in a 1080 timeline. I chose the Social Platforms share destination seen above as that’s an easy one without a lot of different settings. Times below are minutes:seconds.
| 30-minute 1080 Social Platforms share Final Cut Pro 10.7 | with export segmentation | without |
|---|---|---|
| Mac Studio M2 Max | 2:25 | 3:05 |
| M3 MacBook Pro 16-inch | 2:30 | 3:15 |
| Mac Studio M1 Ultra (Updated 12/11/23) | 1:20  |
2:51 |
| Mac mini M2 Pro | not available | 4:49 |
(12/11/23 UPDATE): I was able to run the same output test on a Mac Studio M1 Ultra and the results were quite good with Allow export segmentation turned on. If you remember, the Mac Studio Ultras have twice the encode engines as the Max chips have and it shows with a much faster export time as shown above.
But you can also see this at work when you watch Final Cut Pro 10.7 encode twice as many segments before joining them back into a single file.

As I mentioned above, I do hope this Allow export segmentation gets expanded if it could make ProRes and other H264 exports faster. As of this publication, it only appears to work in Final Cut Pro under Publishing settings when you’re exporting an H264 or HEVC files to a .m4v wrapper. Mastering settings to an H264 .mov do not get the Allow export segmentation as an option as it is greyed out.
Can we get this with ProRes .movs? Can other applications do something similar? I sure do hope so. It might give some workflows a real reason to spring for the M Ultra chips in the Mac Studio.
That’s a nice improvement when you’re exporting from FCP in a format where you can use export segmentation. Since this new feature is only available on M Max and Ultra chips, I was curious what the same export time would be on a Mac mini with only an M2 Pro. As you can see, it was slower, as expected. It’s not a ton slower, but that would really add up if a Mac mini was your primary machine.
I do hope there is an option to add ProRes to export segmentation on supported chips. Since a ProRes master file (I’m not supposed to call it a master anymore am I) is still a requirement for so many jobs (and it should be for every job as you can always make any file you want from it) it help save time. And you know what they say …

Filmtools
Filmmakers go-to destination for pre-production, production & post production equipment!
Shop Now


