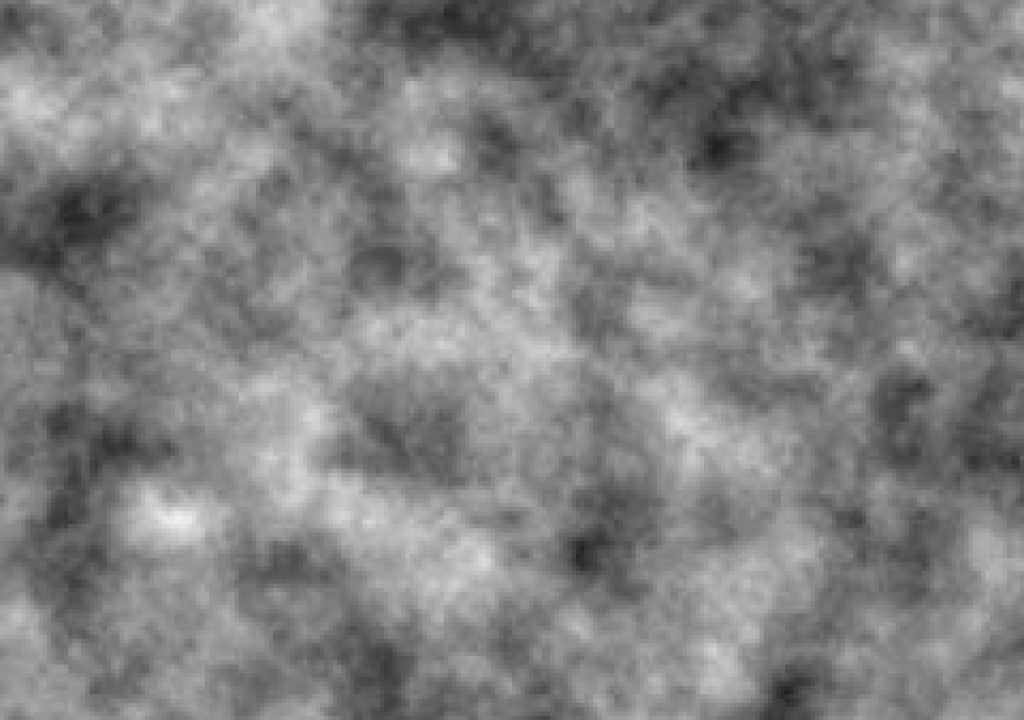
The Fractal Noise effect in Adobe After Effects has to be one of the beloved plug-ins among power-users for its ability to create everything from abstract backgrounds to realistic natural phenomena. Here are a pair of ideas (from our After Effects in Production book) for creating the former: a blocky pattern, and a soft blurry pattern that we like to use for a “lighting” effect. In Part 1 of this bonus tutorial, you will learn how we created these layers, and in Part 2 we’ll offer some tips on making the Fractal Noise effect and other sources seamlessly loop.
Loading Up
Click here to download a small .zip archive containing an After Effects CS3 project which contains these tutorials. As all of the imagery will be created using Fractal Noise, no source footage is necessary.
Part 1: Background Noise
Explore the [Fractal Noise Background] comp from the Fractal Noise * prebuilt folder in the Project panel. You can RAM Preview short sections if you like, or Shift+RAM Preview to render every nth frame (as set in the Shift+RAM Preview Options). It will take a few moments to render the whole thing; Fractal Noise is one of the slower plug-ins in After Effects. You’ll notice that because of the evolution of the effect, it may not look like it is animating much as the RAM Preview is being built, but it will look quite lively when it plays back at the full speed. You will recreate this composition in the following steps.
Fractal Blocks
Step 1: In the Project panel, open the folder MyComps. In it is a comp called [MyFractalNoise]; double-click it to open it. If you are working with a slower computer, set the comp’s Magnification level of 50% and to Half Resolution; these reduced sizes will speed up your work.
Step 2: Press Command+Y on Mac (Control+Y on Windows) to create a new Solid layer (or select Layer > New > Solid). Name it “FractalNoise_blocky”, and click the Make Comp Size button (640×480). Color the solid Black and click OK.
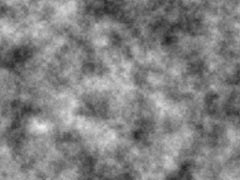
Step 3: With FractalNoise_blocky still selected, apply Effect > Noise & Grain > Fractal Noise. The default is a grayscale cloudy fractal pattern, as seen at right. We’ll change this to a blocky pattern, animate it slightly, and tint it blue. If you’re not familiar with the Fractal Noise effect, experiment with the Fractal Type and Noise Type popups, as well as the other parameters. Then click on Reset in the Effect Controls panel before proceeding.
Step 4: Make the following changes to the default settings:

- Set the Fractal Type to Threads, which is relatively low in contrast – we don’t want the background to be too overpowering.
- Set the Noise Type popup to Block, the only boxy pattern available. We want a digitized, mosaic-style look.
- Although the goal is low contrast, the image tends too much towards dark gray at this point. Boost the Contrast value to 170.
- To make the boxy pattern smaller, twirl open the Transform section and change the Scale parameter from 100 to 90. Your result should now look somewhat like the one above/to the right.
next page: tweaking the blocks
Step 5: Next, let’s tweak the appearance of the fractal blocks:
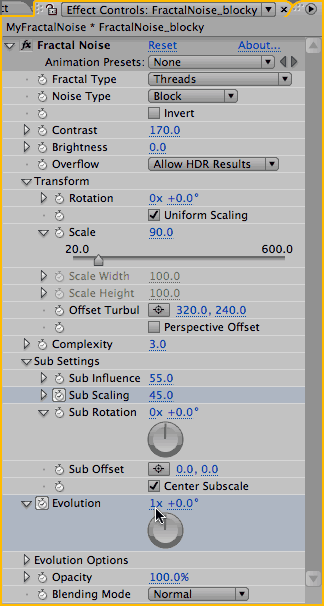
- Although the block pattern is obvious, the amount of detail inside the blocks is giving it a cloudy appearance. This is because the fractal pattern is being calculated too many times (i.e. for too many “iterations”). To decrease this detail, reduce the Complexity parameter from 6.0 to 3.0.
- Twirl down Sub Settings. These decide how each iteration of the fractal pattern are drawn: Are they larger or smaller than the original? Stronger or weaker?
- Scrub the Sub Influence parameter to see its effect, then set its value to 55% (reduced from 70%). This will reduce the strength with which the further iterations are rendered.
- The Sub Scaling parameter decides how much smaller subsequent iterations are than the original. We will reduce this, and also animate it so the pattern will appear to grow over time. Make sure the current time indicator is at 00:00, enable the animation stopwatch for Sub Scaling, and scrub its value to see the effect of this parameter. Then set its value to 40.
- Hit the End key to jump to 05:29. Hold down the Command (Control) key, and slowly scrub the Sub Scaling parameter while watching the Comp panel to get a feel for its effect. Set this parameter to 45 – a little scale goes a long way towards adding interest without being too distracting.
- Turn on the Center Subscale checkbox. This aligns all iterations to start from the same point, and is important for creating smooth scaling and more order in the block pattern.
- The main animation parameter for Fractal Noise is Evolution. While still at time 05:29, enable its animation stopwatch, and set a value of 1 revolution. Make sure you set the revolution and not the degrees parameter; it should read 1 x +0.0?. (Check the image above/to the right to make sure you’ve set it correctly.)
- Press Home to return to 00:00, and set Evolution back to zero revolutions and degrees.
- Press U and verify that the Sub Scaling and Evolution parameters indeed have keyframes and are animating.
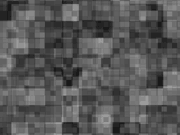
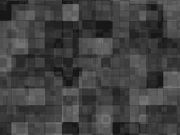
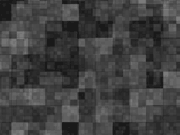
Step 5: Tweak the fractal pattern by reducing the number of iterations (left), toning down how strongly these iterations are rendered (center), and reducing the size of each iteration (right).
Check that the comp is set to 50% and Half Resolution and RAM Preview; remember you can Shift+RAM Preview to render every nth frame (as set in the Shift+RAM Preview Options). Feel free to tweak to taste.
A movie of your progress so far is shown at right. If the results look nothing like our version, check your settings against the prebuilt version [FractalNoise_after Step 05].
next page: tinting, plus lighting effects
Block Tint Party
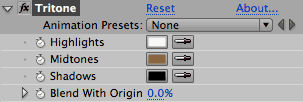
To give the blocky pattern a blue tint, you can use any number of color tint effects. Previously, we used Boris Tint-Tritone or CC Toner for this job; as of After Effects CS3, a 32-bit Tritone filter now comes with the program. The great thing about all three of these plug-ins is that they can tint the midtone color, not just the darkest and lightest color, so you can maintain rich blacks and bright highlights in a tinted image.
Step 6: With the layer FractalNoise_blocky still selected, apply Effect > Color Correction > Tritone. The default settings create a sepia tint. Click on the Midtones swatch in its Effect Controls panel and change it to a darkish blue color. On the Mac, we used HSB settings of Hue 235, Saturation 45, and Brightness 50; on Windows, try RGB 0-255 color values of Red 70, Green 75, and Blue 127.
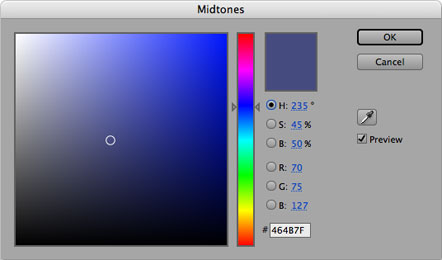
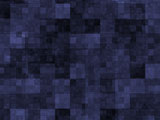
Step 6: We altered the Midtone color of the Tritone effect to shift the midtone grays to a darkish blue.
Fractal Lighting
You’ll now create another version of the Fractal Noise whose purpose is to add a soft lighting effect to the underlying layers:
Step 7: With the current time indicator at 00:00, press Command+Y (Control+Y) to create a new Solid layer. Name it “FractalNoise_soft”. The size (640×480) and color (black) should be the same as the last solid created. Click OK. This second solid should be resting above the FractalNoise_blocky layer.
Enable the Solo switch for this layer to speed up previews – you don’t want the blocky pattern slowing you down by rendering in the background.

Step 7: Create a second solid called “FractalNoise_soft”, and enable its Solo switch (where the cursor is pointing) to speed up previews.
Step 8: With FractalNoise_soft still selected, apply Effect > Noise & Grain > Fractal Noise.
Step 9: There are a number of combinations that will create the soft “curtains” effect, but these are the changes we made to Fractal Noise’s default settings for our version:
- Set the Fractal Type to Dynamic Twist. This will create twirls in the noise pattern.
- Set the Noise Type popup to Spline. The result is a softer pattern.
- Twirl down the Transform section and uncheck the Uniform Scale checkbox. Stretch the pattern horizontally by setting the Scale Height parameter to 250, leaving Scale Width at 100. This is the key to changing the “clouds” into “curtains” – if you stretch a lot you get the infamous stretchy-lines look.
- Twirl down Sub Settings, and set the Sub Influence to 25%. The greatly reduces the effect of successive iterations of the fractal pattern, resulting in an amorphous look.
- At time 00:00, turn on the stopwatch for Evolution, which creates a keyframe of 0 x +0.0 at the start of the comp.
- Hit End to jump to 05:29 and set Evolution to 2 x 0.0? (two full revolutions).
- Press U to check that the keyframes were added correctly.
RAM Preview and tweak to taste!

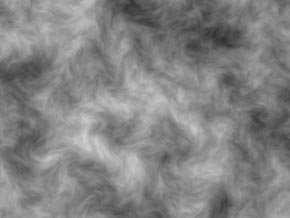
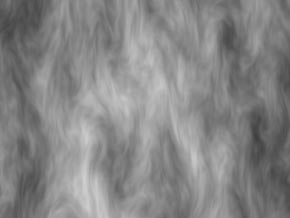
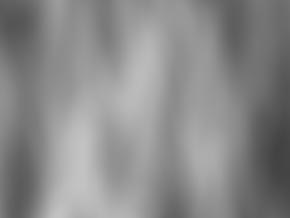
Step 9: A softer effect was created using a Fractal Type of Twist (top left), Noise Type of Spline (top right), setting Scale Height to 250 while leaving Scale Width to 100 (above left), and reducing the Sub Influence parameter to 25% (above right).
The movie at right is the final result of the second Fractal Noise layer. If the results look nothing like our version, compare your work to [FractalNoise_after Step 09].
Step 10: Time to combine the two effects, so the soft noise acts as an animated light for the blocks:
- Turn off the Solo switch for FractalNoise_soft so you can see both layers.
- Reveal the Modes panel in the Timeline panel (shortcut: F4). Try different modes for the FractalNoise_soft layer.
We personally like Overlay mode for these kinds of lighting effects: highlights in the “light” layer brighten the underlying image, while dark areas create shadows. The result seems to be an increase in contrast and saturation. Toggle FractalNoise_soft‘s Video switch on and off if you want to compare before and after versions.
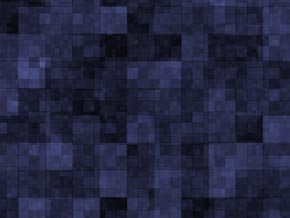
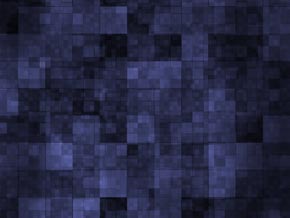

Step 10: Set the soft noise layer to Overlay mode to act as a lighting effect for the underlying blocks. These two images show before (top left) and after top (right) applying this effect. The final Timeline is shown above.
next page: creating seamless loops
Part 2: Seamless Evolution
On the previous two pages, you’ve created a nice texture – but what if you needed it to loop repeatedly without a hitch? There are a few approaches to this, which we have saved as comps inside the Project panel’s _FractalNoise * prebuilt > Seamless Loops folder. We’ll walk through these different techniques.
Cycle Evolution
The Fractal Noise effect has an option where its Evolution parameter can be forced internally to loop seamlessly. This is demonstrated in [Seamless 1].
Open the comp [Seamless 1]. The effect applied to the layer FractalNoise_soft should already be revealed in the Timeline panel; if not, select this layer and type U.
Then double-click on the Fractal Noise effect’s name in the Timeline panel to open its Effect Controls panel. Scan down the list of parameters to Evolution, and then to the Evolution Options just below it. Twirl these open if they are not already exposed.
The Cycle Evolution switch in this section forces the Fractal Noise effect to loop all by itself. The parameter Cycle allows you to set how far you can animate the Evolution parameter until the noise pattern repeats. We set this parameter to two revolutions for FractalNoise_soft and one revolution for FractalNoise_blocky.
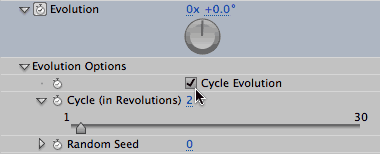
The Fractal Noise effect is capable of looping within itself. The secret is turning on the Cycle Evolution switch, and setting how many cycles make up a loop.
Bring [Seamless 1]‘s Timeline panel forward again. Press End to locate to the end of the comp. Note that the current time indicator still hasn’t quite reached the final animation keyframes.
Important Concept: When creating a seamless loop, you want your loop point to be one frame beyond the end of the comp. When looping during playback, going to this “beyond” frame is the equivalent of jumping back to the start of the comp, which is where your loop should be joined.
If you are using keyframes to create a loop (as we are here), and you set the second keyframe to be equal to the last rendered frame of the comp rather than one frame beyond it, this last frame will be a repeat of the first frame at the start of the comp. When you render it as a movie and set the animation to loop, the result will be a glitch when two identical frames are played back at the loop point. Instead, you need to place the second keyframe one frame beyond the end of your comp’s timeline.
To access keyframes that are placed beyond the end of the comp, as in the [Seamless 1] comp, press End to jump to the last frame and then press Page Down to advance one frame later. You can also Go To Time and enter the exact frame, or click the keyframe navigator right arrow for an animated property.
Whichever method you use, the Comp panel will display as a gray frame when the current time is after the end of the comp – which is not very helpful when you’re trying to check that the image at the last set of keyframes is identical to the frame at 00:00, which it needs to be to create a seamless loop. You’ll need to make a leap of faith here.
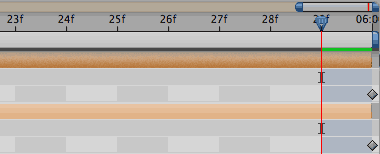
To set up a seamless loop using keyframes, the last loop point keyframe is placed one frame beyond the last rendered frame of the comp (which is 05:29, where the current time indicator is now).
Note that the Cycle Evolution switch only affects the Evolution parameter – it won’t force Fractal Noise’s other parameters to seamlessly loop!
For example, we had previously animated the Sub Scaling parameter for the FractalNoise_blocky layer to make the blocks grow in size over time. We can’t do that here and expect our loop to work, as you can see by playing the movie at right. If you look at the Timeline panel for this layer, you’ll see we didn’t animate this parameter. On the next page, we’ll explore different solutions to this problem.
Ping-Pong Looping
If you really want to animate a parameter that otherwise does not loop on its own, one solution is to “ping pong” the parameter: animate it to one value, and then have it return to its original value at the loop point.
Open the comp [Seamless2], and study the keyframes for the Sub Scaling parameter of FractalNoise_soft. If the keyframes are not visible, select this layer and type U.
The Sub Scaling value animates from 40 to 45, as it did in the original design. To make it loop, it is simply returned to the same value by the end of the comp that it had when the animation started. It does this by animating from 40 to 45 in three seconds, and then back to 40 by the end of the comp. The Easy Ease keyframe assistant was applied to all three keyframes to help make the change in direction less abrupt. Note that the same “rules” as on the previous page about setting your final keyframes one frame beyond the end of your timeline still apply!
![]()
The scaling rate of change is now doubled from our original design, where it animated from 40 to 45 over six seconds. If you wanted to keep the same rate of change for Sub Scale as in the original, you could change the comp’s duration to 12 seconds and double all the Evolution cycles.
RAM Preview this comp or play the movie at right; you will notice it takes on an interesting inhale/exhale “breathing” pattern. The fact that a second layer on top is also evolving and looping adds to the complexity and removes some of the boredom that might come with only one layer ping ponging its animation back and forth.
Crossfading
A third approach to looping is old-fashioned crossfading, where the image proceeds in a linear manner, and then you just fade a copy of it back over itself that starts the pattern all over again.
Open [Seamless3]. Note this comp has two copies of the FractalNoise_blocky layer. The copy on the bottom plays from 00:00 to 07:00. From 06:00 to 07:00, a duplicate of this layer fades up on top of the original blocky layer. At 07:00 in the comp, this duplicate has faded up to 100%, and is at time 01:00 in its own animation.

Comp marker #1 is set at 01:00 and marker #7 is set at 07:00. Press 1 and 7 on the keyboard (not the keypad) to jump between these two markers and you’ll see that both frames are identical.
For this animation to loop, you must render the section from 01:00 (not 00:00!) to 06:29 (remember, you don’t render the frame at 07:00 or you will repeat the first frame). The result is shown at right. To improve this result, ideally you would have an even longer crossfade.
It is important to note that you do not render the entire animation; you need to repeat some of it for the overlap that creates the loop. That means your loop will be shorter than your source material – so you may need to create your sources to be longer than originally intended, to provide extra material for the crossfade.
This trick can be applied to many other sources as well in order to force them to loop, though with some movies the cross fade may be quite obvious depending on the content.
Once you’ve rendered your seamless loop, import the movie back into After Effects. Select it in the Project panel and go File > Interpret Footage > Main. Set it to Loop as often as necessary; when you click OK the new duration will be reflected at the top of the Project panel.
Further Reading
There are many Fractal Noise tutorials on the web. If you really want to learn how Fractal Noise works underneath the hood, we suggest this tutorial by Chris Zwar (available on Creative Cow).
If you are curious to learn more about a couple of the techniques discussed in this tutorial, we wrote an article for Artbeats.com on “artificial lighting” – click here to download its PDF. We also wrote an article for them on looping footage; click here to download its PDF.
The content contained in our books, videos, blogs, and articles for other sites are all copyright Crish Design, except where otherwise attributed.

Filmtools
Filmmakers go-to destination for pre-production, production & post production equipment!
Shop Now