Free normally comes at a price, as funny as that sounds. Normally when you see something that’s free, your first thought is….”Okay, what’s wrong with it?”, meaning that it could very well be only part of a product, and the full version will give you the full set of tools you need to do the complete job, or that the tool is just, well, crappy in general. That’s not the case when it comes to products from Video Copilot. Andrew Kramer and his team are constantly coming up with new and VERY cool tools that either add something stylistic to your work, or in this case, to add some great functionality that you might not have had before. The free tool I’m talking about is Video Copilot’s FX Console. It’s a fantastic free tool that you can use in After Effects to speed up the more mundane processes you do on a minute by minute basis.
INSTALLATION
The FX Console (FXC) is a Script UI that is available for both Mac and Windows. That’s something else that I want to point out, and that is that Video Copilot always makes sure to release all versions of their plug-ins and tools for both Mac and Windows, which is great to see. Once you’ve downloaded the script, which is a whopping 3 mb, you’ll be up and running with it in a few minutes. Keep in mind that you’ll want to have the “Allow Scripts to Write Files and Access Network” option checked in your General Preferences, or the Script won’t install or run properly.
GETTING STARTED WITH IT
Once you’re ready to go, the FXC can be “Launched” via the standard keyboard shortcut of CTL + Space on both Mac and Windows. This shortcut can be altered, but we’ll get to that in just a second. One thing that I do want to point out is that you can launch FXC via the shortcut, but this workflow is normally recommended if you want to use the FXC with a specific clip that’s already selected. Otherwise, I normally like to just work with it via the Window drop down, and moving it to an area of my display that is not being taken up by the AE interface (it can be docked as well). The FXC will sit over top of the interface, and won’t disappear, which makes it very handy when assigning tasks to certain clips. Okay, so let’s now talk about exactly with the FXC does.
Basically, in a nutshell, it’s designed to take tasks that you do on a minute by minute basis, and make them easier. Let me give you an example. Let’s say you have a clip in your timeline that you want to add a Fast Blur to. The process is to head to the Effects & Presets window, wait for it to load up, either scroll to, or search for the effect you want to apply, and drag it onto your clip. Pretty straightforward workflow for After Effects artists. What if I told you there was an easier way to do this process. Say with a few letters of typing and one click. That’s right. Simply select the clip you want to add the effect to, and call up the FXC (if it’s not up already) with the shortcut. You’ll now notice that there is an input box with “FX” in it, where you can type the name of the effect you’re looking for. Let’s use Fast Blur again.
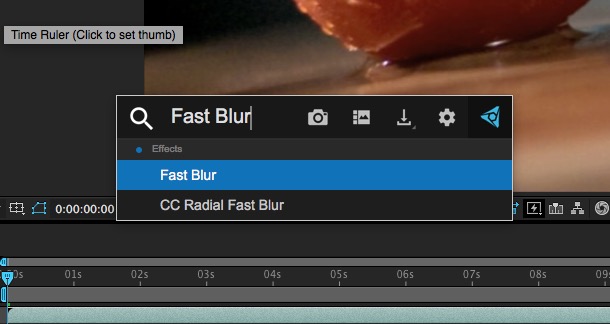
Once you’ve typed it in, simply hit enter, and the effect will immediately be added to your clip. You can do this for as many effects as you want. Super quick and super simple.
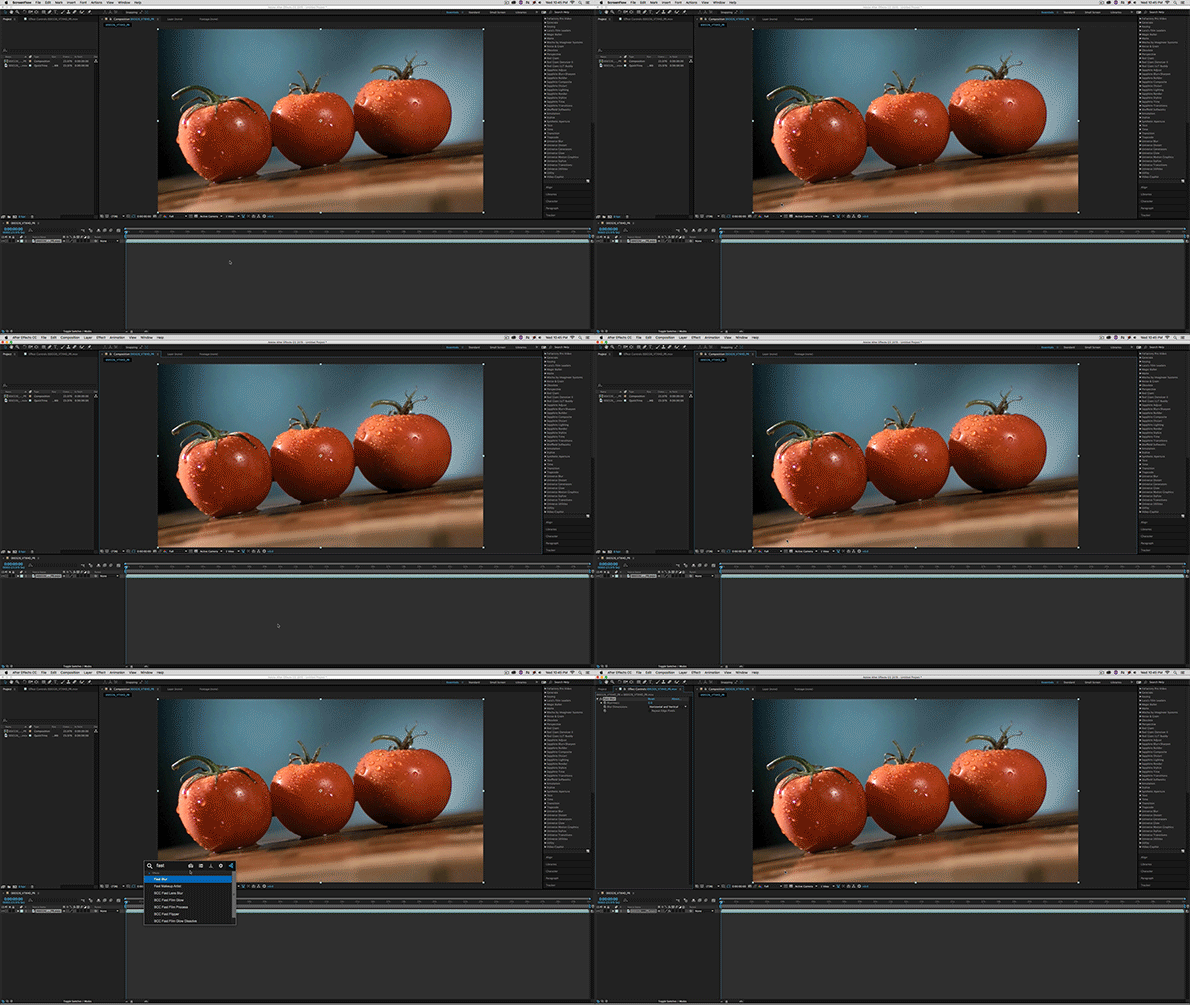
Now, how can we make things even easier. Well, if you do the process again, and this time, once Fast Blur is displayed in the FXC, right click on it and select “Add to Favorites”. Now, hit the Gear icon on the right side of the UI, and you’ll be presented with the Settings window where you can adjust things like the UI Color, the shortcut to call up the FXC AND, you’ll notice on the right, that your Fast Blur favorite is listed in the dialogue box, with a couple of columns called Alias and Override. This is where you can make your life easier. Instead of typing out Fast Blur every time you want to apply it, you can add an alias to the “Alias” column, let’s go with “FB” and now, every time you want to add a fast blur, just type FB in the FXC and Fast Blur will immediately appear. What’s very cool about this is that if you wanted to have, let’s say, “CC Radial Fast Blur” appear every time you type in “Fast”, you could add that effect as a favorite, and change it’s alias to be “Fast” or even “Fast Blur”, and this way it will now appear first, before Fast Blur, every time you type it in . If you hated the standard Fast Blur so much you never wanted it to appear in your searches, you can right click on it and say “Blacklist”, and it won’t show up in searches anymore (this can, of course, but undone as well). Now, that does bring up the question, what does the “Override” parameter. Well, this is a cool one!

How many times have you added a “go to” effect, and thought, man the defaults of this effect stink. I really wish I could set a new default state for the effect. Well, the Override parameter lets you do it. To use it, simply add the effect, and configure it as you want. Once done, save it out as a preset to your logged in users Preset folder (C:\Users\YourNameHere\Documents\Adobe\After Effects CC 2015\User Presets). Now, inside the Settings Window, simply click on the Override area beside the new effect favorite, and type in the name of the preset you created. Once it appears, select it, and you’re now all set to go. Next time you apply the effect, it will have the exact parameters of the preset you exported! Very cool. What you can also do is create up to nine different shortcuts that you can get quick access to in the FXC, to speed things up even more.
Now, if that was it, it would be pretty impressive. But, there’s more, and this is the one that I’m super excited about. One thing I do all the time is export stills from After Effects for client approval. I mean a good 5-10 times a day, and doing the usual “Composition>Save Frame As”, or constantly going to the snipping tool can get pretty annoying. There are also many times that I just want to compare a shot in one composition with a shot in another. Well, this is where the Snapshot and Gallery features take over. This is why I normally like to have the FXC open in it’s own window, as this process can be slightly annoying constantly having to hit CTL+Space to get at it constantly. Now, if you have used the shortcut to the the FXC up, you can use the shortcut of SHFT+F5 to take a snapshot, and populate the Gallery with it. Now, you ask, why is this such a big deal. Well, here’s why. All the snapshots you take will be saved to C:\Users\YourNameHere\Documents\VideoCopilot\FXConsole\Capture, and will then be viewed by the Gallery. With the snapshots in the gallery, not only can you simply click through each shot to take a look at it, but you can also then export the clips into a location of your choice, or even copy it to the clipboard to then paste into an e-mail to send to a client. Now, if that was all you could do, I would call that a “Bell and/or Whistle” to what the FXC can already do, but wait, there’s more. Let’s say that the screengrab you needed to take looked something like the below image, and you had added masking to the shot, or the shot had an alpha channel in general.
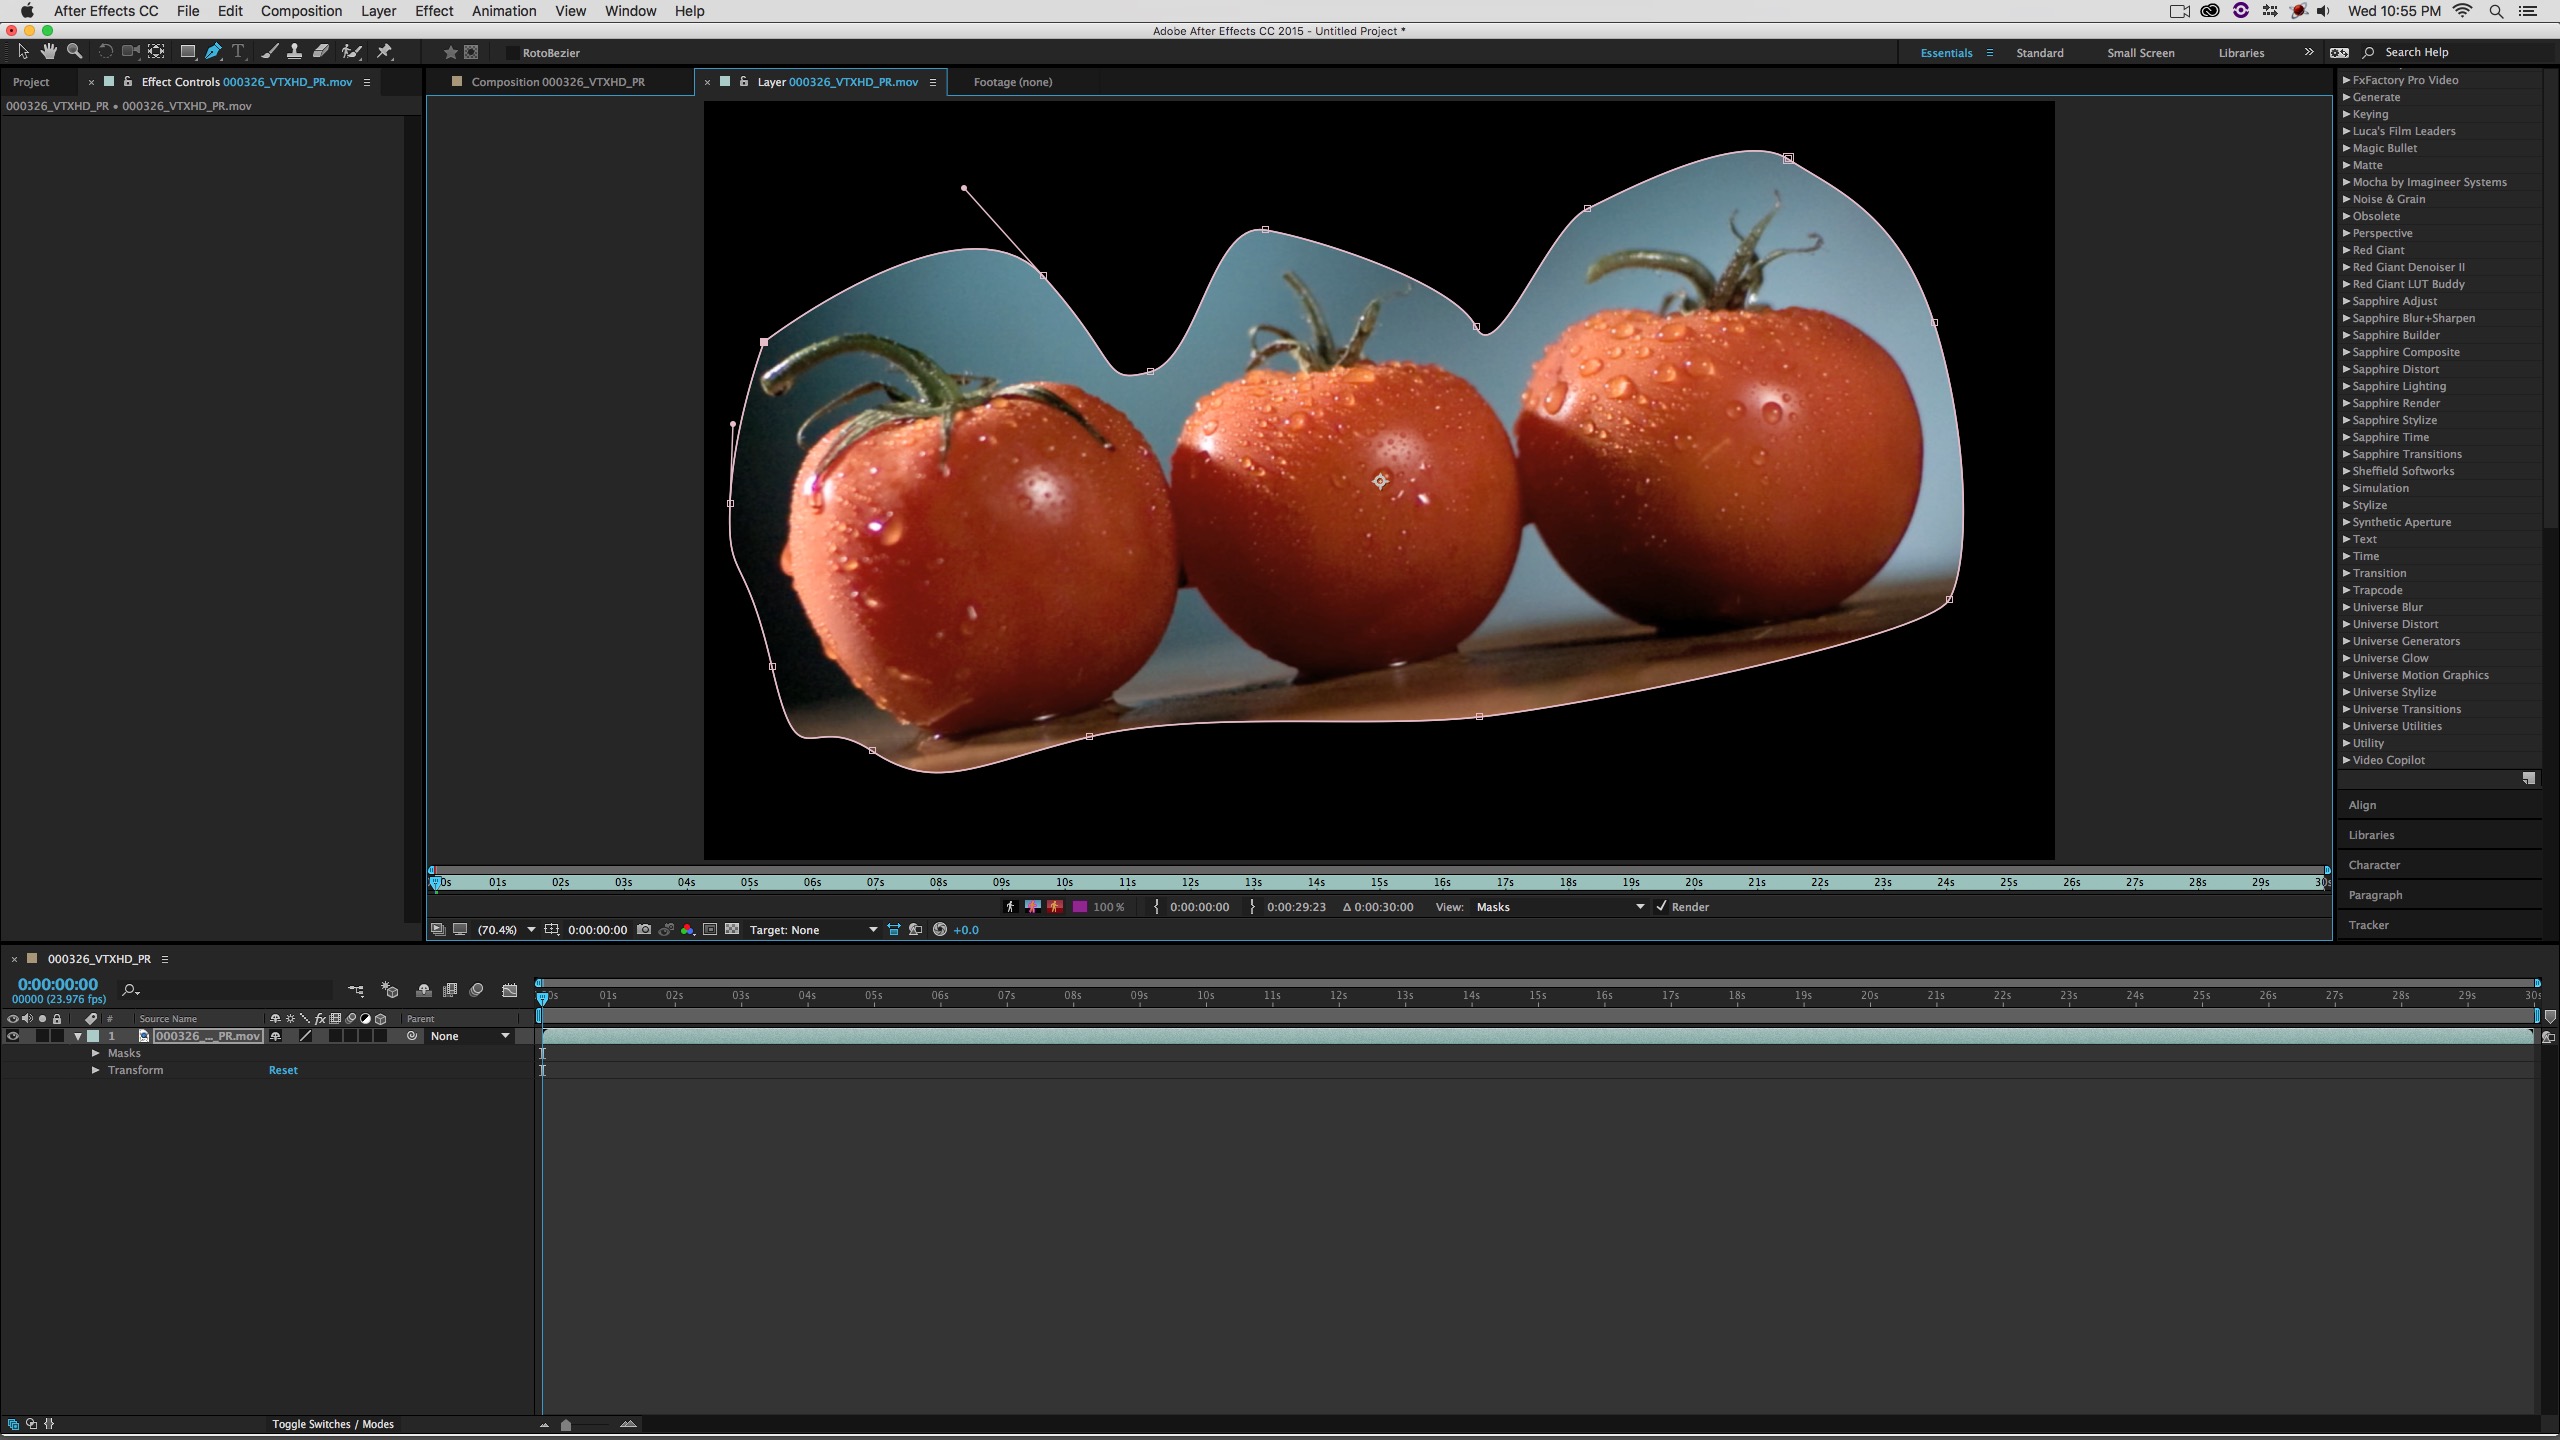
Well, when the screenshot is taken, the alpha channel is carried over with the image, and what you now have in the Gallery is your shot taken, and file saved with the alpha channel intact. When I first sat down with the FXC, I was wondering why JPEG was not the format of choice, and now I understand why. Alpha Channel support! Now, with that being said, If I had to pick an issue with the Gallery, it’s that with Alpha channel files, it doesn’t show them over a checkered background which would be a helpful option, with the ability to toggle it on and off if needed. The only way that you can assume that it has a matte in the gallery is that all the thumbnails in there are representing a full comp-sized image, and therefore any smaller image would represent the fact that there is an alpha there.
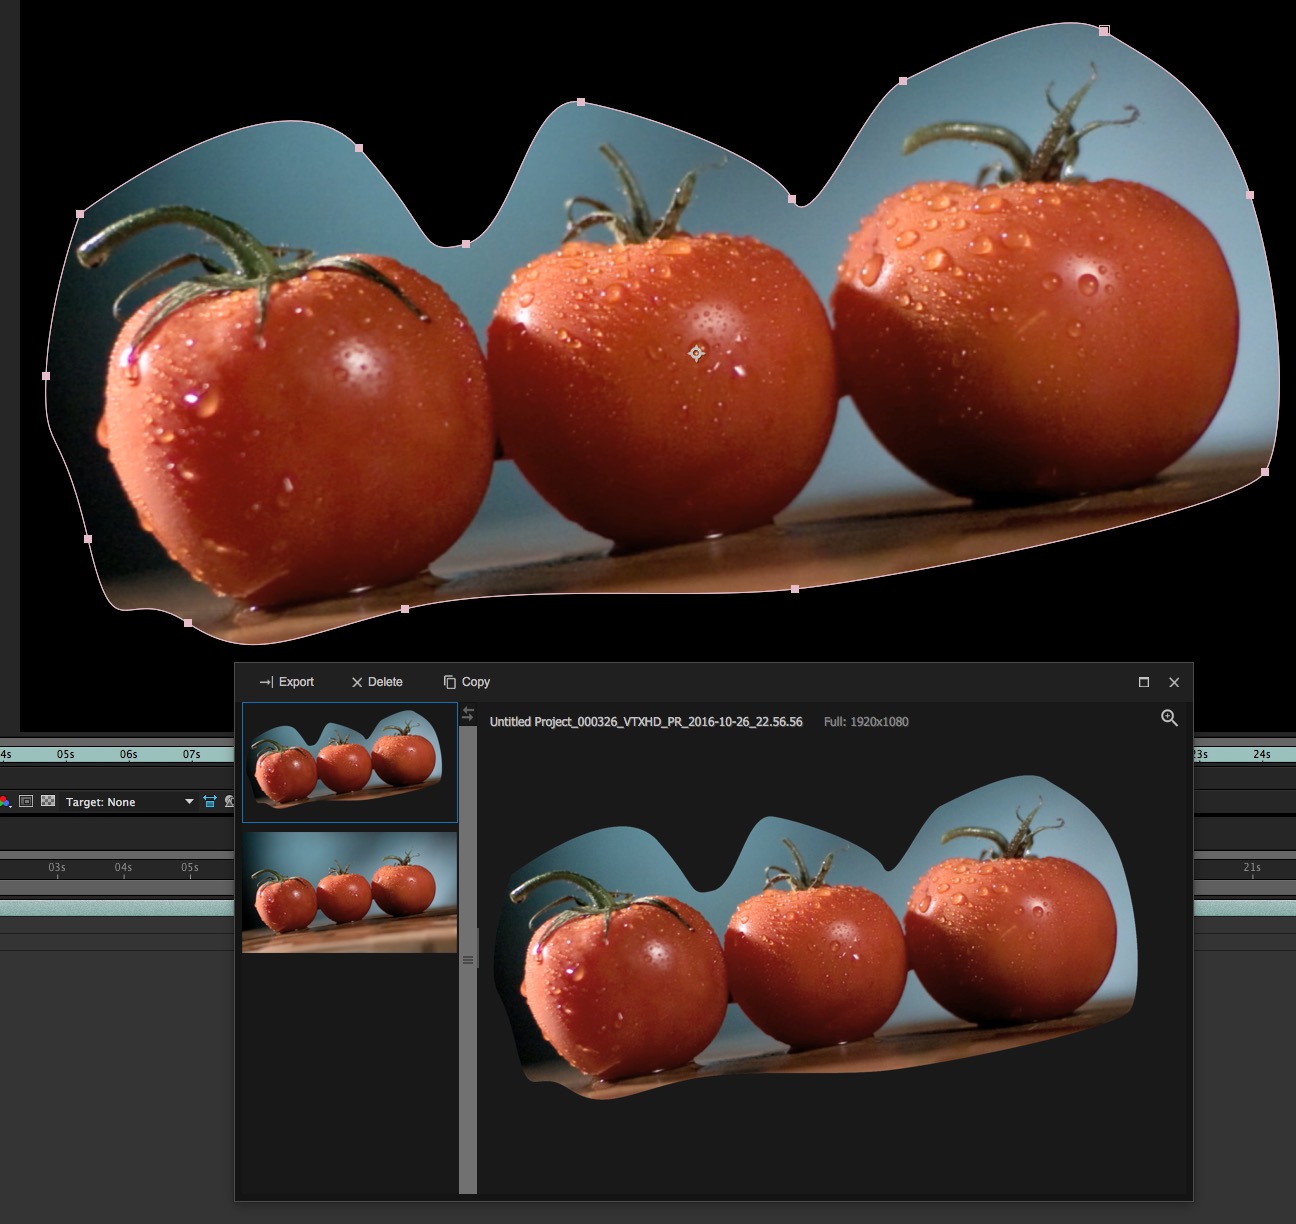
If you want to be doubly sure, you can always right click on a thumbnail and simply say “Show In Finder”, and you’ll be able to see right away which files have alpha channels, and which ones don’t. Now, let’s talk about the last cool feature of the FXC and that, again, is the fact that the FXC interface (including the Gallery) can sit open, over top of whatever current composition you happen to be working on. Why is this such a big deal? Well, I’ll tell you exactly why. How many times have you been working on a comp, and you want to create some text that is the same color as part of a shot, earlier in the composition. You end up finding yourself clicking back and for trying to not only find the correct shot to eye drop, but the correct part of the shot as well. Again, time consuming. Well, the fact that the FXC can sit over top of your composition without being pushed into the background is exceptionally helpful, as it means that you can quickly take a snapshot of the scene with the color you want to match, and then use the effect’s eyedropper to match the color RIGHT OUT OF THE FXC’s GALLERY!!!! I sat there shaking my head when I saw it, because it so simple and straightforward, I can’t believe no one else has thought of it up until this point. Bravo Video Copilot!
Now, there is something else, workflow wise, that I do want to mention when it comes to taking snapshots, and the Gallery. You would think that the “Gallery Workflow” would be the only way that you would get your still shots quickly out of After Effects, but it’s not. There is a simple command that will let you bypass the Gallery altogether, and just export the clips to your desktop (or destination of your choice), or the copy it to the clipboard, and the “Export” command is on the FXC toolbar, right in the middle. It’s the little down arrow. Simply click and hold, and choose whether to export to your desktop, or to the clipboard.
Well, I seem to be saying this a lot with Video Copilot and, well, they’ve done it again. This time, as opposed to giving us a cool effect for free, they’ve given us a fantastic tool that anyone and everyone who uses After Effects will want to use. Not only is it super simple once you get up and running with it, but the seconds that it will save you will end up turning into minutes over days, and hours over weeks. If you haven’t checked out Video Copilot’s lineup of free effects and tools, you really should. The quick breakdown of each of them are:
Saber
Looking to make Light sabers exactly the way you have seem them in all the Star Wars movies (more specifically The Force Awakens)? This effect will do it.
Color Vibrance
Send your Comp colors off the charts with this intense bright colorization effect.
Sure Target
Always make sure your AE camera is pointing where you need it to point with this handy effect
Reflect
Make simple 2D reflections fast with this simple to use effect.
You can check them out, and download them at https://www.videocopilot.net/products/recent/

Filmtools
Filmmakers go-to destination for pre-production, production & post production equipment!
Shop Now


