Affinity Photo for Windows is the Mac version converted for a wider audience. It wants to be your photo editor for less than $50 and without any subscription. The beta, available now, suggests that it may well be so.
On Mac, Affinity Photo was chosen as Apple’s App of the Year 2015, and voted Best Imaging Software 2016 by the Technical Image Press Association. It has also received thousands of 5-star reviews from professional photographers, editors, artists and retouchers from all around the world. Now, finally, PC users can get their hands on the app, and during the beta period it’s completely free!
The Windows version matches the Mac version feature-for-feature, so all the thrilling speed, sophisticated tools and pinpoint accuracy which have earned Affinity Photo its formidable reputation are now available to Windows users too without compromise. What’s more the Windows version shares exactly the same back-end as Affinity’s Mac version so you can be confident the file compatibility between both platforms will always be 100% perfect.
Affinity says that this beta version even includes some new features which will be included in version 1.5 (to be released next month) giving you the chance to be among the first to try them out. They include:
- HDR merge
- Focus stacking
- Macros
- Tone mapping
- Batch processing
- 360 degree image editing
Developed through the last seven years, the Affinity apps follow a rule: they have to be cross-platform. The launch of the beta version for Windows represents a huge milestone for the team. One thing users are asked to bear in mind is that it is the first beta version, so there will be some rough edges and bugs to fix. Serif says that those who wish to help in the development process can report any issues found on the beta forum so they are fixed and adds “we should work through any problems pretty quickly with new builds coming out at least every week.”

Installing the beta is straightforward, on a Windows 10 64-bit machine. There is a learning curve to follow on Affinity Photo. There always has to be, when you move from one application to a new one. Still, without reading manuals or looking at videos, I managed to find my way around things as creating a panorama from multiple images, reducing haze or perform the most common operations you expect to use one photo editor for.
Some shortcuts are the same, others are new, following new features that are particular to Affinity. There are also new names for some functions, and all that makes for some confusing first moments, but I can gladly report that after one hour opening and closing menus I felt almost familiarized with Affinity Photo and can start to explore further.
I started the difficult way for a test, but could not resist. Picked some 15 images to create a panorama. I ended with a huge image that slowed the program down, but I had a special reason to do so: I am still using Photoshop CS6, so I can not open the RAW files from my new camera directly in Photoshop. That has made me create an alternative workflow with Canon’s software, DPP, which is great to deal with Canon’s own RAW files but continues to depend on Photoshop for final editing. Affinity Photo means I can do everything under the same program, and it opens the RAW files from my new camera, meaning I can create a panorama directly from RAW files.
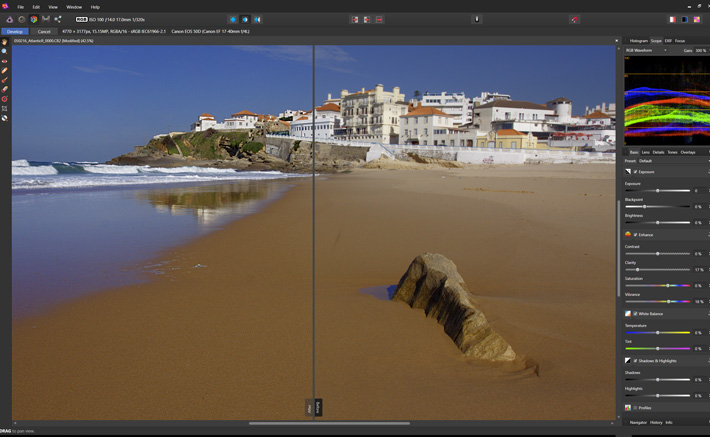
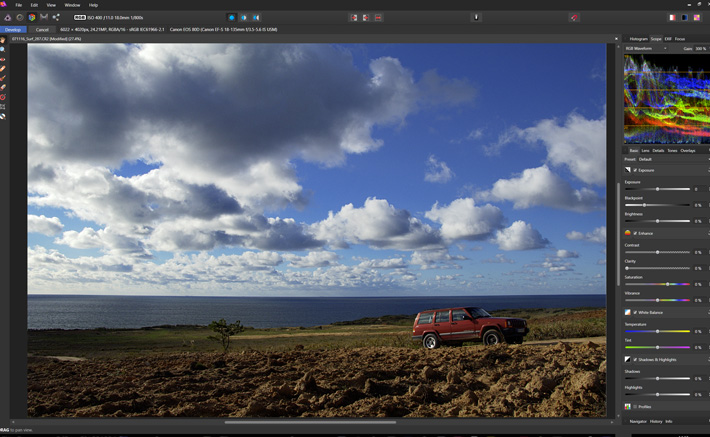
Affinity has different workspaces, called Personas. One of them, called Photo, is used to open JPEG files and other types of files directly. When you select a RAW file, though, it’s the Develop module (Persona) the program opens. And you can either open the file the classic way or drag and drop it into Affinity Photo.
On the right side of the screen the menus – the area is called Studio – will change accordingly to your selection and you’ll soon discover that most of the things you need are all there. If you prefer to use the tools bar on top, a more classic way to access features, you can. Affinity Photo immediately creates a layer for each new adjustment chosen as the editing is no-destructive.
Besides those panels immediately visible, there are many others that you can make visible from the tools bar on top. Some are also activated from the right menu. Things like Scope, which allows to evaluate your image different ways. Or little tricks that are hidden under the apparently simple interface. The feeling one gets is that everything is very much at hand, paving the way for a workflow that you can easily adapt to and will become second nature.
Affinity Photo comes with a long help file that explains all the features of the program. Besides that handy help you have more than 100 video tutorials online, created for Mac, but as the interface is the same they will work to guide Windows users. The videos will help you to get to grips with more complex levels of the program. These first notes together with the videos included here will give you and idea of the potential of this new RAW and photo editor for Windows. Give it a try, as the beta is free. Follow the link to download the beta.
Naturally, Affinity Photo works perfectly with Serif’s stunning graphics editor Affinity Designer, sharing a common file type and shared save history. Affinity Designer for Windows is on the verge of full release.
Windows prices will match Affinity’s subscription-free Mac pricing ethos, with a one-off payment of $49.99 / £39.99 / €49.99 covering future updates.

