The last post we talked about how to get a proper initial setting when lighting your subject/foreground and background. If you missed it, check out Part I: Foreground and Background Exposure. For this post I wanted to take that initial step and move a little more in depth and talk about lighting scenes with the checkerboard pattern.
Helpful Ways for Cinematographers to Get a Grip on Lighting
Part II: the Checkerboard Pattern Method
As you know a checkerboard has alternating light and dark squares and move diagonal and across. With this pattern in your mind you apply that same concept when lighting your scene. Mainly with wide shots but you can use the method even with medium shots as well. But you see it mainly in wide shots. Again, this creates depth in your scene and allows you as a story teller to focus your audiences attention on the details you desire. There is not a simple or singular way to achieve this look because every scene is different and the lights you can use to achieve the look vary quite much. So instead of telling you how to do it, let’s look at some still shots from scenes and analyze.

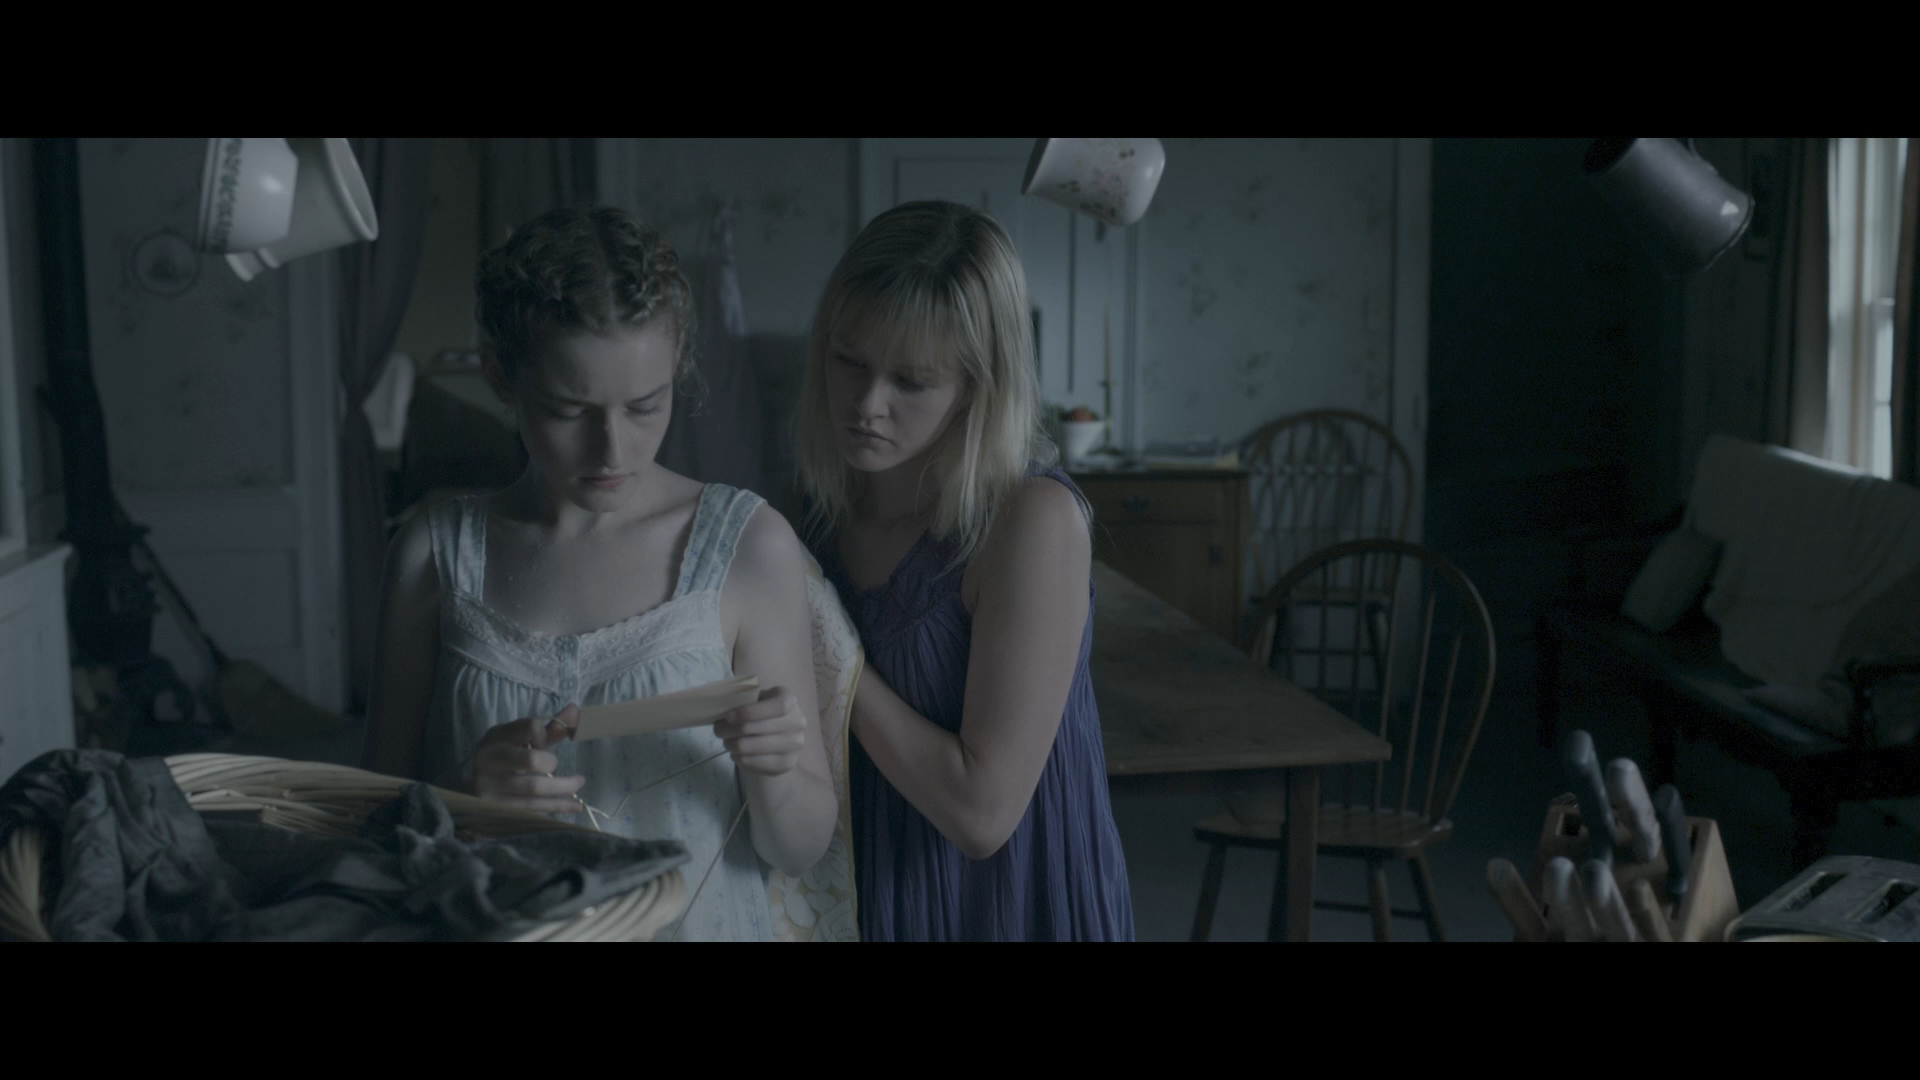
We Are What We Are (2013) Ryam Samul – DP
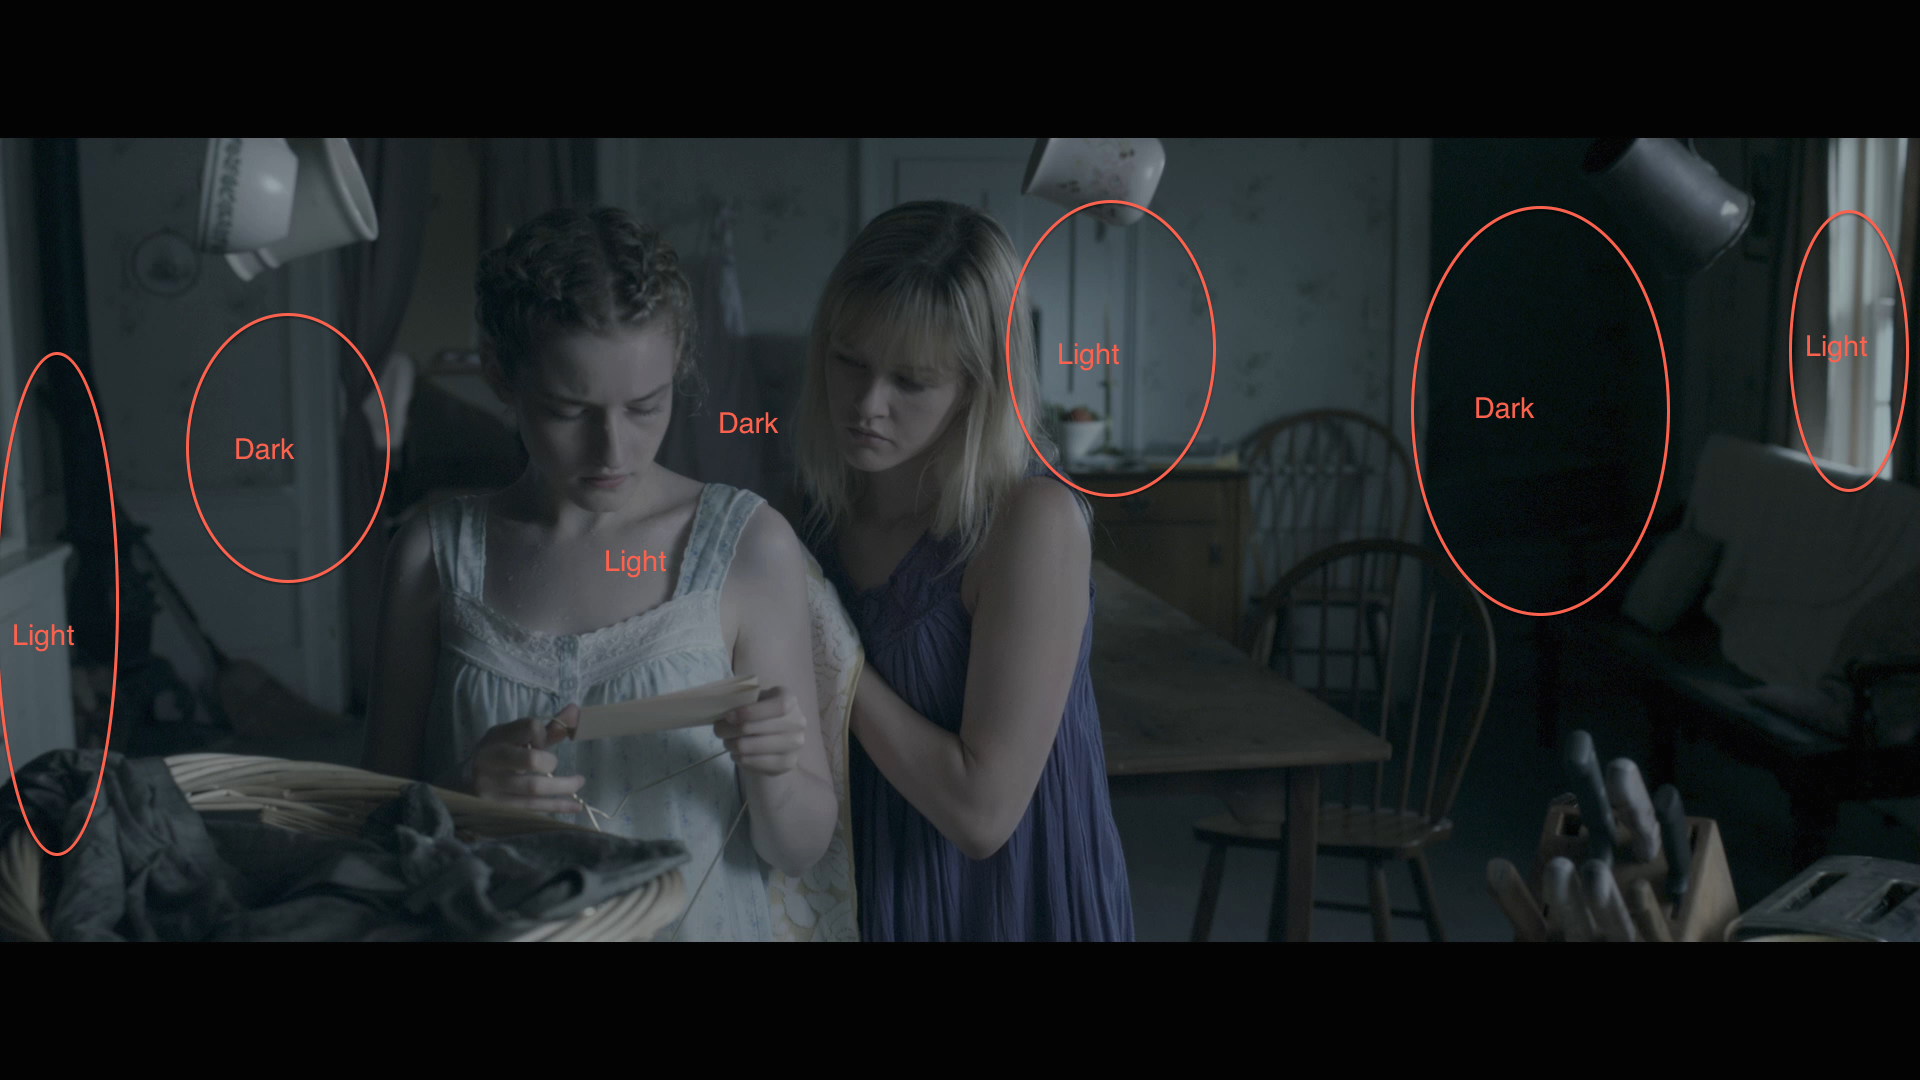
Here is a good start to talking about the checkerboard pattern with lighting. Notice how the subject is lit but directly behind them is not. But just to the right of the talent there is a splash of light on the door and then it falls off. Continuing right there is a fall of area and then the window. You see moving from talent to the right the light-dark-light areas. Same with going left, the talent is lit, the room off to the back is dim and the cabinet just at the edge of frame is slightly brighter from the window light. See the edited frame below.
You see how this creates depth in your scene and it gives you enough of the background to let the audience know the setting and set the mood but not too much it distracts you from the talent and where the director wants the audience to focus their attention. Let’s look at a couple more examples and I want you to spot the pattern.
No Country for Old Men (2007) Roger Deakins – DP
John Dies at the End (2012) Michael Gioulakis – DP
Doubt (2008) Roger Deakins – DP
Yes, I know, I use many examples of Roger Deakins films. That’s because he’s a master at knowing how to light his scenes. Every cinematographer wanting to grow in their skills should study every Roger Deakins film!
As I’ve said, the checkered pattern is noticed more in wide shots but it can even be used in medium and close shots as well. Let’s look at another example.
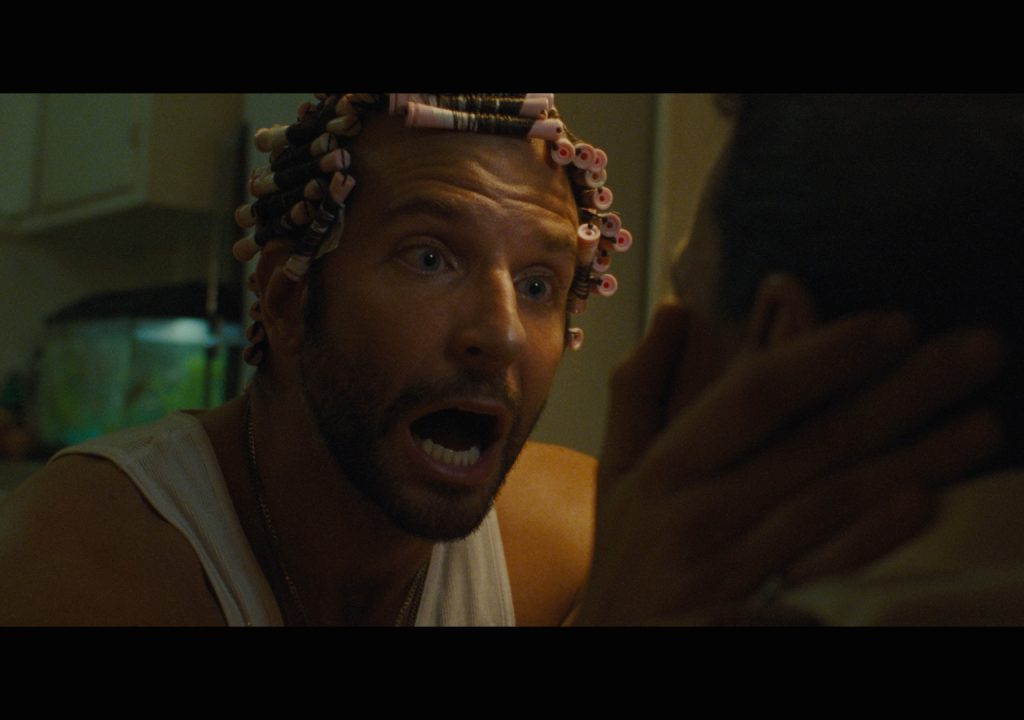
American Hustle (2013) Linus Sandgren – DP
Here is a medium shot from American Hustle. Notice how the shot forces you to look right to left. The foreground character is shaded, the facing character is lit from stage left, shading his right side and then continuing left you see the fish tank lit and then more shading. This is more simple than the previous example but still an example of the checker board pattern. See the edit frame below.
Now, there are times in which the checkerboard pattern would not work for a particular scene, primarily when your background plays a huge part in the scene. Case in point below with this example.
O’ Brother Where Art Thou (2000) Roger Deakins – DP
As you see here in this shot, Deakins has the subject and the background lit with the same intensity. Why? Because in this scene we were just shown Goodman’s character is part of the KKK and this shot communicates to the viewer the number of KKK members the lead characters are up against. Having them lit the same intensity shows the subject is a part of the background and not separated from it.
I urge you to watch films and begin to look for it in the scenes and you will see how common it is. Maybe you’re already doing it for your own projects but didn’t know why or when to apply the method. I hope this gives you a better understanding of this method and you will begin to be more intentional when creating and lighting your scenes.
As always, I welcome your comments and questions, please feel free to comment below.


