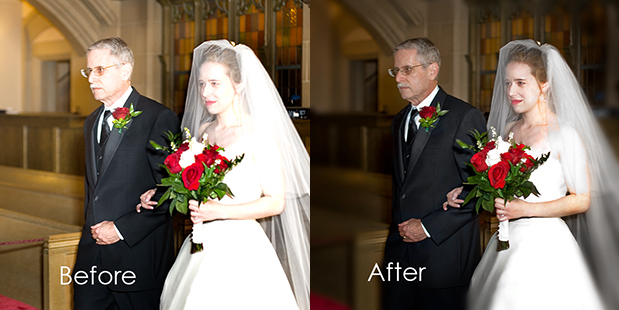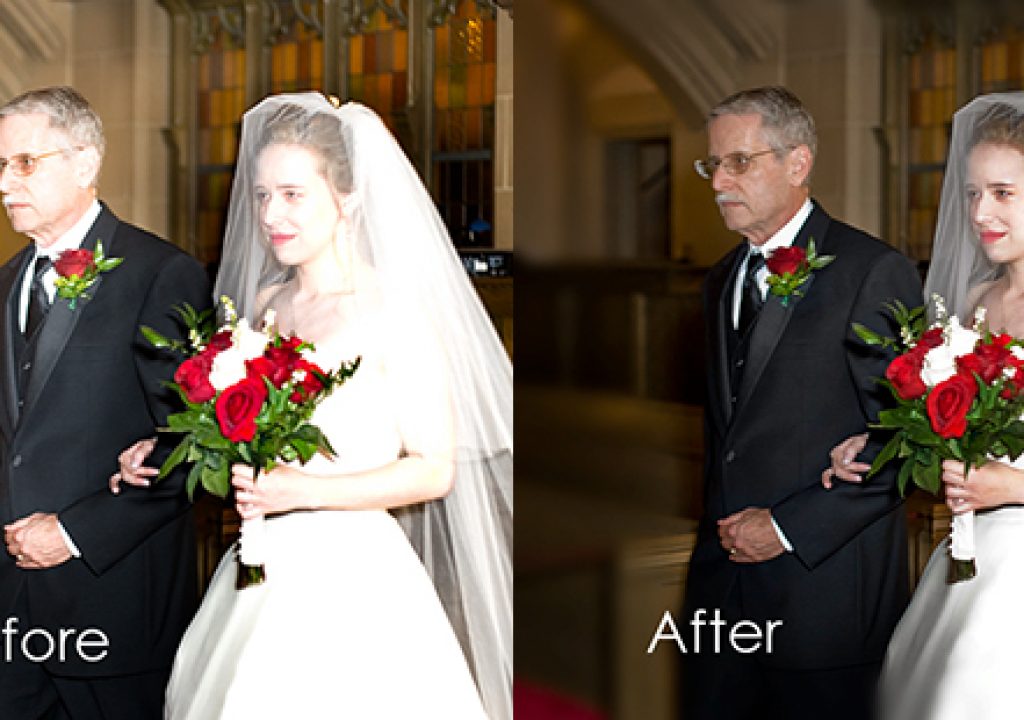
Everybody knows you can’t fix everything in post, but I had to try. Not an absolutely must-have shot, because I had four other good ones from different distances and angles. Most people would cIassify this one unrecoverable. I probably should have just tossed the image. But call it pride or embarrassment, I wasn’t going to let this one go. I felt responsible to turn the ugly duckling into the beautiful swan.
The image was made about five years ago, before I got an Ultimate Light Box and before I developed my bounce flash technique for events. My current gear and techniques thankfully dodge this kind of exposure problem.
Having just shot the obligatory in-the-doorway view, I stepped back into a church pew to snap dad and daughter passing by me. At about six foot camera to subject range, I overexposed by about five times simply by not resetting the flash output. Use of ETTL would have partly salvaged my oversight. Being closest to the bride made things worse. And the camera at the time was the Canon 20D with far lower pixel count than our 5D Mark IIs.
This many years later I’m just now designing an elaborate, dramatic 14×11 fold-out album from Seldex, Australia, as distributed in the US by our great friends at Finao. {www.finaoonline.com} The bride and groom, who are both involved in theatrical production in NYC, waited to be able to afford the best art work I can do. So now it’s time for me to prove my Photoshop salvage ability.
Here are the steps I took:
- Original image was uploaded to Lightroom 2 to recover highlight, darken overall exposure, decrease both chromenance and luminance noise. Intent was to shift the whole histogram darker to gain every shred of detail. But the exposure was so bad that I couldn’t go very far on any slider before it appeared muddy, and noise reduction was only a partial fix.
- Opened in Photoshop in ProPhoto color space 16 bit to get maximum detail potential.
- Background duplicated, and blend mode changed to multiply.
- On black layer mask, multiplied bride density was painted in with small, soft white brush at 100% opacity, dad’s face and black suit at 60%. I used a Wacom tablet and very high image magnification. Didn’t forget detail on white roses.
- Color shift was eliminated by desaturating bridal dress, veil and black suit with the Sponge tool, again with small soft brush at 100% using the tablet.
- Significant noise benefited from additional reduction with the Blur tool at 50% opacity, everyplace but faces, arm and roses.
- Dad’s face was highlighted slightly with Dodge tool.
- Patch tool and Healing Brush bandaid tool were alternated to smooth the splotchy, greyish face, neck and arm of the bride. Hard healing brush was used. Tablet and very high image magnification.
- Roses saturated with Sponge tool, and the green leaves darkened, which helps to hide the punchy quality to straight on flash.
- To continue the artistic soft focus dream-theme, Gaussian blur of 15 setting on a layer was masked back to just the background.
- Final layout called for a tight crop, to emphasize expression rather then environment. Sound booth was eliminated, plus a slight corner vignette.
Whew! All this for just a 4×4″ image within the layout! Moral: get your exposure right the first time, and use an Ultimate Light Box for far better flash on camera. {See my one flash on camera with the ULB tutorials.}

