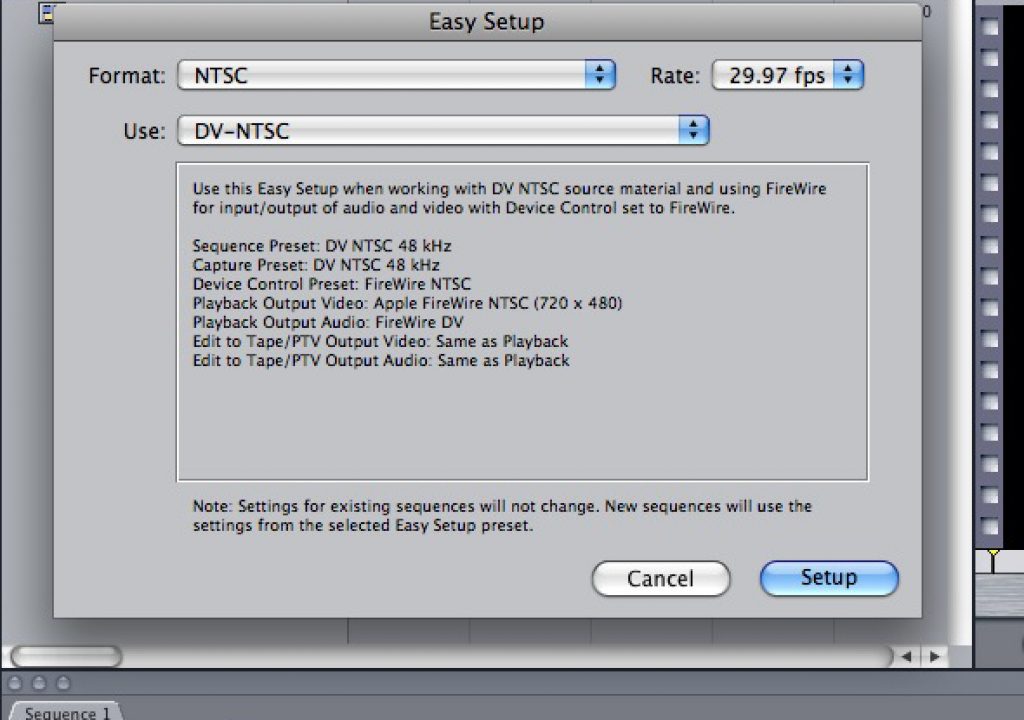
Any editor who works on FCP, no matter what version, is familiar with the Easy Setup. You simply select the Easy Setup that is most suited to your workflow, and you're all set to go. For example, if you are working with a DV camera, you would choose DV-NTSC.
{C}
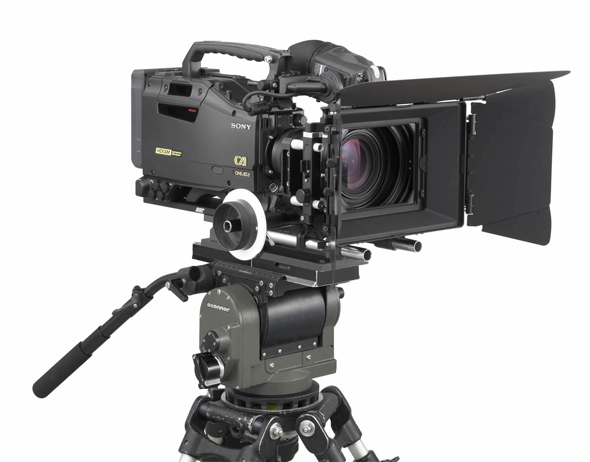
There is really no thought involved. It's quick, easy and gets you editing right away. But let me give you another scenario. What if you had a producer who shot all his footage on a Sony F-900 camera, and you were going to be editing at home on an iMac with an external FW-800 drive.
Most people would say “No problem, just capture your footage with ProRes (or ProRes HQ), and you can edit with it right off the FW-800 drive”. True, but not all editors out there using FCP have upgraded to Final Cut Studio 2 (but with all the new features, you really should), so what do they do? Are they out of luck? No, they aren't. You, as the editor, have the option to create your own Easy Setup (ES) and define the workflow that is right for you, your client, and most importantly, the system you are working on. But, as Uncle Ben told Peter Parker, “With great power, comes great responsibility!”, and that is definitely the case here. I thought that for this article series I would take a very in depth look at how to get the most out of your ES by understanding every aspect of the Audio/Video settings, and what the benefits are to creating your own.
WHERE TO BEGIN
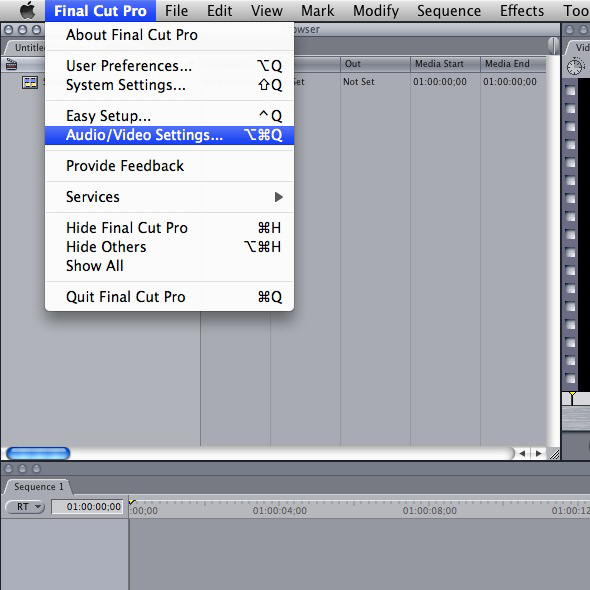
As I said before, every Final Cut Pro editor knows the Easy Setup, and how to use it. However, most editors tend to stay away from their AUDIO/VIDEO SETTINGS (A/VS), as that is where if you don't know what you are doing, you can get lost and frustrated very quickly. So, let's see how we can manipulate our A/VS to our advantage. To get to them is simple. You can see that they are located right below your ES.
Once you click on it, you are greeted by the SUMMARY screen. What you see here is the Sequence, Capture and Device Control preset for the particular ES you have currently selected, as well as the video and audio playback format, as well as the option to save the current configuration as a different ES.
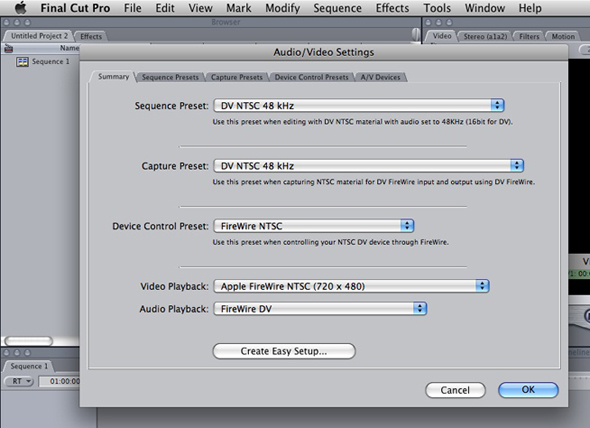
Most people, at this point would jump over to the Sequence Presets tab, and start creating their “ultimate setup”, but don't. Stop right where you are. I have the same problem with this setup that I have with the way people are taught to edit. For some reason, when people learn to edit, they are always taught how to put clips on the timeline, do audio mixes and add effects, and then at the very end, they are taught to digitize footage into their systems. That's like learning to play hopscotch before you even know how to walk. Whenever I am creating a new ES for the workflow I need, I always, always, always (did I stress that enough) start at the Capture Settings (CS) tab, as I am going to be capturing first, before I even lay a single clip into my timeline. For me, this setup would make more sense being laid out with CS first, (DS) second and Sequence Settings (SS) last, as that's the order you want things set up in. But, since it's not laid out like that, I always recommend to editors to create their Easy Setups in that order, as it's the most logical workflow. Clicking on the CS tab brings up this window.
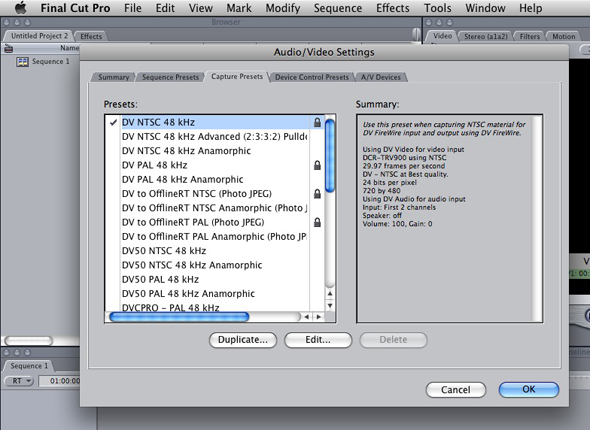
As you can see, since my ES was set to DV-NTSC, that's the default setting in my CS, and for the purposes of explaining the settings window for your CS, it will work fine. As you can see, there is a lock to the right of the setting.
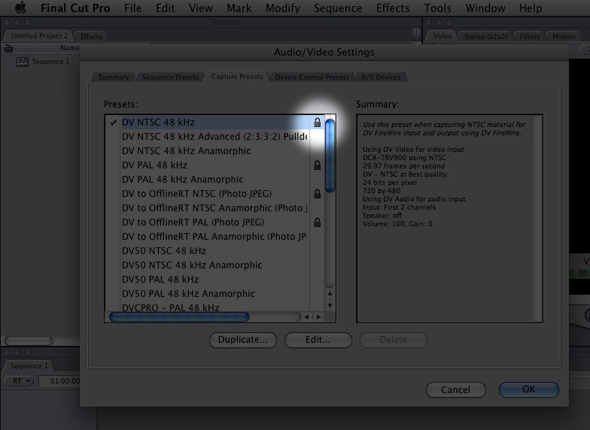
The reason for this is that there are “standard” settings that Apple doesn't want you to mess with, and in the end, it's a good thing. What I normally do when creating a new CS is to duplicate one that is close to the setting I need, as I then only have to alter a few settings instead of the whole thing. I'm going to duplicate the DV-NTSC setting by clicking DUPLICATE, located at the bottom of the window, then, making sure it's selected, I'm going to click EDIT.
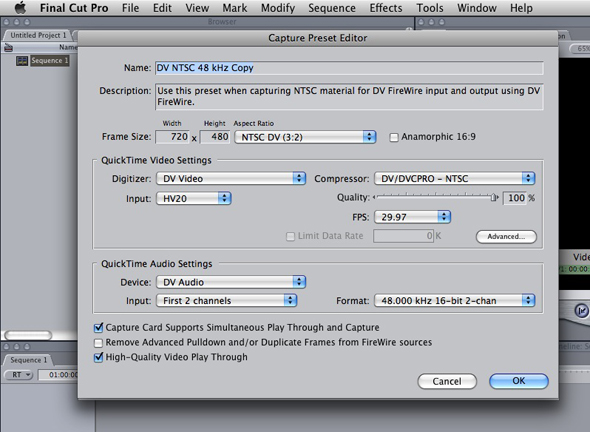
Now we have a new window with a whole bunch of settings that might look intimidating, but if you take your time, and work your way through them, they really aren't.
NAME & DESCRIPTION
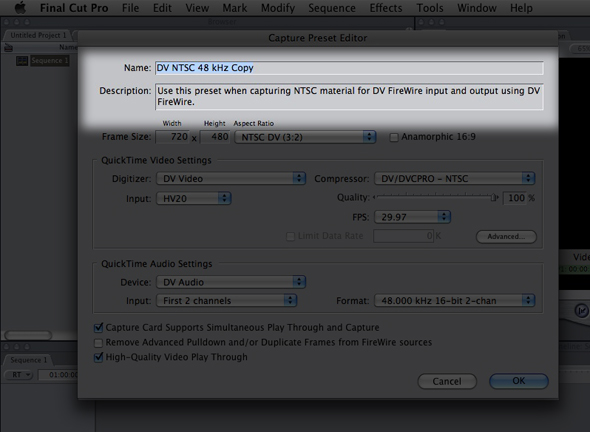
This is fairly self explanatory. The name you enter here is what will appear in your CS window. What I like to do is add a space before the name I'm going to give my CS, that way it always appears at the top of the CS window. As for the Description, what I normally do here is put in the name of the project that this particular CS is relevant to. That way if another editor sits down, and needs to figure out which CS I used for a particular project, there will be absolutely no confusion.
FRAME SIZE & ANAMORPHIC
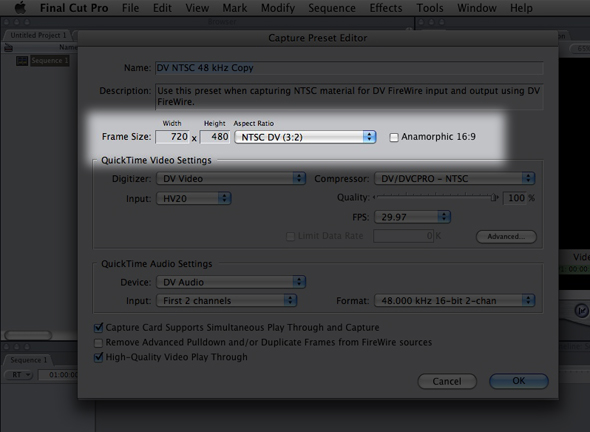
Here is where you need to have attention to detail, because if your settings aren't correct here, you can start to run into a world of problems. The frame size obviously is directly related to the footage type you are capturing, and that means that you NEED to know either what camera the footage was shot with, or what deck you will be digitizing from, and with the world of HD, there are many different ways of working on the same footage. Let's use the Panasonic Varicam as our example.
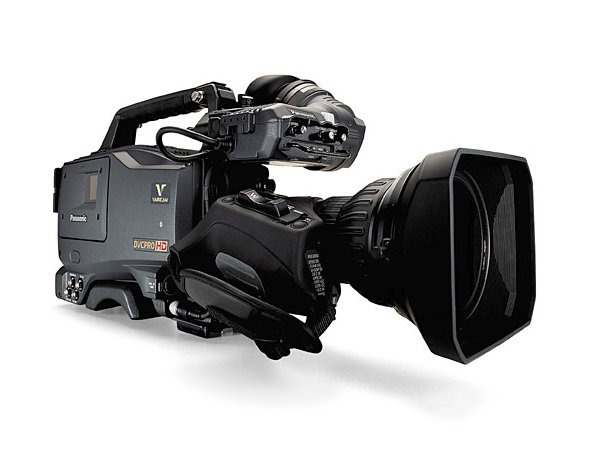
I know that it is a 720p camera, and that should raise a flag right away about the needed frame size. 720p equals 1280×720, and will be the frame size for our capture, but not our sequence. I know that the native codec for DVCPro HD is 960×720, and that is created by our Compressor Setting, not by our frame size. This will make more sense as we move forward, so just bare with me, and everything will make sense towards the end. Once you have chosen your frame size, there is a checkbox next to it called Anamorphic. What you would use this for is if you are doing an offline from an HDCam VTR in DV resolution, you can set the VTR to take the 16×9 image and “Squeeze” it to be full frame, and then have Final Cut Pro “Squeeze” it back to an anamorphic frame. This is imperative if you are doing a 4×3 offline for a 16×9 online. You can click here
QUICKTIME VIDEO SETTINGS
Digitizer & Input
This setting will vary depending on one main factor, and that is which capture device you are using. Higher end editing systems using capture cards such as a Kona 3 or Blackmagic will see “Kona” or “BlackMagic” in this drop down menu. If you have multiple capture devices (Kona and Firewire), you can select the one of your choice here as well. Input refers to just that. How will you be inputting your video? Will it be SDI, Firewire, S-Video? You will need to tell FCP how you want to get your footage into your system.
Compressor/Quality/FPS/Advanced/Limit Data Rate
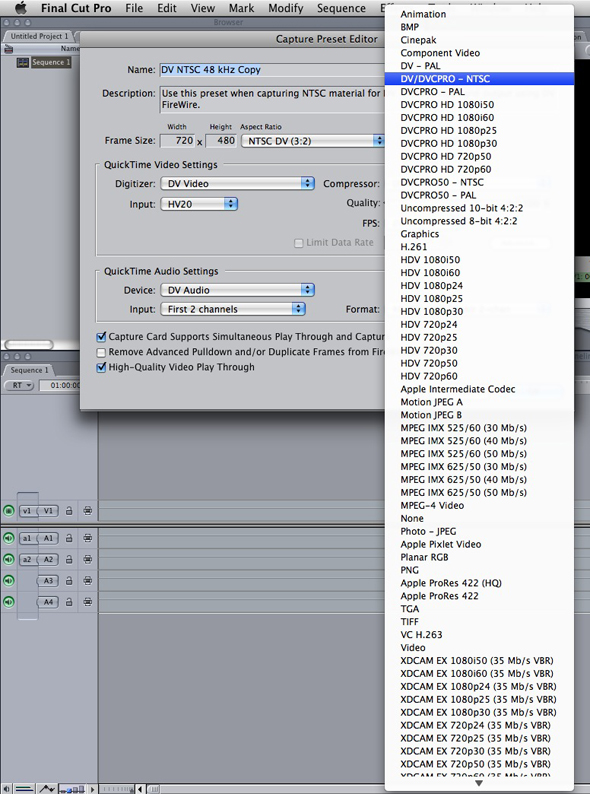
This is probably where people get stumped the most, and you really shouldn't be. This is where you are going to set the codec that will be used to capture your video, but keep this very important fact in mind. Different codecs support different frame sizes. Like I had mentioned before with the Panasonic Varicam, even though it is a 720p (1280×720 frame size – 16×9) format, it records on the tape at DVCPro HD Compression, which is 960×720 (4×3), so at the end of the day, FCP will be reformatting the footage based on the codec you have chosen to capture with, so when you are editing and outputting, you are doing so in 16×9. If it sounds confusing, think of it this way. Up until a little while ago, there was only one camera that could record in true 24p (24 individual frames per second), and that was the Sony F-900 Cine-Alta camera (we have George Lucas to thank for that). There were other cameras out there that recorded in pseudo “24p”, but it wasn't a true 24 individual frames per second. Inevitably, pulldown had to be removed when capturing the footage so you could edit in “true” 24p. There is something else very important I want to point out here, and that is that just because you are capturing from a DVCPro HD source, you don't have to capture with the DVCPro HD codec if you don't want to. You can pick any codec you want to work with like ProRes 422 (or HQ), Uncompressed 4:2:2 8-bit (or 10-bit), or any other codec that your system supports, assuming your drives can handle it. For example, I would never work at 720p Uncompressed 10-bit on my iMac with a FW-800 drive, as my computer would probably croak. This is where you can experiment to get the right codec for your particular editing configuration.
Quality is self explanatory. The lower the data rate, the lower the image quality, and the more you can fit on your hard drives. To be honest, I leave this at 100% as in most cases I'm working in DV or compressed HD (DVCPro HD, ProRes (and HQ)), so I don't normally offline and need tons of free storage space.
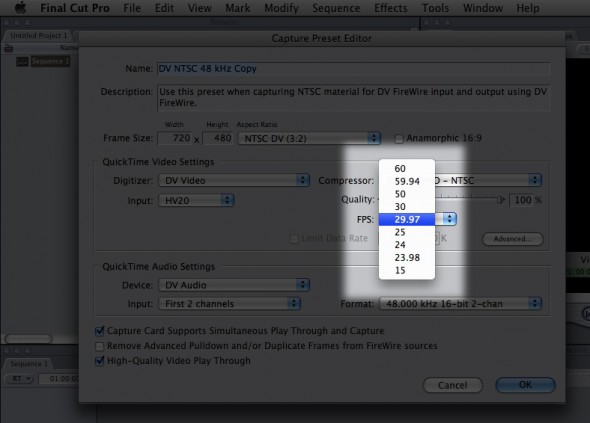
Frames-Per-Second, again, is fairly self explanatory. If you live in North America, chances are you will be working in one of three frame rates, which are 23.98, 29.97 or 59.94. Don't confuse 59.94p with 59.94i, as they are very different. 59.94i is basically referring to standard 29.97 interlaced frames-per-second.
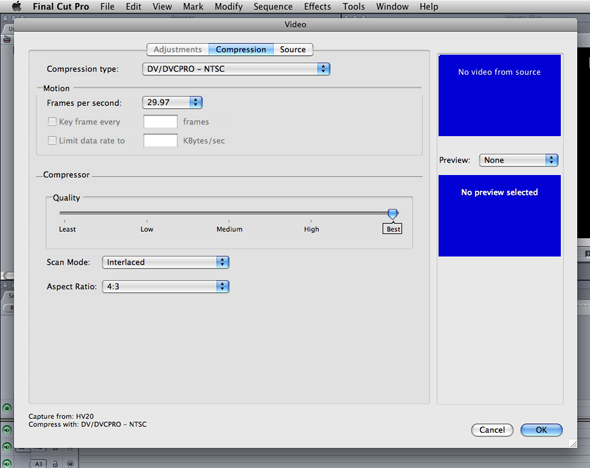
The Advanced button is very similar to setting up your QuickTime codec in the Render Queue in a program like After Effects. You can adjust the codecs for things like “Interlace” (yes/no) and “Aspect Ratio” (4×3 vs 16×9). These settings will vary by codec, and I always tell people to stay away from the Advanced button, if you don't know what you are doing.
Last, we have Limit Data Rate which, if you are familiar with creating H264 QuickTimes from QuickTime, you should know what this means. Other than DV that has a fixed data rate, you can cap off your video at any data rate of your choosing. Again, I never set this, as I don't want anything capped off, as it will directly affect the quality of your images, and as always, especially with HD, it's all about the picture quality.
QUICKTIME AUDIO SETTINGS
Device/Input/Format
Much like in the QVS section, the Device drop down will vary depending on your capture device. If you have a Kona/Blackmagic or if you are just using your Firewire camera or VTR, you will either see, or need to set that here. In most cases, if you are using a Kona 3 capture card, it will default to that, and you won't have to change it. The same can be said for a DV device.
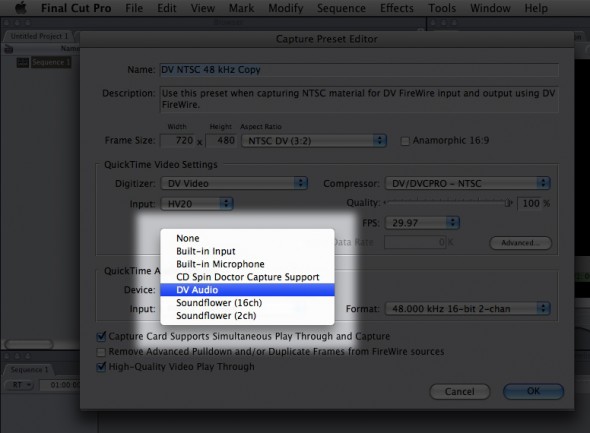
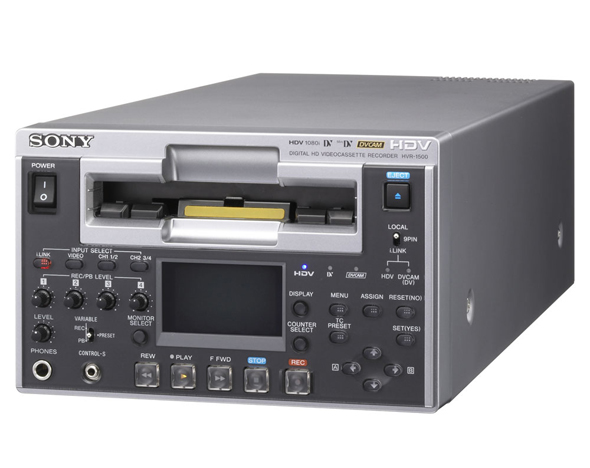
Input, again much like in the video section, will vary depending on how the audio is getting into your system. If you are working via SDI, that will appear here. Since I have my HDV camera attached to my system, I have the option of importing channels 1&2, 3&4 or a mix of all four channels. Some DV and HDV cameras can capture four channels of audio, but you cannot capture all four channels at the same time via F/W. What I would recommend in this situation, if for example you shot your footage with video and four channels of audio in HDV, would be to use a device like the Sony HVR-1500 VTR that not only plays back and outputs HDV via F/W, but it also has an HD-SDI and RS-422 control to output your HDV via HD-SDI, so you can capture all video and four channels off your HDV tape via HD-SDI into your editing system.
Finally, we have our Format section where you can choose between different audio configurations. Since I have my HDV camera hooked up, I can choose between 32, 44 or 48kHz, 16-bit, two channel audio. If I had a different capture device, my options would be different. In most cases, you will probably be capturing your audio at 48kHz, as it is considered the “industry standard”.
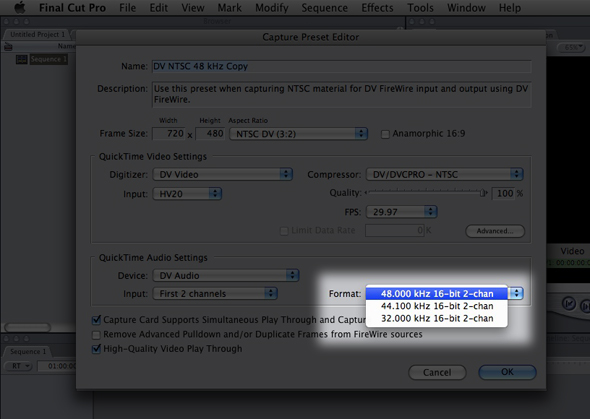
Finally, at the bottom of the CS window, we have three other options that can be activated or deactivated depending on our system configuration.
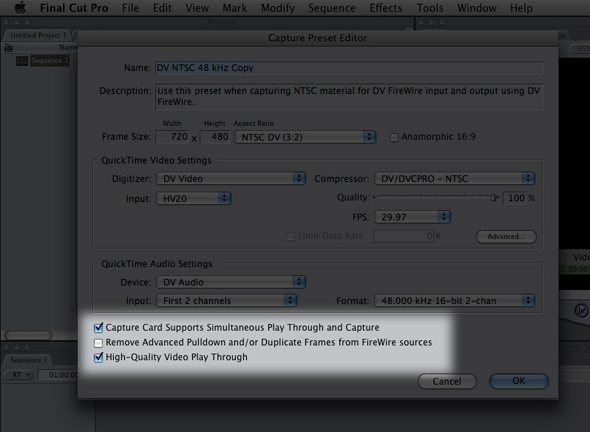
Capture Card Supports Simultaneous Play Through and Capture
Basically, what this feature does is enable you to see your video on an external client monitor, while it is being captured onto your drives. If your capture card supports it, I would suggest keeping this enabled, as it is a good way to QC your codec as you capture.
Remove Advanced Pulldown and/or Duplicate Frames During Capture From F/W Sources
As I had mentioned earlier, there are many DV cameras on the market that shoot in a simulated 24p. What I mean is that they are still shooting at 30 fps, but the camera is adding redundant frames that will be removed at a later time (the editing phase). I normally do not have this selected as I like to have the footage in my system exactly as it was shot. You can very easily do this process after the footage is captured by navigating to TOOLS>REMOVE ADVANCED PULLDOWN.
High-Quality Video Play Through
Have this box checked so that your DV video is displayed in the highest quality in the Log and Capture window.
I know that the Capture Settings window can be daunting, but hopefully this article will help explain a lot of what you are looking at, to help you build a better process for yourself, your client and your edit station. In part two of my three part article series, I will take an in depth look at the Sequence Settings, and in part three we will look at the Device Settings and putting everything together. If you have any questions or comments about this article, feel free to e-mail me at kevinpmcauliffe@gmail.com .

Filmtools
Filmmakers go-to destination for pre-production, production & post production equipment!
Shop Now