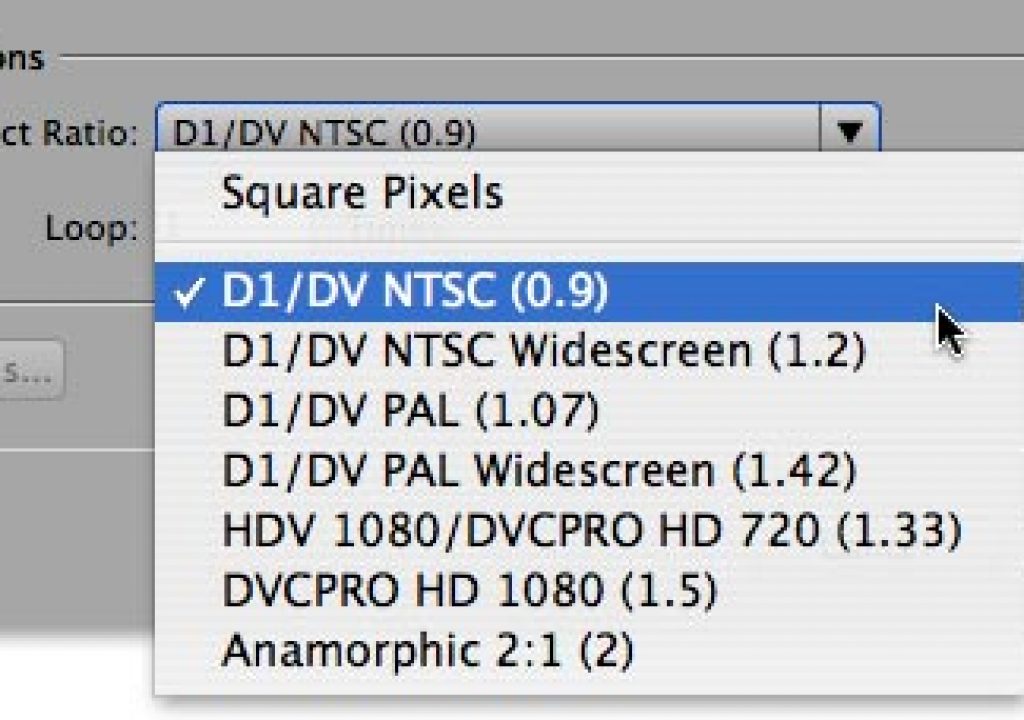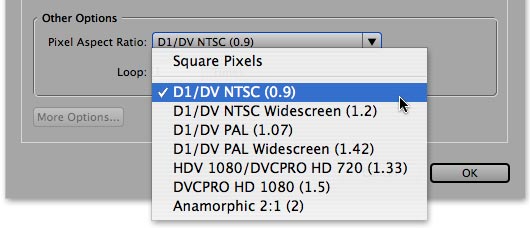
No matter which workflow you choose, always make sure your source footage has been tagged with its true pixel aspect ratio – this is the only way your software will know what to do with it in order to keep you out of trouble.
For a variety of arcane technical reasons (trying to record NTSC and PAL on the same tape, cutting corner on data throughput, being compromised by camera sensor technology of yesteryear, etc.), virtually all digital video formats have non-square pixels. This means they must be projected in a way that stretches or squashes them on playback to properly fill the television screen. Unfortunately, a side effect of this is that they will also look odd on a computer screen. When all you do is send the digital signal from camera to tape deck to switcher to monitor, this is neatly hidden from you. But when you start working with digital video inside a computer, you have to deal with these misshapen pixels.
As a result, a common question is what is the best way to work with these pixels: Stretch them back out to being square? Or leave them in their native format? The answer depends on what your primary goal is in life: preserving maximum image quality, or preserving your own sanity.
The Maximum Original Image Quality Route
If your primary goal is to preserve the original image as much as possible in order to make sure it cuts back in with similar sources without detection, then you should work in the native pixel aspect ratio of your source footage.
For example, if you are working with 1080 line HDV footage which uses a frame size of 1440×1080 pixels, set your compositions, sequences, or timelines to use 1440×1080 with a pixel aspect ratio (PAR) of 1.333:1 – or more accurately, 4:3. This will mean the original footage should pass through without being stretched to 1920 pixels wide and then later squashed back to 1440.
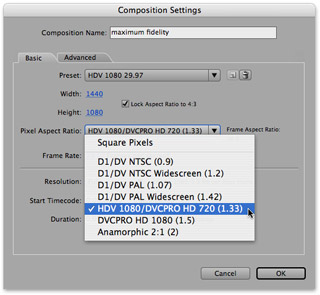 If you plan to use any additional graphics such as text overlays, digital photos and the such, you have the option of creating them at either 1440×1080 with a PAR of 4:3 or 1920×1080 with square pixels. As long as you have the PAR tagged correctly, your software will squash as needed to make your new sources conform to the size of your composition.
In the past, you couldn’t always expect software to factor the PAR into every calculation. As a result, sometimes effects would be processed incorrectly (meaning circular gradients would end up looking like eggs, etc.). For this reason, we tend to use the square pixel size for our additional graphics just to be safe. Software is smarter these days, but old habits die hard – especially when they were born out of being bitten. As long as we tag these sources as having square pixels, our software should scale them down to fit the frame size of our compositions or timeline. Since the images are being scaled horizontally instead of vertically to fit, we don’t have to worry about this scaling introducing field flicker.
The problem with this workflow is that your original sources, compositions, and sequences may look odd on a computer screen. Most programs have a way to correct for any PAR distortion in their display, but this correction has the side effect of either reducing the displayed image quality – for example, After Effects uses a crunchy nearest neighbor algorithm to stretch the pixels – or consuming more CPU cycles to display smoothly. (If this trade-off seems worth it to you, on the last page we’ll show you the secret switch which enables it in After Effects.)
The better solution is to preview your comp or edit window out through a true video chain on a real video monitor – this way, you will see the image after it has been stretched by an actual delivery chain. The additional benefit of this workflow is that you will see any color space shifts or safe area restrictions in the real world, on a real monitor.
The Maximum Sanity Route
There is just a certain comfort level in working at the aspect ratio which matches how the viewer will eventually see the final image – you don’t need to worry about accidentally compromising your graphic design, font size, and the such as you compensate for looking at non-square pixels.
Therefore, if we’re not worried about shot matching (not that you will be able to tell after the video has been compressed and broadcast), clients who are insane about image quality, or any other essential reason to maintain the look of the original image as accurately as possible, we will then instead set up our compositions, timelines, and the such at the corresponding square pixel size for the format we’re working in.
In the 1080-line HDV case we’ve been talking about, that size would be 1920×1080 square pixels; for widescreen standard definition video, it would be 864×486 for NTSC or 1024×576 for PAL. As long as you have set the PAR correctly for all of your source footage, and remember to set your comp or timeline to use square pixels, your software should automatically expand your sources to fit your full composition or sequence size.
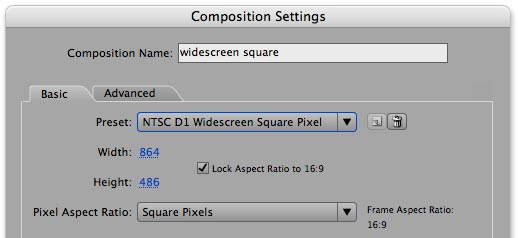
There are a few advantages to going this route:
- You will see the image displayed correctly – with no PAR distortion – on your computer screen without the need for an external display system.
- You do not have to worry about any effects or image processing steps that may not correctly take PAR into account, forgetting to set the PAR switch correctly in programs such as Photoshop, etc.
- Although you will be altering your source footage slightly by scaling its non-square pixels to fit your square-pixel composition, from that point on you will be performing image processing on more pixels – which in a few cases may result in higher quality or more consistent results. For example, if you apply a light ray, lens flare, or star glow effect to the footage, that effect will be generated with the maximum number of pixels – not the reduced size of the original footage.
If you follow this path, there are two things you need to also take into account:
- You’ll suffer a performance hit, as you’re processing more pixels.
- You must make sure you re-scale the image back down to its correct final size when you render. In a program such as After Effects, you can do this in the Output Module in the Stretch section. Check the Stretch option, uncheck the Lock Aspect Ratio switch, then change the width back down to 1440 for HDV or 720 for the SD widescreen examples mentioned above.

In After Effects, you can re-introduce non-square pixels as you save the file to disk by using the Stretch section in the Render Queue’s Output Module for your comp.
Of course, there are exceptions to every rule; in the next page we’ll discuss a few of those exceptions with the Standard Definition (SD) NTSC video formats such as D1 and DV.
Making Exceptions: SD NTSC
The one exception we make to the “rule” on the previous page is when working in standard definition D1 or DV formats with a 4:3 image aspect ratio (IAR). In this case, we nearly always work at the native frame size, not one of its square-pixel equivalents. That said, a lot of people prefer to work square in this format – so let’s discuss both cases.
One of the reasons is that we do not feel comfortable scaling images up from 486 lines to 540 lines (or 480 up to 534, in the DV case) if the source was interlaced. If you did not separate the fields to start with, then lines from one point in time (one field in a frame) will be combined with line from another point in time (the other field in a frame). If you did remember to separate fields – and you almost always should with interlaced footage – then you’re stretching up a half-resolution image (243 lines) up to 540 before you work on it.
An even worse problem arises if you need to field render the output. You cannot field render at 540 (or 534) lines, and then use the Stretch section to squeeze it back down to 486 (480) lines – your fields will be “munged” in the process, screwing up your motion and making the resulting render much more difficult to handle down the road. This is only a problem with SD NTSC comps, as all other common non-square-pixel frame sizes require stretching and squashing in only the horizontal direction, which will not affect fields.

Don’t ever, ever, ever scale an interlaced render in the vertical direction; you will screw up its fields.
However, if you find your design calls for a lot of accurate squares and rectangles, you may prefer to work in square pixels anyway. In that case, the best square pixel size for these formats are 720×540 for D1 and 720×534 for DV (remember, DV is D1 with 6 lines missing – it doesn’t have a different PAR than D1!). If any of your source footage was interlaced, be sure to separate the fields in Interpret Footage before stretching those clips horizontally from 486 to 540 (or 480 to 534).
When it comes time to render, be sure to do the vertical stretch in a final D1 or DV-size comp, which will be rendered before the interlacing is introduced in Render Settings. If you use After Effects, fellow user Lloyd Alvarez has created an After Effects script that will nest a 720×540 comp into a D1-sized 720×486 comp for you.
 An additional bonus tip for After Effects users: Turn on the Collapse Transformations switch in the final comp so that the transformations are calculated across both comps. This will increase speed and quality (because it skips another anti-aliasing stage).
Again, just to reinforce: if you work in the 720×540 comp, but render the D1 comp it is nested into, then the squashing will occur before interlacing takes place, and life will be good.
If this still makes you nervous, but you still want to work square, the other alternative is to work at 648×486 for D1 (or 648×480 for DV) and then scale horizontally out to 720 in a final comp or when you render – the image will be a little softer, but you won’t have to worry about your fields.
If you would like more information on pixel aspect ratios, we wrote a pair of articles for Artbeats on the subject. Click to download PDFs for Part 1 and Part 2.
sidebar: Antialiased Pixel Aspect Correction in After Effects
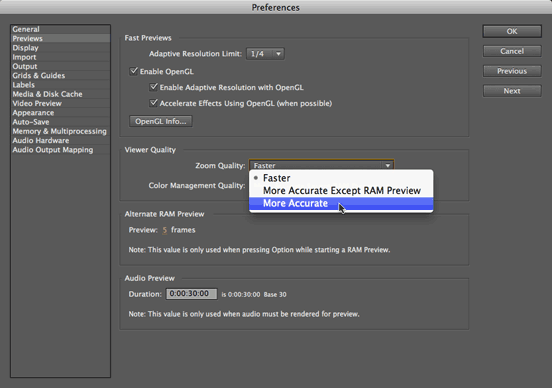
In After Effects CS5, you can set a new preference to have After Effects anti-alias the image when it is performing pixel aspect ratio or is scaling the display by a uneven amount:
For recent older versions such as CS4, there is a factory-unauthorized workaround to enable having After Effects antialias its display when correcting for pixel aspect ratio. It requires hand-editing the program’s preferences file, and has not been tested exhaustively, but if you’re feeling lucky, here’s how to do it:
- Quit After Effects if it is running. After Effects re-saves the preferences file when you quit, and re-opens it when you launch the program again.
- Open the preferences file. For After Effects CS3, this file is called “Adobe After Effects 8.0 Prefs” – search for it. On the Mac, it’s in:
Users/yourusername/Library/Preferences/Adobe/After Effects/8.0/
Under Windows XP, it is located in:
Documents and SettingsyourusernameComponent DataAdobeAfter Effects8.0- Save a copy of the unaltered file for safekeeping. Then open the prefs file in a text editor.
- Search for the following header in the file:
[“Item Window Settings”]
The search for the following line under that header (it’s at the bottom of the list):
“Viewer Odd Zoom Quality (0=low, 1=high, 2=high except for RAM preview)” = “0”
Change this setting as you see fit.- Save the prefs file, and restart After Effects.
Again, this is an unsupported feature, and will result in a performance hit – it’s up to you whether or not it is worth it. You can always set the preference back to “0” or replace your edited prefs file with the copy we had you save in Step 2. Good luck!
The content contained in our books, videos, blogs, and articles for other sites are all copyright Crish Design, except where otherwise attributed.

Filmtools
Filmmakers go-to destination for pre-production, production & post production equipment!
Shop Now