Working with Notes in Scratch
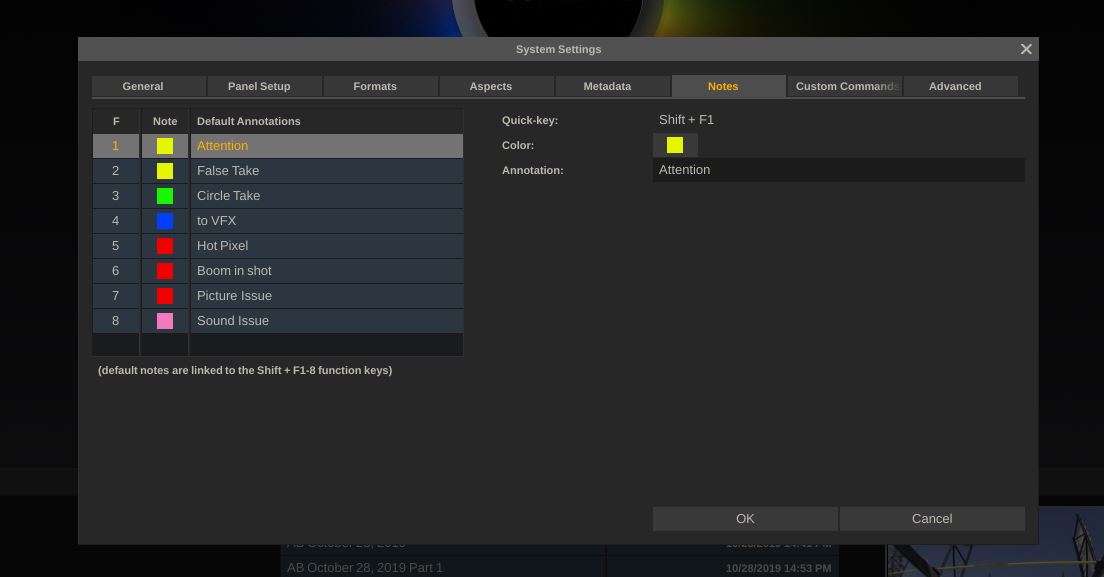
As you’ll see, the deeper and deeper we go into Scratch, Scratch is all about organization and information. Whether it’s on your exported clips, or in the slots in the application, you have a ton of flexibility, as to how you want to keep yourself organized. Notes, much like Sticky Notes in real life, are a great way to add very visual “markers” to versions of your shots, in the construct window (Notes can be accessed in other locations as well, but for this lesson, we primarily deal with the Construct Window). How do you add a Note to a clip version in a slot of the construct window, well, much like everything else in Scratch, there are multiple ways to do the same task. The shortcut for adding notes varies slightly, as there are different default Notes you can use (Attention, False Take, Circle Take, etc), and these can all be altered to suit your needs, with revised default values if necessary. Shift and F1-8 are the keyboard shortcuts you can use to quickly add a note to a shot/version.

You can also easily add a note by accessing them on the bottom of the Construct module, or you can even add them by clicking on the little page curl icon on the upper right of any shot/version in any slot of your timeline. If the concept of slots are confusing, don’t worry, we’ll cover them in depth in an upcoming lesson.

(Click image to access tutorial)
OUTPUTTING PART 1 – The Output Tree
One thing that I do when teaching anything editing or compositing related is I teach people how to import their footage first, obviously. But, very close to that lesson, I teach people how to output. Doesn’t really matter if you know how to edit, composite, audio mix, or anything else for that matter. Importing and Exporting are essential. Why? Well, if you teach online like I do, where your courses will be pretty long, people really need to know how to get stuff in and get stuff out, and they can play around in between, while they are waiting for more detailed lessons on editing, or compositing, or whatever it is you happen to be teaching. This is why we’re jumping into our lessons on exporting early on, on the road to learning Scratch! I’ve broken exporting down into three lessons, and we start out Exporting Lesson one on the Export Tree. The Render Module is set up in a pretty unique way inside of Scratch. The first thing that’s important to keep in mind when taking a look at the Render Module, is that you can export a single timeline, or multiple timelines, all with different settings, codecs burn-ins and reframes, all from within the one window. If you simply tap left on the interface, you’ll have access to all your different timelines, so you can easily queue up whatever you want, and start them exporting right away.
Next, ignoring the Publishing and Reporting option, you’ll start out your Exports via a single node, named after your timeline. Now, you can either use an Output Template (preset) from the lower left corner of the interface, or simply build your own. The reason your output is referred to as a “Tree” is that your timeline would be considered the trunk of the tree, and all the different nodes you add will “branch out”, sometimes in multiple branches, based on what you need your outputs to do (approval files, low-res offline files, high res files, etc). It’s a very clever way of doing things, and the depth you can get into with the different nodes and different branches makes me wish I had this type of control in other applications! Enjoy, and don’t forget to hit the “Subscribe” button to stay up to date on all the new lessons posted!
(Click image to access tutorial)


