The most important thing you will ever learn about lighting is this: LIGHTING IS NOT A FORMULA. Learning about lighting, though, is a process of becoming aware, and in this first of many articles I’m going I’m going to try to increase your awareness of one specific thing per article. The more awareness you have the more easily you’ll be able to adapt your lighting to your circumstances because you’ll see, with your own eyes, what you need to do to make an image that satisfies your inner artist.
I think the best place to start is with classical key light placement. This knowledge is not something you will use verbatim as this is not a style that is in vogue at the moment. The underlying principles, however, should be of daily benefit.
In film school we all learn about the key light, fill light and backlight. We’re typically shown a setup where a key light is placed 45 degrees to one side of the camera and raised high and tilted down toward the subject at a 45 degree angle. The fill light is placed in the same position on the opposite side of the camera. The backlight, or hair light, is opposite the camera, behind the subject.
This is a great way to learn the basics of lighting as long as you can grasp what the lights do and then completely forget everything about this formula. Lighting is not about formulas, it is about seeing. Formulas can be a trap. Learn from them, but don’t rely on them.
There are almost infinite variations of this setup and other setups that deviate completely from this plan. The goal in my upcoming “Lighting Strategies” series is to open your eyes to some lighting techniques and strategies that I had to learn the hard way–because there are very few people who can communicate what they do artistically to another person. There are a lot of DPs who can tell their crew what they want, but if they had to tell another DP how they did it they’d fail miserably. I find that really frustrating, so I’m going to try to fill that void.
One of the hardest things to do is to light a face well with hard light, because hard light brings out details that not every face wants revealed: bumps, pores, imperfectly-formed noses, wrinkles… everything that can go “wrong” with a face shows up really well under hard light.
A hard light is defined as a light source that appears small in relation to the subject and casts a sharp shadow. This can be a small light up close or a big light far away. (I’ll go into soft and hard light in another article.)
I believe that the origin of the “traditional” hard key light placement came from the old studio days of the 1930s when it was most common to light from a lighting grid placed over the set. Film speeds were quite slow and the lights used were quite big, and the easiest way to power them and keep them out of the shot was to hang them. This is probably where the 45-degree downward-facing key light came from, as this angle is one of the more pleasing for hardlit faces.
I’m not going to talk about fill or backlight in this article. I’m going to focus strictly on classical methods of placing hard key lights. We’ll get to other lights, and mixing lights, in future articles.
Before we get into details you should understand the concept of “Rembrandt lighting.”
Rembrandt most often lit his subjects by placing them near a north-facing window that was higher than they were. This did two things:
(1) A north-facing window in Europe almost never receives direct sun. This ensured that the subject was lit with the same quality of soft indirect light all day long.
(2) The height of the window caused the light to cast shadows along the “smile line,” the invisible line that connects the corner of the nose to the corner of the mouth.
This kind of facial modeling is the hallmark of classical portrature, and it was only natural that this technique should find its way into early filmmaking.
On the following pages I’m going to illustrate some concepts using the software package Poser 9. It’s easier for me to putter around on my computer and construct demos than it is to plan out everything that I want to show and then hire a model and try to shoot it all, so I hope you’ll forgive the virtual nature of these illustrations. Also, I’m not going to show you lighting diagrams because I want you to figure out how to place the lights yourself. I’ll give you a tip for observing where others place their lights, but not until the last page.
On to our first example. Turn the page…
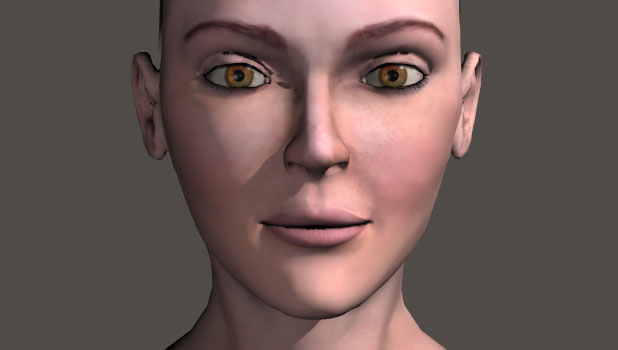
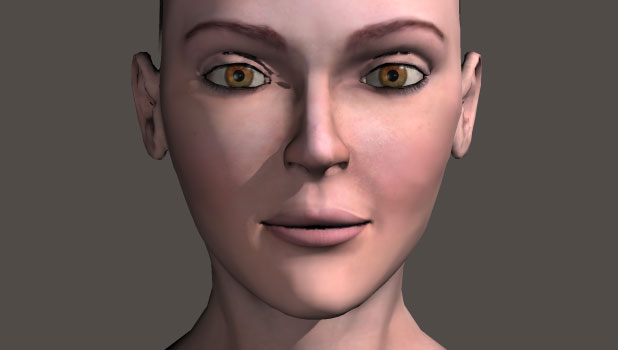
This is classic “Rembrandt” hard lighting. It’s not strictly “Rembrandt” style because the light is very hard: it casts sharp shadows and doesn’t “wrap” around surface details. The nose shadow does fall along the smile line and connect to the cheek shadow, which are both hallmarks of Rembrandt’s style.
This virtual face is very forgiving as its nose is fairly even and free of bumps and deformities. It’s also not very long. Hard light reveals distortions in nose structure quite easily, and as it is often our responsibility as DPs to make the performers look their best we must be aware that certain lighting setups may not work for everyone.
In this case, though, the classical hard light placement of 45-degrees up and 45-degrees to the side works well. Traditionalists might argue that this is an extreme way to light a woman’s face, and that the key is better placed closer to the camera:
This shorter nose shadow is considered kinder to women, especially those who are concerned about how their noses photograph. If you think such women don’t exist then you’ve never worked with Barbra Streisand. I haven’t, but I knew someone who did and they told me that she would only allow herself to be photographed from her left side. She has a long nose and it points slightly left, so by showing the camera the left side of her face her nose was always pointed into the lens instead of across it. That had the effect of making her nose look straighter than it really was.
A small nose shadow can make a nose look shorter than it is.
This is the kind of thing that endears you to actresses. Pay attention: you never know where your next job will come from, and if you take care of the people you photograph they may have the opportunity to take care of you.
This virtual model also has very shallow eye sockets. The deeper the eye sockets the lower the key light has to go to reach into them. This is not a requirement, only a comment regarding classical portraiture. We don’t always need eyes to be lit, but if an actor or actress has deep-set eyes and the director wants to see them then the lights will have to drop lower, or another light must be added.
The important thing is that there’s always a bit of shadow on the face. I can spot rookie directors very easily: they’re the ones that complain that “Her face isn’t evenly lit; one side is darker than the other!” Yes, that’s intentional: a face that’s lit dead-on doesn’t look three dimensional. That shadow creates depth, and the lightness or darkness of that shadow creates mood. People who complain about shadows on faces haven’t been paying visual attention to nearly every image they’ve ever seen in a motion picture.
Having said that, lighting “flat” can be very interesting. I’m going to save that for another article.
Bringing the light further around results in this:
This is still a nice look, and is very kind to someone who has nose structure issues. The closer the key light is to the camera the fewer wrinkles and bumps it will see as their cast shadows become shorter. (These can also be erased with fill light. More about that later.)
Last but not least, we can place the light directly over the lens:
This can be a very flattering look but it depends on the face. If the person has a wide face you’ll just emphasize its width, and that’s rarely pretty. Sidelight makes a face look thinner; front light can make a face look fatter.
Here are some things I hate:
I’m not a big fan of horizontal nose shadows. I’ve eased up on this opinion over the years as I’ve found situations where it’s not necessarily a bad thing, but a hard sideways nose shadow is more often than not a rookie mistake. Sometimes it works…still, pay attention to this, as it’s a very dramatic look that may not look flattering in a lot of situations.
The hard upward nose shadow can work in certain situations, such as if the actress is lit by a candle that she’s carrying, but there are a lot of situations where this just doesn’t do nice things to an actor’s face. Soft light from this angle can be very interesting, but we’ll get into that later. Save this look for serious drama involving actors with perfect faces.
How to adjust your lighting for men, and some tricks of the trade, can be found on the next page…
Here’s typical “Rembrandt-style” hard light on a man. Men can tolerate side light more than women as men tend to be lit for ruggedness whereas women are more often lit for beauty.
Bringing the light around a bit is still quite flattering.
And here’s the dramatic extreme:
This is a great example of how hard light can reveal nose structure. Notice the shadow of the large bump just below the bridge of the nose. On a man this is rugged; on a woman, not so much. As with everything in lighting, sometimes this works and sometimes it doesn’t. Be aware and you’ll soon figure out what works and what doesn’t.
Here’s a technique that I learned when Stephen Burum, ASC spoke to my Advanced Cinematography class back in college:
Almost everyone’s face curves. The eye and mouth will be closer on one side of the face than the other. Generally people look better if that side of the face faces the camera and the key light is placed opposite the curve.
You’ll not always be able to block and light shots this way, but being aware of this may help you win the confidence of a difficult actor or actress.
Last but not least, here’s how I determine where other DPs place lights when I watch films and television:
I look in the actors’ eyes. In this case you can see the key light reflected high and to the right in one eye, and the virtual fill light I’ve placed immediately to the left of the camera, at lens height, in both eyes.. Judging light placement can be a bit tricky as the curvature of the eye adds distortion, but with practice you can learn to judge the placement, size and number of sources being used in a shot just by observing reflections in eyeballs.
In my next article we’ll look at soft keys. Until then… play around and see what kinds of faces work with different kinds of light. Every face is different. The trick is that you often can’t tailor your lighting to an individual, but you can learn how to fix common issues when they arise.
Art Adams is a DP who fails to flinch from facial photography. His website is at www.artadamsdp.com.


