All editors who paid attention to NAB in 2019 were very surprised when Blackmagic introduced the DaVinci Resolve Editor Keyboard. I had questions, and they were answered when I did a full review of the keyboard here on PVC.

That review was written back in 2019 when I wasn’t doing a ton of craft editing in Resolve, but fast forward to the present day, there’s more creative editing happening in Resolve. I’ve worked on several show edits in Resolve from start to finish, and while I didn’t buy my own Resolve Editor Keyboard (I opted for a Resolve Speed Editor), I was wondering what it would be like to work with it again for an extended period through a long edit. I asked BMD to borrow a review unit for this long-term follow-up review.
A few things to first consider
A keyboard is a very personal thing, so there’s a lot to think about before you spend your hard-earned money on a third-party keyboard, considering your system might have come with one included. There’s even more to consider when looking at a specialty keyboard like the Resolve Editor Keyboard. These were the same things worth considering when the Resolve Editor keyboard was initially shipped.
Price
If you’re considering a DaVinci Resolve Editor Keyboard, you’ll first want to look at the price. While the original cost when it was introduced was nearly $1,000, a price reduction a few years ago set it to $595. That’s a lot more palatable for any piece of hardware, especially a keyboard since regular keyboards can be cheap. But no other keyboard integrates with Resolve in quite the same way. And since you get a full copy of Resolve Studio with the keyboard purchase, that’s $295 you can save right there if you haven’t purchased Resolve Studio.
Size
This keyboard is still large. My office has limited desk space, and it barely fits with my standard setup of a mouse on the left and another input device on the right. I will fit in both office and home edit suites, but adjustments were required. Measure your space accordingly before purchasing.
Functionality
Most editors will ask about the functionality of the DaVinci Resolve Editor Keyboard. Is it worth the price? The TL: DR answer is yes; if you’re only editing in Resolve with default keyboard shortcuts, then at the new price, it’s a good purchase. You have to go all-in on what it offers, and part of that all-in is doing a lot of work in the Cut page if you want to make full use of it. But the same thing could be said for the Speed Editor.
If those specific things don’t apply to you, then the answer is a bit more complex. Read on.
The setup panel is always watching as the setup is easy.
Setting up the DaVinci Resolve Editor Keyboard is as easy as plugging the keyboard in via USB-C. While there are USB-A ports on the back, those are made to plug in other peripherals like a mouse or trackball. There is no Bluetooth support like the Resolve Speed Editor, which I find strange.

There’s an app called DaVinci Control Panels Setup that watches your system and any of the BMD control panels. Blackmagic does make quite a few control surfaces beyond the Editor Keyboard that can be used with Resolve. The panel doesn’t have to run continuously in the background and will usually prompt you when it’s time for an update.

I found that sometimes, on my laptop, I had to launch the DaVinci Control Panels Setup to get the system to recognize the keyboard. Then, it prompted me to update the keyboard on successive days. I assume it was the same update, but maybe two updates came two days apart?
Overall, the setup is simple and easy, and that’s what you would expect in a keyboard like this. Without any extra electronic gizmos and custom settings, there isn’t much to do beyond what Blackmagic pumps into it via updates.
It was a curious choice not to include Bluetooth in the Resolve Editor Keyboard. It didn’t bother me much when I reviewed it the first time, but since then, I’ve retooled some edit suite arrangements and plugged more crap into the Mac Studio ports, so it took some work to get the thing connected. The cable management struggle is real.
The Functionality and the Feel
Functionality and feel are two of the most important things to consider when using a keyboard.
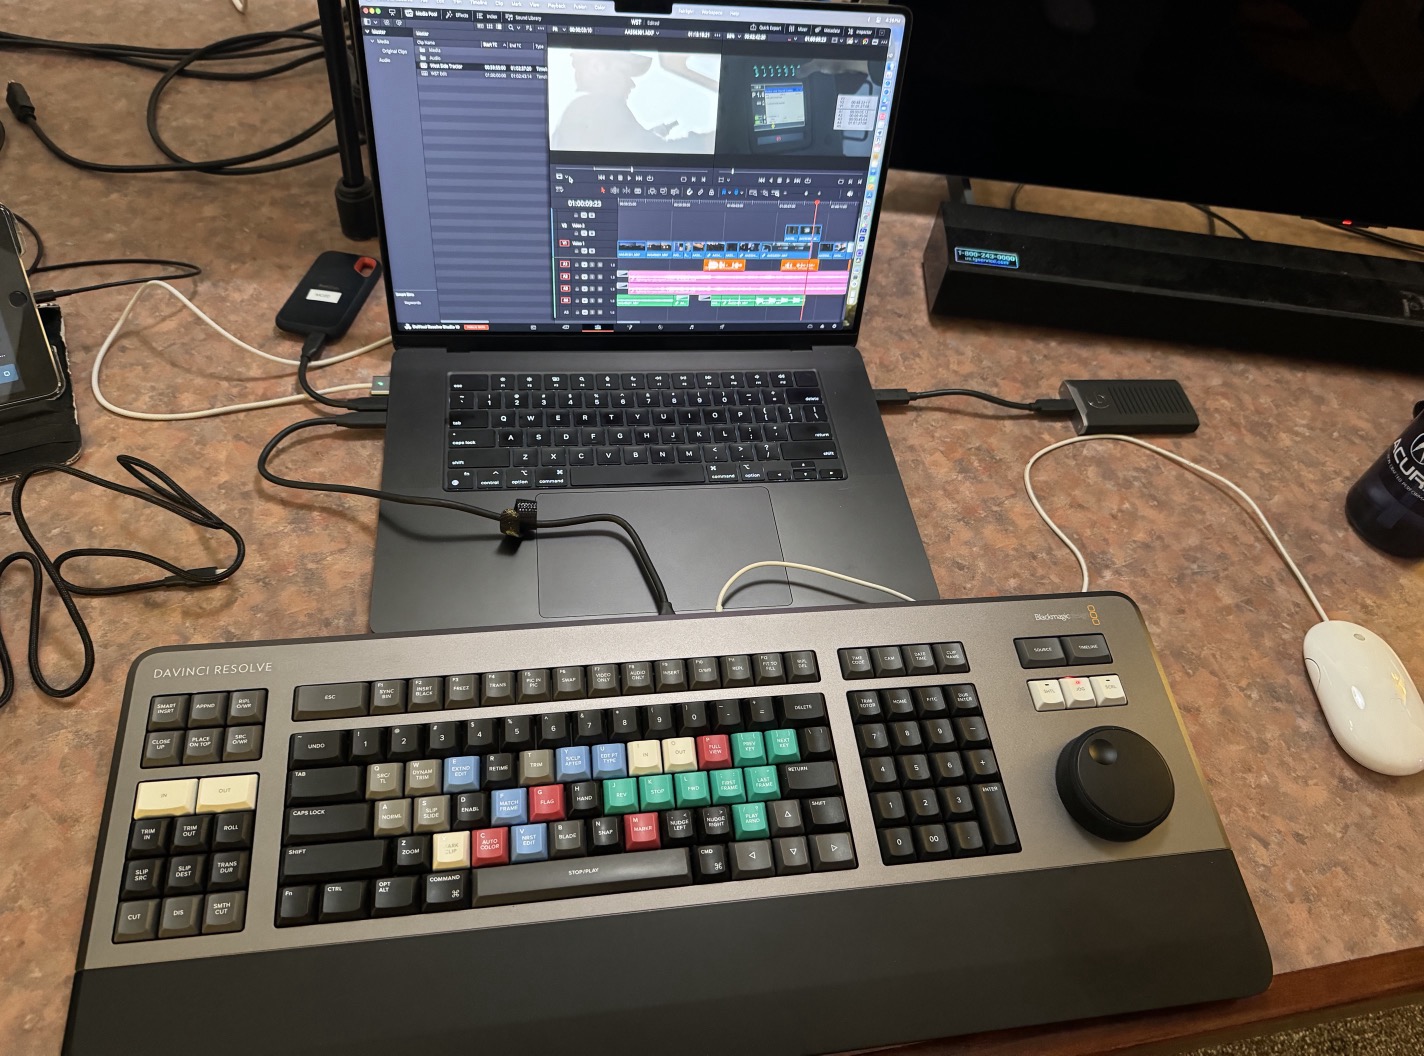
Let’s talk feel first. All of the Blackmagic keyboards are very well constructed. They are solid pieces of hardware; the keys provide just the right resistance and are a pleasure to use. The F and J keys have the little raised nibs you expect, so your hands can be positioned by touch.
The Seach Dial, which is the signature feature and the reason you buy this thing, works great. But more on that in a bit.
Regarding functionality, my biggest gripe in the design is the arrow keys. I noticed that while the arrow keys bothered me the last time I used the Resolve Editor Keyboard, this time, they really bothered me.
I use the arrow keys a lot when editing as I am a keyboard-first editor. I use the left and right keys to move the playhead around and move to and from things like markers or keyframes. The up and down keys might move between editing events or change multicam angles depending on the context or the application. But I’m constantly using them, so when they are different, like on a laptop, or non-existent, like on a small and stubby Apple keyboard, I can really feel it.
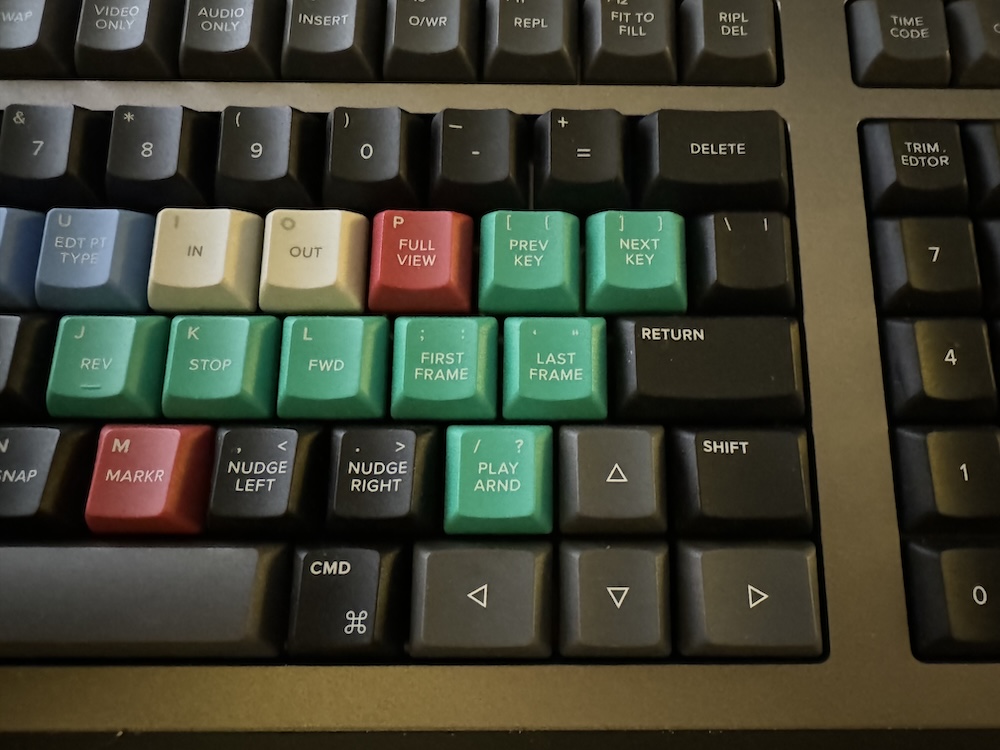
While arrow keys are present, they are stuffed into the lower right corner of the main set of keys. This means the designers had to make the right shift key and right command key smaller to accommodate.
This leads to a two-fold problem. First, I found I often had to look down to ensure I was on the arrow keys, whereas on an extended keyboard, I could just hit them by feel. Second, I often missed the right shift and command keys since they are much smaller than my muscle memory remembers. These are things that can be retrained for but they take time.
Elsewhere on the keyboard, the F keys are an important part of the Resolve Editor keyboard. While F keys are there, they default to several Resolve functions. You’ll use the replace/REPL and FIT TO FILL keys a lot but there was probably no need for a dedicated SYNC BIN button. That would have been better off defaulting to a more useful function. If you need the regular F keys then hold the Function/Fn key to get normal F key access. It was a miss to not let the use lock the Function key when you need non-modifier access to the F keys.
The keypad lacks some standard keys, so count some muscle memory retraining into your new keyboard time. It’s nice to have a dedicated double-zero 00 key for faster timecode entry.
What about the dial?
By far, the signature feature of the Resolve Editor Keyboard is the Search Dial. The same goes for the Resolve Speed Editor, but the Speed Editor lacks one signature feature of the Editor Keyboard: the mechanical Shuttle SHTL functionality. While JOG and Scroll SCRL are pretty easy to describe, SHTL is different in that you feel the dial go into Shuttle functionality when you hit the button, as a mechanical clutch within the keyboard goes to work, giving the dial a different feel as you turn it. Depending on how far you turn the Search Dial, the playhead (in the timeline or perhaps in the Source Tape mode) will scan through your footage at various speeds, including audio.
This Shuttle functionality is meant to mimic search on old, physical tape decks like a Beta SP or D-Beta. I have spent many hours shuttling through video tapes at various speeds, listening to the squeak of chipmunk-sounding high-speed audio, and trying to decipher that footage playing back. It’s an art in and of itself and probably one lost in this day and age since no one uses tape decks anymore. But as one who has done much of that, Resolve’s implementation just doesn’t feel as smooth or as fluid. When the clutch kicks in, it makes the dial a bit cumbersome to turn, but more than that, the digital shuttle of a software timeline doesn’t equal the fluidity we used to get from magnetic tape running fast over video tape deck heads.
This is just an opportunity to embed this video above of an old videotape deck threading the tape!
If you’ve never shuttled high-end videotape in a high-end tape deck, you’re none the wiser. Perhaps shuttle SHTL will be your thing. It just doesn’t click with me on the Resolve Editor Keyboard. The SHTL actually feels better to me on the Speed Editor where there is no tactile feedback in that mode, the more you spin the knob the faster the playhead goes.
But what does click is both the JOG and SCRL functions. Spinning the dial in JOG is a great alternative to clicking and dragging a playhead in the timeline or in a source clip. SCRL allows for fast navigation along a timeline without ever grabbing the mouse. Changing these dial functions is as easy as hitting the button above the Search Dial. It’s a great design, and your single right hand moves the playhead around the timeline. Since you can toggle between source clip / Source Tape modes and the timeline with buttons just above your right hand, the left can stay on the main keyboard area and perform many editorial tasks. There isn’t any faster way to assemble selects reels, or quickly edit from raw footage than this combination of keyboard buttons and the Seach Dial.
The Resolve Speed Editor allows for the same kind of navigation, but I’ve realized something during this tour I’ve spent with the Resolve Editor Keyboard: reaching away from my regular keyboard up to the Speed Editor is about equal to reaching over to the mouse. This takes time, and time is often better spent with your hands on the keyboard. In the past, I have sometimes not adjusted my desk to use the Speed Editor on an edit since it’s a different control surface than my keyboard. But I always make use of the dial when using the Editor Keyboard.
But what if I cut in applications other than Resolve?
This might be an important question if you’re considering spending $595 on a Resolve Editor Keyboard. You won’t get the search dial functionality when working in other NLEs, and you’ll constantly be faced with many colored and printed keyboard keys that don’t match your keyboard settings. That might be a tough pill to swallow. On the other hand, you can switch out the Editor Keyboard with your normal keyboard, and I did that quite a few times during my time with the Resolve Editor Keyboard.
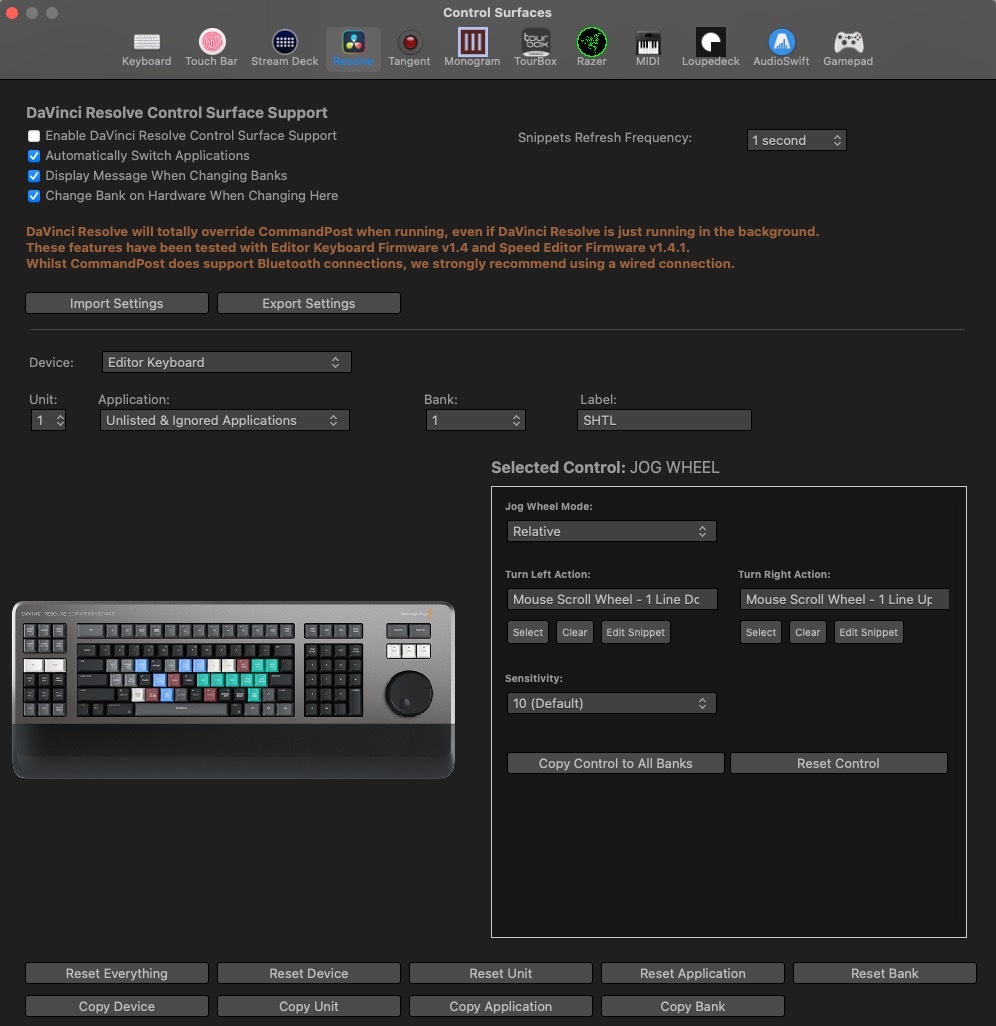
What about the size of the keyboard?
Due to the size of the editor keyboard, you will have to clear your desk from the clutter that accumulates during day-to-day work. And you will have to find a place to store the Editor Keyboard if you choose to go this route. But it is a viable option for those of us who are NLE—ambidextrous.
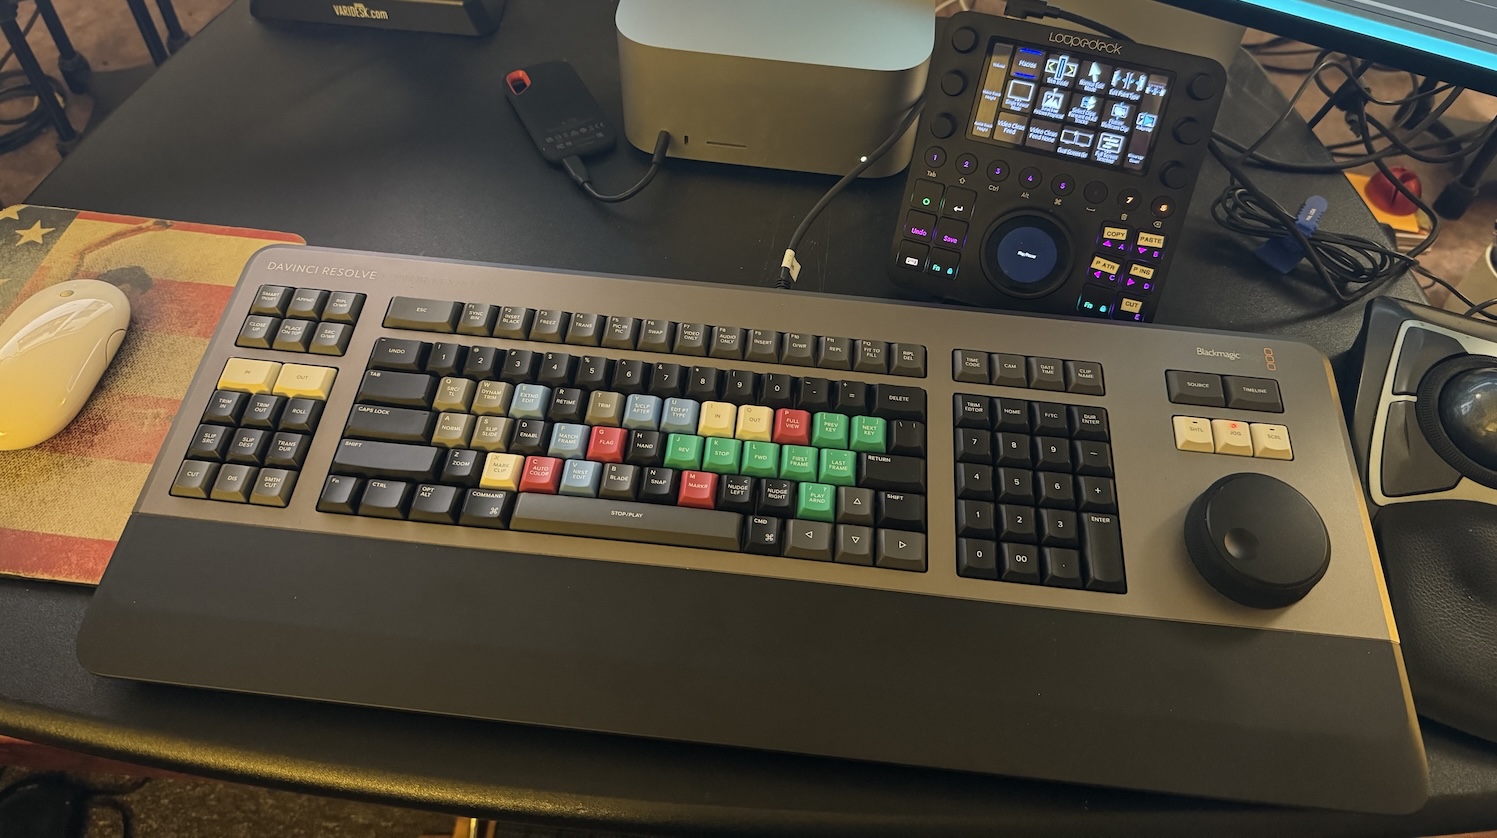
If you’re exclusively cutting in Resolve and would leave the Editor Keyboard front and center all the time, then ,it’s a pretty good recommendation to add the Editor Keyboard to your suite if you can afford the cost.
But there is one more thing to consider …
What about my custom keyboard layout?
If you’ve mapped your keyboard shortcuts away from Resolve’s defaults, then beware, you will have to overcome those differences between your software Resolve keys and the real keyboard keys. This one might be difficult for some editors to overcome. It’s why I long ago abandoned the color-coded “editing keyboards” and prefer to work with just a regular keyboard. I know exactly what the keys do, so I don’t need printed and colored keys telling me what they used to do. I can use my custom keyboard mapping just fine with Resolve Editor Keyboard (or any editor keyboard, for that matter), but sometimes, seeing those key differences might trip me up for a few seconds.

There is no equivalent to the Resolve Editor Keyboard for other NLEs. The integration between hardware and software, in this case, is top-notch. It’s the same thing you feel when using a Blackmagic color control surface when grading vs. a third-party surface from a vendor like Tangent. While the Tangent surfaces work great, they often require extra software and more setup. While you do get some extra customization with third-party surfaces, you can’t beat the simplicity of plug-and-play. There are other third-party Resolve editor keyboards, but they are just keyboards without what makes BMD’s editor keyboard special.
A few random thoughts, strange things and observations about the DaVinci Resolve Editor Keyboard
The keyboard has some duplicate functionality. For example, the Q key toggles between the Source/Timeline Viewer. The big Source and Timeline buttons above the dial do the same thing on the Edit and Cut pages.
Using the Auto Track Selectors properly is important to using the Resolve Editor Keyboard’s trimming functions. They help target the trims, and with them all turned on in a complex timeline, it often feels like they need more attention to trim the exact edit you want. And I still can’t figure out how to always trim two tracks simultaneously, like a lav and boom mic on separate tracks you always want to trim together.
The SWAP key is fantastic. While we do have keyboard shortcuts for swapping clips to the left and the right, you have to select a clip first where, with the Editor keyboard, SWAP will take the clip under the playhead. And it’s just more fun to swap with the dial! I sure do wish the Speed Editor had a SWAP key.
The C key is a red AUTO COLOR but doesn’t do anything. Looking at the default keyboard layout, Auto Color isn’t mapped to the C key, it’s Option+Shift+C.

Perhaps it used to be on the C key so I wonder why the engineers changed it if they have a $500 keyboard with that dedicated hardware key. You can, of course, remap Auto Color back to the C key.
Another peculiar thing is the Y key. That key is labeled as S/CLP AFTER, which means select clips after the playhead. But the name of that key in the keyboard customization is Select Clips Forward on This Track.

It’s a minor discrepancy, and they do the same thing, but the big difference in name makes me wonder if the hardware designers need to talk to the software designers.
One difference that is notable between the Editor keyboard and the Speed Editor is the Speed Editor has several features labeled on the side of some of the buttons. That means those buttons have a secondary function with a double-press. This is a really nice feature that the more expensive Editor keyboard doesn’t have. This is most likely due to the fact that the Editor keyboard came first and this was a new idea added to later hardware. It’s a detail worth noting.
Wrap-up
Once I again started using the Resolve Editor Keyboard on a recent job, it was an interesting few hours. I first had to determine how my custom keyboard shortcuts would or would not conflict with the hardware keys. But then, I found it best to return to Resolve’s default keyboard shortcuts. While my muscle memory was gone, the Resolve Editor keyboard had enough unique controls that I was able to adapt quite easily. My beloved custom editing keyboard shortcuts are important, and I’ve honed them via years of tweaking.
So in closing, I will say this: after using the Resolve Editor keyboard for an extended period of time for the second time in my life, I think I can sum up the recommendation quite easily:
- Who is the Resolve Editor Keyboard for? If you’re doing your craft editing exclusively in DaVinci Resolve, using mostly the default keyboard shortcuts, then the Resolve Editor keyboard is a good buy (especially at the $595 price, even better if you can find a used bargain).
- Who should pass on the Resolve Editor Keyboard? Editors working in multiple NLEs or editors who have extensively remapped their Resolve editing keymapping.

Filmtools
Filmmakers go-to destination for pre-production, production & post production equipment!
Shop Now


