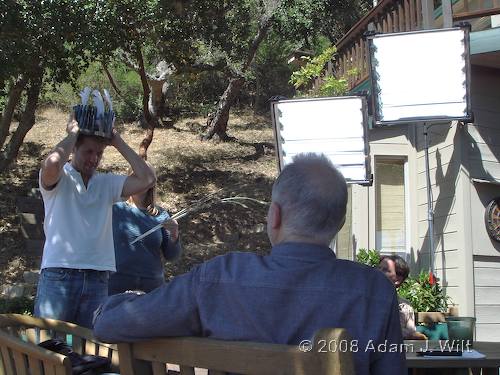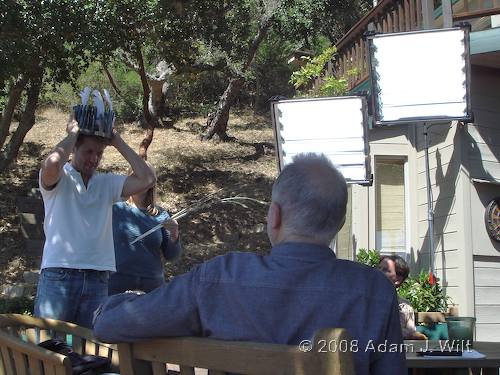
Sunflowers: two VistaBeam 600s fill the shadows.
[See also: Preproduction; Production (part 1)]
Day 4 – We have a 3pm call for a 4pm start (we’re skewing later in the day as we need to shoot nighttime footage) and plan to shoot to midnight, covering the climactic dinner and post-dinner scenes.
I ask Aaron, who has worked on other Rob Nilsson films, about the “two days behind schedule after two days of work” phenomenon, and he says it’s not uncommon: the schedule gets rewritten constantly to reflect what did and didn’t get done. Scenes get combined or dropped as needed, and the film goes on; it’s part of the workshop mindset, and part of Direct Action Cinema.
Even so, we’re starting to establish a rhythm; we’re beginning to act like a film crew, and not just a bunch of random goofballs. We’ve sorted the battery situation, so we’re not stopping for battery changes; data wrangling is proceeding apace; we’re starting to move from setup to setup with reasonable alacrity. We’ve also had more lighting gear appear: Tim and Alan fetch it up from DTC, so we now have the other VistaBeam, two Diva-Lites, and an Arri HMI kit at our disposal.
There are still over three hours of daylight, and it’s pretty, late-afternoon daylight, so we polish off a few more outdoor scenes.
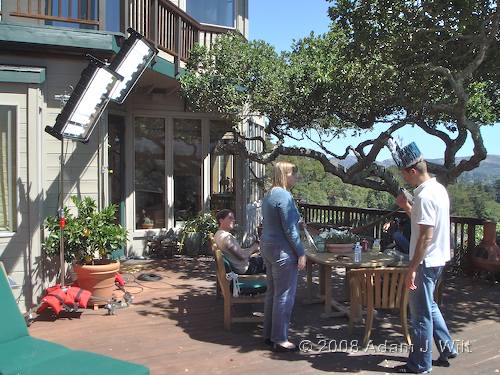
The Vistabeams let us keep detail in both open sky and shaded faces.
Indoors, we shoot a dinner prep scene: “Iron Chef” style closeups of vegetables being chopped and thrown into a pot. We get the water in the pot nice and hot, and Tim stands just out of frame with a Litepanel Mini to backlight the steam and make it pop. I move in close as the actress pulls the lid off; the steam boils out and is beautifully illuminated. She scoops up an armload of chopped veggies and dumps them in; they fall with a glorious splash, showering camera and cameraman with scalding soup. It’s wonderful! And hot! Ouch!
Production halts for five minutes while I clean the lens. I’m happy to report that the Sony wide-angle adapter can tolerate hot soup splattered across its front surface, and the subsequent cleaning, with no ill effects; still, I do not suggest that you try this at home.
We set up for the nighttime work: four actors with lavs, plus boom, and two cameras. My 302 mixer only has three inputs, so I’ve also brought along my vintage Sony MX20, an 8-in, 4-out board I used for live recordings of D.C. punk bands in the ’80s (with a friendly shout out to “The Enzymes” and “Tony Perkins and The Psychotics”) as well as mixes on several films. This all-analog-all-the-time mixer (it doesn’t even have any LEDs, fercryinoutloud) evokes some jocular commentary, but it does the bollocks—and the price is right. The Sennheiser on the boompole takes phantom power, so it still feeds (and draws power from) the 302, which then relays its signal to the MX20. Alternatively, the boom / 302 combo feeds camera 2, while the four lavs, mixed two to a side, feed camera 1 from the MX20; that way we have four recording channels to work with instead of the two on a single camera.
I should talk about color: I don’t know how post will occur, and we’re shooting XDCAM HD EX, a compressed 8-bit format, so we lit it and shot it the way I expect it will be seen, with no guarantee (or expectation) of any significant color correction.
We largely went with a natural, existing-light palette, but I used the difference between daylight and tungsten to our advantage.
During daylight hours, interiors were mostly lit by ambient window light, with fill from the VistaBeams or the 1×1 Litepanel, both at 5600K. I let practical fixtures go warm, but Tim put 1/2 CTB liners in some of the lights so the color shift was visible but not dramatic (cameras stayed balanced on 5600K for this work).
As the sun sets, and as we move into night interiors, I let the look warm up: the cameras stayed at 5600K, but practical fixtures (around 2900K) and candles (????K) dominate the lighting. We used one Diva-Lite 400 to bring up base levels in the dining room, and another in one end of the kitchen; both were lamped half-and-half with 5600K and 3200K tubes.
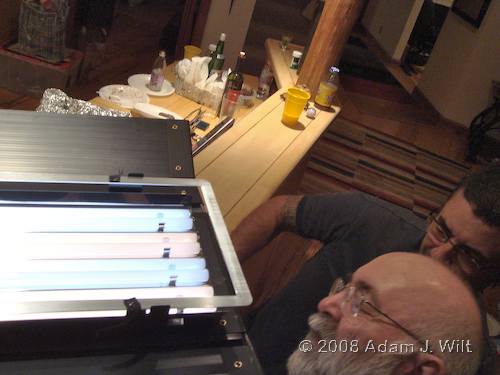
Lamping the Kino: mixing tubes to get halfway between daylight and tungsten.
The Divas gave us a halfway-in-between kick, just like putting the 1/2 CTB on the practicals upstairs, so the scenes wouldn’t go entirely warm and yet the color contrast wouldn’t be too extreme. Additionally, where needed, we rigged the daylight-balanced 1×1 Litepanel or a Litepanel Mini to cast a comparatively cold accent on a character.
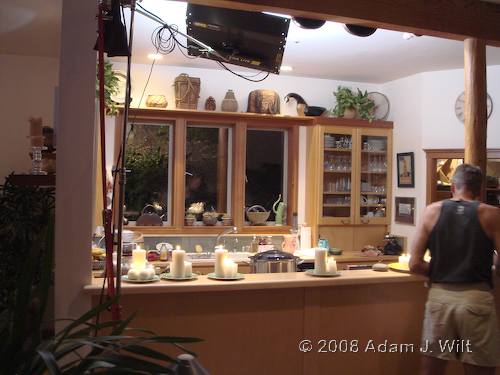
The half-and-half Divas let the warmth of the practicals come through.
However, as the drama unfolds, the actors move to the darker, unfilled end of the kitchen, and the uncorrected color—combined with the low exposure levels—goes almost entirely (and appropriately) red.
Subsequent scenes have a cool, bluish tint; a calmer look. They happen in the wee hours of the morning (shot day-for-night), or in the dawn’s early light (shot dusk-for-dawn). The bluish tint helps to sell day-for-night and simultaneously cools down the emotional energy of the presentation. These scenes were shot under daylight illumination, with the cameras set to color temperatures of 3800K to 4600K depending on the scene.
Back to the narrative: finally, with lighting and sound set, we roll, and some very intense interactions unfold before the lenses. We’re mostly done with the dinner sequences, and have survived a minor disaster with spilled candle wax, when wrap time comes. Rob says it’s officially time to knock off, but the cast and crew have built up a nervous energy, and the scenes have momentum: we all say we should keep working. Astonishing things happen, and the story takes some unexpected turns (all par for the course in Direct Action Cinema), and finally, at 3am, we have this critical sequence of scenes in the can (erm, on the cards?). It’s been a 12 hour day, but a worthwhile one; Rob says that by continuing on as we’ve done we’ve “broken the back” of this film: the hardest part is now done.
Day 5 – After four days of scrambling to suss out what Rob wants and how he wants it (it’s the first time we’ve ever worked together), I’m ready to start behaving like a department head (or at least ready to start faking it). We sit down with the revised shooting schedule, and I can now read enough into the terse descriptions to actually plan how to schedule the day’s setups, based on sun angles, dramatic needs, and costume changes. This allows me to give the crew a fairly good idea about the day’s setups and what we’ll need; suddenly we’re working ahead of the current setup, not just reacting to things as they occur.
Tim heads back up to Ethan’s room with blackwrap to cover the windows, and we haul the VistaBeam in again for a nighttime shot in broad daylight. We climb a hill to shoot day-for-night in a forest setting, then have time to get some voiceovers recorded for the 13-minute shot from two days earlier, as well as a couple of pickups. We look at the timestamps on previous days’ clips in XDCAM EX Clip Browser to figure out exactly when to shoot sunset-for-sunrise, and these shots go off without a hitch.
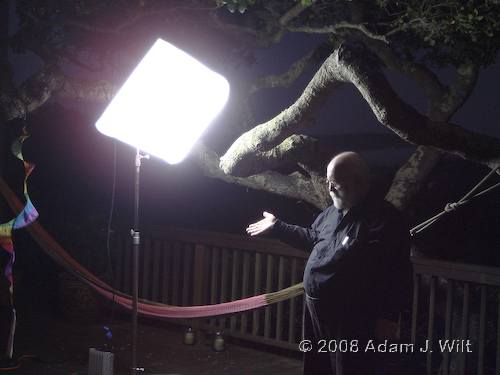
Tim tests an Arri Pocket PAR in a Chimera pancake.
We have one final scene to shoot this day, a dusk-for-dawn setup at the same outdoor bathtub seen in sunset shots. We wait for the sun to be safely down, then throw the VistaBeams on the tub from the sunrise direction. It’s not an entirely convincing illusion (for example, why isn’t the hillside behind the camera similarly lit?), but it’s sufficiently different from the dusk scenes to “read” as morning.
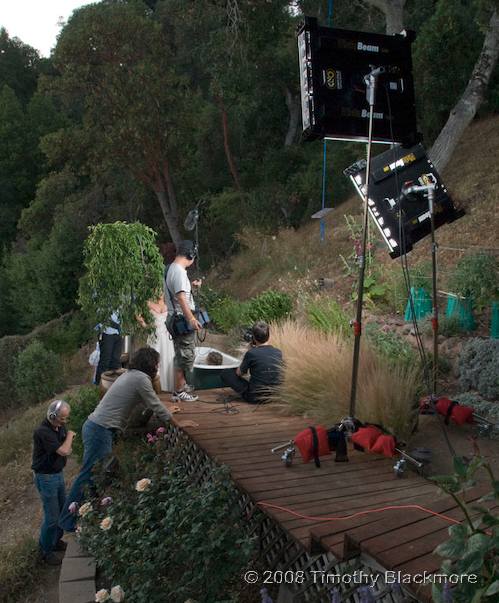
Dusk-for-dawn: VistaBeams give us morning-angled daylight.
Both VistaBeams are run from the same household circuit; the equivalent of 8KW of tungsten draws only 1200 watts, or about ten amps. No gennies, no tie-ins, just a simple stinger run to a common household outlet.
Rob suggests a couple of takes, but for a variety of reasons I insist this is an unrepeatable, get-it-in-one shot, and we need full coverage in pix and sound on the first attempt. After an excessive (for Direct Action) amount of blocking and preplanning, we get the shot in one take. It’s 9pm; we’re actually ahead of schedule by a bit.
Next: Day 6; loading out; lessons learned…
Day 6
The spilled-wax incident aside, we haven’t broken any glass, trampled any flowers, blown any breakers, or otherwise caused obscene amounts of damage. Nonetheless, we weren’t expecting this when we arrived on the final shooting day:
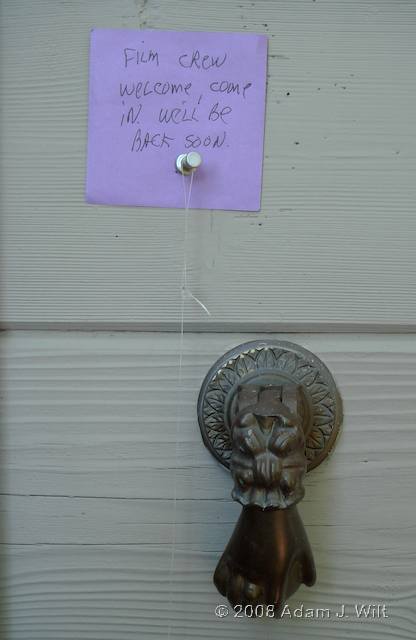
How often does a film crew see a sign like this?
We’re so far ahead of things, we’re relaxed, and we can tack on shots that weren’t in the original schedule:
EXTRA CREDIT- Ethan/Alex scene- after dancing
This translates to a calm scene in an upstairs bathroom. It’s a light, airy room, but I want to keep the windows from blowing out, so Tim and Alan rig a Diva-Lite from a furniture clamp on a ceiling beam. It’s out of the way enough that I can aim the camera through the doorway it’s above; all I have to do is avoid seeing it (and myself) in the mirror.
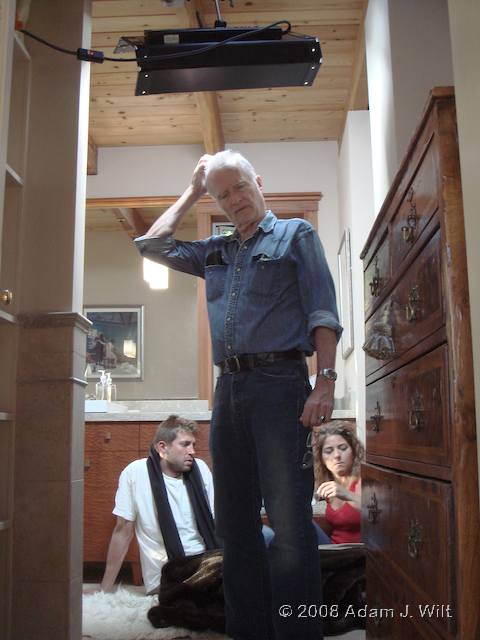
Rob ponders beneath a Diva-Lite 400 clamped to a beam.
Two hours later, we have that scene covered from about three different angles. I’m getting cocky, so I start doing things like racking focus out at the end of a zoom, or panning slowly up from the actors sitting on the floor to a still life composition of the outdoors, reflected symmetrically in the mirror—and by this time, Rob is comfortable enough with my shooting that he not only lets these indulgences pass, but actually approves of them [grin].
We shoot a final outdoor scene after sunset, with the VistaBeams for fill; they’re so bright, I wind up turning off all but one tube, so that we get only a gentle, modeling edgelight on our actors.
Then we break for a leisurely dinner (Rob’s usual craft services lady, Bridget, has been prepping excellent vittles throughout the shoot), and settle in for some extra pickups for the kitchen scenes. I put a Litepanels Micro in the EX1’s shoe with both the diffuser and full CTO gels on it, and turn it down to minimum, just for a catchlight and the barest hint of fill in the shadows. We shoot for half an hour, and with a whispered, “I love you”, we have the final shot: it’s 11:08pm, only eight minutes past my estimated wrap time. [1]
Beer, wine, and absinthe all around!
(Absinthe, you know, makes the heart grow fonder. [2])
We return the next day to load out. We send the VistaBeams off with Alan (his Ford Windstar is big enough for the road case, and he can use the Vistas on a gig), and send one data drive off with Tim and two with me (we had transferred each card to a drive with XDCAM EX Clip Browser; made QuickTimes with XDCAM Transfer, and then duped the data onto two additional backup drives). Tim and Alan return gear to Chater and DTC; I return gear to Videofax. We all go home and catch up on sleep.
Over the weekend, I make yet another backup of the clips, and Tim picks up his now-repaired MacBook Pro (all fixed under warranty) from the Apple Store.
What’s next? On Monday, Aaron picked up the master data drive, so it’s off to Rob’s crew for post. Some day, we may see it. And I hope to post some frame grabs next week, after CineGear Expo. I also delivered a data backup to Marshall, so we have four geographically-separated copies of the show’s footage (frameage? Clippage? Shottage?).
After a week of recuperation, my thumb is back to about 75% functionality. That danged composite cable really mashed some nerves! I don’t plan to use the EX1 handheld with that cable plugged in again, and I suggest you avoid doing so, too.
We found that Sony’s own XDCAM EX Clip Browser was a good tool for marching data off the SxS cards and onto disk; it has CRC checking to increase reliability, and the workflow is both fast and simple.
We did find, also, that making QuickTimes ASAP, before releasing the cards, was essential: we had one system crash of unknown etiology during a transfer, and while the transferred clips looked OK, they could not be converted to QuickTimes: we got a “metadata missing” error. As the card had not yet been erased, it was simply re-transferred, and QuickTimes were then made from the fresh transfer.
Establishing good procedures is an essential part of the workflow. Exposed cards were always placed to the left of the MacBook Pro; erased cards to the right. Tim made sure to take a card all the way through the process before turning his attention elsewhere. No clips were lost to operator error during six days of shooting, with about ten hours of total recording across 33 SxS loads.
The EX1 lets you set the REC REVIEW function to play back the last three seconds of the previous clip, the last ten seconds, or the whole thing. On several occasions, Aaron or I would press REC REVIEW accidentally, between takes, and have to wait for the playback to complete before we regained control of the camera. Based on this, I’d suggest using the three- or ten-second settings only. If I had had the camera set for “entire clip”, and had pressed REC REVIEW after that 25 minute take? Heck, we’d still be sitting there in Mill Valley…
Similarly, the EX1’s ASSIGN 4 button, below the lens, is unassigned by default. I had in my wisdom set it up for DELETE LAST CLIP, thinking it would be handy to have. On a couple of occasions, after manhandling the camera around on the DvRig, I saw the message, “Delete Last Clip?”, with “Execute” and “Cancel” choices in the EVF. I was so freaked out, I simply powered off the camera, just to avoid accidentally moving the highlight to “Execute” before pressing the selector button. After only three or four such frights (I’m a slow learner), I went into the menus and unassigned that button. Alternatively, I could have set it to something innocuous, like “take up knitting”, or “count sheep”, but clearly, DELETE LAST CLIP was not the right thing to have assigned to an out-of-sight yet easily-pressed button.
The EX1 is a beast to operate; the lens, when fully wide, has too much distortion; the wide-angle adapter is prone to flare. But despite all my whingeing, the cameras really came through. The EX1’s handling of tone and color were consistently pleasing, and its ability to handle contrast was jaw-droppingly amazing. The zoom rocker’s ability to creep the lens along at a snail’s pace came in handy several times, as did its smooth ramping and high top speed. Even with detail off, the pictures are almost distractingly crisp at times, and the pix lack the chromatic aberration that plagues many low-cost HD cameras.
I wound up using the EVF for focus most of the time, even though the LCD is sharper. The EX1’s digital peaking signal wasn’t useful, as we often didn’t have enough sheer brightness in areas of interest to trigger it, but the expanded focus function was universally helpful in nailing the focus point.
I set the cameras up to a standard profile, with the following changes:
- Detail: Off
- Gamma: Cine4
- 1080p24, HQ recording.
- Shutter: Off (1/24)
That was it: no fancy matrix settings or anything like that. I used a 1/24 shutter to increase motion blur and reduce the staccato look of a 180 degree shutter; Rob liked the smooth fluidity of 60i, and I thought that 24p with a 1/24 shutter would be a good compromise between 24p-ness and smoothness.
Rob seemed to like the look, and as long as he’s happy, I’m happy.
[1] As this is one of the very, very few times we’ve ever wrapped any time close to schedule, please indulge me as I glory in the stunning accuracy of my prediction.
[2] OK, I’ll stop now. Really.

Filmtools
Filmmakers go-to destination for pre-production, production & post production equipment!
Shop Now