A few weeks ago Red Giant Software released update to the ever popular, ever useful Magic Bullet Suite. This new version 10 includes the most recent versions of many useful tools including Magic Bullet Looks, Frames, Grinder, Instant HD, Mojo, PhotoLooks and the recently updated Colorista II (which you can find a review of here). One tools that is now gone from the suite is Magic Bullet Steady but it’s been replaced by a new one: Magic Bullet Denoiser. And it’s available as part of the suite or as a stand-alone purchase.
What happened to Steady? I guess in an era of Smoothcam and CoreMelt’s Lock and Load X that Steady just wasn’t long for this world. I used Steady quite a bit during its life but it never seemed to be as fast as Lock and Load and never seemed to work as well as Smoothcam though it did an admirable job. I did use Steady’s denoise feature from time to time. I had used it mainly with a 35mm lens adapter on my Canon HV20 when a longer lens meant I was seeing the texture of the ground glass in the image. Steady’s denoise setting did a decent job of smoothing out the texture though often at the expense of sharpness.
The official statement of Magic Bullet Steady’s demise is this (full information can be found here):
Our goal at Red Giant is to always offer unique products that are the best of breed in their respective category and provide real value to our customers. If any of our products do not meet this criteria, we either add new features or consider discontinuing them.
Since the release of Magic Bullet Steady in 2008, stabilizing technology has been added or enhanced in most host applications. Based on this development, and the availability of competitive products like ProDad Mercalli we decided Steady no longer meets our criteria and will be discontinued and removed from our product catalog. It also means that Magic Bullet Steady will NOT be redeveloped for use in Adobe CS5.
Today no one is shooting 35mm adapters anymore and we’re all using DSLRs! These cameras have very high ISO settings and with increased ISO comes more noise. With more noise Magic Bullet Denoiser was born and is included in the new suite.
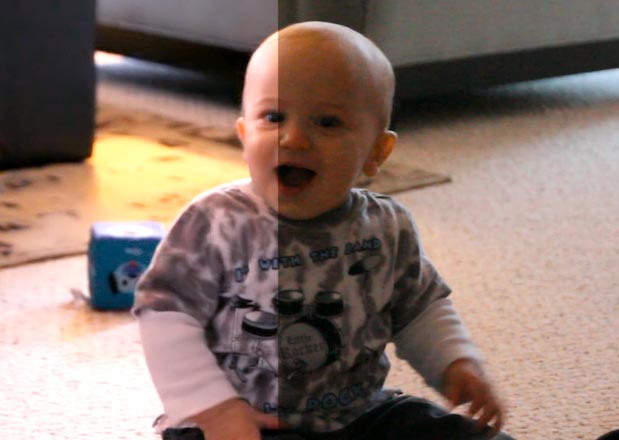
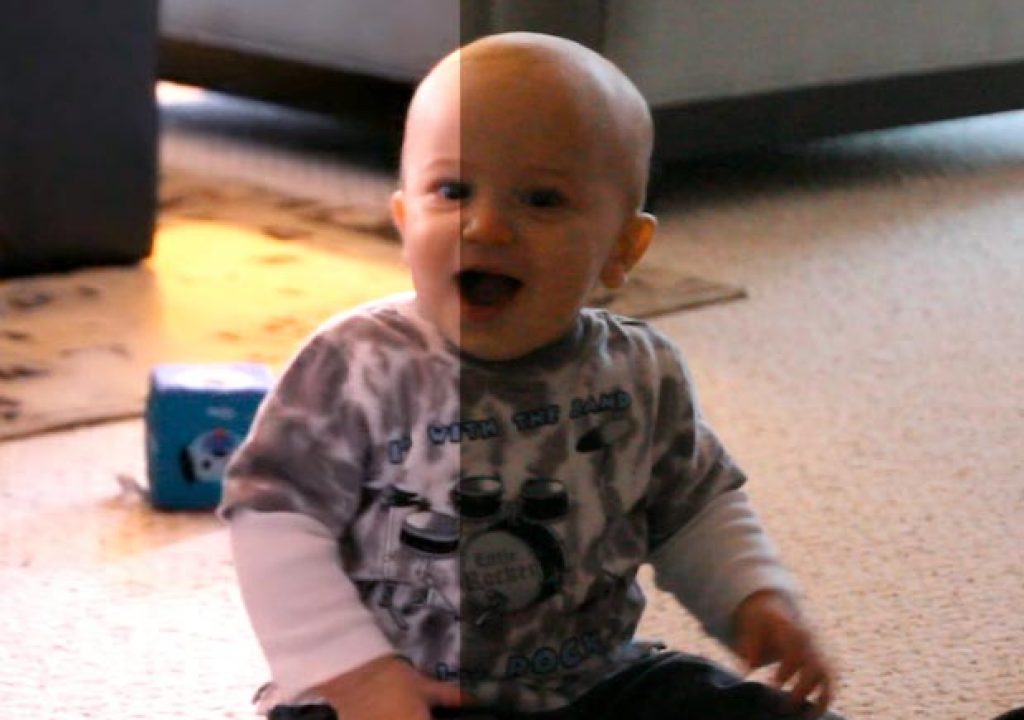
I got a copy of the new Magic Bullet Suite from Red Giant Software a few weeks ago and I have been meaning to test out the new Denoiser tool but I hadn’t run across any noisy footage that I would be able to share. Low and behold one jumped into my lap the other day courtesy of my laughing baby and the desire to throw together a montage of laughing baby clips for the family (and really, who doesn’t love laughing baby clips?). I ran across a good clip that was dark and noisy.
I remember shooting this clip one day when we were playing with the kid and blowing in his face. He would crack up and laugh his head off. I ran upstairs and grabbed my 7D and flipped it into video mode as I ran back downstairs. I didn’t bother to check any settings (and I didn’t have a custom video settings at the time) as I knew the fun and laughter wouldn’t last long. I was able to get a couple of bursts of laughter before the boy moved on to other things.
A detail still of the footage before any work was done to it.
The same frame detail after color correction was applied. The color enhancement makes the noise much more visible.
A detail of the same frame after applying Magic Bullet Denoiser.
A detail of a frame with only Magic Bullet Denoiser applied and no color correction.
While I admit that this isn’t the ideal test clip that was staged just to produce noise in the image or a real-world interview of a random famous person I think it could easily represent something that you might end up with when shooting documentary style – no lights, no setup, no planning: just get the shot now or you may never get it again. The shot is shaky, the focus goes in and out, the subject moves all around, it’s too dark … and it’s noisy. But the objective of the shot was to get the laughter, which I did. Now to make it look a bit better.
It probably stands to reason that a lot of noisy clips where shot in too low of light so they’ll probably need some color correction (really … most all footage needs some color correction). I was curious as to how rendering and the general functionality of MB Denoiser would be affected by color correction so I used Colorista II to color enhance the below shots.
There was definitely an overall slowdown when tweaking the footage with both Denoiser and Colorista II applied. There’s quite a bit of number crunching going on when you park the playhead and it renders a single frame (all this testing was done in Final Cut Pro). Sometimes I would get a blue screen instead of the image or this error:
That error happened a lot when both Colorista II and Denoiser were applied (footage was 1080 ProRes), less so with only Denoiser but it still happened. Usually a close and reopen of the sequence fixed the errors. On a couple of shots I applied the MB Denoiser, rendered and exported a new self-contained QuickTime and that definitely sped up the overall responsiveness in the FCP timeline when doing the color correction but I didn’t see a quality difference from this method.
The Before and After video samples
Click the above image to open the original clip in a separate window, it may take a bit to load. 18 meg 900×506 H.264 QuickTime.
Click the above image to open the clip in a seperate with only color correction and NO denoise applied. 34 meg 900×506 H.264 QuickTime.
Click the above image to open the final clip in a separate window with both color correction and Magic Bullet Denoiser applied. 15 meg 900×506 H.264 QuickTime.
Click the above image to open a split-screen clip in a separate window between the final clip and the original with color correction. 23 meg 900×506 H.264 QuickTime.
It’s generally a good idea to take care of noise reduction before you apply color correction as the color enhancement can just amplify the noise. This is quite evident from the second QuickTime above but I wanted to really amplify that noise so it could be more easily seen through Internet video compression and to see how well Magic Bullet Denoiser handled it. I’ve also had clips before that had very little noticeable noise before color correction only to have it brought out as I graded. I would then apply the noise reduction after and it worked well. The below QuickTime is the above shot with Denoiser applied before color correction. I then exported the clip as a self-contained QuickTime. This method might be handy if you’re doing a lot of extensive color correction with multiple applications of the color correction filter. Each parameter adjustment would take a lot less time to render the frame the playhead was parked on as you tweaked since it wouldn’t have to render the Denoiser effect as that would be baked into the self-contained QuickTime. Of course you couldn’t make adjustments after the export so you pick your poison. There’s not much noticeable difference from the others.
Click the above image to open an example that had Denoiser applied and a self-contained QuickTime exported and reimported into FCP before color correction was applied. 15 meg 900×506 H.264 QuickTime.
Magic Bullet Denoiser controls
There’s a number of controls available in MB Denoiser including a button to sample the current frame where the playhead sits, the amount of reduction applied and a setting for video or film. It seems that the default settings when you first drop it on a clip are quite nice. I didn’t really tweak the controls from their default on the clip above. It’s nice to have control options like Motion Estimation so you can help Denoiser decide what to do if your footage is shaky or more still.
The MB Denoiser controls in Final Cut Pro
The Show Noise Detection check-box under the Advanced Settings is interesting in that it shows a red overlay of the noise pattern:
I’m not sure of its usefulness but it’s there in case you need it!
Next Up: One more example of Magic Bullet Denoiser in action.
After I completed testing on the shot above I remembered an EPK I did earlier in the year that had a few noisy shots as well. It was shot with natural light in a recording studio, not the best setting for pristine footage. I went back and found one of the noisier shots from that piece and tried Magic Bullet Denoiser on it as well, using the same color correction from the original piece.
Click the above image to open the original clip in a separate window. 4 meg 900×506 H.264 QuickTime.
Click the above image to open the clip with color correction only in a separate window. 11 meg 900×506 H.264 QuickTime.
Click the above image to open the final clip in a separate window. 5 meg 900×506 H.264 QuickTime.
Click the above image to open a split-screen of the original clip and the final clip in a separate window. 5 meg 900×506 H.264 QuickTime.
I do wish I had had Magic Bullet Denosier when we shot that project but it was edited in Avid Media Composer 5 and the Magic Bullet Suite 10 (including Denoiser) is only available for After Effects and Final Cut Pro.
Denoiser is available as a stand-alone install for $99 or $69 for an upgrade if you were a Magic Bullet Steady customer. Check the FAQ for more details. And if you want the entire Magic Bullet Suite it’s $799 with upgrades ranging from $99 – $399. And there’s a trial version available as well. For compatibility options check the compatibility matrix.
You can see another example of Magic Bullet Denoiser in action via a recent tutorial at Creative Cow. Yes, we all know the COW never links to external websites but we’re bigger than that here at PVC and want to provide all the information we can to readers. They’ve got some different type of examples in that tutorial so it’s worth a viewing to see more about what Magic Bullet Denoiser will do.
I hope the little examples of Magic Bullet Denoiser in action have been helpful. If you have noisy footage then give the free download a try as it might make some unusable footage usable again. In a perfect world of shooting we wouldn’t need to denoise but it’s nice to know tools like these are available when we need them.

