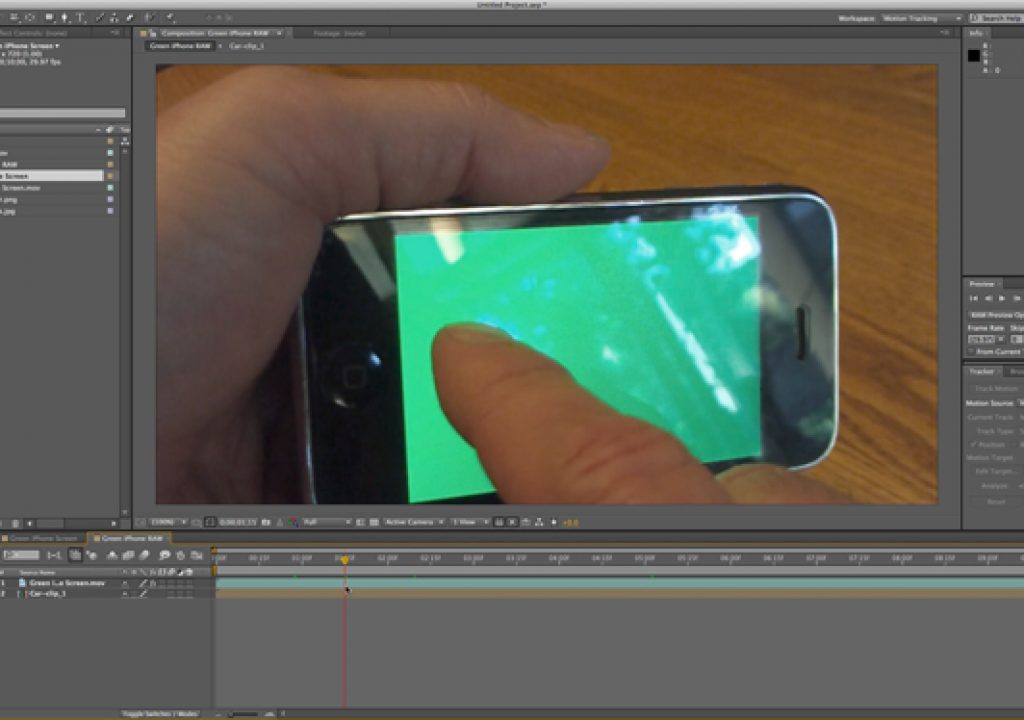
Amazingly, a lot of people don’t even know that they already OWN Mocha AE… it ships along with After Effects CS4 and higher and is a stand-alone application for providing planar motion tracking. You’ve probably already seen the trick of using Mocha AE to track and insert an image or a video clip inside an iPhone, but how about dealing with fingers on the screen and reflections on the surface? Sure, you could root out the fingers with the RotoBrush tool in After Effects and get pretty decent results, but that’s a fairly time-consuming workflow if you can avoid it.
This tutorial will show you how to take a video clip of an iPhone or iPad or any other handheld touch device set to a solid green screen, and insert your video clips or animations into to it perfectly, while realistically retaining the bright reflections on the shiny glass surfaces.
*NOTE: You can follow along with this tutorial by downloading the free project folder with included source files (After Effects CS5.5) at this link from my web site HERE.
Setting up the shot in After Effects:
The After Effects project has 3 comps in it:
Car-clip_1 – (include video and animation layers that create the insert for the iPhone screen)
Green iPhone RAW – (just two layers that include the iPhone clip and the insert comp)
Green iPhone Screen – (this is a completed comp for you to use as a reference guide)
You can choose to either follow the existing project or try your own video clip to insert into the iPhone in the comp. Just replace the Car-clip_1 subcomp layer in the Comp we’re working on.
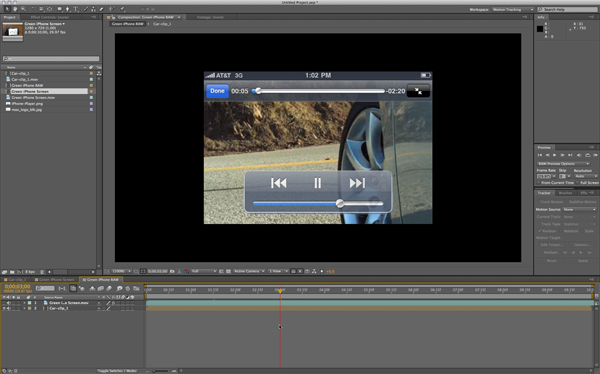
I’ll start with the Green iPhone RAW comp and note that I have the insert layer beneath the iPhone video layer. Ultimately, this is where the layer will reside when we composite, as the green screen will be extracted from the iPhone and reveal the insert footage beneath it – but first we need to get our tracking/corner pin data. For this we move to Mocha AE.
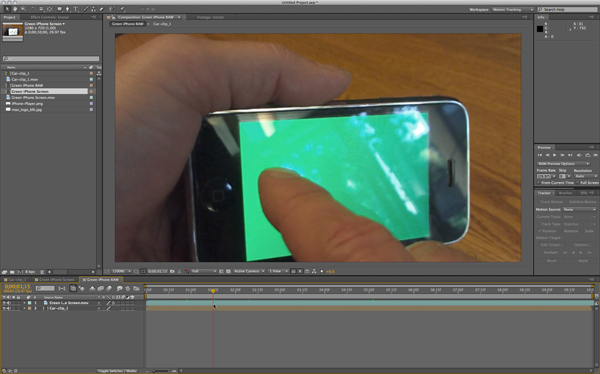
Motion tracking in Mocha AE:
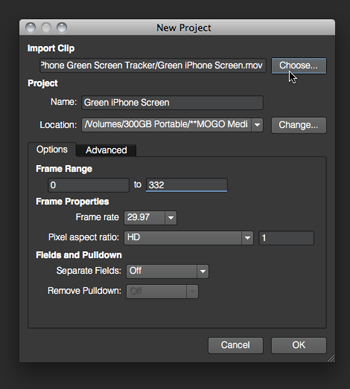
First you’ll need to launch Mocha AE. If you’ve never opened it before, it should be installed in your Applications folder along with your other Creative Suite products. Once you’ve launched it, select the top left icon to Create a new project. Start by selecting the “green iphone screen.mov” file from the footage folder inside your project folder. Mocha AE will extrapolate the rest of ht edit for you and fill in the other fields for frame range, frame rate, pixel aspect ratio, etc.
Once the footage file is loaded you can scale the clip to fit your screen resolution so it’s fully visible, using the Zoom tool (Magnifying glass icon). You can position the clip in the window with the Position tool (Hand icon). You need to see the entire cir to properly work on it.
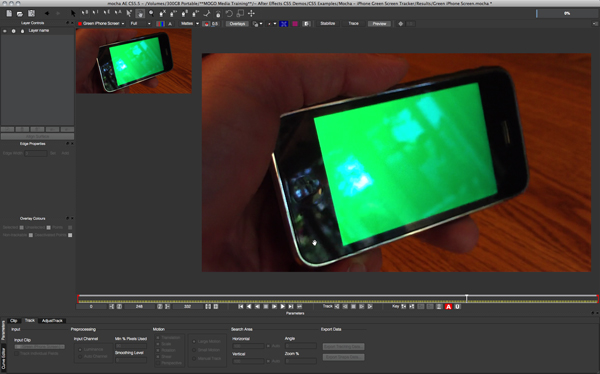
Next, we’ll need to set the tracking spline. In this particular clip, since the iPhone is off-screen for most of the first 2/3 of the clip, I start from a position on the timeline where it is fully visible to set my first (Master) keyframe. Keyframes are automatically created when you add or edit a spline.
Select the Create X-spline Layer Tool and click out around the edges of the four corners of the iPhone. You can reposition them to more closely “hug” the outter edges from this position using the Move tool, before starting your tracking process.
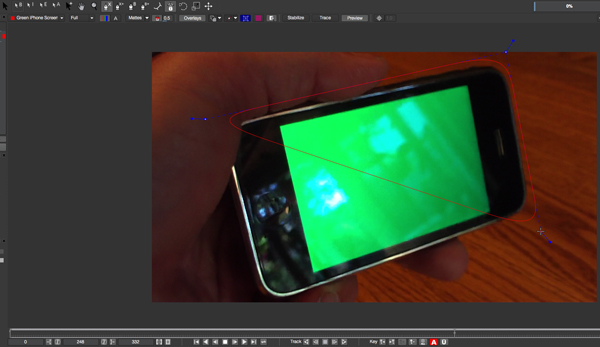
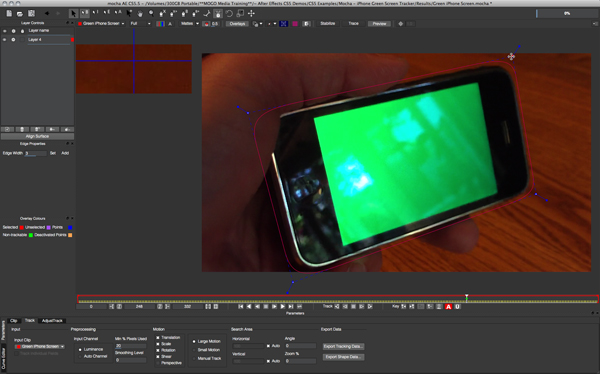
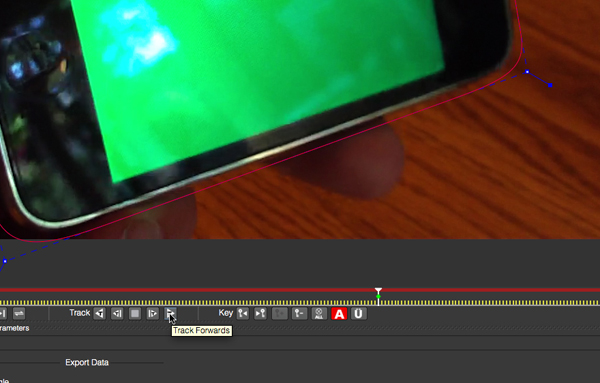
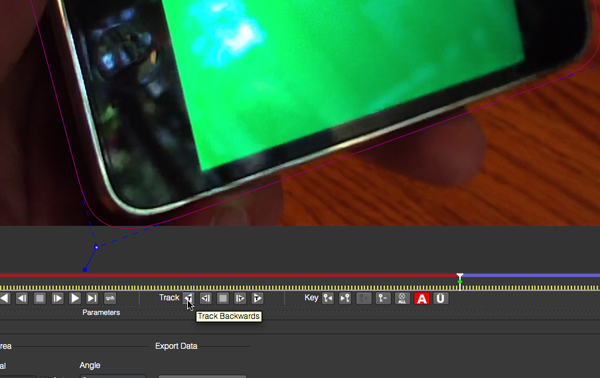
From the Master keyframe that you set on the timeline by creating the X-spline, start the tracking calculation process by first clicking the Track Forwards button. You will see a blue bar appear as it progresses along the timeline. Once it has finished, return to the Master Keyframe and selection the Track Backwards button and allow it to complete the analysis all the way to the first frame. It may appear to wander off a bit so if it gets too off track, stop it – reposition the X-spline handles and continue. Scrub though the entire timeline and make corrections as necessary by adjusting the handles of the X-spline. Mocha AE is smart enough to make necessary changes between keyframes for you so minimal correction should be necessary.
Setting the Planar Surface Corners:
Once you’re satisfied with the tracking X-spline, then select the blue Planar Surface button in the top toolbar to activate it. A blue rectangular wireframe box will appear over your clip. Click on the corners of the wireframe box and position each just at the corners of the green screen on the iPhone. You’ll see a detail window in the upper left corner that shows a close-up for accuracy.
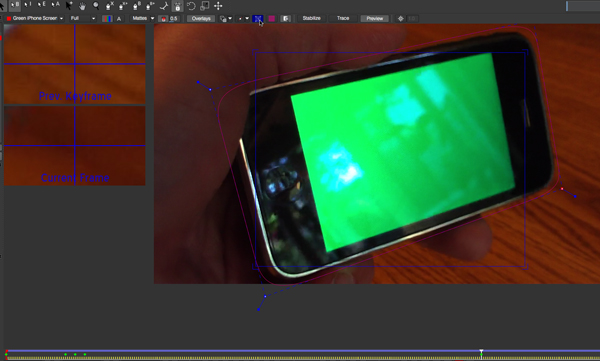
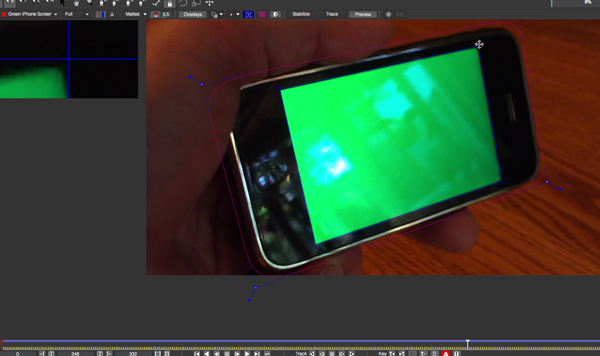
When you playback the clip with the tracker in motion you’ll see places along the timeline where the planar surface may go off track. You can manually move the planar surface corners with your mouse or use the Nudge features to more accurately reposition the point. Select the AdjustTrack tab on the bottom left of your screen and notice the Nudge buttons. You can refer to the detail insets at the top left of your screen to see how much your points need to be adjusted, compared to your Master Keyframe. I usually start with the center “Auto” button to see how accurate it is and then manually make adjustments from there if necessary.
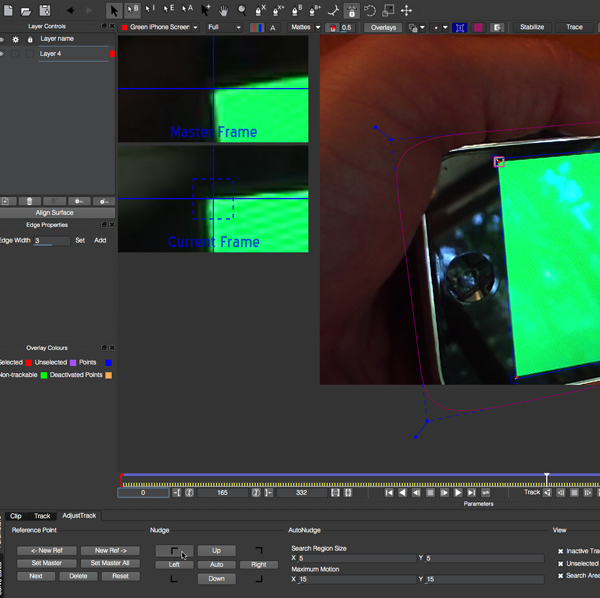
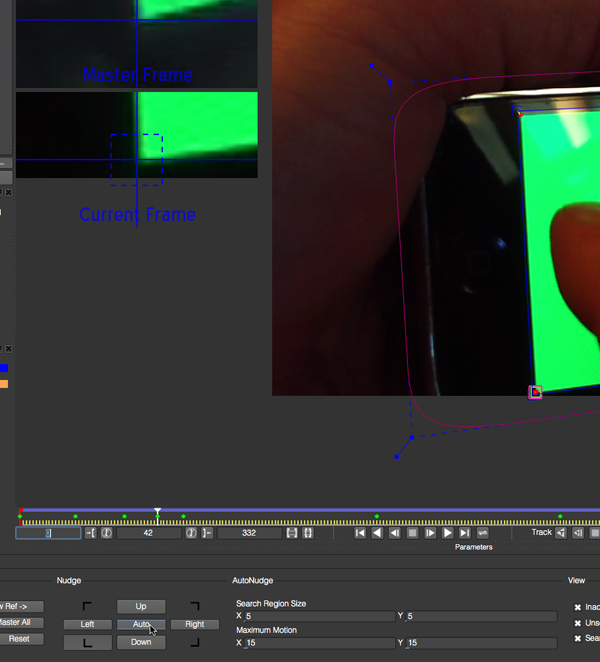
Once you’re pleased with the tracking and planar surface, select the Export Tracking Data option on the bottom right of your screen. You can either save the data as a text (.txt) file or Copy to Clipboard (quickest/easiest).

Return to your open After Effects project and select the Car-clip_1 layer and be sure you are on Frame 0 on the timeline (hit the “home” key on your keyboard). Then “paste” the data from the clipboard (CMD+V / CTRL+V). This will insert all the keyframes for the Corner Pin effect onto this layer. Your image may appear to be way off to the side or along the bottom, but don’t worry, we can fix that easily.
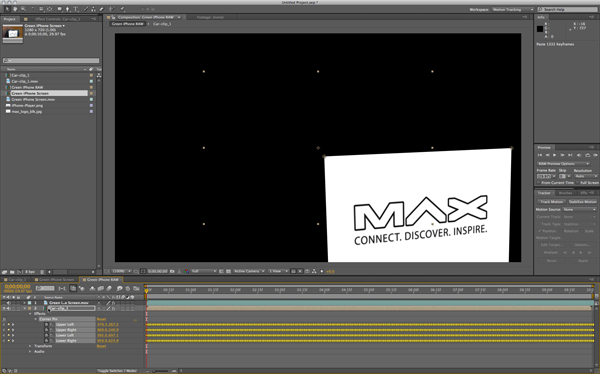
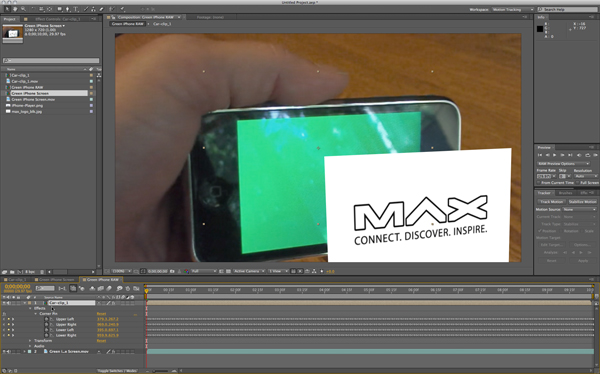
To make the alignment of the insert clip layer, move it to the top of the layer stack in the After Effects timeline so it appears on top of the iPhone clip. Then adjust the Anchor Point X & Y dimensions until the corners line up over the iPhone clip layer as shown. I usually just click-slide over the X & Y numbers until it’s aligned visually. Now you can move the layer back to the bottom of the layer stack, underneath the iPhone clip layer.
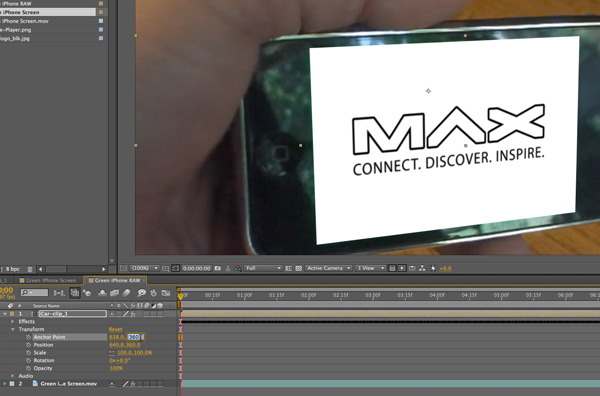
Next, apply the Keylight effect to the iPhone clip layer (Effects>Keying>Keylight) and use the eyedropper to select a section of the green screen that’s out of the reflection area. This will produce the initial keying of the composited layers.
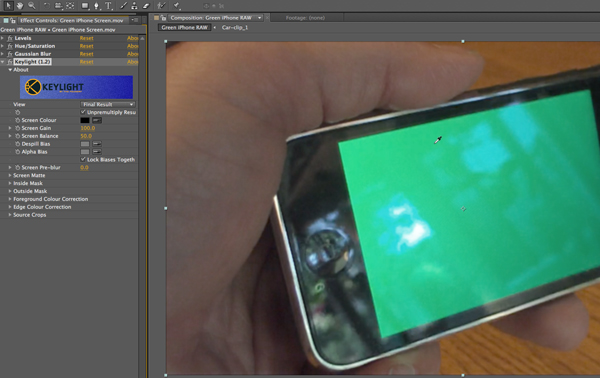
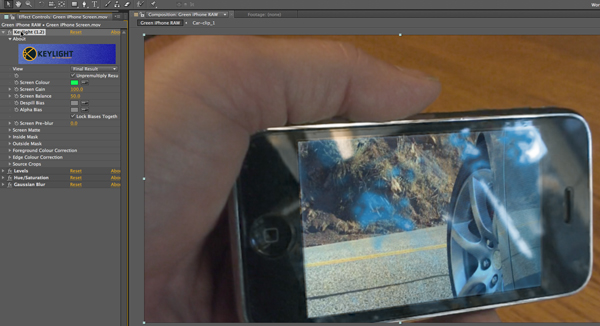
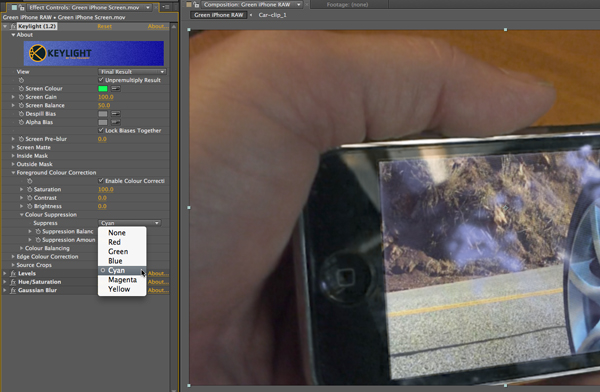
Since the highlights are so intense at this point, we need to move the Keylight effect to the top of the effects stack in the Effect Controls panel so that it’s before the Levels, Hue/Saturation and gaussian Blur effects that have been previously applied to the clip. We’ll then twirl-down the Foreground Colour Correction controls in Keylight and set the Suppress Color Suppression to Cyan.
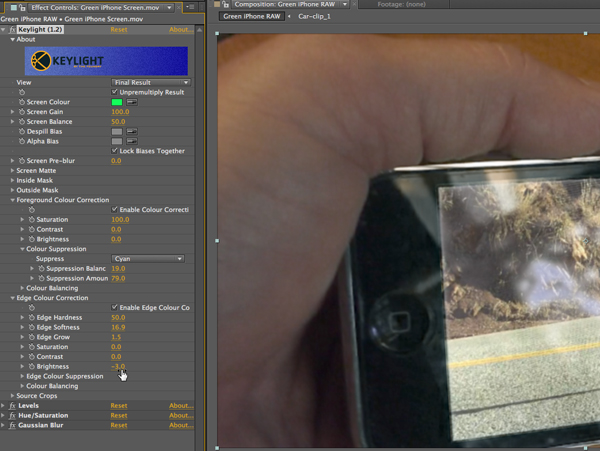
Finally, twirl-down and enable the Edge Colour Correction and reduce the brightness to -3.0. These settings will take out the added blues from the iPhone’s reflections and give a more natural appearance.
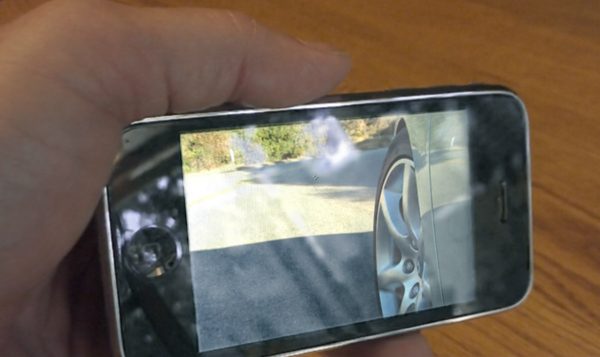
Here’s the before & after video of the result below:

Filmtools
Filmmakers go-to destination for pre-production, production & post production equipment!
Shop Now