
In Part 1 of our exploration of Motion’s Order of Operations, or OoO (which you can find here), we looked at a situation where a drop shadow applied to a layer would rotate with the layer because transformations are calculated after effects. Today, we’ll look at another common issue that can arise when working with still images.
The scenario: you add several photos to Motion that you took with a digital camera or purchased from a stock photography site. You then add some filters and find that Motion’s performance begins to suffer. You are working in a simple 720×480 DV project and so you wonder, what’s going on here?
Let’s take a look. Here’s a photo in the Canvas after importing and adding a gaussian blur filter cranked up to 64:
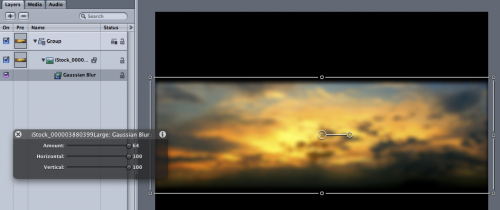
There are two issues here. The first is the impact of the filter. Even though the blur amount is cranked up as far as you can go in the HUD (tip: you can go higher in the Inspector), the photo isn’t blurred much at all. The second issue is performance: without the blur applied, this project plays back at a full 30fps on my MacBook Pro. With the filter active, it plays back at a measly 2fps.
The preview window of the Inspector gives us a hint as to what is going on:
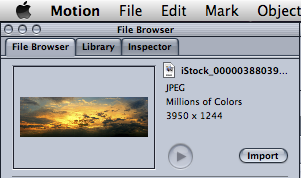
Note that the dimensions of the photo are 3950 x 1244. This is a large photo (although not so large by digital camera standards), and Motion is automatically resizing it to fit the Canvas. Note the Scale parameter in the Properties tab of the Inspector:
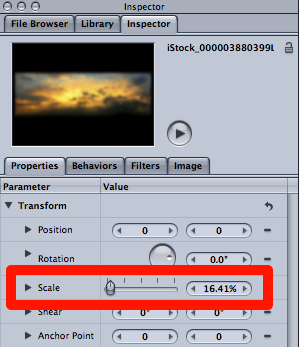
Motion has scaled down the image to 16.41% of its original size to fit in the Canvas.
So if you didn’t check the Inspector, you may not realize you are working with an image that may be much larger than you need. You may think it shouldn’t matter how big the original photo is because you have scaled it down before adding the blur filter, but here’s where the Order of Operations will get you: filters are applied before transformations, so the full size photo is loaded into RAM, blurred, and then scaled down. This is why the blur has such little effect – you are blurring a very large image.
To get around the order of operations issue, you can apply the same technique discussed in Part 1: namely, move the filter from the layer itself to the group containing the layer. Here’s the result:
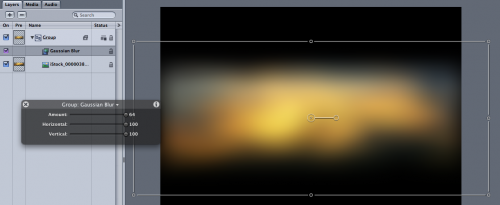
Note how much blurrier the image is – but as you can see in the HUD, the blur amount is unchanged at 64. With the filter applied to the group, the image is first transformed (in this case, scaled down), then the filter is applied to the smaller image.
By switching the order of operations, we’ve also dramatically improved playback performance: from 2fps to 14fps.
But the best solution is to first use an image manipulation application like Photoshop or even Preview to create a lower-resolution of your image, and import that version into Motion. This way, Motion doesn’t need to scale the image at all – and, you can get the same amount of blur with a lower setting, which will improve playback performance.
What resolution should you use? A general guideline is to make it large enough so that you never scale the image up over 100%. So for a DV project where you don’t plan to “pan and scan” the photo by scaling it up, 720 x 480 would be enough. For our example, since the photo is wider than our DV aspect ratio, we would need to resize its height to 480 pixels, allowing the width to scale proportionally.
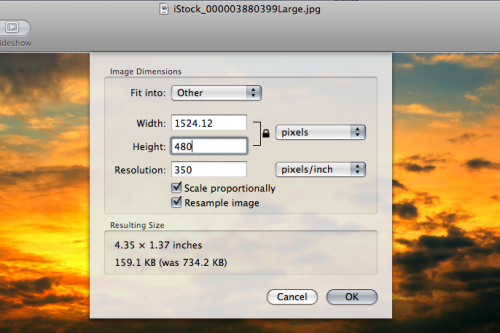
Preview’s Resize dialog, found under the Tools menu. I set the height for 480 and let Preview calculate the width. The Resolution setting does not matter for video.
A few side notes:
1) You may have noticed, especially in the the last image, the black edges of the blurred photo. This is due to the blur filter pulling in “blank” pixels from outside the Canvas – to fix this, select the Crop checkbox in the Filters tab of the Inspector.
2) If you don’t want Motion to automatically resize your images when you add them to the Canvas, you can change this default behavior in the Project section of Motion’s preferences (choosing “Down-Res to Canvas Size” is a quick way to deal with this issue).
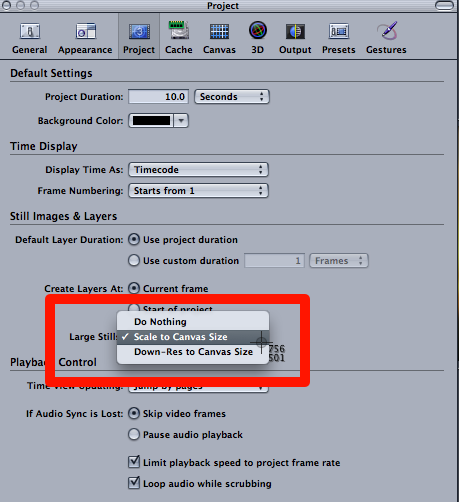
3) For photos to appear completely distortion-free in a non-square pixel format like DV, you need to do some additional work which I did not cover here (for a blurred background like this example, it’s not necessary). For more information on working with still images for video, I highly recommend Rich Harrington’s book.
For more training on Motion, check out my DVDs available from Ripple Training.


Filmtools
Filmmakers go-to destination for pre-production, production & post production equipment!
Shop Now


