DaVinci Resolve 15 was a big update at NAB 2018. It began with the buzz that Fusion was getting added into Resolve (like Fairlight the year before) since there was a big banner splashed on the front of South Hall. Once the Blackmagic Design press conference had wrapped Fusion was the big thing for Resolve 15 but digging into the update during the days after it became obvious to me that Fusion is less important from an editorial standpoint that some of the edit page updates that found their way into 15.

Fusion is less important IMHO because if Blackmagic truly wants Resolve to penetrate the creative editorial market then it’s little things like my top 5 list below that craft editors will take notice of. That’s not saying Fusion isn’t important but as great as Fusion and Fairlight and color grading is, if it’s too difficult to cut picture then editors aren’t going to use it for the craft edit.
But Resolve 15 did add a lot of little things to the edit page of version 15. There’s a whole What’s new section in the expansive Resolve manual that goes through a lot of these little things and is well worth the read. Blackmagic engineers are definitely working hard on bringing the basic editorial features up to par (and in some cases beyond) with what their Avid, Adobe and Apple rivals have had years to do. It has been and will continue to be an interesting journey to watch.
In addition to my tip 5 features I have also embedded my interview with Blackmagic Design’s Director of Sales Operations Bob Caniglia. I sat down with Bob a couple of years ago at an NAB past and had a similar conversation. While we talked a bit about Resolve 15’s new features I was more curious about where Bob thinks Resolve’s place in the world might be. Scroll down to the bottom for the interview.
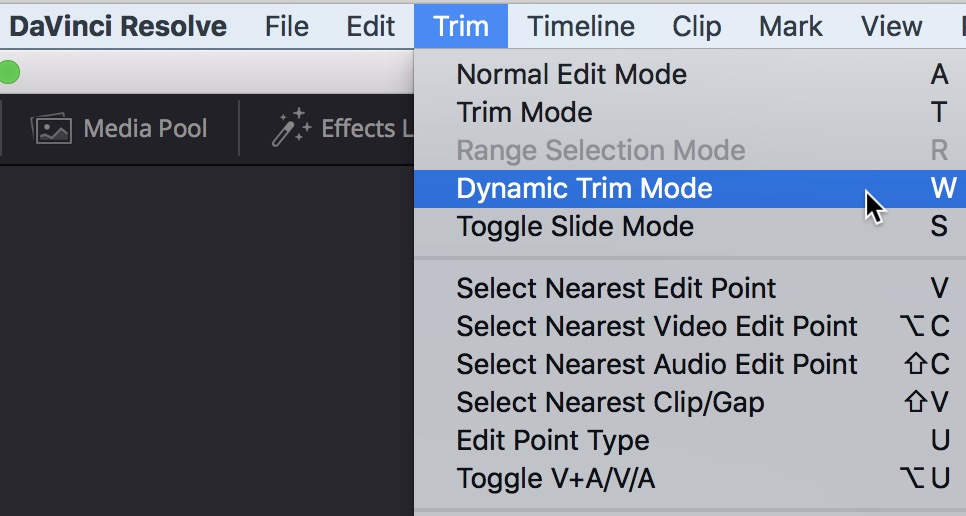
#5 Pressing W to Enable Dynamic Trimming Automatically Selects the Nearest Edit
Avid editors will like this little enhancement. Like the description says when you hit W to enter Dynamic Trim Mode the nearest edit is automatically selected as the playhead jumps to the edit ready for a trim. That’s a bit of time saved as you don’t have to manually move to the edit or select it yourself.

I’m still wrapping my head around how Resolve’s trim operates and I’m not convinced it’s any better than anything else. It’s definitely usable just … different.
#4 Play Again Command
This little addition allows you to “restart playback from where the playhead began without stopping.” That seems insignificant at first especially when you’ve trained yourself to mark an IN point before you begin playback. But with this new feature, using OPTION+L, that mark IN before playback can be a thing of the past.
No matter where you begin playback from just hit option+L and the playhead will jump right back to the frame the playhead was on when you hit play.
#3 Linked Move Across Tracks
Sometimes features updates seem small and insignificant but they are little things that craft editors have longed for. One of those is the new menu item for Linked Move Across Tracks.
With this checked/turned on, when you click and drag a video or audio clip that has attached video or audio to another track then the attached audio/video will follow to another track as well. Turn it off then dragging the attached video/audio doesn’t move to another track. Small but a nice timesaver.
I wish this preference would also work using the OPTION + Up/Down arrow moving clips from one track to another.
#2 Convert In and Out to Duration Marker
I do love markers in my NLE that can be set to a duration or extended/spanned marker. No NLE has really gotten this right yet. Adobe Premiere Pro comes close but you can’t turn an IN to OUT into a extended marker. You can do that in Media Composer but Avid’s spanned markers only exist in the Source monitor or the timecode track of a timeline. Final Cut Pro X doesn’t really do them at all.
In Resolve there is now an option to Convert In and Out to Duration Marker. You can also do the reverse of that as well.
#1 Fade In and Out to Playhead Trim Commands
This little gem gets my numero uno spot because up until this release this little feature has only been possible in Media Composer.


