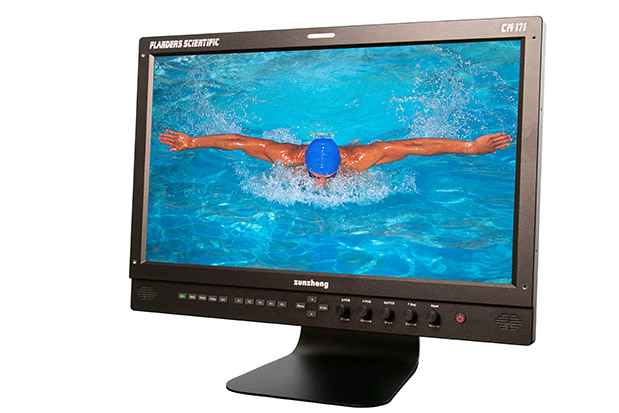
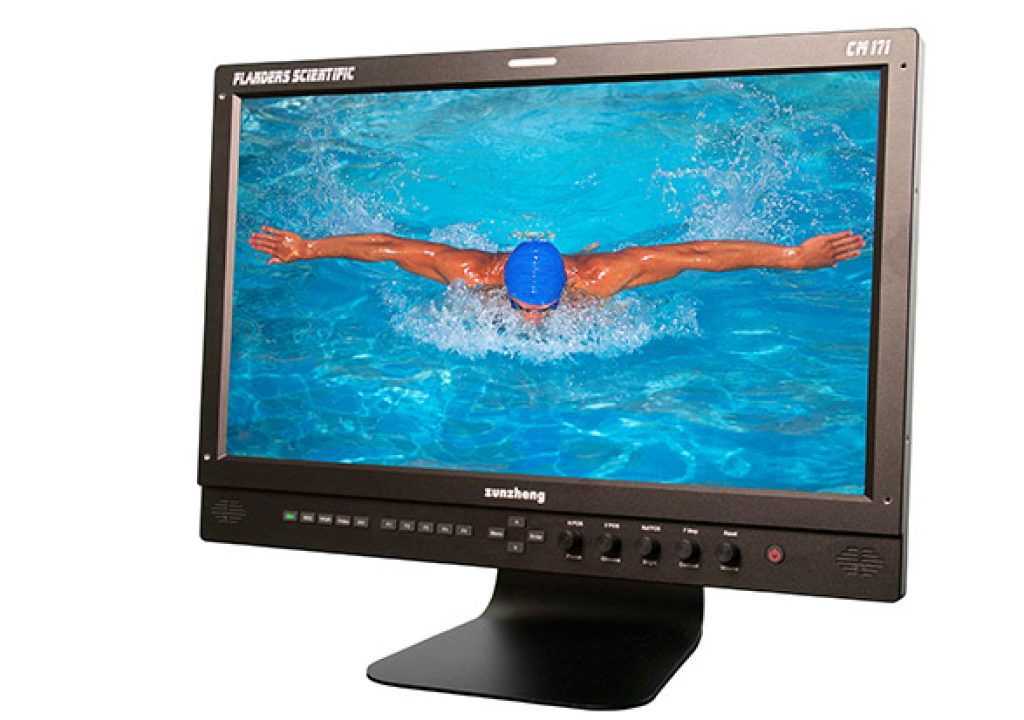
A few months ago, I put together the ultimate field monitor — for my purposes, anyway. I’m so happy with it that I find myself talking it up to clients, fellow shooters, and now to you, dear Reader.
Here’s what makes this monitor — really, this monitor rig — so great in the field:
- It’s 17.3”, which is just big enough so you can appreciate what’s going on in your scene.
- It’s a full 1080 panel (actually, it can do 2K at 2048×1080), so you’re seeing every pixel your HD camera records.
- It displays 10-bits color depth as opposed to the more common 8 bits, so, again, you're seeing what many new cameras are capable of recording.
- It weighs only 6.4 pounds (less than many Mac laptops), so you can move it around very easily. I mount it on a standard Matthews Medium Duty stand, and can move it around with one hand.
- It only draws 28 watts of power, which means it can run for a long time on a big battery. One of my Dionic HC batteries can drive it for a little less than 3 hours, and a big Dionic 160 battery can go for more than 5 hours.
- It connects to cameras wirelessly using a Paralinx Arrow receiver, so there are no long HD-SDI cables cluttering the floor and just begging for someone to trip on them.
- It can show two camera angles on screen at once (and even the second angle comes in wirelessly via a second Paralink receiver).
All these features make for a very versatile monitor. Being able to run a big monitor for hours without plugging it into a wall is extremely liberating. It makes getting ready for new setups much quicker and also cuts down time spent blocking and lighting. On small jobs, I constantly walk the monitor around to each light on my set to tune it, scrim it, flag it diffuse it, dim it, etc., instead of running back and forth between the light and video village. Showing two angles at once — without additional hardware like a splitter — is also really convenient for the dual camera shoots that I do frequently these days. It’s especially useful for getting eye lines matched (or sufficiently different, if that’s the goal) in interviews.
Cost-wise, my rig isn’t exactly cheap — with two wireless angles, the damage can come close to $6000! But chances are, you already have some components on hand (like a big battery, or a wireless transmitter/receiver), so the financials aren’t likely to be quite so painful. Regardless, the monitor speeds up every job as well as impressing clients, so it’s worth the splurge for me.
Here’s how I put the monitor rig together…
The Monitor – Flanders Scientific CM171
The heart of my setup is the 17.3”” Flanders Scientific CM171 ($2495), which gives you a 10-bit 1080 LCD panel, a 6.4 pound weight, and a 28 watt power draw, plus the ability to show two SDI inputs side-by-side.

My “rig” isn't so pretty from the backside, but it fits a remarkable amount of add-on gear, mostly attached via velcro.
From the side, the monitor rig is about 7.5 inches deep—eneough to still fit into the Flanders small soft case.
You can order the Flanders with a streamlined light-stand mount ($295), as well as an Anton Bauer or V mount battery back ($195). You can also order it with a clever soft case that keeps the weight down, but also features a built-in sun hood. Indoors, I usually just take the monitor out of the soft case, but if we’re shooting outside, I’ll leave it strapped into the case, mount the whole thing on a stand, and then extend the case’s hood flaps.
The monitor also has built in LUTs for adding rec709-style contrast to video shot in Log, with separate options for Canon Log, Sony Log and others. Plus, you can load up to 16 custom 3D LUTs into the monitor. You can build the LUTs in standards like Resolve, and then convert them to Flanders’ custom format using apps like LightSpace CMS or Lattice.
For my purposes, the only hitch with the Flanders is that it has two HD-SDI inputs (and outputs) but no HDMI input. HDMI is what my Paralinx Arrow receivers use to bring wireless video to the monitor, which is brings us to the next bit of gear on my rig….
(Note: the CM171 does have a DVI connection, and you can indeed get an HDMI-to-DVI cable to connect the Paralinx receiver to the monitor’s DVI port, but the image won’t be as sharp or as colorful as you’ll get by using the monitor’s HD-SDI inputs).
Showing two angles at once is one of the unique features of Flanders monitors that you don't find in many other brands.
The Converters — Atomos Connect H2S
The Connect H2S ($295) is a palm-sized gadget that converts HDMI into an SDI signal. At 4 ounces, it’s very lightweight and can run for an hour on an internal, rechargeable battery. That’s useful in a pinch, but it also ships with an add-on battery (based on Sony L series specs) that can power the converter for another 10 hours to get you through a day. You can also power the Connect with a p-tap.
With the help of a little velcro, I’ve attached two of these Connects to the backside of my Flanders monitor. Each one plugs into a Paralinx Arrow receiver via a 12” HDMI cable ($12.95) on one end of the converter, and a 10” coiled HD-SDI cable going to one of the Flanders’ SDI inputs.
When I start a shoot, I clip the small 10 hour batteries into each Connect, and press a little power button to get things going. An LED shines green to show that the converter is doing its job.
The Wireless Video —Paralinx Arrow
I use a Paralinx Arrow Plus receiver ($1049 for receiver/transmitter) to bring each camera angle to the Flanders CM171, wirelessly. The Arrow transmits 1080 video up to 60 fps with 4:2:2 subsampling at 10 bit color depth, so it accommodates full-quality video from most cameras, with no latency. Advertised range is up to 300 feet with line of site, and 150 feet with obstacles, but real world usage can vary wildly. Still, after using an Arrow for about 2 years, I've never found range to be an issue for conventional jobs.
As I said above, the Paralinx is at a bit of a disadvantage when working with the Flanders monitor, since the receiver only has an HDMI output, and the Flanders uses HD-SDI inputs. But besides that issue (which is solved by my Atomos converters), the Arrow is pretty ideal for a couple of reasons…
- The receiver is small and lightweight, so I can just velcro each one to the back of the monitor, or to the back of the Anton Bauer battery that I almost always have attached to the monitor.
- The Arrow receiver comes with p-tap cables, so the Anton Bauer battery that I use to power the Flanders also powers both receivers (the Flanders battery plate has only one available p-tap, but I use a $59 Anton Bauer PowerTap Multi to turn that into 4 taps).
- The Arrow transmitter, which goes on my Canon C300 cameras, is very small so it doesn't weigh down the camera or make it unwieldy for handheld work.
- Finally, the Arrow is relatively affordable. An Arrow Plus transmitter and receiver costs $1049, whereas a competitor like the Teradek Bolt 300 package is almost three times as much at $2990! The Bolt has more features such as HDMI and SDI input/outputs, and a USB 3 port for sending video to a DIT system, but the Arrows work great for my purposes. (Note: I would always recommend getting an Arrow Plus versus a plain Arrow. The Arrow Plus transmitter can send its signal to four different receivers, which lets me broadcast a camera angle not only to the Flanders monitor, but also to a wireless 7” handheld monitor that I give to directors and producers).
The Arrow transmitter sits in a small protective shield (an add-on accessory). I velcro a Mophie 2.1 amp USB battery to the side, which powers the transmitter for almost 3 hours.
I use a Redrock Micro doohickey to attach the transmitter shield to a 4' 15mm rod, which goes into my MovCam top handle.
Wrapping Up
So there you have it. My monitor rig doesn’t look very slick from the back, and I could still spend some time tucking in cables to clean it up a bit. But the whole rig, fully assmbled, still slips into my Flanders slim softcase, and I can pull it out with one hand, and get it completely set up on a light stand in about 60 seconds.
Being able to run dual camera angles completely wirelessly all day long on just one or two batteries makes this rig one of my favorite pieces of gear.
Pros
- 17.3″ screen is a decent size
- 1080, 10-bit panel
- Lightweight at 6.4 pounds
- Runs on an Anton Bauer battery for hours
- Can show two wireless camera angles at once
Cons
- Not cheap to put together (neighborhood of $6K)
- A few batteries to keep charged
- The backside of the monitor doesn't look too pretty
Helmut Kobler is a Los Angeles-based DP and cameraman. www.losangelescameraman.com.


