It wouldn’t be NAB without Blackmagic updating Resolve. 2016 brings Resolve 12.5 with enough features to warrant a .5 update. Apparently that wasn’t planned but as the features kept getting added it seemed only appropriate. I won’t make any attempt to outline the new features here as Steve Hullfish took a tour of the 12.5 beta right after it was released and outlines a few or his favorite things.
I sat down for an audio interview with Bob Caniglia about Resolve 12.5. While asking about performance improvements were at the top of the list I was also curious about where Blackmagic sees Resolve slotting into a rather crowded and diverse NLE market.
I’ve played around with the Resolve 12.5 beta a bit and it is a big update. The first thing that I noticed was that the designers have taken what was an overly stuffed EDIT menu and broken all the commands in that menu out into several other menus as well. This makes sense as Blackmagic continues to push Resolve deeper into editor’s hands. I’ll have to update my Resolve keyboard cheatsheet!
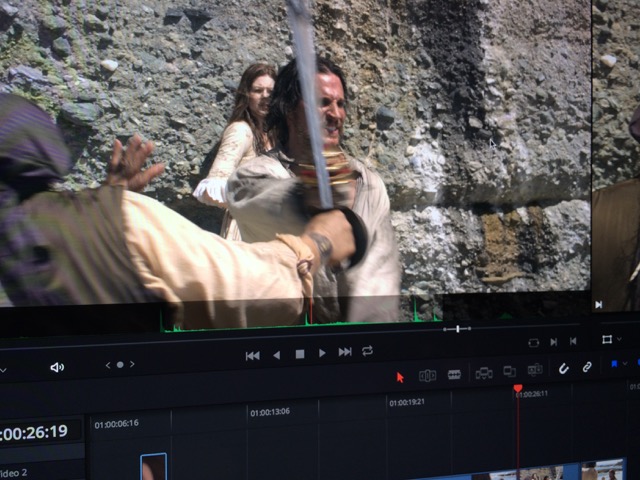
Here’s a few things I noticed while looking at Resolve 12.5 on the NAB show floor.
For a more comprehensive list of all that is new just give a scan to this long list up updates posted by BMD over on the Blackmagic forums. Yep, that’s a lot.
Significant New Features
- Improved edit timeline and color page UI performance
- Fusion Connect lets users send a clip(s) from the edit timeline to Fusion for compositing and when returned from Fusion they automatically replace the originating edit timeline clips
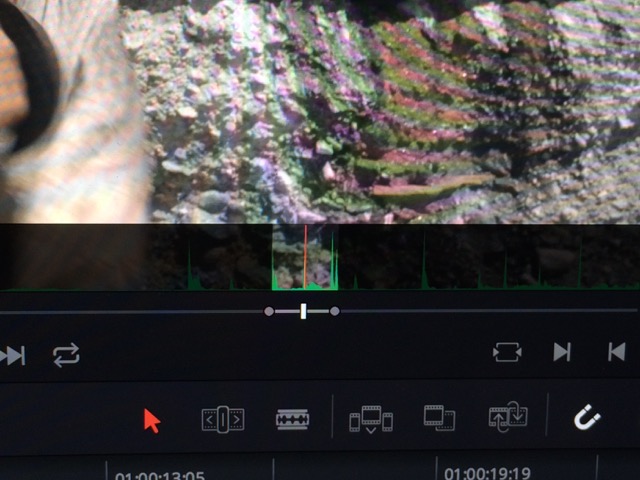
- The Source viewer now includes an optional Audio Overlay on Video
- Primary color palettes now include Temperature and Tint sliders
- Resolve FX – Film Grain, Lens Flares, Lens Blur, Light Rays and others
- Dramatically improved Spatial Noise Reduction – DaVinci Resolve Studio only
- Extended HDR grading controls, HDR scopes, HDR support for 16bit cache formats and HDMI 2.0a metadata – DaVinci Resolve Studio only
- Redesigned and improved Log grading controls with a Project Setting option to switch between legacy and new behaviour
- Improved management of nodes and links in the Node editor
- Expanded Marker feature set
- Improved Titles with support in place editing
- Metadata keywords are now stored as text bubbles which are saved in a user dictionary and can easily be appended to multiple clips
- Easy to use Tags are now supported in Display Name, Burn-ins, render filenames and render paths
- New Media Pool Power Bins allow sharing content between multiple user projects
- You now have the ability to adjust via the inspector parameters for all selected clips or transitions
- Ability to create User Transition Presets
- Power Windows and ResolveFX can now be tracked with a Point tracker
- Edit Sizing now includes Lens Distortion Correction – DaVinci Resolve Studio only
- Added selection for 3:2 rendering of 23.976 and 24fps to 29.79fps and 30fps
- Audio can now be rendered in a single track or one track per channel
- Clip Retime effects are now adjustable using a Retime Curve in context with the timeline clip
- Dynamic Zoom for fast start and end positioning of still image transforms
- Expanded Multicam feature set
- Interlaced media can now be de-interlaced with optional normal and for some clips a high setting – DaVinci Resolve Studio only
- Added support for DaVinci Color Transform Language, .dctl for user defined color transforms – DaVinci Resolve Studio only
- Resolve Color Management now includes a checkbox and dropdown menu to separate gamut and gamma options
- Support for several new edit Transitions
- Expanded Keyframe and Curves feature set in the Edit timeline
- Clip metadata for selected or all Media Pool clips can now be imported with selection rules or exported using .csv format
- Spanish interface support
Edit – Key new features
- Improved edit page timeline performance
- Editing commands have been reorganised into Edit, Trim, Timeline, and Clip menus for speed and ease of use
- The Cinema mode is now available for Edit Page viewers
- You can now seamlessly switch in and out of Cinema mode during playback
- Metadata palette is now available on the Edit Page
- The header of the metadata window indicates focus between Media Pool, Media Storage and Timeline
- You now have the ability to adjust via the inspector parameters for all selected clips or transitions
- Users can now select, drag, Copy, Cut, Paste and Delete Individual and multiple Keyframes at the same time in the timeline keyframe window
- Fusion Connect lets users send a clip(s) from the edit timeline to Fusion for compositing and when returned from Fusion they automatically replace the originating edit timeline clips
- Dynamic Zoom for fast start and end positioning of still image transforms
- Option to soften the crop in the Edit Inspector
- Users can now swap timelines between timeline and source viewers
- Clip Colors can be assigned on Media Pool clips via metadata window and on the edit timeline clips via contextual menu
- All clips in the timeline including titles, audio clips, generators can now be dragged into any Media Pool bin to make a copy
- The zoom range for transforms is now increased to 0 up to 100
- Edit Sizing now includes Lens Distortion Correction – DaVinci Resolve Studio only
Edit Speed Improvements
- Swap and Shuffle edits can now be performed with multiple clips and including those with different video and audio in and out points
- Added new Trim operations with shortcuts;⁃ Resize In or Out Point to Playhead
⁃ Ripple In or Out Point to Playhead
⁃ Roll In or Out Point to Playhead
⁃ Select Nearest Edit and Resize In or Out
⁃ Select Nearest Edit and Ripple In or Out
⁃ Select Nearest Edit and Roll or Slip
⁃ Select Nearest Clip and Slide or Move
- Timeline In and Out points can now define the Copy and Cut operation limits
- Ripple Cut clips from the timeline using keyboard shortcut or contextual menu
- Paste Insert clips into the timeline using keyboard shortcut or contextual menu
- Fit To Fill now automatically uses the duration of the timeline clip or gap that intersects the playhead if not otherwise defined
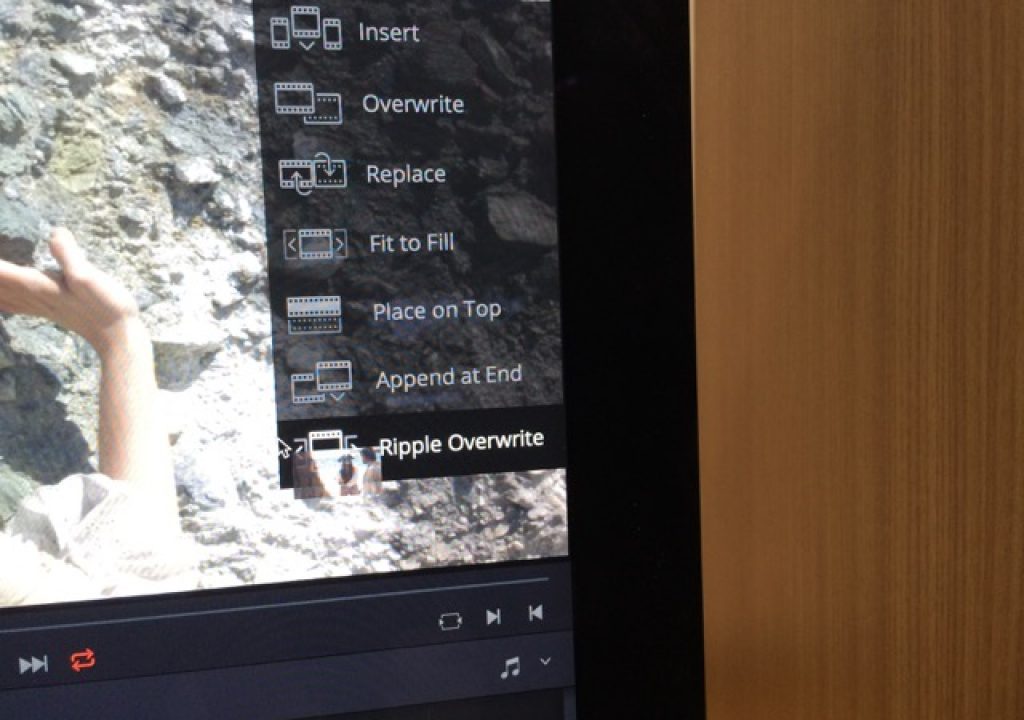
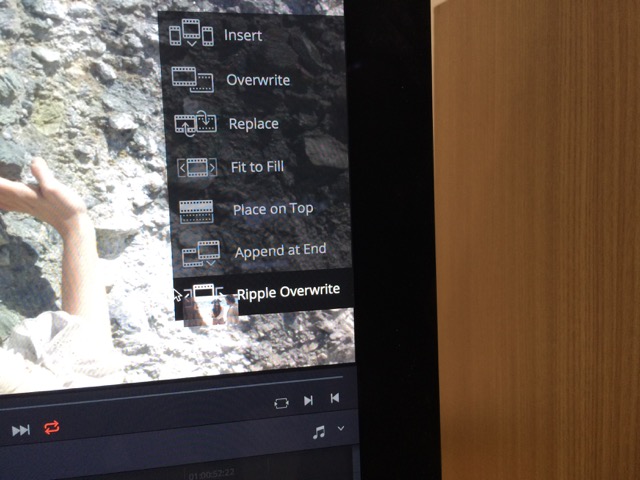
- Ripple Overwrite and Append edits now have overlays when dragging a source clip into the Timeline Viewer to create an edit
- Preview Marks are now optionally displayed for three point edits. If you define three of the In-Out points, the automatic fourth edit point is indicated with a mark to let you preview the edit you’re about to perform
- An optional and adjustable length shadow around Playhead selectable in View menu
- Using the Go to In or Go To Out shortcuts you can jump to in or out Preview marks
- With a Project Settings option, dragging a clip from the Source Viewer to the Timeline Viewer to perform an edit will use the last edit overlay you used when dragging the clip into the large undefined region of the Timeline Viewer
- It’s now possible to add video-only or audio-only transitions separately using two new menu commands and keyboard shortcuts
- The previous Paste Attributes selections are now saved for the next paste attribute operation
- With Command + Drag a compound clip or timeline from the Media Pool or source viewer will decompose nested sequences prior to adding to the timeline
- Command + Drag a compound clip or timeline from the Media Pool or source viewer can be changed dynamically while dragging
- A popup dialog, with an option to automatically trim clips, is displayed when Transitions are added to timeline clips with insufficient handles
- New Trim Menu items to switch between Slip and Slide mode
- Multiple In or Out points can now be trimmed in single frame increments or multiple frame increments (using Command key)
Speed Effects
- Retime controls now follow Trim or Normal mode to either ripple or overwrite adjacent clips
- Within the Retime control window clips can be retimed from the top left handle and top right handle
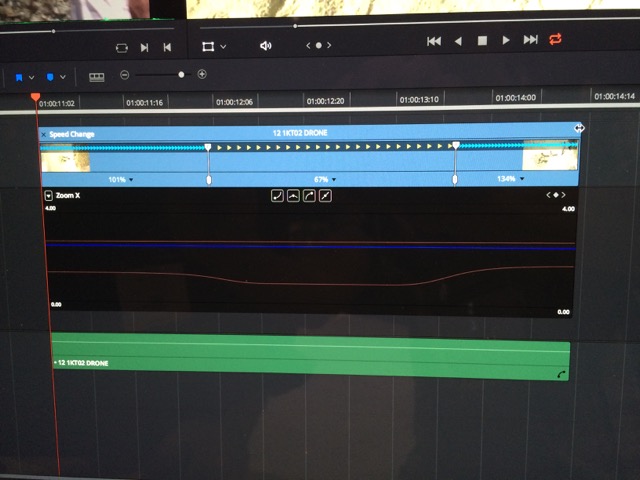
- Clip Retime effects are now adjustable using a Retime Curve in context with the timeline clip
- Clip Retime effects now include a positive and negative Speed Curve
- A new Clip Retime Curve includes variable speed changes with interactive speed and position curves Keyframes and curve control points
- Shift Command C now opens the Keyframe editor
- Shift C now opens the Curve editor
- Clip keyframes and curves can now be toggled on or off independent of each another
- The current curve can be selected by clicking on the parameter text
- Clicking a curve highlights the corresponding parameter in the inspector
- In the keyframe curve editor the command arrow keys now allow you to move one or more selected keyframes by frames
- Keyframes can now be navigated on the curve editor using navigation buttons
- Option clicking on the keyframe curve now adds a control point and keyframe
- Keyframes and Keyframe curve control points can be selected via lasso
- Multiple keyframes control points can be cut, copied and pasted
- Multiple keyframe curve control points can be copied, pasted or deleted
- Option-dragging one or more selected keyframes now duplicates them
- Option clicking on the keyframe editor now adds a keyframe
- Keyframes control points in the curve editor can now be freely dragged in any direction
- Shift-dragging keyframes control points lets you constrain the movement in only one direction
- Hover over keyframe curves displays the curve name and setting
- Improved curve UI refresh with Inspector performance
- Retime Keyframe curves display includes adjustable scaling range values on the left side top and bottom
Markers
- While in Trim mode a new Ripple Marker option ripples timeline markers
- Markers with duration are now supported
- Option dragging an existing marker converts the marker to a duration marker
- Dragging the in or out point of a duration marker extends or shortens the duration
- Click dragging the duration marker moves along the timeline
- During source playback you can add and edit markers
- Markers with notes now support a hover tooltip for easy marker information review
- Improved Markers and Flags UI with more info and ability to switch flag colors, remove current marker or flag and set marker durations
- Viewers and Timeline ruler now have a context menu for easy marker action access
- Multiple Viewer Markers can now be selected, moved, and deleted
- Multiple Timeline Markers can now be selected, moved, and deleted
Titles
- Improved title editing performance of titles with in-place editing and re-sizing control within the timeline viewer
- Title and Video parameters are now in separate tabs in the Inspector
- Title elements within a multi-title item like Lower 3rd can be transformed independently
- Color picker dialog changes are now displayed in real time on the viewer
Multicam
- Multicam editing now includes additional menus and keyboard shortcuts for:⁃ Switching pages of angles
⁃ Switching to the next and previous angle
⁃ Changing between audio/video/both switching
- You can now review and select multicam angle in the Media page viewer
- New Multicam viewer settings include a one up and side by side display
- Clips from the same camera can be put into the same Multicam angle by Camera ID, Angle, Reel Number, and Roll/Card metadata
- Multicam angle sync can now use the first marker
- Multicam angle names can now be set by Sequential order (Default), the Angle or Camera shown in the clip metadata or by the clip name
- Multicam editing supports drag and drop multicam clips from the source viewer to the timeline viewer to perform an edit
- Users can now flatten Multicam clip in Resolve timeline
Transitions And Composite Modes
- Ability to create User Transition Presets
- Added new transitions;⁃ New dissolve transition: Non-Additive Dissolve
⁃ New wipe transitions: Barn Door, Band Wipe, Radial Wipe, X Wipe, Eye Iris, Spiral, Split Wipe
⁃ New transform transitions: Slide, Push
⁃ New Iris transitions: Arrow Iris, Star, Hexagon Iris, Pentagon Iris and Triangle Iris transitions
- Added new Compositing modes⁃ Divide, Linear Burn, Linear Dodge, Linear Light, Vivid Light, Pin Light, Hard Mix, Lighter Color, Darker Color
General
- Ability to save, recall and delete custom column layouts for the list view of Media Pool and Edit Index
- Timeline menu now included option for ‘Selection Follows Playhead’ including inspector selection
- New Edit menu option to turn off switching focus to Timeline after performing an edit
- A new menu option and Shift-Q shortcut to disable the four-up displays in the Timeline Viewer that occur during Slip or Slide trim operations. This toggles them off and on as an alternative to the Shift key to temporarily disable the heads-up displays
- Go to nearest clip action now navigates to the first frame
- A timeline gap contextual menu option allows Ripple deletion of the gap
- The Edit Index including filtered or unfiltered contents can now be exported as either .csv or tab delimited .txt files
- Generator names can be defined and edited in the Inspector
- Ability to view source clip’s keykode or frame numbers in viewer timecode display
- Selecting multiple clips now shows “Multiple Clips” in the Inspector clip name field
- Offline Reference now includes a difference wipe mode
- With a Project settings option you can now show offline reference video through non conformed clips
- A new menu lets users find the current timeline in Media Pool
- When creating a new timeline, users can now select the number of Video tracks and the number and type of Audio tracks
- If no timelines exist, dragging a clip to the timeline viewer edit overlay now automatically creates a new timeline
- A new timeline can be created with no clips
- You can now from the Media Pool insert clips into timeline with automatically generated handles
- Using the Add Track window users can create multiple video and audio tracks at any track position
- An indicator in the scroll bar now automatically marks your playhead’s position when you scroll away from the playhead in the Timeline
- Command Option Up or Down arrow will now move the video destination control up or down tracks
- Command Shift Up or Down arrow will now move the audio destination control up or down tracks
- The middle mouse button can now be used for horizontal and vertical timeline scrolling
- Improved Opacity keyframe and speed change compatibility with imported Premiere Pro XMLs
- You can now access Clip Attributes from the Timeline
Audio – Key new features
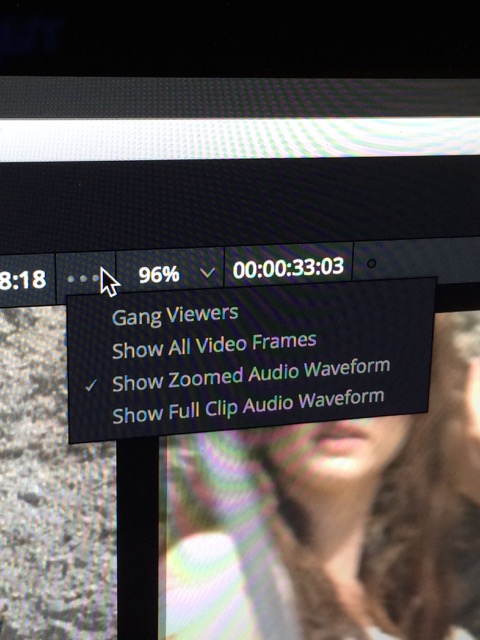
- The source viewer now includes an option for audio waveform overlay for full clip or zoomed range
- Audio waveform display is consistently detailed for the same zoom level irrespective of the length of the clip
- 30x, 40x and 50x zoom levels have been added in the source viewer to view audio waveforms
- Keyframe shortcuts can be used for +/- 1 and +/- 3dB audio gain for the selected audio clip
General
- Audio meters on the Edit Page display additional Peak indicators while in VU ballistics mode
- Enhanced drawing of audio waveforms for improved peak visibility
- Audio Tracks on the Edit timeline can be set taller for a better view of audio waveforms
- Audio track names are now shown in the audio mixer channel strips
- Double click on track name in the audio mixer now toggles between track name and track index
- Audio track name display in mixer can also be toggled from the View menu
- Improved waveform based audio sync in Media Pool
- AAF import now includes the audio transition cross fade effect
- Improved audio import and export via AAF with new support for mono, stereo, and 5.1 audio clips and tracks and support for mono audio within stereo tracks
- A new Preferences Audio Plugin Manager lets the user view, enable and disable audio plugins
- Improved performance with Quicktime clips with a large number of audio tracks
Color – Key new features
- Dramatically improved Spatial Noise Reduction – DaVinci Resolve Studio only
- Temporal NR now includes up to 5 support frames – DaVinci Resolve Studio only
- Added support for DaVinci Color Transform Language, .dctl for user defined color transforms – DaVinci Resolve Studio only
- Improved UI image updates when performing grades using a mouse or pen and tablet
- Primary palettes now include Temperature and Tint sliders
- Power Windows and ResolveFX can now be tracked with a Point tracker
- Redesigned and improved Log grading controls with a Project Setting option to switch between legacy and new behaviour
- New project setting option is available to switch between a linear or an S-curve contrast
- Lasso multiple PCW control points to move, zoom, rotate and delete
- Redesigned gallery stills which now support applying grades with source timecode or edit start keyframe alignment
- Keyframe timelines are now always grabbed with Stills
- A new Project Settings Color Management option now allows selection of Trilinear or Tetrahedral interpolation for 3D LUTs
HDR Grading Tools
- Extended HDR grading controls when HDR mode is enabled in a node – DaVinci Resolve Studio only
- With DaVinci Resolve, the DeckLink 4K Extreme 12G and Ultrastudio 4K Extreme now support HDMI 2.0 HDR metadata – DaVinci Resolve Studio only
- Support for HDR waveforms and scopes in Resolve – DaVinci Resolve Studio only ResolveFX
Resolve FX
- OpenFX section now includes ResolveFX which is a new framework for GPU and CPU accelerated effects including:⁃ ResolveFX Film Grain – GPU accelerated – DaVinci Resolve Studio only
⁃ ResolveFX Lens Flare – DaVinci Resolve Studio only
⁃ ResolveFX Lens Blur – GPU accelerated – DaVinci Resolve Studio only
⁃ ResolveFX Light Rays – GPU accelerated
⁃ ResolveFX Glow – GPU accelerated
⁃ ResolveFX Emboss
⁃ ResolveFX Dent
⁃ ResolveFX Vortex
⁃ ResolveFX Mirrors
⁃ ResolveFX Waviness
⁃ ResolveFX Ripples
⁃ ResolveFX JPEG Damage – GPU accelerated
⁃ ResolveFX Color Space and Gamma Transforms – GPU accelerated
⁃ ResolveFX Box Blur – GPU accelerated
⁃ ResolveFX Directional Blur – GPU accelerated
⁃ ResolveFX Gaussian Blur – GPU accelerated
⁃ ResolveFX Mosaic Blur – GPU accelerated
⁃ ResolveFX Prism Blur – GPU accelerated
⁃ ResolveFX Radial Blur – GPU accelerated
⁃ ResolveFX Zoom Blur – GPU accelerated
⁃ ResolveFX Scanlines – GPU accelerated
⁃ ResolveFX EdgeDetect – GPU accelerated
Nodes
- The node editor header now includes easy navigation selection dots for Pre-Clip Group, Clip, Post Clip Group and Timeline
- New Option-Shift-; and Option-Shift-‘ commands in the Node menu navigate to previous or next node
- Pointer and Hand tool for node selection and panning around node graph is selectable with keyboard shortcut H
- Added ability to select multiple nodes with a lasso
- Multiple selected nodes can now be moved together with mouse selection and dragging
- Multiple selected nodes can now be deleted together using the delete operation
- Command dragging a still from the Gallery onto a node graph node or link will apply its grade as a compound node
- Added visual cues for replacing one link with another and the old link that will be deleted is highlighted
- Dragging a node connection line to and input with a connection now automatically overwrites the previous connection
- Command-dragging one node on top of another swap the contents of the two nodes
- Option-dragging one node onto another will copy one node’s contents to overwrite the other
- The keyboard shortcut E will extract the current node from the tree
- New serial nodes can be created with a contextual menu option on non-active nodes
- Node contextual menu includes options to add a Serial Node and a Serial Before current node
- Reset individual nodes via an option in each node’s contextual menu
- Embedded alphas in mattes can now be accessed for grading or compositing
- Multi layer EXR layer names are now displayed in the matte node context menu
- EXR layers with only alpha channels are now available in matte nodes
- Ability to choose between alpha and luminance for matte nodes
Split Screen
- Split screen view of selected clips now allows single-click, on the viewer, to switch the current clip
- Split screen view of Versions now allows double-click, on the viewer, to switch the active version
- Split screen of Gallery Stills now allows double-click, on the viewer, to apply the gallery grade
RCM and ACES
- RCM now includes a checkbox and dropdown menu to separate gamut and gamma options
- Resolve Color Management now includes an option to select separate Input Gamma option to clip right click menus on the color and media pages.
- Added RED camera curves and color spaces to RCM for non RAW input data
- Added Rec.2020 Gamma 2.4 to RCM
- Added ACES sRGB (D60 Sim.) The IDT and ODT are in D65 with corrected color temp to D60
- Added ACES sRGB IDT and ODT with D65 white point
- Added ACES RED IDTs for red curves and color spaces to ACES to support RED workflows using non RED RAW files
Advanced Control Panel Updates
- Knob positions for custom curves and YSFX have been remapped to allow two additional custom curve anchor points for adjustment
- Shift Down + Play Still will now display the node graph of the wiped reference still or timeline clip
- Shift Up + Play Still will now apply the grade from the wiped reference still or timeline clip
- In addition to using the Conform button for Lightbox, Shift Up + Conform now toggles Lightbox full screen on and off when using a dual screen setup
- The Advanced Control panel now includes controls for the Sat-Sat curve
General
- Ability to apply ARRI Look (CDL and 3D LUT) to current node – DaVinci Resolve Studio only
- OpenFX plugin UI has now access to all the frames of the clip for performing advanced operations like tracking, noise profiling etc. – DaVinci Resolve Studio only
- Support for more variety of Compositing Modes: Color Dodge, Color Burn, Exclusion, Hue, Saturation, Color and Luminosity
- Support for V3 Camera Color Science for 4K and 4.6K BMD camera sensors
- Default anchor points for Custom Curves are now at 0, 20, 40, 60, 80 and 100%
- The number of Custom curve UI control points have been doubled
- Color page keyframes and tracking can now be applied and pasted to single frame still media
- Smart Filter criteria added for filtering based on Media Pool metadata clip details for Dropframe clips
- Markers with duration are displayed in the mini timeline
- Invisible mouse on color wheels and grading bars for better experience
- Ability to quickly toggle to full screen lightbox in dual screen mode
- Ability to see and access organized 3D LUT list in the project settings
- LUT folder hierarchy is now accurately reflected in the context menus
- Add support for Aspect Ratio slider in Linear Power Window (LPW)
- Added Reference Sizing controls in the Sizing widget
- Xrite Colorchecker Video chart is now supported in the Color Match palette
- Xrite Colorchecker Passport Video is now supported in the Color Match palette
- Tags are supported for burn-in texts
- Option to show display name below color page thumbnails
- Applying grades from other timeline clips now follows the gallery option for keyframe alignment
- The Timeline menu now includes a reset for output blanking
Media – Key new features
- Interlaced media can now be de-interlaced with optional normal and for some clips a high setting – DaVinci Resolve Studio only
- The Cinema viewer is now available for the media page viewer
- Media Pool Power Bins and their contents can be shared across all projects
- Clip metadata for selected or all Media Pool clips can now be imported with selection rules or exported using .csv format
- The Media Pool Clip Attributes dialog now includes a Field Dominance setting for interlaced media
- Ability to save, load and delete custom column layouts for the list view of Media
Storage and Media Pool
- Added list view columns for Shot, Scene, Take, Angle and Good Take to Media Storage
- Support for thumbnail sorting in Media Storage
- Clip bit depth now has its own Media Storage column
Media Pool
- Mark In and Mark Out columns are now available in list view.
- Users can now Set and Clear Poster frames for clips in the Media Pool
- Media Pool bins now have a custom user sort mode
- Media Pool Thumbnail view is sortable by Name, Date Modified and Date Created in ascending or descending order
- Media Pool bins are sortable by Name, Date Modified and Date Created in ascending or descending order
- Media Pool bins now save date created and date modified metadata
- Media Pool bins and list views now support drag-and-drops from Media Storage, Media Pool and Finder
- Within the Media Pool bins list you can relink clips for selected bins using a new context menu
- Ability to select Clip Color in Media Pool context menu
- Ability to display a new column ‘Clip Color’ in Media Pool list view
- Smart Bins and Power Bins splitter position is now remembered per user
- Smart Bins and Power Bins in the Media Pool can be hidden
- Sort support for Smart Bins
- When Media Pool metadata fields for multiple clips are modified the field checkbox is Auto selected
- Metadata keywords are now stored as text bubbles which are saved in a user dictionary
- Keyword bubbles can now easily be appended to multiple clips
- Media Pool now includes a deep level search for relinking clips
- Title Thumbnails now include text in the thumbnail view Display Names
- Display Names can now be used ubiquitously with new “View” menu setting
- To edit the derived Display Name field in the Media Pool users can now Option-click in the field
- Timeline, Compound Clip and Multicam clip can now have their display name uniquely edited
- Tags are supported for metadata fields in Display Name
General
- Video field order of MXF clips is now automatically interpreted on clip import and stored in the Video panel of Clip Attributes
Deliver – Key new features
- The Cinema viewer is now available for the deliver page viewer
- Audio only rendering is available in MXF, QuickTime and WAV formats
- Audio can now be rendered in a single track or one track per channel
- Export for RGBA in ProRes 4444, 4444QX, Uncompressed BRGA 8-bit, Uncompressed ARGB 8-bit and DPX RGBA 8 bits
- Added selection for 3:2 rendering of 23.976 and 24fps to 29.79fps and 30fps
General
- Using a terminal -rr command a GUI-less Resolve system can made ready for remote rendering – DaVinci Resolve Studio only
- Stereoscopic 3D monitoring and rendering now includes top-bottom option – DaVinci Resolve Studio only
- QuickTime ProRes remote render jobs to supported platforms can now be created from Windows systems – DaVinci Resolve Studio only
- New Round Trip options on deliver page for Final Cut Pro 7 and Adobe Premiere Pro
- Added support for render queue job renaming and job details
- EXR DWAA and DWAB formats now include user adjustable compression
- QuickTime decode and encode now honors the clip pixel aspect ratio
- The render progress is now also displayed on the Mac Dock and Windows Taskbar
- Added completed render job context menu item for revealing in Media Storage and Finder
- Tags are support for render setting file paths and burn-in texts
Format Support
- Added support for ARRIRAW MXF
- Added EXIF parsing to get metadata from JPEG files
- MXF encoder updated to improve Sony XDCAM compatibility
- Added support for Codex Action Cam RAW files
- Support for audio from Sony Alpha 7S clips on Windows
- Added support for decoding and encoding the VP9 codec in a QuickTime container on Mac
General Items
- Spanish interface support
- Faster incremental save for PostgreSQL database
- PostgreSQL database projects now support a 1 minute autosave interval
- UI indicators for fast autosave and color indicator for time since last save
- Support for ProRes 4444 XQ decode on Windows OS
- Includes support for extended range for 16-bit RGB cache formats
- Project Management archive and restore operations now support render cache and optimised media
- Ability to save, recall and delete custom column layouts for the list view the Project Manager
- Project Manager now offers a Project Export and Project Export with LUT and Stills option
- Project Manager contextual menu now includes a Revert to Last Save project load option
- The UI layout for 21:9 wide screens is improved
- Within the Project settings users can add a frame delay in updating the UI viewer to account for delays in SDI output
- Improved performance for resizing UI palettes
- Option Help menu creates a Diagnostics status log for the system
- OpenFX plugins now only initialized network licenses when needed
- Ability to release the Capture and Playback card when Resolve is not running in the foreground
Minimum system requirements
- Mac OS X 10.10.5 Yosemite
- 16 GB of system memory is recommended and 8 GB is the minimum supported
- Blackmagic Design Desktop Video version 10.4.1 or later
- CUDA Driver version 7.5.25
- NVIDIA Driver version – As required by your GPU
- RED Rocket-X Driver 2.1.31.0 and Firmware 1.4.1.16 or later
- RED Rocket Driver 2.1.23.0 and Firmware 1.1.18.0 or later

Filmtools
Filmmakers go-to destination for pre-production, production & post production equipment!
Shop Now