
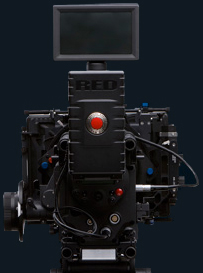
For a few weeks now I have been checking out the new Red Camera Adobe Importer plug-in for Premiere Pro, AfterEffects, and Encore. For their first Adobe CS3 plug-in, they’ve done some excellent work. Their importer plug-in makes using the native R3D file type as easy as any of the other tapeless formats we currently support with CS3. As with our P2 and XDCAM support, importing is as easy as drag and drop or you can still use the standard File>Import dialog. The Plug-in gets installed in the Adobe Common MediaCore folder and is shared by all Adobe video applications. Yes, there are plug-ins for both Intel Mac and Windows. Windows users might consider using Vista64 so they can address more than 3.6 GB of RAM for the larger frame sizes(yes – currently CS3 can only address upto 4GB of Ram on Windows ** stayed tuned ** we’ll have a better answer – more on that later) Vista users, just remember to turn off all of the friendly Vista helpful messages like “Cancel or Allow?” )
The first beta works a little different than most Premiere Pro users would expect. Red needed to give us a quick way to set how the Importer would handle large frame sizes on less powerful machines. Since Premiere Pro is resolution independent, it can have both a “working resolution” that plays smooth on your particular machine and also an Export for outputting the sequence at Full res.
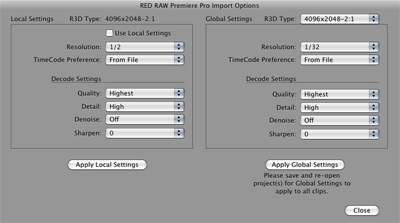
To get to the Red Importer dialog box, you simply double click on any clip in the Premiere Pro Project Panel and the Red Importer Dialog window will open (normally double clickin on the Project Bin sends that clip to the Source Window). There are various settings, but the one that you will use most often is the Global Settings. Here you select your Frame Size like 2048×1152 and then tell the importer how you want it to treat that video. You have various settings like Full, ½, ¼, 1/8, and so on. For my 17″ MacBookPro , using ¼ for 2K and 1/8 for 4K as a “working res” was an excellent editing experience for a laptop dealing with 2K files. Remember, these are not proxies, since Red uses a different encoding method for their R3D files, scaling down the video still keeps the picture very clean – not the typical scaled artifacting you would normally see with other encoding methods.
For example, once you select “Apply Global settings” , this will tell the Red Adobe Importer that whenever it sees a 2048×1152 clip to treat it as 512×288. You’ll need to set up a Preset in Premiere Pro and set your frame size to 512×288. Again, when you export, you simply tell the Exporter to change the Frame Size to 2048×1152.
Premiere Pro as a Control Panel
Currently, in this first internal beta build, Premiere Pro acts like a Red Control Panel for setting the Global settings for all Adobe apps. Yes, whether you are only planning to use AfterEffects, you would need to still launch Premiere Pro to change the Global setting for your clips. You only need to do this for one clip. Once you’ve set it, the importer remembers the setting for R3D files of that size and will hold that setting until you change it again. You can set a different setting for each R3D type file. I have my 4096 x 2048 set to 1/8 which is 512×256. We all know this is not an ideal way to access the Global settings but it was a quick way to get the Importer working for the beta. REMEMBER, this an internal beta and not the public beta. If it’s at all possible, I personally would like to see a simple Adobe Air Application (all Adobe Air apps are Cross Platform) that brings up the Red Importer dialog box. Since these apps work like Widgets/Gadgets , you can call them forward at anytime. If you have not seen Adobe Air you should check it out on our main home page.![]() (Click here for more info about Adobe Air)
(Click here for more info about Adobe Air)
What about AfterEffects?
The best way to work in AfterEffects with R3D is set the Global Settings to Full so AE will render correctly during Render/Export. You can still work with the various Global settings, just remember to change back to Full before you export. To make this easier in the future, the AE team is already working on several new Red ideas, so stay tuned.
From Red to Blu in a few easy steps
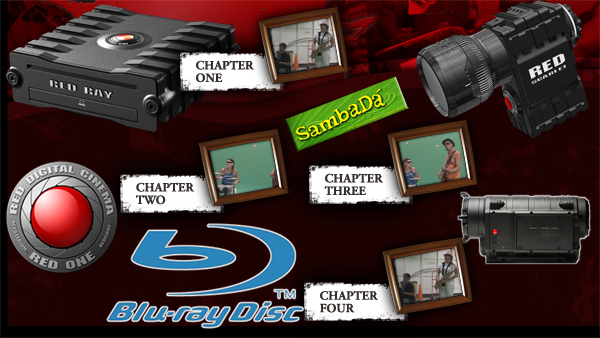
Encore is a breeze to use with Red R3D files. If you want to work at 512×288 to create your Blu-ray disc and test preview in Encore – it’s no problem. All you need to do is save your Encore project and quit, set the Global Settings back to Full and then re-open your Encore project , it will now be at Full Res using the same project. Remember that Encore Blu-ray only supports the HD frame sizes supported by Blu-ray players and therefore has a fixed output size. The key is remembering to go back and set the Global setting to Full.

SNEAK Peek
PLEASE keep in mind that this is the first sneak peek video at the work that’s been going on between Red and Adobe. The Importer plug-in I use in these videos is an early beta and only shows the basic workflow. I don’t discuss Audio in the video because this internal beta currently only supports video as of Aug 11th 2008. The first development hurdle is to get the basic Red Importer plug-in working and then work on adding support for more options like audio.
The longer workflow video was really created as an internal video for our various video/audio teams here at Adobe (Premiere Pro, After Effects, Encore, and Soundbooth). The main idea was to have a way to see the plug-in action and discuss the different workflows and discuss ways to improve the overall Red user experience. There are few places in video where I drag multiple clips from the same folder without discussing Card Spanning. Card Spanning is term that simply means when a clip fills up the first storage card on the camera, it starts filling up the second card and so on.As with most tapeless cameras, a new folder is created with clips and other data every time you start and stop recording.You only need to select the first clip in each folder as the Red Importer tells Premiere that their are more clips that go with the first clip in the subfolder. If you import all of the R3d files in the same folder (as I showed) you will end up with duplicate clips. I also import an entire folder of Red clips to show how fast it reads the files, again, not a real workflow because you will end up with duplicate clips if there is more than 1 R3D file in a subfolder. I was looking at it more from a performance test not real workflow.
The GOOD NEWS is that we have already figured out how to address this card spanning and clip workflow issue. This new method makes reviewing your tapeless clips a snap. I’ll talk more about that at a later time
Several Adobe team members have already commented on better workflows and it has also given them more ideas on where to take our products in the future. To me this was the most important thing to accomplish in making this quick video. Getting the various teams here at Adobe talking about formats is key to having a successful suite of tools for the Red Camera.
This is the first time we are opening the doors to let you take such an early peek. I’m sure these videos will be out dated soon when the first sets of Beta Red Plug-in gets released to the public.

For the High Res H.264 version, you will need Quicktime 7. If you need to download it, you can get it here: http://quicktime.com For an excellent streaming Windows browser experience, try Apple’s Safari for Windows. Download it here: www.apple.com/safari
 Special thanks to http://mbsdirect.com for hosting the high res QT versions.
![]() Click here to see the short intro QT7 Video (2 minutes)
Click here to see the short intro QT7 Video (2 minutes)
![]() Click here to see the longer Workflow QT7 Video (20 minutes)
Click here to see the longer Workflow QT7 Video (20 minutes)

Filmtools
Filmmakers go-to destination for pre-production, production & post production equipment!
Shop Now


