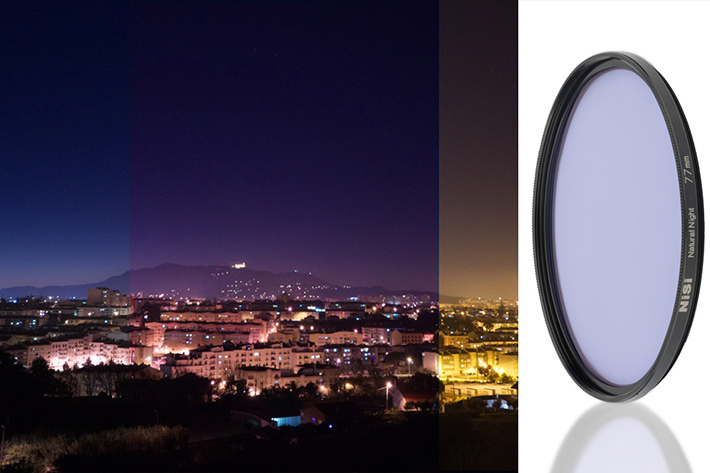
Astronomers and astrophotographers use of filters that can reduce light pollution is normal, but now we’ve different brands offering identical solutions for photographers discovering the stars. NiSi is one of those companies.
The increasing interest of photographers for capturing the night sky and stars has increased the interest for solutions that help to get rid of light pollution, present in many shots. As photographers tend to photograph closer and closer to home and urban areas, and still want to capture the beauty of the night sky, being able to get rid of the excessive light of cities becomes an essential part of that type of photography. It’s in that context that NiSi, a company known for its solutions in terms of photographic filters, introduced last year the Natural Night Filter, with which they want to “make the night natural again”.
Reviews and comments online about NiSi’s filter go from the “go for it” to the “forget it”, revealing that opinions are just that: opinions. Different users have different needs and perspectives, and when they write, what they write reflects their experience with the materials. This note does not intend to change the situation, I also write based on my own experience with the filter, which is not a revolutionary solution, only does the same as other filters already available. Let’s, before we continue, look at some of them.

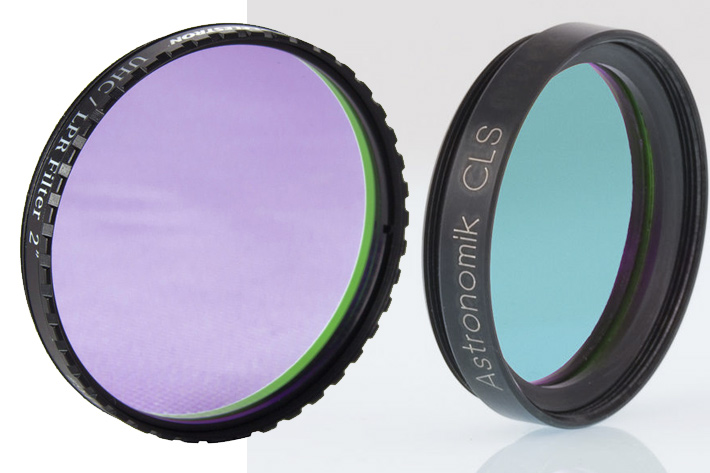
The Light pollution suppression (LPS) filters from IDAS, popular among astronomers, are designed to suppress the common emission lines generated by artificial lighting, yet allow the important nebula emission lines to pass, thus enhancing the contrast of astronomical objects, particularly emission nebulae. These filters, available from different vendors, are, according to the information available, different from other light pollution suppression filters, and are specifically designed for balanced color transmission using the IDAS unique Multi-Bandpass Technology (MBT) process, meaning they are better for photography than filters designed for visual use.
Exploring the information available about these and other light pollution suppression filters for astronomy and astrophotography one understands that this is a very specialized area, with different types of filters needed for, I dare say, very specific uses. On the budget side, there are filters like the Astronomik CLS, designed for visual observation, Black & White photography and CCD photographs of nebulae, galaxies and star clusters with astronomical instruments of any size. Browsing the web for light pollution filters you’ll find solutions, both for visual and photographic use, from names as Celestron, Kenko, Haida or Levenhuk, to which the name NiSi should be added.

Night sky, skyglow and filters
With night sky photography being so widespread, and many times created from locations that are not in the top-ten of the best places to look at the stars, it’s only natural that photographers search for ways to reduce the effects of light pollution. As urban areas appear to grow everywhere, as mushrooms, the sky from our infancy has vanished. Looking at a map of Earth from above, at night, reveals how difficult it is, unless you live in very remote areas, to find a place from where you can see the sky as you remember from when you were a kid.
Urban areas with intense sources of artificial light are responsible for light pollution. The variety of colors and types of lights and their concentration creates hotspots on images, and makes it difficult to define the adequate white balance for each different scene. It also creates a kind of sky glow that makes it hard to see the stars above. That’s where light pollution filters enter, and in this case, the Natural Night filter from NiSi. The company says that “between mercury vapor, sodium, low CRI streetlights, there are many undesirable wavelengths of light that pollute the night sky. The glow from these can keep your camera from seeing the sky properly and ruin your night images” so they created “the Natural Night Filter to block the most common wavelengths of light pollution.”
The filter, still according to NiSi, “is made of high quality, precision annealed, optical glass. Its surface is finely ground and polished to ensure sharpness for today’s ultra high megapixel cameras.The NiSi Natural Night Filter features NiSi’s unique NANO Coating technology. This multi-layer coating reduces reflection on the surface of the filter to help with ghosting and flare. It also includes a protective layer that makes it easy to wipe off water, dust, and oil from the filter without worrying about scratching your glass. The NANO Coating process achieves this without loss in sharpness.”
Goodbye yellow, hello magenta
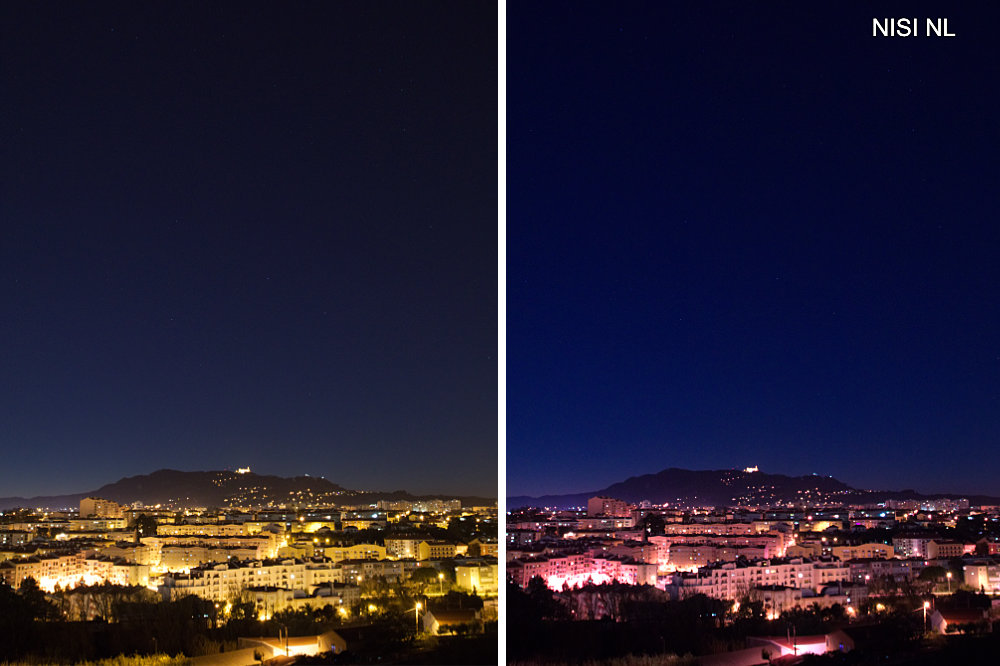
So, having gone through the marketing from NiSi – and the filter I’ve in my hand surely looks and feels good – let’s look at what can be achieved with this filter for night scenes and astrophotography. Some people have used it extensively for cityscapes at night, and while I think some of the results work, I found that my initial experiences where not all that great. The NiSi Natural Light filter does remove the yellowish glow from the sky, but it introduces a magenta cast that I do not like. I believe that has to do with the type of lighting present in different situations, and that would explain why some authors have what can be considered good results while others are, my opinion, less appealing.
Still, I wanted to try out myself what could be achieved on urbanscapes photography and also for video, so I decided to write two articles: this one, centered on the the light pollution characteristics of the filter when used for the night sky, and a second, centered on the cityscapes and video options the filter opens to users. Due to the fact that some of the photographs of the sky also include urban areas, to test the light pollution reduction effect of the NiSi Natural Night filter, there will be some overlapping, but because I found distinctive ways to use the filter for the different scenarios, it made sense to write the two articles. Having explained this, let’s look at what my experiences revealed.
Placing the Natural Night filter over your lens and expecting a miracle is only going to disappoint you, let me tell you. This is not a ND or color correction filter that gives you a result as expected, there is some tweaking to do to achieve something you’ll be happy with, and from my experience I will add that different situations will ask for different approaches. What this means is that there is no “one size fits all” solution, and to get the most of the Natural Night Filter from NiSi, you need to invest some time playing with it, and probably take notes – that’s what I did – for each situation. The filter will deliver, but you need to understand when and how to use it. That’s what I felt once I started to play, and hence the reason for writing two articles instead of one.
AWB, tungsten or what?
Used for night sky, with the always present light pollution from nearby cities, the filter reveals the ability to get your stars better defined. For testing purposes I started by photographing the same scene with Auto White Balance and Tungsten, without the filter. I used AWB as a reference, because in some situations it gives a good reproduction of the colors, but if photographing at night, I will change to Tungsten, as a way to reduce the yellow/orange cast, and will use it for all the photos, in order to get consistency between frames, as AWB is prone to change depending on the relation between the colors in different images. Here, though, as I did not know how the filter would react, I tried it.
Night sky images with AWB revealed the usual yellowish cast, which becomes more evident in areas affected by artificial lighting, usually the bottom section of the photo. Tungsten reduces the cast and things started to look more interesting. Then I introduced the Natural Night filter, and the sky went blue – there is about 0.5 stops less light, so you’ll probably have to adjust for that – with stars perfectly visible, but there is a magenta cast that is more or less noticeable depending on the exposure and type of lighting.
The magenta cast is very pronounced in examples I saw online, but I wanted to reduce its effect on my images while in the field, as it made sense, at least for me, to try to do as much as possible in camera. The reference images were shot with the filter on and without any adjustment, but then I introduced some form of control of the image viewable on the LCD.
Tweaking the White Balance Shift
Fortunately, the EOS 80D used for this test has a White Balance Shift feature – I believe other cameras, besides Canon, also have – which allows me to go beyond the simple White Balance choices and tweak the colour balance in different directions. It’s something that can be used creatively to introduce color shifts in your images (believe me, it’s a fun tool to use) but is there to correct colour casts. I’ve used it as a “hidden filter” toolbox sometimes, and now I wanted to get rid of the magenta.
The White Balance Shift offers the option to bracket exposures, changing the colour between them, and that’s a useful tool too, but in this case, as I had to much magenta in my skies, I just wanted to get rid of the cast. I opened the tool and moved the Green/Magenta slider slightly towards the Green, and took a test shot. Magenta was still there, so I repeated the process, moving the slider two steps more away from Magenta. It was getting better, but believing I could achieve better results, I repeated it until I had moved the slider completely to the Green side of the scale, that’s Green 9, as the adjustments go from -9 to +9.
The magenta cast was more controlled, no doubt, but now the blue sky had a grayish tone to it. I opened the White Balance Shift panel again and moved the Blue/Amber slider towards the Blue, in order to recover some of the colour in the sky. Two test shots later I concluded that Blue 9 was the right setting. I had a good night sky blue back, without any immediately perceptible change to the rest.
It is true that if you’re shooting RAW, none of this is essential, as the RAW file can be tweaked in post-production, but if you’re shooting JPEGs, the whole process will allow you to get images out of the camera with the right – for you, at least – colour adjustments. Still, if you want to see/check and understand, in the field, what the final result will be, and how a filter affects the relation between colours, you need to go through the adjustments the While Balance Shift feature offers, as only then you’ll see on the camera LCD what the final image – yet to be edited – will look like. So, yes, it makes sense, as the LCD image (a JPEG) is always a reproduction of the adjustments you made, to make them while in the field.
Is NiSi’s Natural Night a filter for you?
Trying the different viable approaches takes time, and from my experience – on different days and places – I found out a solution that works fine, I believe, to get the most out of the Natural Light filter. Are the results offered by the filter achievable through editing in your photo editor? I would say yes, probably, but I rather get something as close as possible to a final result while in the field. I tried to edit the AWB and Tungsten images and I prefer the results the filter gives me, also because they give me a starting point from which any changes will be faster. It should be noted, too, that the filter also removes some of the “sky glow” created by light pollution, and that’s the reason why astronomers use this type of filter. So, why not take advantage of the technology, which will give you a cleaner image to start with?
The tests allowed me to define a working method with the filter, but also revealed that different situations will require some fine adjustment of the White Balance. Still, now I know that for night skies using Tungsten, for consistency, and adjusting the white balance shift is the way forward. Is this the solution for all your problems when photographing the night sky? Depends? If it’s an area where you spend a lot of your time, I would say yes. The Natural Night filter costs $ 195, meaning it is not the kind of accessory you buy to use only a few times.
Besides night sky photography, the NiSi Natural Night filter can also be used for cityscapes at night, and for video. The second article, which will be published soon, will cover those aspects and expand a bit more on the interest of one type of filter that, in fact, may not be needed in a not so distant future.
The Natural Night filter is available in two formats, square and circular. The square format, to use with a filter holder, is available in 100, 150 and 180mm sizes, while the circular filters are available with 77 and 82mm diameters. I tried the circular version, using the Manfrotto Xume attachment system, which makes for a faster change or removal/placement of filters for testing purposes or for creative work.

