In our topsy-turvy world, it’s becoming more common to see social media videos shot and delivered entirely in HDR — because it’s on by default. Just like Calibri in Word, the default colours in InDesign and the desktop wallpaper that shipped on your Mac, nobody bothered to change the settings. Revolution through apathy.
Many social media apps can manage HDR content, and Final Cut Pro’s latest release has made it much easier to adopt it as your default. But while cinema and streaming pros have used HDR for a while, it’s been seen as a delicate, specialist process, and most mid-level video professionals have stayed well away. Why? And what’s changed — for Mac-based editors at least?
I’ll be upfront: this article is not intended for colorists already working with established HDR workflows, but for the vast army of smaller creators making video intended for web and app delivery. You’re probably not going to switch over instantly, but if you’re an editor delivering online, an experiment or two is worth your time so you can stay ahead of your clients’ requests.
Let’s take a quick tour through HDR’s backstory before we swing back around to what’s happening now.
What is HDR anyway?
You may know this already, but if not: High Dynamic Range refers an increased range of potential brightness values in video, and you are likely to have seen HDR content on a streaming service recently — even if it wasn’t immediately obvious. HDR10, HDR 10+, Dolby Vision, and HLG are all flavors of HDR, and each describes extended brightness levels in different ways. To briefly summarize:
- HLG is backwards-compatible with SDR, using a relative scale to describe the higher brightness levels. It can adapt to each display’s capability, but will not look quite the same on every one.
- HDR10 uses a fixed scale to describe higher brightness levels, and content is mastered to a specific brightness standard, like 1000 nits or 3000 nits.
- HDR10+ adds dynamic metadata, adjusting the display mapping scene-by-scene.
- Dolby Vision also uses dynamic metadata but with proprietary display mapping. While Dolby Vision normally uses a static peak brightness on most streaming services, on Apple devices it uses HLG’s gamma curve instead.
One important note: HDR in video is not the same as HDR in the photography world, which tends to look a little flat and overprocessed. The photographic HDR process combines multiple exposures, lowering highlights and lifting shadows to squeeze a wider range of values into the traditional SDR brightness range. Unfortunately, a true extended brightness range for photos is even less common than HDR for video, but we’ll get there eventually. Right now, you can’t even take a screenshot or screen recording of HDR content, so hopefully this is fixed soon.
As well as being able to represent specular highlights and direct light sources, HDR standards also include a wide color gamut, so you can more closely match a wider range of more vibrant colors. All this extra data is expressed with at least 10 bits of data rather than the older 8, so you’re far less likely to ever experience banding. Critically, on Apple devices like iPhones, HDR video content is, overall, displayed as brighter than SDR video content. Brighter, more vibrant, more fidelity — what’s not to like?
Here’s an example of what HDR can look like if you film some bright, colorful things and then crank all the saturation sliders in post:
In more typical footage shot in the real world, the benefits of HDR are more subtle, but still worthwhile: the greater dynamic range means you can deliver a more realistic image. If your camera can capture more stops of latitude than SDR allows, you’re more likely to be able to deliver that footage to your viewers. At its core, though, most people will simply notice that HDR footage looks brighter. SDR footage is mastered to a maximum brightness level of 100 nits, while HDR could be mastered to 1000 nits or higher. HLG is more agnostic about a maximum brightness level, which makes your life a bit easier.
With careful color correction and grading, HDR sunsets can really pop and brighter areas will draw more attention. An HDR image can also look a lot closer to reality, but without the artificial feel that a higher frame rate often brings. But most importantly, it’s brighter, and humans look to the light. You don’t necessarily have to be a colorist to use HDR, and here’s a behind-the-scenes video shot entirely in HDR on an iPad, from Scottish actor Karen Gillan, to prove it:
If you’re an advertiser, and there’s a free way for your content to be brighter and more vibrant than everyone else’s, wouldn’t you go for it? Sure! So why isn’t it everywhere? The most important reason is that not everyone can see HDR, because not all hardware is capable of hitting the new brightness levels.
What do I need to watch HDR?
To view HDR content in its full glory, you’ll probably need a modern TV, a modern MacBook Pro, or any recent higher-end phone. All the latest iPhones support HDR, and they’re probably going to be the single largest delivery platform. Apple’s control over the whole experience means that the simplest and most consistent experience is with an iPhone, an HDR-capable Apple display like the MacBook Pro 14” and 16” displays, the 12.9” iPad Pro, or the very pricey Pro Display XDR.
If you have an external display, you may have noticed HDR on its spec sheet — but that doesn’t mean it can really deliver. Many cheaper displays with HDR-capable chips can’t actually display brightness levels of more than 350 nits or so, meaning that HDR content just doesn’t look that different from SDR content. Worse, if you flick a cheaper screen like this into HDR mode, everything can sometimes become dimmer, in an effort to maximize the contrast between the darkest and brightest parts of the image.
While most third-party displays are not really HDR-capable, an OLED TV or monitor should be a safe bet, and some of these are getting quite cheap. Platforms matter here too; the current release of macOS does OK with HDR on a true HDR display like an OLED, but doesn’t always deliver good HDR to a lesser display. I don’t use Windows, so I can’t directly comment on the experience there, but as with color management, it seems to be a bit behind the Mac.
It’s still possible to view HDR content on an older display, though, because HDR content can be down-converted to SDR. This may happen at the OS level (Apple uses Tone Mapping) or at the platform level (YouTube can offer different streams to different devices). This is important — you can deliver the one HDR file to HDR and SDR devices. So…
How can you create HDR content?
Pick up your iPhone and press record, and you’re using HDR Dolby Vision by default. Outside, you’re far more likely to need the extreme dynamic range that this allows than you are in a studio environment, but HDR is useful in controlled environments too.
Looking beyond phones, modern professional cameras are more HDR-capable than they were just a few years ago. If you’re used to shooting in Log modes, you’ll be able to make full use of your camera’s dynamic range, and instead of squishing its range into SDR, you’ll let it go a bit further. Note that even though a GH6 in 10-bit HEVC mode can capture highlights beyond 100IRE in a standard, non-Log profile like Natural, you should use a color profile like Log or HLG to make sure you capture all the detail you can.
HDR is a different beast. By considering HDR, you’re introducing new variables into your color pipeline, and you’ll want to tread carefully, but it’s not impossible. Which leads to the next question…
Why have many professionals avoided HDR so far?
Delivery is probably the primary issue here. While you can, of course, deliver HDR content to streaming platforms and to cinemas, broadcast TV in most countries has been largely uninterested in shifting. The need to keep content accessible to a wide audience means that almost all broadcast TV follows SDR standards, with specific exceptions (such as the UK’s Premier League football) which are delivered through modern digital means.
Of course, feature films and high-end streaming TV have embraced HDR for some time; if you’re putting all that money on the screen and paying a colorist to make your dream look as good as it can, they can create an SDR and an HDR version to precise specs. But if your production doesn’t have a budget for a separate colorist, let alone two separate grades, HDR has been something that many people have safely ignored. After all, it’s not something that most clients have been asking for, but when some user-made HDR content is brighter than almost all professionally-made SDR content, some clients will notice.
You can definitely find HDR content on Instagram, but let’s assume that most of the professionals reading this would prefer to deliver landscape content for clients via YouTube, or maybe Vimeo…
Can I put HDR on YouTube and Vimeo?
Things have been hard for a while, but if you wait long enough, everything changes — and it’s gotten a bit better recently. Here’s a video from Linus Tech Tips about how they gave up on HDR a couple of years ago:
Watch the video for the full story, but it boils down to an unacceptable experience for SDR viewers watching automatically converted HDR content. Today, they just might have better luck.
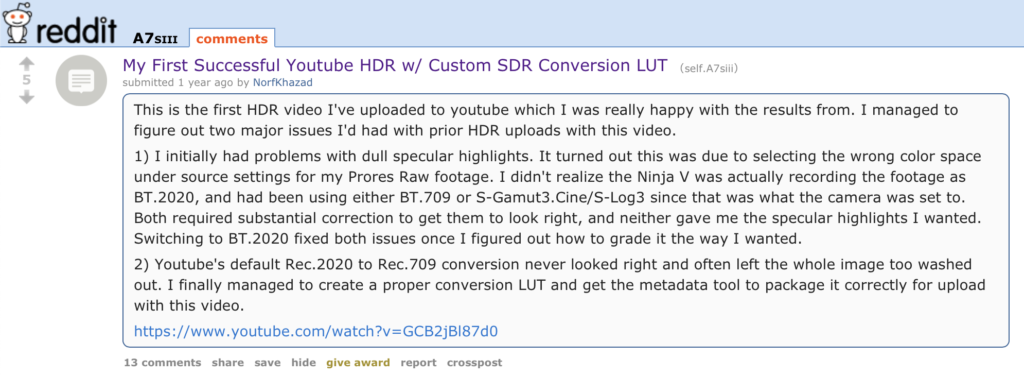
Just a few years ago, if you uploaded an HDR clip to YouTube, the SDR version (which most people would see) could be quite a bit different from the HDR version. Colours might be off, brightness was unpredictable — you couldn’t be sure what you’d get. There was a tricksy way to provide a conversion LUT for YouTube on how to handle the HDR > SDR conversion, but it wasn’t terribly user friendly.
Today, HDR does work, but on YouTube, it still doesn’t process as quickly as SDR. While I’ve had some process within just a few minutes, others have taken overnight or longer, while SDR remains very quick. Vimeo regularly takes just a few minutes more to process HDR, so this seems to be a YouTube-specific issue.
The worse news is that although the uploaded files will then look good on an HDR screen, it’s sadly still the case that not all HDR will look good when converted down to an SDR screen — the same issue that Linus Tech Tips had above. Here’s my test video on YouTube, a simple example of iPhone + GH6 footage in HDR:
Here’s the same file on Vimeo:
Now here’s the tricky thing. If you load this page on an HDR display, both will look good. If you then move the window across to an SDR screen, Apple’s Tone Mapping will keep them looking good, and both the same, because macOS is handling the HDR to SDR conversion. (Windows 11 can do a similar trick.) But if you refresh the page, the YouTube version will look a bit worse, because YouTube’s built-in poor SDR version will be loaded instead. While not everyone will care about the difference, it’s a shame that we can’t force YouTube to send the HDR version of the file to compatible platforms, because that would make a big difference here.
You can use HDR in any NLE, but FCP is easiest
In theory, it’s easy enough to switch an editing timeline to an HDR color space (Rec 2020/Rec 2100) in Final Cut Pro, Premiere Pro or DaVinci Resolve, then throw in some decent footage and stretch it into your new brightness ranges. But in theory, theory and practice are the same.
In practice, it’s much easier in the latest version of FCP, which will handle much of the hard work for you — especially if you need to include some SDR footage in an HDR project. Sadly, the workflow isn’t as easy in other NLEs, though it’s certainly possible. Seek out some detailed guides if you want to pursue this, but as a quick summary:
- In Premiere Pro, it’s difficult to preview a timeline’s HDR look on one display and then its SDR look on another, but you can still get the job done. Set your sequence to HLG, then set your preferences to “Extended dynamic range monitoring (when available)”. When you export, beware of existing presets, as most are locked into Rec.709. Instead, set the correct color space using Match sequence preview settings in the Preset menu, then increase bit depth above 8-bpc and tick Use Maximum Render Quality. Use ProRes as the codec.
- DaVinci Resolve can obviously handle HDR, but you’ll need version 18.5 for per-timeline color management, and the controls are extremely comprehensive, not just one quick novice-friendly switch. (Update: here’s a guide from Dolby, including a video at the end.)
Here’s a relatively easy FCP workflow
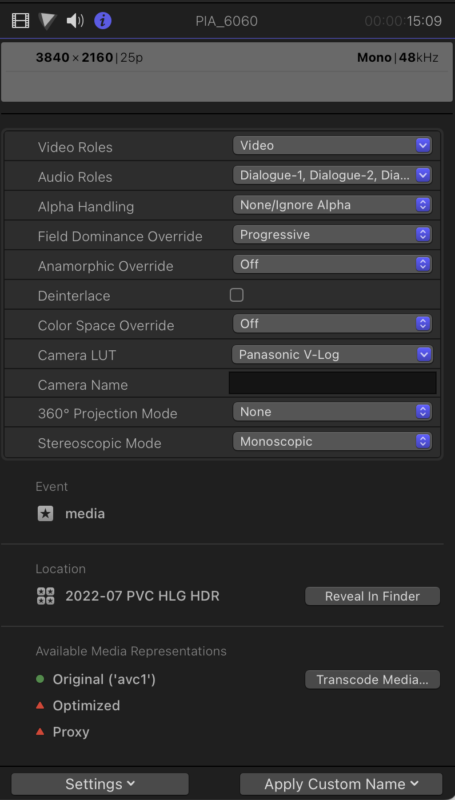
First, create a new Library set to Wide Gamut HDR, then create a new project set to the Wide Gamut HDR – Rec. 2020 HLG color space. Next, grab some HDR iPhone footage, place it in a timeline alongside footage from other cameras, and use the iPhone’s brightness levels as a rough brightness baseline. When working with SDR Log clips from other cameras, you’ll want to first set the correct Log profile in the Info Inspector under Settings.
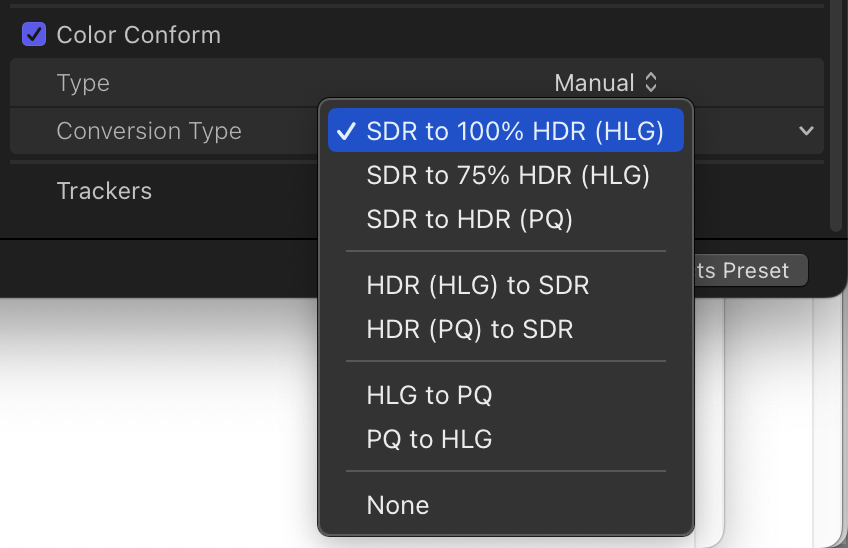
Non-Log SDR clips can use FCP 10.6.6’s new Color Conform setting (at the bottom of the Video Inspector) to convert SDR to HDR at whatever brightness level you choose, but do realize that you have probably limited your potential dynamic range by not shooting Log or HLG.
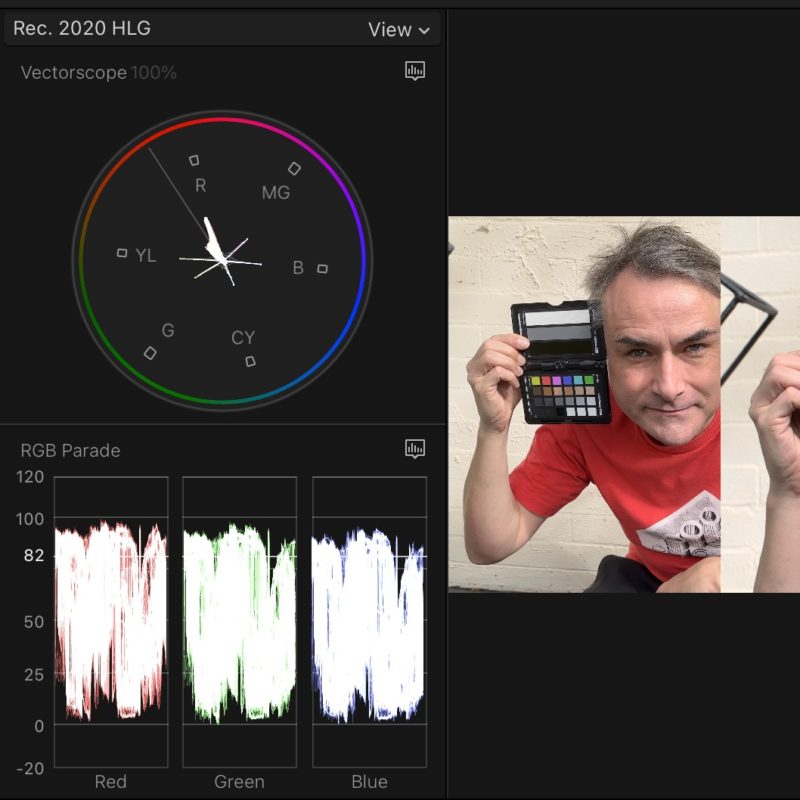
Remember that HDR will absolutely make your clips brighter than they used to be, so prepare for a different look. Grade each clip, focusing on consistency, and note that HLG’s video scopes will look similar to SDR, so you should still grade as if 100 IRE is the peak possible brightness.
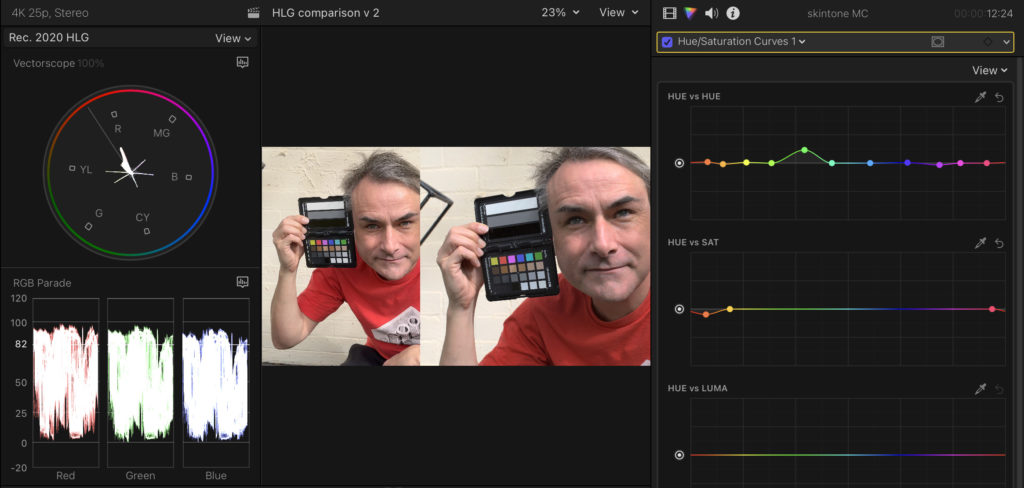
Connect an external non-HDR screen, then move the viewer (or the whole UI) between both monitors to be able to grade for both SDR and HDR at the same time. Take special care with skintones; excessive shine won’t look great. Beware: a shot that looks great in HDR can easily look “milky” in SDR, so be ready to fix it with a Luma curve, and make sure it looks good on both SDR and HDR displays. (Remember, if you want perfection, you’ll need reference monitors and two separate grades — we’re going for “pretty good” here.)
Next, export to the Computer output with the Dolby Vision setting, which is now built-in, and just as quick as H.264 on newer Macs. Finally, upload to Vimeo and/or YouTube, and wait for HDR processing to complete. This should take place in minutes on Vimeo, but is likely to take a little longer on YouTube. Eventually, that video should look good on HDR-capable displays, but SDR displays will see something less good (desaturated and potentially more contrasty) on YouTube.
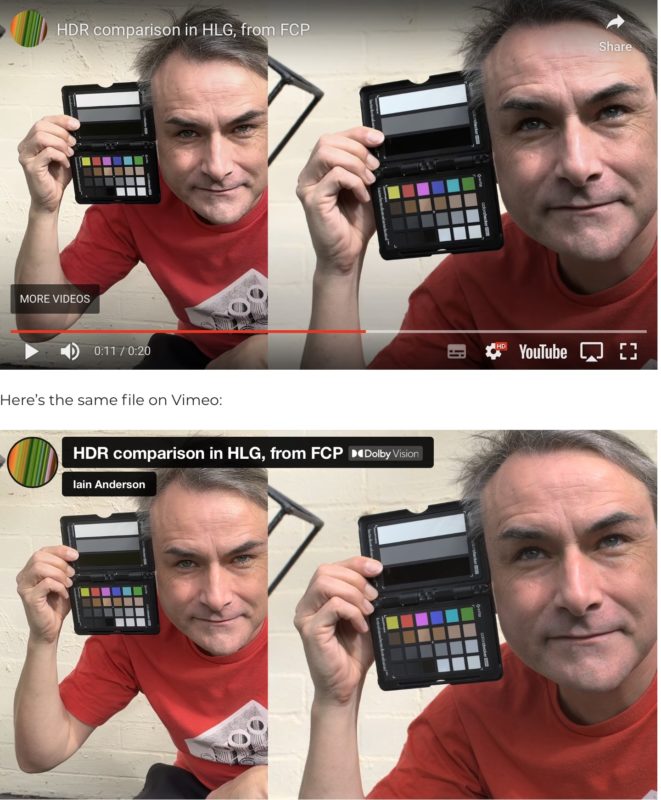
There’s a crucial difference between the two sites here: Vimeo is sending the HDR file to viewers directly, and letting the OS do any conversion needed — it looks good everywhere. YouTube only sends HDR content to HDR screens, and will send its own SDR downconversion if it thinks it’s displaying content on an SDR screen. Unfortunately that automatic downconversion could be better.
Conclusion
Even though moving to an HDR format seems like a backwards step for color accuracy, there is an upside. While color tags for SDR video files are not always interpreted correctly (here’s a long article about it) HDR color tags are more locked down, with less room for interpretation — eventually, at least. However, because YouTube is still delivering sub-standard SDR conversions to most viewers, there is still no perfect solution that will keep everyone perfectly happy.
Today, if you’re on a modern MacBook Pro, editing in Final Cut Pro, uploading for web delivery, and your clients don’t demand that everyone sees exactly the same thing, you can switch to HDR and push the boundaries for at least some of your audience. Each platform will vary in its handling of HDR, and you’ll have to test widely to assess how usable it is, but Vimeo is doing a far better job than YouTube right now.
Is all this worth it? Maybe. I suspect many clients will value the extra brightness and vibrancy above color consistency, so if you’d like to stretch into HDR, upload a few tests and see if they notice. If their only response is “they look super vibrant and I love it” you could be onto a winner. This will be easier if you don’t show them an SDR edit first — expectations will have already been set.
If you want to start, the easiest approach is to shoot in HDR with your cameras in the first place, perform simple grading, and get to a place that’s good enough. If you start by trying to mix SDR and HDR, or by up-converting sub-standard footage, you’re likely to encounter some problems. And of course, the situation outside FCP is still far trickier than it should be. But it’s not all bad: should your experiment fail, it’s relatively easy to create SDR outputs from HDR assets, so you’ll have a fallback.
HDR isn’t easy for everyone yet, but it’s still something you should consider wrapping your head around. If your gear is capable, then it’s a new frontier, fast approaching, and worth exploring. Let’s hope it becomes more accessible for more professionals soon, because you don’t want your clients to just start shooting everything on their phones.
———
Thanks to Jamie LeJeune for corrections and added info on recently updated Resolve workflows.
Thanks to Charles Poynton for corrections regarding technical aspects of HDR terminology.

Filmtools
Filmmakers go-to destination for pre-production, production & post production equipment!
Shop Now