I thought that for this next article, I would take a look at a growing trend for editors these days, and that is the “One Man Shop”. What I mean by that is that these days, with systems coming down in price, independent business owners/editors are wearing many hats, and one of those hats is that of the offline/online editor. Let's take a look at how an editor can offline a 1080i HD project, and then carry it through to the online.
{C}
THE EASY SETUP
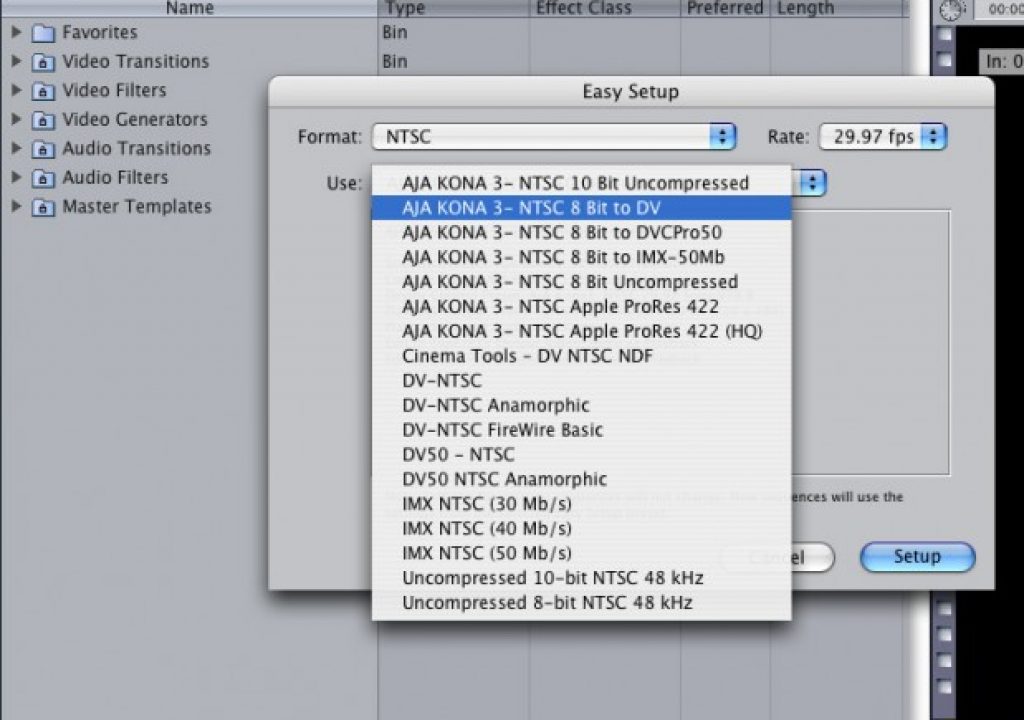
The first thing that you must always worry about when offlining your project is how to set it up. If you make a mistake at this point of the process, you are setting yourself up for a world of hurt later on. Establishing which Easy Setup is right for you will vary depending on which capture card you are using (Kona, Blackmagic, etc), as they all come with their own specialized Easy Setup's, depending on what the capture card is capable of doing. The first and most important thing is to establish what the frame rate of our HD timeline will be, so that we can edit our SD offline in the same frame rate. Since we are using 1080i as an example, we already know that the frame rate is 29.97 (59.94i), the dimension of the frame is 1920×1080, the frame is anamorphic widescreen (16×9), and we are dealing with an upper field dominant format. Now, I know that you are probably asking “How does this help me for the offline?”. There are really two very important details that you need for your offline. First, that it is 29.97 fps, and second that it is anamorphic widescreen. Knowing these two items will help you set up your Easy Setup. Using the Kona 3 as an example, I always recommend that people use the NTCS 8-bit to DV setting, as it can be quickly modified for not only anamorphic widescreen, but for a 23.98 offline as well.
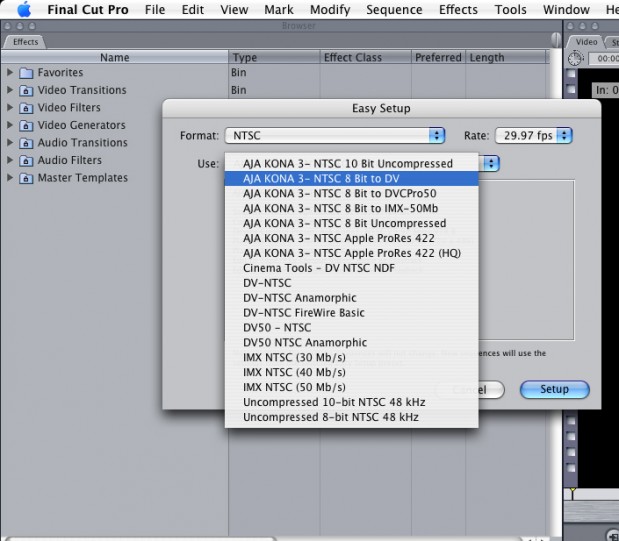
Selecting this Easy Setup will configure your edit system to capture from a standard definition, 29.97 fps VTR in a 4×3 aspect ratio. To change the aspect ratio of what you are capturing, navigate to FINAL CUT PRO>AUDIO/VIDEO SETTINGS, and I would suggest duplicating not only the “Capture” preset, but the “Sequence” preset as well.
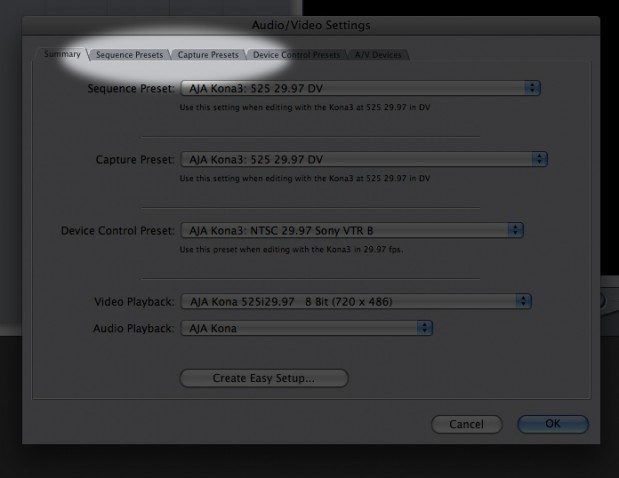
Something to keep in mind is that you are not actually changing the aspect ratio of the clip you are capturing and editing within Final Cut Pro. All FCP is doing is creating a “simulated” 16×9 anamorphic frame for you to work within. Assuming you are offlining for a 1080i online, the only thing you need to do in both your new “Sequence Preset” and “Capture Preset”, is to make sure that the “Anamorphic” box is checked.
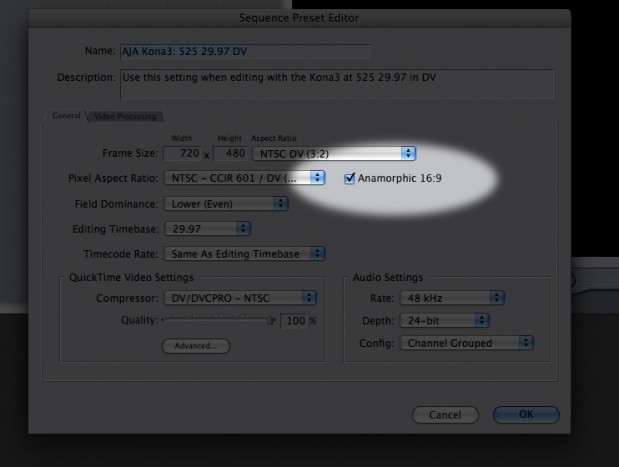
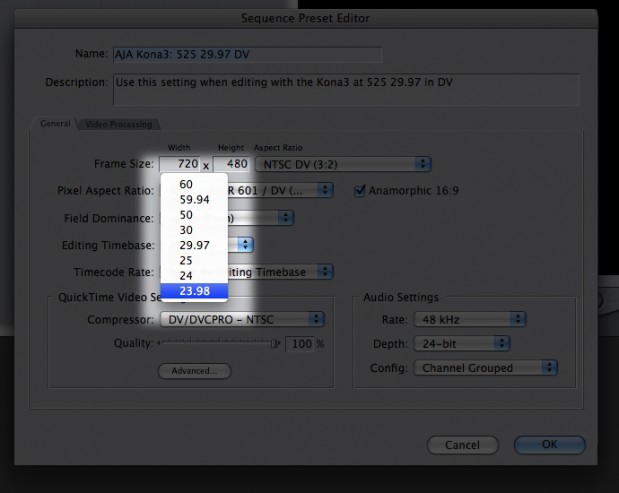
I would probably recommend making a new preset for SD Anamorphic to make your life much easier. On the flip side, if you were doing a 23.98 HD offline, you would not only check the “Anamorphic” box, but you would also change the frame rate from 29.97 to 23.98.
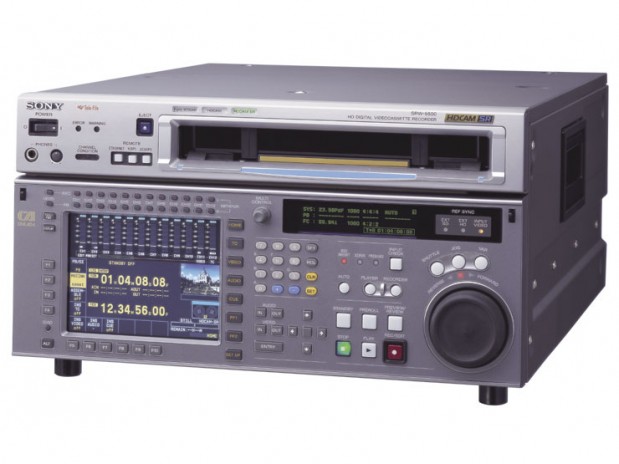
It is important to keep in mind that if you are going to be doing a 23.98 HD offline, you will need to capture from a deck that supports a 23.98 T/C output like a Sony F500, or Sony SRW-5500.
Finally, I just want everyone to understand why you need to make your sequence anamorphic. To be perfectly honest, if you were doing nothing but editing, I'd tell you not to worry about it, and just digitize and edit with letterboxed video. As an offline editor, it is your job to put absolutely everything into the timeline, so when the online editor takes over, there is no thought required, and no need to ask any questions. All your supers, graphics and video are positioned correctly within a 16×9 space. If you don't work in 16×9 space, when you use the Media Manager to create your HD timeline, all of your supers will be located in the wrong space in the frame, as you have switched from a 4×3 aspect to a 16×9 aspect. This one reason is why it's imperative, if you are doing an offline for an HD online, that you work in an anamorphic timeline.
(next page: Your VTR, Editing, and a video tutorial on the off/online process)
YOUR VTR
I had briefly mentioned two HD VTR's before that you might use to do your offline with. Most people cannot afford to rent an HD VTR, so a great alternative is to have your footage downconverted to D-Beta, Beta SP or even MiniDV to (hopefully) save yourself some money. One thing that is very, very important if you are looking to rent an HD VTR to do your offline is first, make sure it has all the outputs that you need. Some VTR's have HD-SDI only, and that will not help someone who has an SD analog capture card. Ideally, you want an HD-VTR that has an SD-SDI downconverted output, with the option of playing back 23.976 psF tapes. Both the Sony F500, and SRW-5500 support this setup, but keep in mind that the SD-SDI downconversion board is an option to those VTR's, and some companies might not have that available. Also, you will need to make sure that you change your SD-SDI downconverted output to “Squeeze”, so that it takes your footage and stretches it to fill the entire SD frame size. That way, when captured into FCP using the “Anamorphic” setting, your footage will be converted back to a proper 16×9 frame. If you do not know how to change the setting in the VTR, make sure you talk to the rental house before you leave with the machine. If you are looking to rent one of these VTR's, I know that in Toronto, Canada, they rent for about $1500 per day, which is expensive. Another option for editors on a budget is to take your tapes to a post house, and inquire as to how much it would cost to have them capture your footage onto an external FW400/800 drive. You just need to make sure that you tell them you are doing an offline for a 1080i online, and if they are a reputable post house, they will know exactly what you need.
EDITING
As far as the editing aspect of the project goes, assuming you have set everything up correctly, you should have no problems, and you won't notice anything different from your normal SD workflow. Something extremely important to keep in mind is that if you are using stills (i.e. – name keys) from Adobe's Photoshop, or animated openings, bumpers and lower thirds from Motion 3, make sure that you create and render them in the final output format that you will be onlining. If you are going to be finishing in 1080i ProRes HQ, make sure that you are working in 1920×1080 square pixels, and you are rendering with the ProRes HQ codec from Motion, so that no additional work is required once your offline is done. The same goes for Adobe's Photoshop. Photoshop actually has television presets including both SD and HD, and I would recommend using PNG files as your file type of choice, as they are real time when working in Uncompressed HD (if that is how you are finishing).
THE OFF TO ONLINE PROCESS
At the end of the day, if you have set your Easy Setup's correctly, and you choose the correct one before you start, everything should be smooth sailing, and after you get over the overwhelming feeling of completing your first “online”, you will be finishing all your projects in record times keeping your clients happy, and the business returning. If you have any questions or comments about this article, or anything else Final Cut Studio 2 related, feel free to drop me a line.

Filmtools
Filmmakers go-to destination for pre-production, production & post production equipment!
Shop Now