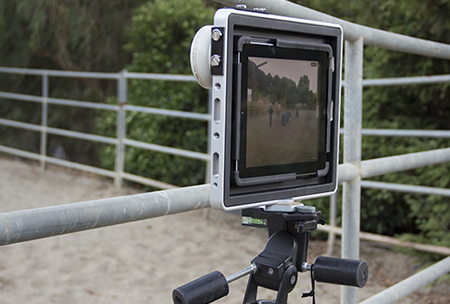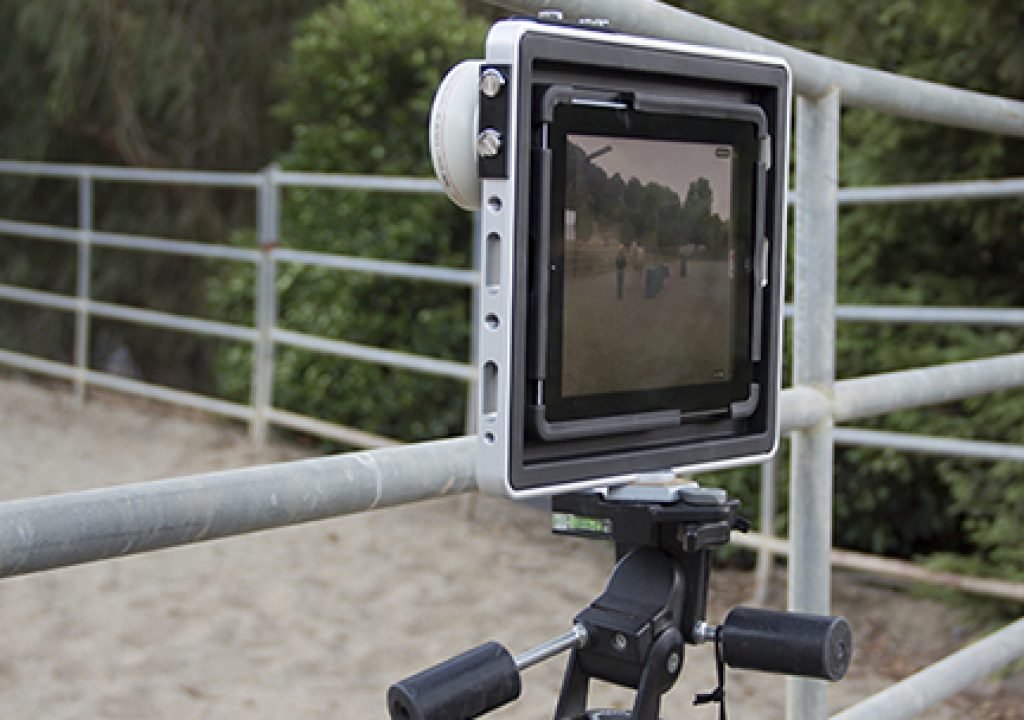
The Padcaster™ is a strong yet lightweight aluminum frame that comes equipped with both 1/4-20 and 3/8-16 threaded holes lining all edges of the frame, and has a molded Urethane insert that secures your iPad into position. Attach external microphones, lights and other camera accessories to enhance filming with the iPad. A tripod thread and locking-pin hole let you easily connect the Padcaster to a tripod, monopod or shoulder mount for stable shooting and a solid feel. Adding the Lenscaster™ attachment allows you to attach various lenses to your Padcaster giving your iPad some options in various shooting conditions.
Why the Padcaster?
I know what you’re thinking – why the hell would I ever want to shoot with an iPad in the first place? When I first saw the prototype of the Padcaster in use at the NAB Show in Vegas this past Spring, I admit that I had mixed feelings about it’s practicality and use – until I got a demo by the inventor/developer of the Padcaster, Josh Apter from Manhattan Edit Workshops. Once I saw how easy it was to snap the Padcaster to a tripod or monopod, connect external audio devices and then record/edit/upload all directly from one single iPad, I was convinced this was something special.
Josh Apter giving a live demonstration of the Padcaster prototype
Beyond hobbyists and amateurs who frequently use their portable devices as they’re only production tool, using the Padcaster with an iPad does have several potential professional applications – especially when combined with a number of accessories. I’ve been experimenting and shooting in various locations with the Padcaster over the past few weeks and everywhere I go, I get a lot of interested inquiries – usually resulting in asking for a web address where they can get one. Fortunately, the URL is molded into the Urethane insert that holds the iPad: www.thepadcaster.com
The Padcaster prototype in use in the field for video podcasting/reporting direct to the Web.
What comes in the Padcaster/Lenscaster Kit?
The Padcaster is ready to use right out of the box. However, if you also get the Lenscaster attachment, you simply have to attach it with the provided specialty fasteners that are cleverly designed to NOT require any tools (which is especially handy when you’re in the field and want to tighten a loose fastener). The Lenscaster attaches to the frame directly over the corner where the iPad lens is situated and perfectly aligned around the center of the lens.
The Padcaster comes complete and ready to use.
The Lenscaster easily attaches to the frame with special hardware.
The Padcaster with the Lenscaster installed, stands perfectly balanced on a table or flat work surface.
The aluminum frame has a base plate that is designed for easy attachment of a quick-release plate or video tripod mount with mounting thread and locking pin hole. It’s designed with appropriate slots to access plug-in components and many 1/4-20 and 3/8-16 threaded holes to attach and mount many devices and accessories. There are also slots in the Urethane insert to allow easy access for the power and volume buttons. I did find that actually plugging in the USB connector and headphones into the audio jack were more easily done by removing the iPad and feeding the cables through to securely fasten them to the iPad and then snapping the iPad back into place. The nice part about this design is that is acts as a reinforcement and strain relief on these cables so they don’t become detached too easily.
Easy access to the iPad’s power and volume buttons while still mounted in the Padcaster.
Easier to attach cables before inserting into the Padcaster Urethane housing.
With the Lenscaster installed, you only need to be sure you have the correct size step-up/down rings to mount additional screw-on video lenses.
The Lenscaster with a Vivitar 2.2X Tele video lens attached.
The Lenscaster with a Vivitar Wide Angle video lens attached.
(The Padcaster in-use – Continued on next page…)
The Padcaster in Use
Okay – just to get this out of the way, you KNOW I had to use my horse again in another product review. She’s just a good model as we’re out with her almost daily, so I drag my gear out to the stables.
🙂
I first try a side-by-side comparison test with the lenses and see how they affect the light coming into the iPad. Starting with the Vivitar 0.43X Wide Angle lens, I set up the Padcaster on a tripod near the door to the stables and shoot some video footage using the Video Camera+ App by Totus. I then removed the Wide Angle lens and shoot some footage with no external lens and only using the built-in lens from the iPad. I then attached the Vivitar 2.2X Telephoto video lens and shot a clip. These examples are all captured from the test clips I shot with no correction and you can see there’s quite a bit of difference in what the iPad chooses in this kind of lighting condition with a strong backlight source from the door at the opposite end and the artificial lights on the ceiling. The vertical lines of the posts in the barn also reveal how much lens distortion is appearing with the add-on lenses. But still, the center focal point is properly aligned and remains in focus.
Shot with the Lenscaster and the Vivitar 0.43X Wide Angle video lens
Shot with no additional lenses
Shot with the Lenscaster and the Vivitar 2.2X Telephoto video lens
I then took the setup outside to the area to see how it handled stronger light and autofocus with movement and dust. To my surprise, even with the external lenses, the iPad did a good job of staying focussed and maintained decent light/color balance.
The Padcaster mounted on a tripod with the Vivitar Wide Angle lens
Here I’m selecting the focal point on the iPad video camera software before recording
Looking through the iPad while recording with the Vivitar Wide Angle lens attached
And here are a couple of examples from the clips I shot:
Shot with the Vivitar Wide Angle lens attached
Shot with the Vivitar Telephoto lens attached
More Configurations & Tests
I wanted to see what it was like to use the Padcaster out in public and how easy it was to set-up and change varying configurations in different conditions. I first headed out to a park by the bay and it was extremely windy/gusty that day. What I quickly realized was though the Padcaster is sturdy and stabilizes the iPad securely, any movement from the wind or accidentally “kicking” the tripod produces that dreaded “jello effect” from the Rolling Shutter of the sensor. This alone would probably prohibit me from wanting to use an iPad if I’m going to be moving around a lot… which is just the nature of the beast. The shame is, the Padcaster feels really good in your hand, and makes the iPad much easier to hold and would otherwise make for a good grip to shoot stable hand-held footage. But using my trusty 25yr old Bogen steel tripod (it weighs nearly 25 lbs) and locked everything down, I was still able to get some nice shots as long as I didn’t pan too quickly of course!
Shot with the Vivitar Telephoto lens attached
This 36′ wide kite was shot with the Vivitar Telephoto lens attached
I took a bunch of gear with me down to the Oktoberfest in the quaint small town of Clayton, CA near where I live and set up across from the Harley parking outside the gate. Of course I got lots of questions from drunk people passing by, there were quite a few pro photographers and videographers at the event who were intrigued by the different configurations I was able to do with the Padcaster. I snapped a few shots with different configs and possible setups I might use for day/night video shots and interviews – including the LitePanels Micro Pro, wireless mic receiver or a shotgun mic mounted and running through an Apogee jam interface to the iPad, headphones to monitor audio and different lens combinations, etc. There was still plenty of room for more if I needed it.
Padcaster with various accessories attached
Padcaster with various accessories attached
Using the Padcaster with a DSLR
The Padcaster also makes a great frame for use with a DSLR setup, simply by popping out the Urethane iPad insert. I was able to easily attach my HD Monitor with battery pack, the Micro Pro LED light and the wireless receiver with my 60D. So instead of loading down the camera body with multiple cold-shoe mounted devices and clamping stuff to a tripod, everything can be mounted to the Padcaster frame and easily moved from a tripod to a monopod to a small jib or slider rig complete, since the frame attaches to a single quick-release plate.
Removing the Urethane insert to use with a DSLR
The DSLR, HD monitor and accessories mounted to the Padcaster frame
The DSLR, HD monitor and accessories mounted to the Padcaster frame
(Additional Uses – Continued on next page…)
iPad Prompter or Slate Support
Since the iPad is also a great production support tool, there are many apps available to make life on-set and on-location much easier. From slates to viewers to prompters, there’s bound to be a tool you rely on and wish you had another set of hands for your iPad – or at least a heavy-duty frame to hold it in! I found that on a camera tripod, I can lock it down in 90º angles and utilize it in several positions – even flat if I want to do some simple edits/playback in iMovie or check online for a Google map location and still be setting up my other gear.
Using the Padcaster with an iPad running prompter software in both landscape and portrait mode
Live Light Painting & Slow Shutter Photos
I’ve been wanting to try my iPad with the Slow Shutter app to get some cool light trails and experiment with light painting. Of course you need to keep the iPad perfectly still for this, and the Padcaster does that in spades! Depending on which app you use, you can get some amazing results – and being able to preview your light painting LIVE on-screen is amazing! I only wish my DSLR would allow me to do this too!
Using a Slow Shutter app on the iPad to capture light in motion
Using a Slow Shutter app on the iPad to do Live Preview Light Painting with an LED flashlight
Here’s a crude hand-held video I shot while light painting on the iPad:
Final Thoughts & Overview
Whatever creative use you may have for your iPad in production, the Padcaster will definitely make it easier to use all-around. It’s easier to hold and transport in a bag without fear of it getting crushed or shattered if you drop it off a crate. I’ve just kept my iPad mounted in the Padcaster 24/7 because it’s safer and easier to manage – even if holding to read/use apps in bed or on the couch.
The Padcaster is sold online at www.thepadcaster.com and the PVC Promo price through October 15 is $149. for the Padcaster alone or $189. with the Lenscaster adapter + S/H (normally $199 & $229 + S/H) – but at that price, it’s a no-brainer to make your iPad work a little harder for you!
____________________________________________________
Jeff Foster is a published author of several how-to books and training videos in the motion graphics, animation and video production industries and is an award-winning video producer and artist. Visit his web site to learn more about his training methods, tips & tricks at PixelPainter.com


