Everyone who edits with Final Cut Pro knows that you have full access to animating and keyframing parameters via the Viewer. Double-click a clip in the timeline and it loads in the Viewer. There you can keyframe parameters in the Motion tab or parameters of any filter that might be applied. But you can also do this in the timeline as well.
To performing keyframing via the timeline you have to turn on the Toggle Clip Keyframes (option + t). As mentioned in yesterday’s Quicktip you can turn on and off different parameters to save timeline real estate.
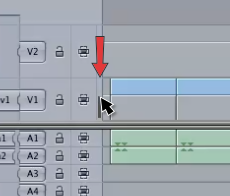
The way to get the keyframe editor to appear is to turn on Keyframe Editor. Then a space will appear below each video clip and a Keyframe Editor Sizing bar will appear in the track panel:

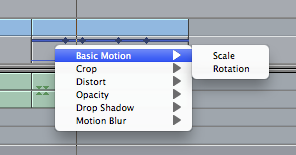
This Keyframe Editor Size slider is the key to make the timeline Keyframe Editor large enough to do some good work. Once that is setup you right + click in the Keyframe Editor below a video clip to select which parameter you want to display in the Keyframe Editor:

Keyframes can be added via most any method that you add keyframes in the Viewer. This method is complete with smoothing and handles as well. See the video below for the Keyframe Editor in action.

Filmtools
Filmmakers go-to destination for pre-production, production & post production equipment!
Shop Now


