For the boutique studio looking for a way to collaborate on media projects from home, Nextcloud could be just the ticket. It’s free, it’s been road-tested by 20 million users, and it doesn’t require an army of IT professionals to set up. I’m not going to pretend that it’s completely plug-and-play, but it’s within the reach of the reasonably tech-adventurous video editor or digital artist.
In this article I’ll take you through the what, why, and how of remote collaboration with Nextcloud; in a follow up video walkthrough I’ll break down the recipe for setting up your own Nextcloud service.
What is Nextcloud?
Most people know what Dropbox is. You sign up for free and it syncs your files across multiple machines and makes them available for download. The problem for media professionals like us is that we have a lot of files. And our documents aren’t measured in kilobytes, they’re measured in terabytes. At the time of writing, 100GB of data on Dropbox will set you back $25 a month per user account.
What if you could host your own Dropbox and have as much data as you want? That’s Nextcloud. Nextcloud offers all the convenience of Dropbox, but since you host it yourself, you can pick as big and bad a hard drive (or RAID) as you want to use as the storage volume. So a quick trip to Amazon and about $700 later, you could have 36TB of available sync storage.
OK, let’s get down to details for those who aren’t familiar with Dropbox as anything other than a place to store and download files. First of all, Nextcloud is completely free. That said, if you go to download it, there’s an enterprise version of Nextcloud for those who want paid support, and several vendors who will charge you to host a Nextcloud server for you. But then you’re back to paying by the terabyte, so let’s scratch those options off our list and stick to the free self-hosted solution. Here are the benefits:
Local copies of your files synced everywhere
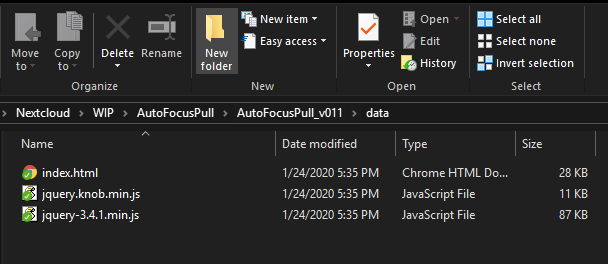
Let’s say you’re working on an After Effects project. You save it on your Mac laptop, then walk across the room to your Windows workstation. There you automatically have the same folder structure as you had on your Mac, and within seconds you find the updated After Effects file, ready to open on the Windows machine.


This is what makes Nextcloud so powerful. As long as you set up your file paths correctly you can move back and forth between multiple machines and Nextcloud will keep all your files in sync. You can start work on a project in the office, and when you get home you can immediately pick up where you left off on your home workstation, which was happily downloading changes as you were making them at the office.
I do need to make a caveat at this point: If you’re going from one Mac to another, or one PC to another, everything is flawless. However, due to the fundamental differences in file systems between Mac and PC, you’ll have cross-platform issues if you use absolute file paths. If you use relative file paths to reference media outside your project files (and After Effects for example does just that) all is well.
I also want to mention that this thing is solid. With an estimated 20 million users, the big kinks have been worked out. I’ve never lost a file from using this thing. Occasionally if I have the same document open and being edited on two machines I’ll confuse Nextcloud. In such cases it’ll make a “conflict” copy file so that I can later choose which version is the one I want to keep. I make no guarantees or warranty for your data, but all I can say is that after several years of using with expensive data for TV commercials and feature films, I trust it to keep my data intact.
Instant file sharing access for clients via a single right-click
Do you have a render you want to share with a client? just right-click the file on either a Mac or Windows and choose Share via Nextcloud > Copy public link. That’s it—Nextcloud will paste a URL into your copy buffer. Just paste it into an email and click send.
Need to set edit permissions and a password? Choose share options from the same menu. Password-protected files will present to the client as a standard web page interface. What’s more, Nextcloud includes an embedded video player for browser-based playback of shared MP4’s and other formats.
This one comes without any extra effort: Since your data is being copied to multiple machines, you automatically have redundant backup. The more computers you share the data between, the safer that data is (From drive failure that is. There’s obviously more chance for your data to be stolen…). Of course if all your computers live at the same campus, it’s not safe from earthquake/fire/tornado/tsunami/EMP. But it is safe from drive failure. And if you have computers at an office and home sharing data, then that data is safe from most catastrophes.
SSL security without requiring a VPN tunnel
Properly set up, Nextcloud operates through a security certificate so that client computers can access it via https instead of old-school http. That means you’re tunneling to the data via SSL (well, really TLS these days, but everyone still seems to call it SSL). So you—and your clients—get transfer security without having to set up messy VPNs or leave your files vulnerable to easy pilfering.
What are the hardware requirements?
Nextcloud should cost you next to nothing in hardware. You can even run it on a $30 Raspberry Pi. (I’ve done it, but I wouldn’t advise it. It’ll work great for a month or two, and then when you start hammering it with a lot of data it’ll seize up and stick its electronic legs in the air.)
Rule of thumb here: if you have a PC from 2010 or later that was reasonably powerful in its day, it’ll make a perfect Nextcloud host. My Nextcloud is actually running on a 2009 Mac Mini formatted to run Linux. I planned to transfer it to a 2012 Mac Mini (you can pick one up for under $US200 on eBay) but the old girl refuses to die.
If you are using an older machine, at least replace the system drive with a new one. You can pick up a new 128GB SSD for around $30—that’s more than enough to install the Linux kernel and the Nextcloud system files.
And then of course you need the data drive. Speed isn’t important—your internet bandwidth will be the weakest link in your data chain, not the drive speed—so you can pick a fairly humble drive spec like this 5900 rpm 4TB drive that comes in under $125.
In summary: that older PC you gave to little Jimmy to play Minecraft on? Go break little Jimmy’s heart, then come back and read the rest of the article.
How do I set it up?
Let’s get to the nuts and bolts. First, you need to house your Nextcloud server at a location that has good upload and download speeds. So if it’s your house, make sure you have good internet service. A lot of internet providers boast 100 Mbps speeds, but in the fine print it turns out to only be for downloads. Such asymmetric services may have upload speeds of 8 Mbps or less. Since your server is going to be sending updated files to multiple computers, it’s going to be doing a lot of heavy uploading. In my experience a connection of 100 Mbps minimum upload and download is sufficient for a good experience with Nextcloud.
Secondly, you’re going to need to install Linux. This is not as hard as it might sound. I would recommend Ubuntu Server 18 LTS, the current stable version of Ubuntu. I’ll be creating a video walk through of the process soon, but you’ll find it pretty easy to set up if you give it a shot yourself.
If you want to use an old Mac Mini as the server, you’ll need to Google how to set up Linux for the specific year model. It requires a little booting trickery to initially get the Linux installer to run (the keyboard shortcuts vary from model year to model year). But once the installer launches it should work like any off-the-shelf x86 machine.
Thirdly, you install Nextcloud via Snap, an installer tool that should come pre-installed on any Ubuntu version after 16.04. To do so, use the command:
sudo snap install nextcloud
The great thing about installing via snap is that all the tricky configuration is taken care of for you. Here’s a nice, quick article on how to set things up if you can’t wait for my video tutorial.
Fourthly, you’ll need a domain name and an SSL certificate to be able to reach your server via https when you’re not on the same local network as the server. The good news is that the Snap Nextcloud installer includes a free SSL service called Let’s Encrypt that handles all that for you. If you don’t have a domain name linked to your IP address, you can use a domain forwarding service to create one. Just check to make sure it’s compatible with Let’s Encrypt first (freedns.afraid.org isn’t). You may also need to set up a cron script to automatically update the DNS records if your IP address is dynamic (most residential IP addresses are).
Finally, you’ll want to add an external storage drive (that’s your big, multi-terabyte volume) to use as the data drive. Once you’ve got it to automount on your Linux system, you can use a simple command to tell Nextcloud to use it as your data drive instead of your system drive.
Oh, and of course you then need to install the Nextcloud client software on all your client computers.
There are a few other things you can configure once all this is set up, but most of it is good to go out of the box. If you’re already overwhelmed by the steps I’ve just outlined, don’t panic. Firstly, if you have a friend or distant relative who knows anything about Linux, most of the steps should be straightforward to them and they can probably help walk you through any problem areas over the phone. Secondly, with a bit of luck and some COVID-19 downtime, I should be able to create that video walkthrough in the next few days.
So how does this help me during the COVID-19 lockdown?
Good question. There are several different workflows that you can use once you’ve set this up. You can create as many user accounts as you like, and each account will start carving out a piece of the main storage unit. But for true collaboration, use a single Nextcloud account that all collaborators have access to. Then on your local machines, make sure everyone maps their Nextcloud directory to the same place. So if you’re on Windows for example, that might look like D:/Nextcloud. If you’re on a Mac, you might choose a Thunderbolt drive that has the same name on each client computer, e.g. /Volumes/NextcloudDrive/NextcloudData.
You can then make an initial dump of the source data onto each client drive via a hardware copy. When Nextcloud goes to sync next time it’ll see those files already there and won’t try to re-copy them from the internet (as long as your copy process didn’t modify creation dates by mistake). The first sync might take a while, as Nextcloud databases all the files and confirms they’re identical, but then things should sync seemlessly. My preference is to start from scratch and have Nextcloud transfer everything over the internet to the new client, but if you already have terabytes of information stored that’s not going to be an option.
Once that’s done everyone can work off the same data and their changes will automatically sync. Of course you’ll run into problems if everyone’s working off the same project file at the same time; if you all save different versions of the same initial document/project file, you’ll create conflicts. But then, that’s a problem you’d have even if you were sitting next to each other at the same facility. It’s up to your host NLE or other software to handle those kinds of collaboration scenarios.
While you could sync all your video files, I would leave them on a separate drive and focus on using Nextcloud to store project files and possibly render files. I’ll typically render EXR sequences to my Nextcloud drive and I’m always surprised at how quickly they’re uploaded and transferred to my other Nextcloud client machines.
That’s it for now. Hopefully I’ve inspired you to at least look into Nextcloud as a remote solution. As I said earlier, I’m not pretending this is a three click solution, but it is a manageable one, if you’re willing to spend a couple of days and a few tufts of pulled hair setting it up.


