Editor’s Note: “28 Weeks of Post Audio” originally ran over the course of 28 weeks starting in November of 2016. Given the renewed focus on the importance of audio for productions of all types, PVC has decided to republish it as a daily series this month along with a new entry from Woody at the end. You can check out the entire series here, and also use the #MixingMondays hashtag to send us feedback about some brand new audio content.
There are a wide variety of factors contributing to the quality of sounds that we hear in our lives throughout the day. The pitches, the frequency, the loudness and how the spaces interact with the sounds, contribute to the ultimate blend of it all.
Reverberation is a physical trait, defined in physics as – the persistence of sound caused by multiple reflections in a space. In other words, how does it sound if I clap my hands in this room? How does it sound if I clap my hands in a cave? What I hear with the clap is the reverberation of that space.
Every space we occupy has some sort of reverb characteristic to it. They are all quite different. Many things will affect the reverb of a space. The dimensions – is it a large space or small space, does it have high ceilings or no ceiling at all? What material is the space made of, is it a large room with plaster or dry wall, or is it a small bathroom made with tile and marble? Exteriors have different reverb characteristics than interior spaces. Exteriors can be surrounded in trees that deadens the sound reflections, or it could be canyons that echo the sound for miles.
When location audio is recorded with shotgun microphones, the ambient quality of a space can be captured along with it. Lavaliere microphones however, that are close mic’d, tend to favor the voice in a very important way, at the rejection of many other sounds, often including the reverberation. This is useful to keep noises out of the recordings, but it’s not the way we hear voices, so these dry recordings need a bit of lift to give them characteristics that we are used to hearing. Adding reverb in the mixing process adds character and dimension to the main sound elements – the dialog, music and effects tracks.
Since many film sets are simply a large stage with a couple of flat walls, dialog tracks are often mixed with various types of reverb for clarity, for story and for meaning. For instance, the scene could be a preacher in the pulpit of a large cathedral, even though the actual production space was in reality, a small green screen stage. Adding a large reverb to the dialog in mixing creates the illusion of this huge reflecting sound, helping tell and sell that moment of the story.
Reverb is also an essential component in dialog replacement or ADR. I have a prior post on that here. The location audio will be recorded with whatever reverb was characteristic to the space that served as sets. Later, when the actor rerecords the needed lines, it will be in a flat, quiet room. Reverb will be required to better match the location recordings to the newly recorded lines of dialog.
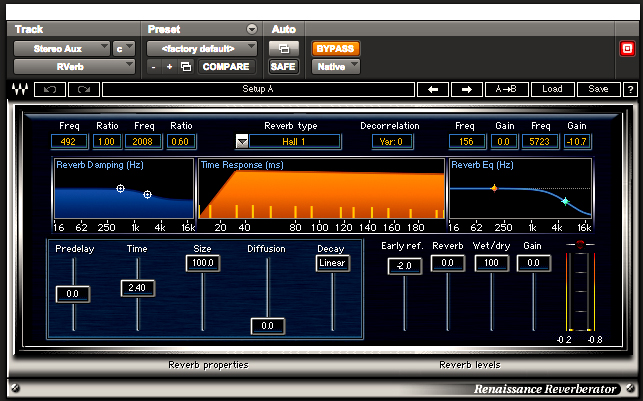
There are many different types of reverbs and reverb devices, but in general they all have similar parameters. There is the type of reverb itself – a plate, a hall, a room and many others. There are also a number of parameters in how the sound source interacts with the chosen reverb type, there is damping which muffles the reverb, there are EQ parameters and much more depending on the device. Let’s have a look by using the Waves Renaissance Reverb for an example which is a digital reverb, a software device that uses digital algorithms to recreate spaces.
There are three graphs – one is a damping graph, one is a time response graph and one is a reverb EQ graph. The top panels above each graph has controls that work with specific parameters for each function.
The lower half of the device front panel indicates the size and depth of the reverb and the reflections, the wet or dry amount of the signal to the reverb and the gain of the signal. Other controls include the amount the sound is diffused in a space and the delays induced by the reverb unit. Many various reverbs offer variations on the amount of control for each of these parameters. For instance, this reverb can have a time of up to 24 seconds of reverb tail (time).
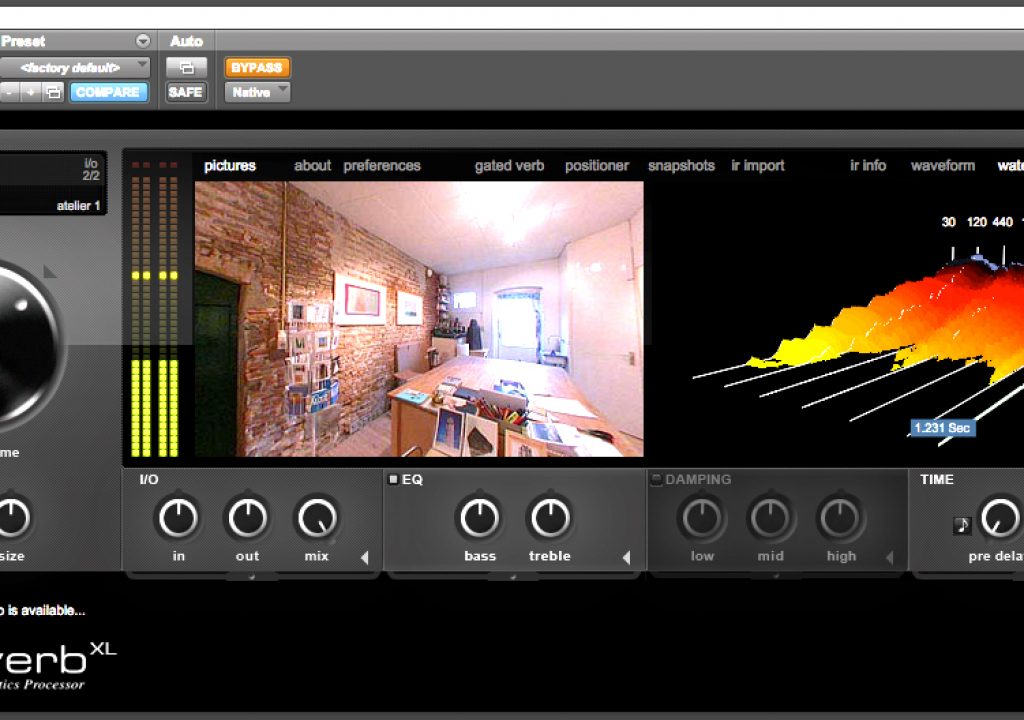
A very different type of digital reverb is something called a convolution reverb. There is a separate, deep discussion to be had about these amazing devices, but suffice it to say that it allows for a space to be “sampled” and then used as a basis for a reverb. A loud, sharp sound is created in a space and the impulse response of that is then sampled for use in a convolution reverb device. There are many convolution reverbs available today. As a point of reference, I will use Audio Ease’s Altiverb, which is a convolution reverb that I use regularly. The team behind Altiverb has crisscrossed the globe sampling spaces of all kinds. They have sampled some of the highest regarded halls, auditoriums, theatres and studios in the world. They also sample spaces from various locations in a space, in the house (audience), on the stage and from different distances, offering high quality reverbs from a single space, in many perspectives.
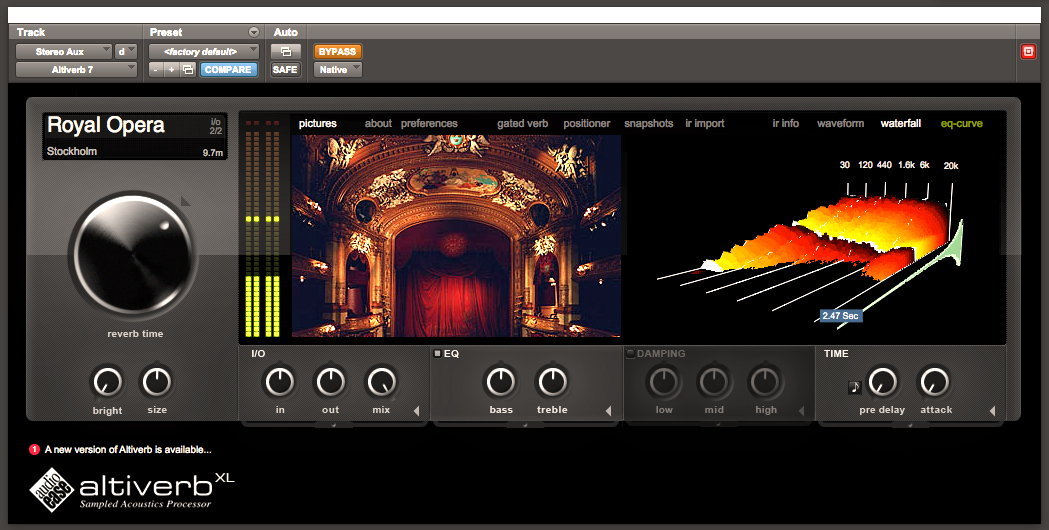
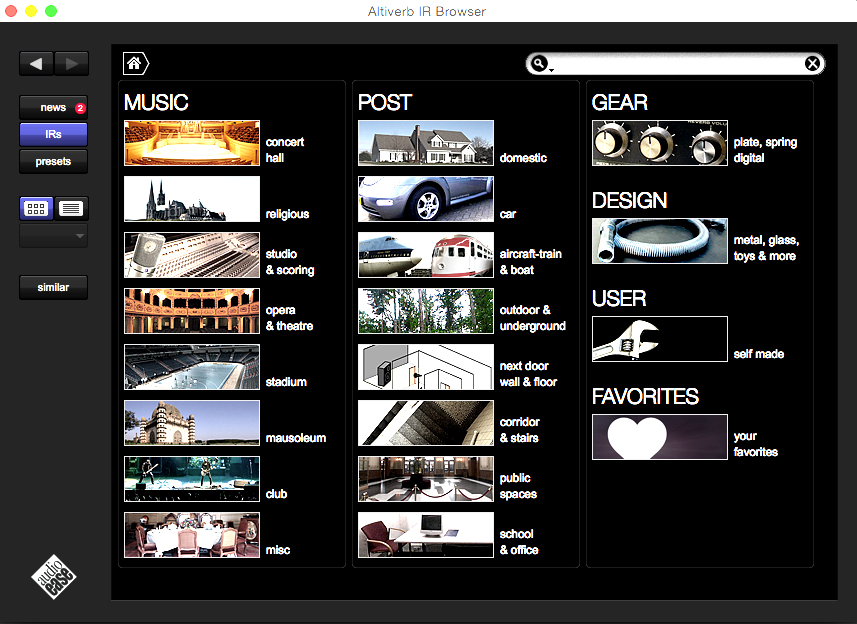
Looking at the interface of Altiverb you can see a similarity in the controls for the reverb parameters with the Waves Ren EQ. However, in this case, instead of using a plate verb, or a room, or a chamber verb, these use a sample from a specific place for the reverb. The Altiverb interface also clearly shows a photo of the space that was sampled as well as the “listening” position of the reverb in the space. Convolution also allows for very specific and unique spaces to be sampled, like car interiors, trains, planes and the types of spaces that typically get used for productions.
There are a number of ways to use the reverbs in a mixing session. You could just put the reverb onto the track you want to process, and play the audio through it. Sometimes this is perfectly correct. However, most of the time, reverbs are sent to an auxiliary track, which offers the reverb to a number of tracks simultaneously, and then that reverb is blended back into the main mix. Here is where the wet/dry control is key. If you put a reverb onto a track itself, you must use the wet and dry balance to determine the amount of reverb being used as the signal is sent through it. Typically, when using an aux track for the reverb, the reverb is set to 100% wet and then the reverb is controlled into the main mix by the volume setting of the reverb aux track, the level of the sends to the reverb aux track, and the level of the signal being sent to reverb itself.
Like most things in audio, there are no hard and fast rules in the “proper” use of reverb. Whatever sounds best, or whatever serves the scene is the proper use. Play with the controls and find out what sounds good. Learn how each section of the control parameters affect the reverb.
There have been many sorts of reverberation techniques used over the years. There are numerous stories about an engineer’s love of the reverb of a stairwell or hallway. They then have a performance in that space to record the effect of the reverb.
What recording studios used to do before digital reverbs were devised, was to create rooms called echo chambers. They would take a fairly unflattering room and cover it in tile and shellac. Then they would send audio to a speaker inside that room and record the resulting reflections, played back in that room, into another track. Rock and pop music didn’t sound great recorded in halls and opera houses like an orchestra would, it required ways to control and minimize the reflections, so the echo chambers and rooms with large hanging plates were devised.
If you don’t have an extra room to use for a reverb chamber, fortunately you won’t need it these days. Today, most editing systems and digital audio workstations have some sort of reverb software device included. Put one on a track and play with the depth, the EQ and damping and the wet/dry signal and see how it can add a sparkle not only to the dialog, but also the music and the effects tracks as well.
This series, 28 Weeks of Audio, is dedicated to discussing various aspects of post production audio using the hashtag #MixingMondays. You can check out the entire series here.
Woody Woodhall is a supervising sound editor and rerecording mixer and a Founder of Los Angeles Post Production Group. You can follow him on twitter at @Woody_Woodhall
![]()

Filmtools
Filmmakers go-to destination for pre-production, production & post production equipment!
Shop Now