This is my first review article on Ecamm Live, a multicam mixer app for macOS-powered computers for live streaming and/or local recording. Ecamm Live features NDI among other camera connection possibilities. Many readers will recall that NDI is a royalty-free software standard developed by NewTek, which I first covered at its historic birth in 2016 with NewTek’s NDI is now the lingua franca among broadcast brands. This article will cover Ecamm Live and its integration as I helped a client last year to create a five camera studio in Miami, Florida, US. Two of the local connected cameras are HDMI, and two are wireless via NDI. Up to 5 remote guests can connect via the built-in NDI-powered Skype integration.
In this article
- Multiple ways to connect local cameras to your macOS-powered computer
- Supported recording or live streaming resolutions
- Audio connection and lip sync
- Playback of pre-recorded clips in a show
- Chroma key (blue screen/green screen capability)
- Translucent graphics, lower thirds with alpha channel
- Record locally and/or stream/broadcast live via your chosen CDN
- Scenes: understanding them and using them
- Realtime output for monitoring or encoding (Pro version)
- Human interaction with Ecamm Live for the operator
- Current pricing
- My wish list for Ecamm Live
- Conclusions
Multiple ways to connect local cameras to your macOS-powered computer
There are at least three ways to connect local cameras to Ecamm Live:
- USB, for either directly-connected webcams or certain professional Canon cameras. The webcam in my client’s computer appeared, but we didn’t use it.
- Cameras with an HDMI output (or even with SDI in some cases) can be connected either with a Blackmagic card (or box via Thunderbolt or USB 3) or Elgato CamLink 4K. My client chose to purchase two CamLink 4K interfaces, one for each of his Panasonic GH4 cameras. There are also two other brands recommended by Ecamm: Magewell and Pengo, which I have never used anywhere. Of course, I have had over a decade of experience with Blackmagic.
- Via the NDI protocol, which I have covered in many articles, my client uses three mounted iPhone cameras which were running the ≈US$10 app called NDICam, which can broadcast the particular camera’s signal via wifi (as my client currently does) or Ethernet, with the appropriate converters on the iOS or iPadOS device. Other hardware NDI cameras or NDI apps for Android or iOS or iPadOS should also work, like NewTek’s own ≈US$20 (although temporarily free) NDI HX Camera app which I have not tested yet since it was launched after my client’s installation.
Note that when connecting 2+ Elgato Cam Link 4K devices to the computer, we found it absolutely necessary to use a powered USB 3 hub to have enough combined amperage for all devices. Otherwise, the Elgato Cam Link 4K devices would spontaneously shut down several minutes into a show. My client chose this one from Plugable.
Supported recording or live streaming resolutions
Here are the spacial resolutions offered by Ecamm Live using its own nomenclature:
- Low (640p) (This probably refers to 640×360 or the opposite if Tall is selected.)
- Standard (720p) (This refers to 1280×720. or the opposite if Tall is selected.)
- High (1080p) (This refers to 1920×1080 or the opposite if Tall is selected.)
- Really High (1440p only with Pro version) (This probably refers to 2560×1440 or the opposite if Tall is selected.)
- 4K (2160p only with Pro version) (Likely to be 3840×2160 if 16:9 or 4K DCI 4096×2160 if “2:1” is selected or the opposite if Tall is selected.)
Ecamm offers variable aspect ratio options (“shapes”), including (using Ecamm Live’s own nomenclature):
- Wide (16:9)
- Wide (2:1) (which is probably ≈2:1)
- Classic (4:3)
- Square
- Tall (9:16) (for vertical video)
You should use the highest spatial resolution offered by the combination of your cameras, your computer and your Internet upload bandwidth, knowing that your CDN (content distribution network) will create and offer lower spatial resolution versions for those viewers whose connection or equipment need it to be lower. In an upcoming section, I’ll go into more detail about the many CDNs supported by Ecamm Live.
Ecamm Live offers a variety of framerates (temporal resolution) for the recording or stream, but I’ll leave those details for the Wish List section at the end of this article. In any case, if your viewers will likely include smartphones and/for tablets, I continue recommending all videos be distributed with one of the following framerates:
- ≈23.976p
- 24p exact
- 25p exact
- ≈29.97p
Most smartphones and tablets on the market (and in use) cannot play over 30 frames per second, so if you were to offer any higher framerate, most of these mobile devices will play only half of the original frames if you stream 50p or ≈59.94p, giving viewers an inconsistent cadence across devices. As long as you use one of the above listed framerates, the cadence will be consistent among all displays and even projectors. The only exception is if you work for a sports channel like ESPN, which really needs to have the very high temporal resolution (framerate), which in their case is ≈59.94p. Another exception could be gamers, as long as you warn your audience about the situation. Another reason to use my recommended framerates is because using the higher ones will drastically increase your bandwidth requirements.
Audio connection and lip sync
As expected, Ecamm Live can accept audio from devices connected to the computer via analog or USB.
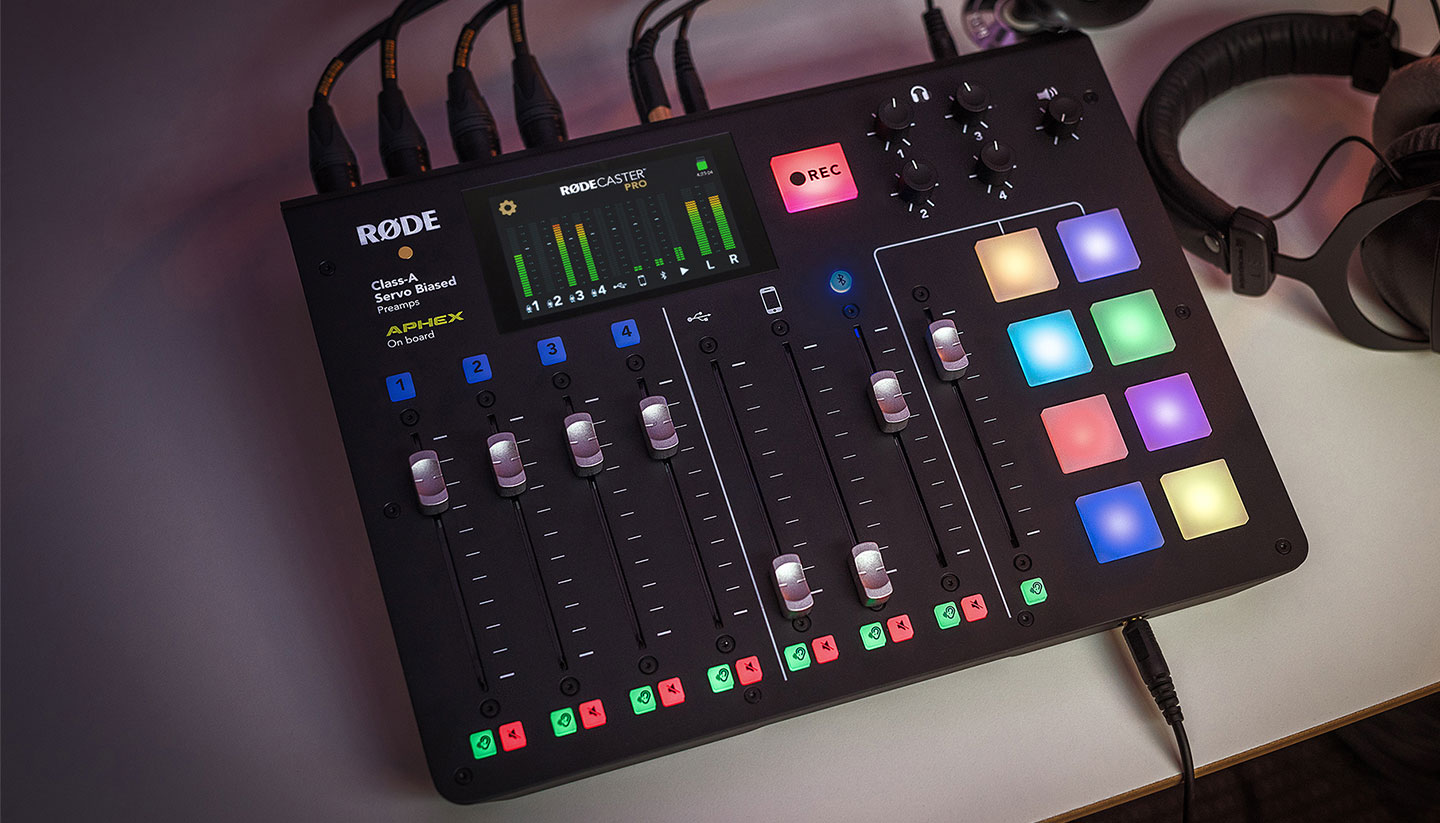
My client accepted my advice and purchased a RØDECaster Pro (shown above, US$599 Amazon — B&H) since I love mine and (at that point my client was making decisions) I had also recommended and configured another one in a studio in Vancouver, British Columbia, Canada where they loved it too. It should be noted that the RØDECaster Pro won an award from the 48 kHz Alliance since it uses the 48 kHz audio sampling frequency exclusively. The RØDECaster Pro connects to your computer via USB and appears a source for Ecamm Live.
Audio delay adjustment to compensate for video delay to maintain lip sync
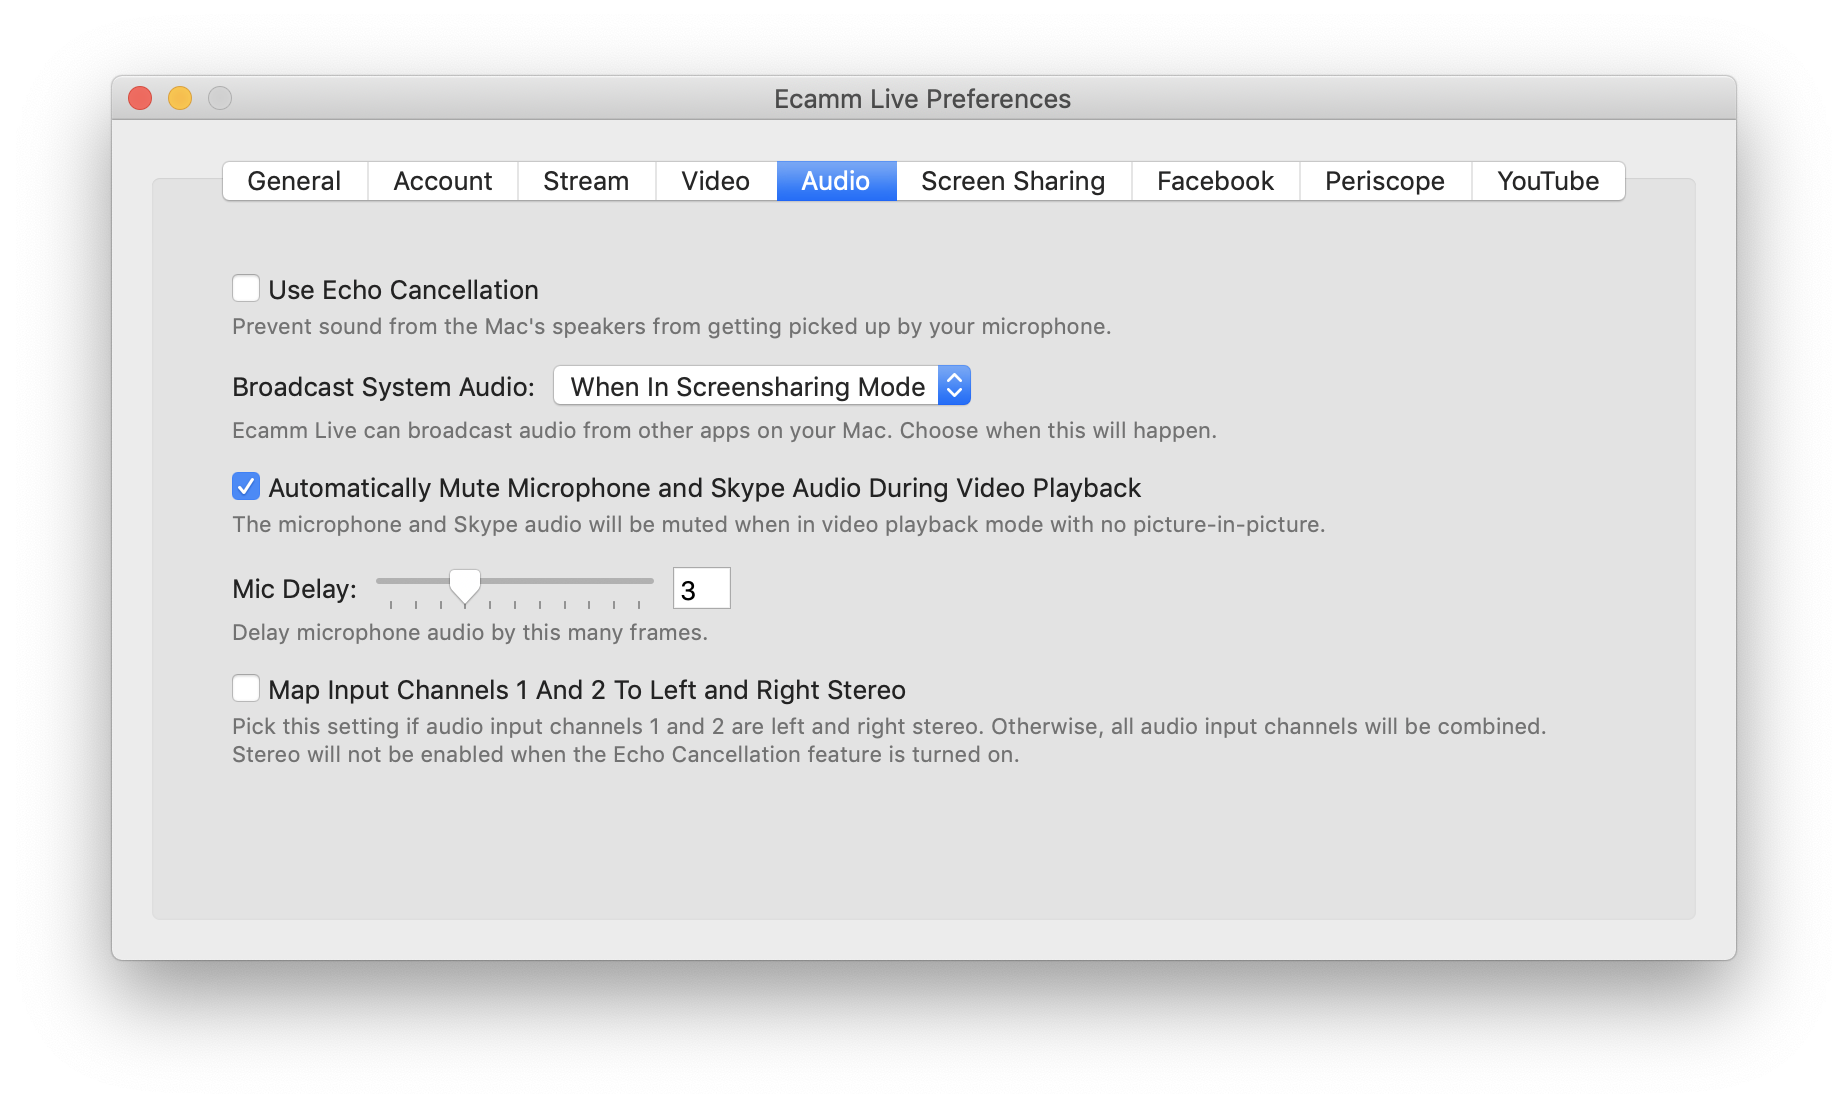
Ecamm Live offers an audio delay adjustment called Mic Delay in the Ecamm Live Audio preferences tab, as shown above. This compensates for video delay.
Ecamm clarifies that we will not see the delay adjustment in real time. We’ll only see the results of the adjustments when watching a live stream or playing back a recording. Ecamm recommends using Ecamm Live’s Record Only mode to make some test recordings to determine the appropriate audio delay for your situation. In their testing, the Elgato CamLink 4K required a 6 frame delay.
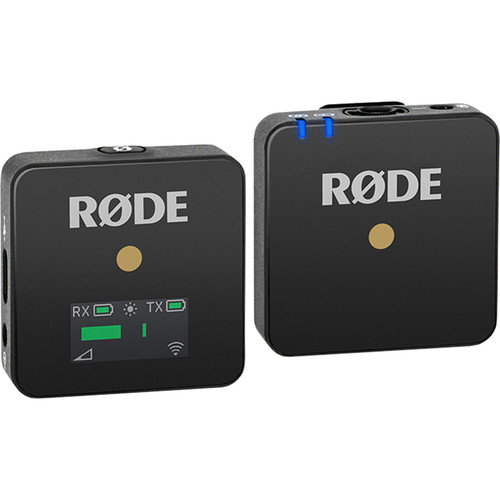
For esthetic reasons, my client absolutely wanted to use lavalier microphones, not radio-style microphones in his Internet television studio. To reduce the number of cables in the studio in his living room, my client decided to purchase two of RØDE Wireless Go units (US199 Amazon — B&H shown below).
Even after doing advanced, multifaceted audio treatment there in his living room, to compensate for the remaining reverb, he found it necessary to purchase a high-end lavalier with a cardioid pattern from Audio-Technica. Most people don’t know, but most lavalier microphones are actually omnidirectional, so you must really look hard if you want it to be cardioid (directional) to cut reverb and background even more, but being extra careful about the proper aiming and position of the clothing to mount it, depending upon the direction the person speaking will be aiming her/his voice during the show, i.e. left, forward and/or right.
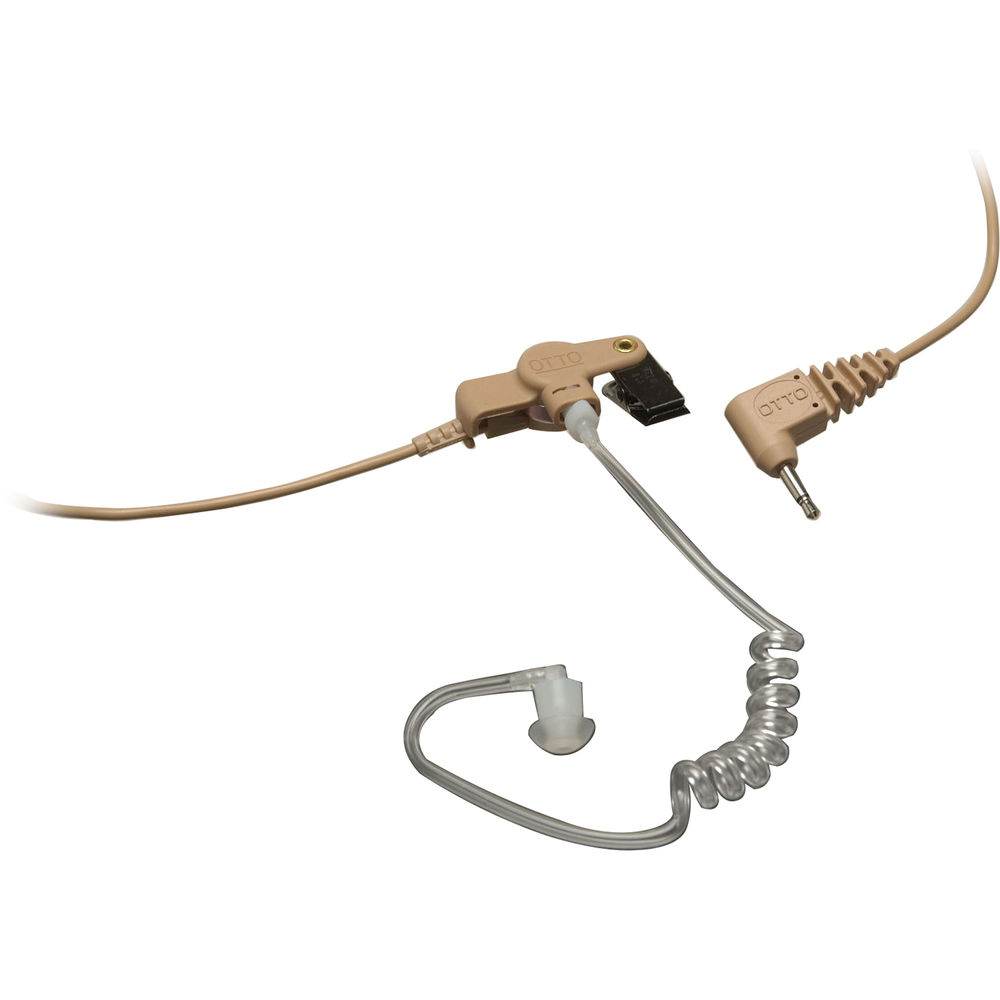
My client also purchased a pair of acoustic IFB earpieces for him and his in-studio guest to hear sound from remote Skype guests and playback of pre-recorded clips without it entering into the microphones. Above is an example of the palindromic Otto Engineering V1-10437 (≈US$50 B&H).
Playback of pre-recorded clips during a show
During a live broadcast or recording session, Ecamm Live allows you to play pre-recorded videos either full screen or picture-in-picture. (For the latter, see the Scenes section ahead in this article.)
Ecamm explains:
When you need to play a video file within your live broadcast, use the third icon in the Sources Bar. Clicking this the first time will display a file browser, allowing you to locate and select a video file for feedback.
On subsequent clicks of the Video icon, you’ll see a menu appear instead, with additional options. Choose File brings up the File Browser to choose a new video. A Recent section lists any videos you’ve previously selected during this broadcast. Selecting a video from this list will immediately play the video filling your broadcast window. If your Recent Videos section needs a clean up, select Clear Recent Items.
Your video will begin playing immediately after you select it, although if desired you can disable autoplay in the Video section of the Preferences.
Behavior after a video clip ends
You have three choices in the Options menu:
- When Video Ends ➝ Loop Video.
- When Video Ends ➝ Go To Next Scene.
- When Video Ends ➝ End Broadcast.
Audio from the video will be broadcast automatically. Your microphone(s) will be automatically muted unless there is a Picture in Picture box for your camera. See the upcoming section about Scenes for clarification.
Chroma key (blue screen/green screen) capability
Fortunately, Ecamm Live has a chroma keyer that worked quite well for my client. Whether it’s blue screen or green screen, chroma key experts know that it is equally important to light the subject well as it is to illuminate the blue or green screen and make it stand out to help the chroma keyer do its job.
When I told my client about the alternative that would alleviate that tedious additional lighting job for the background, he was willing to pay the price. It is is often called among my colleagues a “magic ring” and “magic background”. I had previously worked with the ones sold by Datavideo, which no longer offers them.
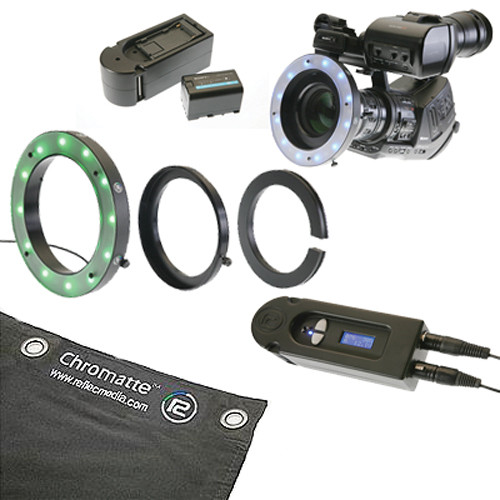
So my client purchased a pair of the Reflecmedia RM 1125DS 8.0 x 8.0′ Deskshoot Lite with Small Dual LiteRing and Controller Kit (US$2175 each, shown above, B&H). He was very happy with the results and the simplicity.
Translucent graphics, lower thirds with alpha channel
Ecamm Live accepts importing graphic files like JPEG, PNG, GIF or PDF. PNG is a great format to use if it is stationary and can potentially have an alpha channel for translucency and anti-aliasing. Animated GIFs are also supported, although Ecamm asks us to use them responsibly
Record locally and/or stream/broadcast live via your chosen CDN
As I have covered in prior articles, a CDN (Content Distribution Network) is a necessary middleware service in order for you to stream/broadcast live to a high number of Internet television viewers. Ecamm Live offers direct settings for CDNs like Facebook Live, YouTube Live, Periscope, and Twitch. It can work with other CDNs via RTMP.
If you want to multi-stream/simulcast via multiple plaforms, Ecamm Live can also work with services like Restream.io and Switchboard Live. If desired, Restream’s chat aggregation allows Ecamm Live to display live chat comments from over 20 platforms. If one of the CDNs where you would like to simulcast is Facebook, be sure to carry out the necessary workaround to comply with its terms of service.
Scenes: understanding them and using them
If you have read up to this point, you are getting the idea how powerful Ecamm Live is to make your macOS-powered computer into a complete video mixer (“switcher”) with built-in streamer, pre-recorded video playback and potentially network-quality graphics. The only element in Ecamm Live that requires a tiny bit of a learning curve for the operator is understanding Ecamm Live’s powerful Scene structure. Adrian Salisbury demonstrates it his video here.
Each Scene can be created to include or exclude any particular graphic overlays including lower thirds for a single camera or combination of cameras. These can be both local cameras or remote Skype cameras with embedded audio. From your keyboard, you can access Scenes instantly two different ways:
- for Scenes 1-9, press ⌘+digit
- for next or previous Scenes, press ⌘ → for the next one (higher number, lower in Scenes Window) or ⌘ ← for the previous (lower numbers, higher in Scenes Window).
You can also access Scenes directly via one of the optional devices covered in the next section.
Realtime output for monitoring or external encoding (Pro version)
If you pay for the Pro version of Ecamm Live, you can have a live fullscreen, realtime output of your live broadcast and/or recording. My client did that so his local interviewee could see remote guests or pre-recorded video clips during an interview. This realtime output available in the Pro version can be either a monitor output of your computer (i.e. HDMI/Mini DisplayPort/Thunderbolt/USB-C), an AppleTV or an NDI device.
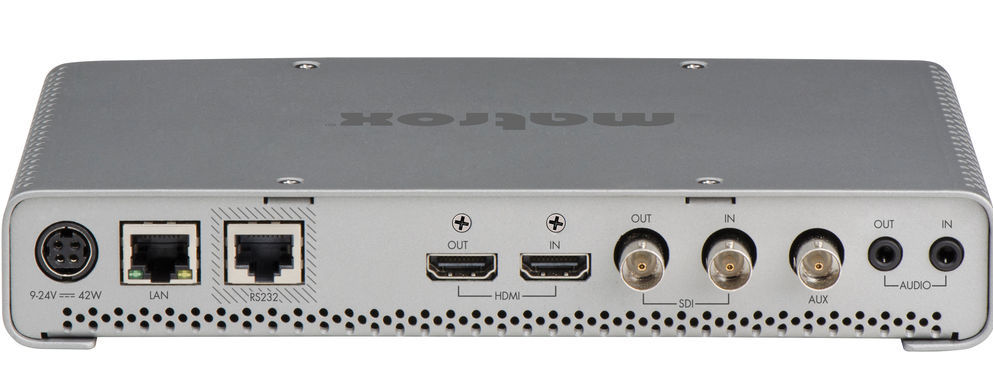
Even though this is not documented by Ecamm, this live output should also be able to be used with a hardware streaming encoder like the Matrox Monarch HDX shown above (US$1295 Amazon — B&H) or the Datavideo NVS-33 shown below (US$899, Amazon — B&H) to alleviate resources in your computer, especially in case you want to have several guests via Skype and you want many of them on screen simultaneously.

The Ecamm Live’s realtime output should also be able to be used in a conventional over-the-air TV station to feed your master control or in the field to a microwave transmitter.
To use Ecamm Live with an external streaming encoder or conventional over-the-air TV station, you would use the Record Only mode. The only disadvantage I see of using this mode is that you would also be deactivating Ecamm Live’s capability of displaying from social media comments for live interaction. There are some TV shows which lend themselves to live interaction with the audience participation and others that don’t.
To clarify: To date, my client is only using the realtime output for a local monitor for his local guest. He is not using any external encoder or broadcasting via a conventional over-the-air TV station.
Human interaction with Ecamm Live for the operator
It is certainly feasible to interact with Ecamm Live using a trackpad (or mouse) and keyboard shortcuts among Scenes. (If necessary, review the Scenes section earlier in this article.) However, if you want even more ways to interact with Ecamm Live as the operator, I’m currently aware of two:
Elgato’s Stream Deck:
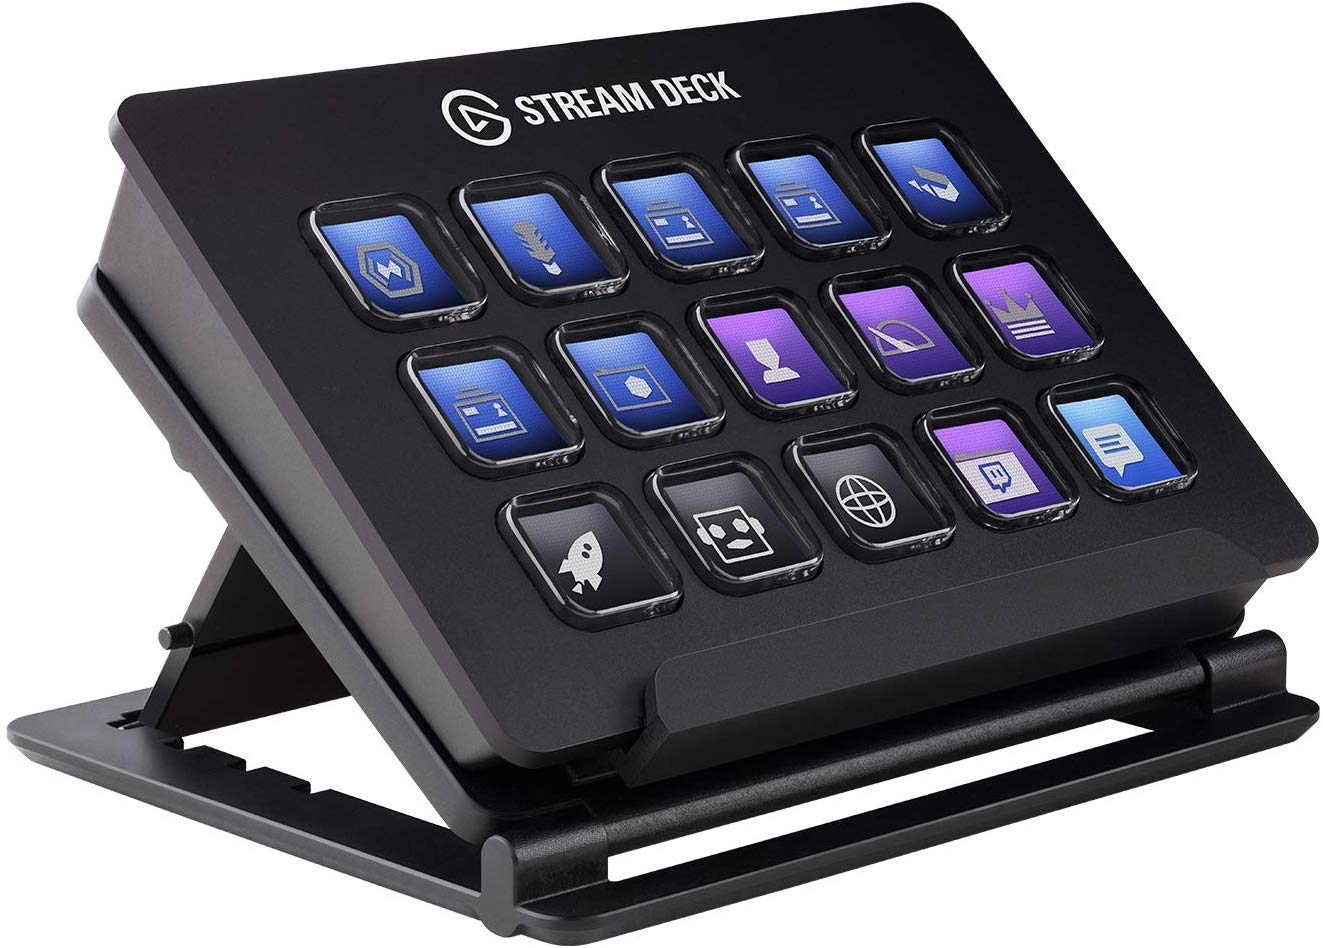
Stream Deck (Amazon) is a ≈US$150 physical controller from Elgato. Ecamm Live provides a plugin for Stream Deck to give you up to 15 direct access buttons to actions within Ecamm Live from the panel.
An iPad using Apple’s Sidecar or Luna:
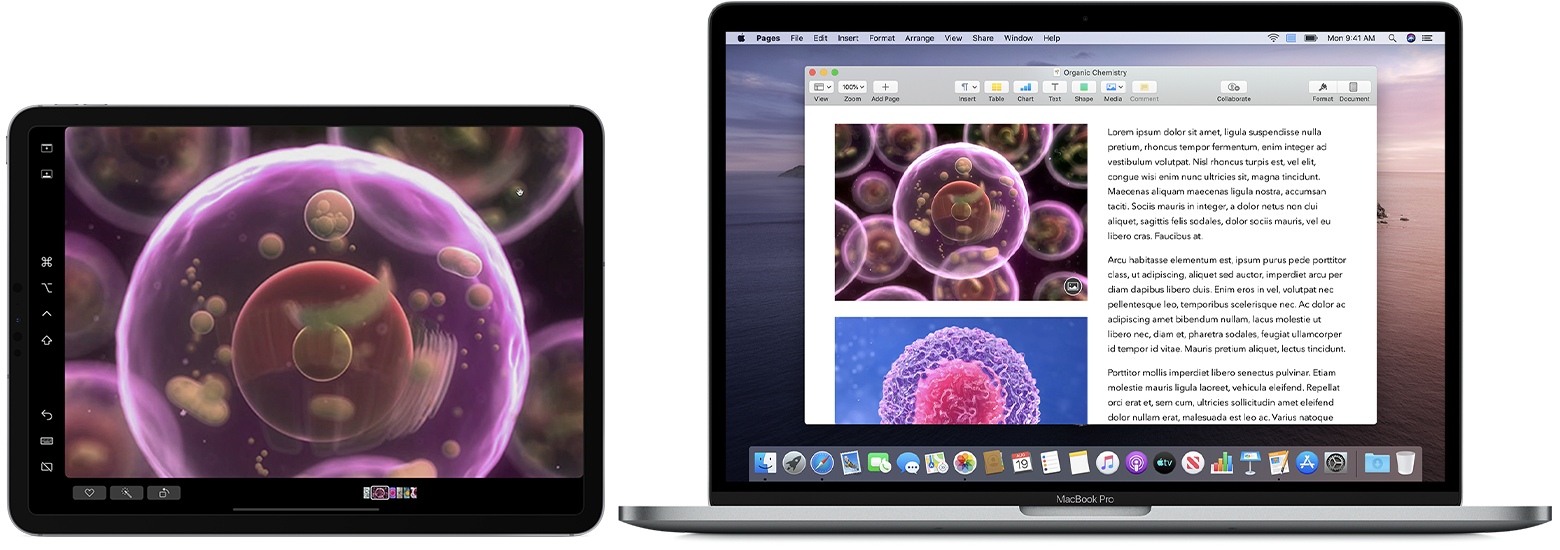
You can use either an iPad with Apple’s Sidecar feature or Luna Display to have wireless touch access to everything you could otherwise do with a trackpad or mouse within Ecamm Live. Even though my client’s computer runs macOS Catalina and his iPad Pro 2018 was the latest up until last week, his computer does not meet Apple’s Sidecar’s requirements. As a result, my client continues to use Luna Display to act as both operator and host of his show, by pressing on Scenes on his iPad Pro 2018 screen as he addresses the audience and his guest(s).
Current pricing
As publication time of this article, the pricing is:
- Free 14-day trial
- Standard for US$15 per month or US$12 per month-billed yearly
- Pro for US$25 per moth or US$20 per month-billed yearly
Click here for current pricing.
My wish list for Ecamm Live
Here is my wish list for Ecamm Live:
1:Ideal treatment of “shy” 1080p cameras
Ecamm Live already offers de-interlacing, which is quite appropriate when the source is truly interlaced (true 1080i, where there is different temporal information in each field), but quite inappropriate when the source is not truly interlaced, but progressive disguised as interlaced video, in the form of either PsF (i.e. 25PsF disguised as 50i or ≈29.97PsF disguised as ≈59.94i) or telecine video (i.e. ≈23.976 with a pulldown over ≈59.94i). While we wait for all “shy” camera manufacturers to offer free firmware updates to remove their shyness, Ecamm Live should offer a setting with a pulldown with the following options for each 1080 camera source:
- Auto (This can be the default setting, where de-interlacing is performed when 1080i is detected.)
- Treat 1080i source as PsF (Where it re-combines the fake segmented fields into a frame, without the damaged associated with de-interlacing a PsF signal.)
- Treat 1080i source as telecine (Where it performs reverse telecine to derive the original ≈23.976 progressive frames, without the damaged associated with de-interlacing a telecined signal.)
Until Ecamm fulfills my wish, producers should either use “outgoing” cameras (those which are capable of outputting the actual progressive framerate natively) exclusively or implement the strategies I covered most recently in this article.
2: Framerate clarification and implementation
The official Ecamm Live documentation currently states:
Choose from 24, 25, 30, 50 and 60 frames per second. This setting will apply to both the resolution of your live stream and the resolution of local recordings.
I am going to give Ecamm the benefit of the doubt and assume for a moment that Ecamm Live’s creators and documentation team know the fact that exact 30 and exact 60 have not been standard television rates since before 1953, when they were respectively replaced my ≈29.97 and ≈59.94 as color was added in the most ≈60Hz regions and accepted the now obsolete NTSC system. Assuming that Ecamm really does know that fact, Ecamm is probably either dealing with VFR (the way Android, iOS and iPadOS currently do, as I covered most recently in this article) or Ecamm’s team is trying to oversimplify the situation, as many camera manufacturers used to do, but more recently have been correcting that practice even in consumer camera models. Oversimplifying was never a good idea, but it’s worse in the era of many even consumer level cameras that offer the option of ≈23.976p (aka ≈23.98p) and exact 24p.
Ecamm: If you are using VFR (variable frame rate), please restate your documentation to be: “Choose from ±24, ±25, ±30, ≈50 and ≈60 frames per second.” If you are not using VFR but CFR, please update your menus and your documentation to state and include: “Choose from ≈23.976, 24, 25, ≈29.97, 50 and ≈59.94 frames per second”.
3: Chroma key background and foreground at full raster
From the emails exchanged last year, Ecamm will know what I am talking about here.
4: Scopes and False Color options
Ecamm, please add waveform monitor and/or false color to facilitate lighting, camera exposure and matching, at least in the Pro offering. Otherwise, your users will have to purchase a monitor with these features built-in, like those offered by Átomos, Blackmagic and Ikan.
Conclusions
Ecamm Live offers a very powerful multicam video mixing/switching tool, with high-end features including local and remote Skype guests, versatile camera source connectivity via Thunderbolt, USB 3 and even NDI. Ecamm Live also has a very manageable learning curve and is a bargain for its price. Ecamm Live is compatible with many optional third-party panels. All of this makes Ecamm Live a very strong contender for today’s multicam studios.
(Re-)Subscribe for upcoming articles, reviews, radio shows, books and seminars/webinars
Stand by for upcoming articles, reviews, books and courses. Sign up to my free mailing list by clicking here. If you previously subscribed to my bulletins and no longer receive them, you must re-subscribe due to new compliance to GDPR. Most of my current books are at books.AllanTepper.com, and my personal website is AllanTepper.com. Also visit radio.AllanTepper.com.
Si deseas suscribirte (o volver a suscribirte) a mi lista en castellano, visita aquí. Si prefieres, puedes suscribirte a ambas listas (castellano e inglés).
Suscribe to his BeyondPodcasting show at BeyondPodasting.com.
Subscribe to his To boldly split infinitives show at Toboldlysplitinfinitives.com.
Subscribe to his award-winning CapicúaFM show at CapicúaFM.com.
Save US$20 on Google Fi, my favorite mobile telephony and data service
One of my favorite services for broadcasting live via is Google Fi. Click here to save US$20 on Google Fi, which now works on iPhone and Android. With Google Fi (covered previously in several articles), there is no extra charge for data-only SIM cards on the same account, for up to 10 devices. You only pay for the total data, and data is free after 6 GB per month. So you could be using one Google FI SIM card on your primary phone, another in a tablet or secondary phone (or third, of fourth…).
FTC disclosure
No manufacturer is specifically paying Allan Tépper or TecnoTur LLC to write this article or the mentioned books. Some of the other manufacturers listed above have contracted Tépper and/or TecnoTur LLC to carry out consulting and/or translations/localizations/transcreations. Many of the manufacturers listed above have sent Allan Tépper review units. So far, none of the manufacturers listed above is/are sponsors of the TecnoTur , BeyondPodcasting CapicúaFM or TuRadioGlobal programs, although they are welcome to do so, and some are, may be (or may have been) sponsors of ProVideo Coalition magazine. Some links to third parties listed in this article and/or on this web page may indirectly benefit TecnoTur LLC via affiliate programs. Allan Tépper’s opinions are his own. Allan Tépper is not liable for misuse or misunderstanding of information he shares.
Copyright and use of this article
The articles contained in the TecnoTur channel in ProVideo Coalitionmagazine are copyright Allan Tépper/TecnoTur LLC, except where otherwise attributed. Unauthorized use is prohibited without prior approval, except for short quotes which link back to this page, which are encouraged!

Filmtools
Filmmakers go-to destination for pre-production, production & post production equipment!
Shop Now