I’ve been fortunate enough to test out many of the different M-series Macs since they launched a few years ago. They really made a difference in productivity for post-production professionals who work in the Mac universe, as overall, they are so much faster in most video editing tasks than old Intel machines. As I’ve said in my earlier reviews, I often refer to my iMac Pro as my beloved iMac Pro because I always thought that was the perfect machine. It was a great balance between power and convenience. I prefer to take a computer out of the box, plug it into the wall, plug in my media drives, and then go to work. The iMac Pro was about as close to that as you can get. With the Mac Studio and the Mac Mini, you do have to plug into a monitor, which is a little bit more work. But it’s pretty darn close.
First the size
The new Mac Mini is incredibly small. It is dwarfed in size by a Mac Studio, and it almost feels like you could fit four Mac minis inside a Mac Studio. A colleague saw the new M4 Mac Mini and commented that he is going to look into buying two or three of them to put in an editing road case where he would usually have only one Mac Studio. I think that part of the charm of this machine is that it’s powerful enough for a lot of post-production tasks, and the size may make it a better fit for a lot of jobs than a Mac Studio.
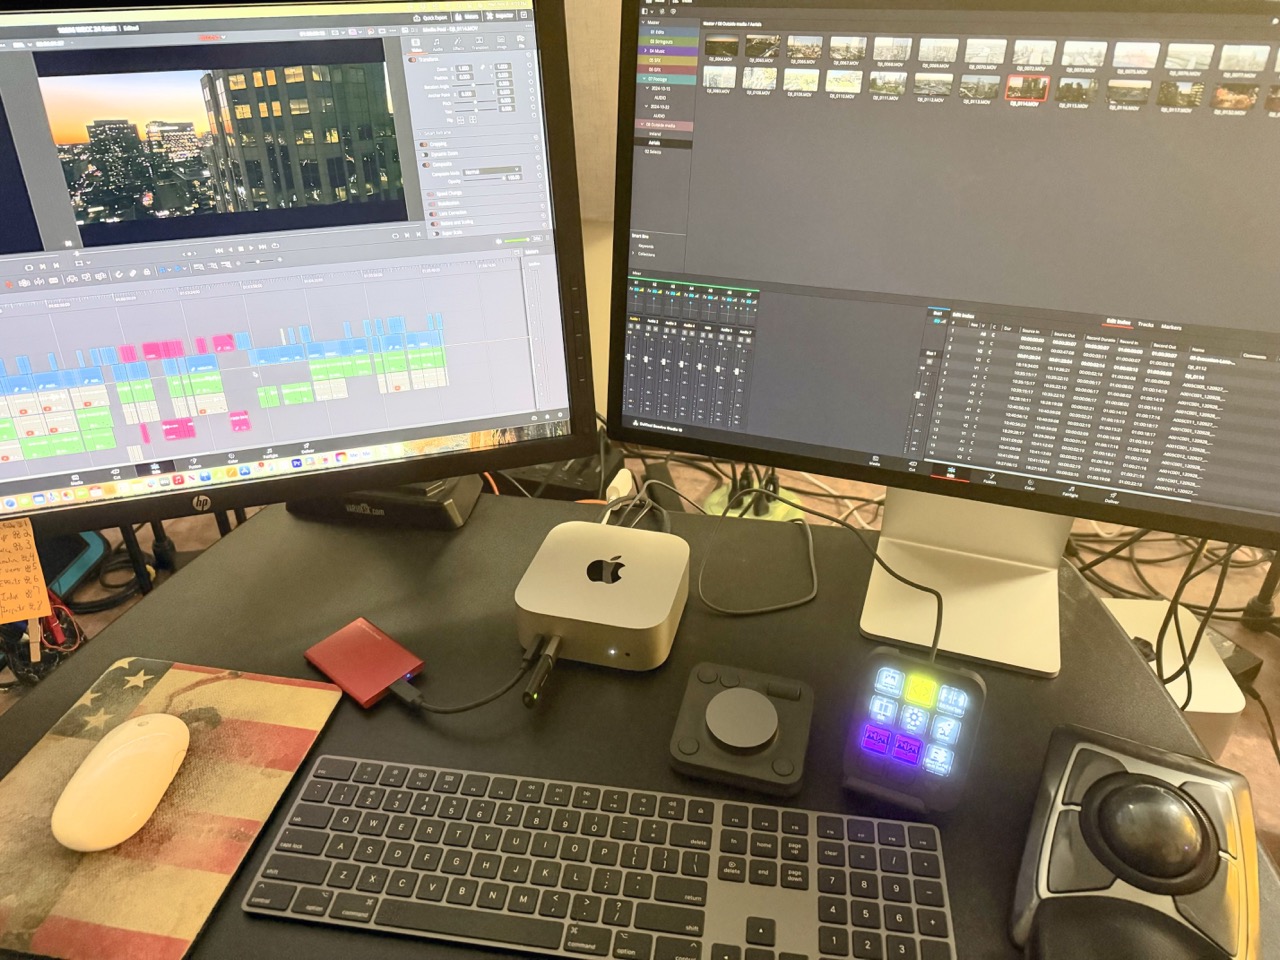
After having a Mac Studio on this desk for a couple of years, I removed it for this review and put the M4 Mac Mini in its place, I felt like I have a whole new desk open up!
I rarely use the SD card slot on the Mac Studio, so I won’t miss that much. I will miss some of the ports from the Mac Studio as I had them all full, including the USB-A ports. I had peripherals like a trackball, a Loupedeck, and the new Logitech MX Creative Console plugged into the USB-A port on the mic studio as it was very convenient.
I have used the M4 Mac mini in two of my edit suites, and I found that I fill the ports almost instantly. A USB hub will be a necessity. That wasn’t the case with the Mac studio; though I did have a USB-C hub connected, I didn’t always fill up the ports. If you’re using a device like an iodyne Pro Data that uses multiple Thunderbolt connections for maximum speed, then the M4 Mac mini might not be the right computer.
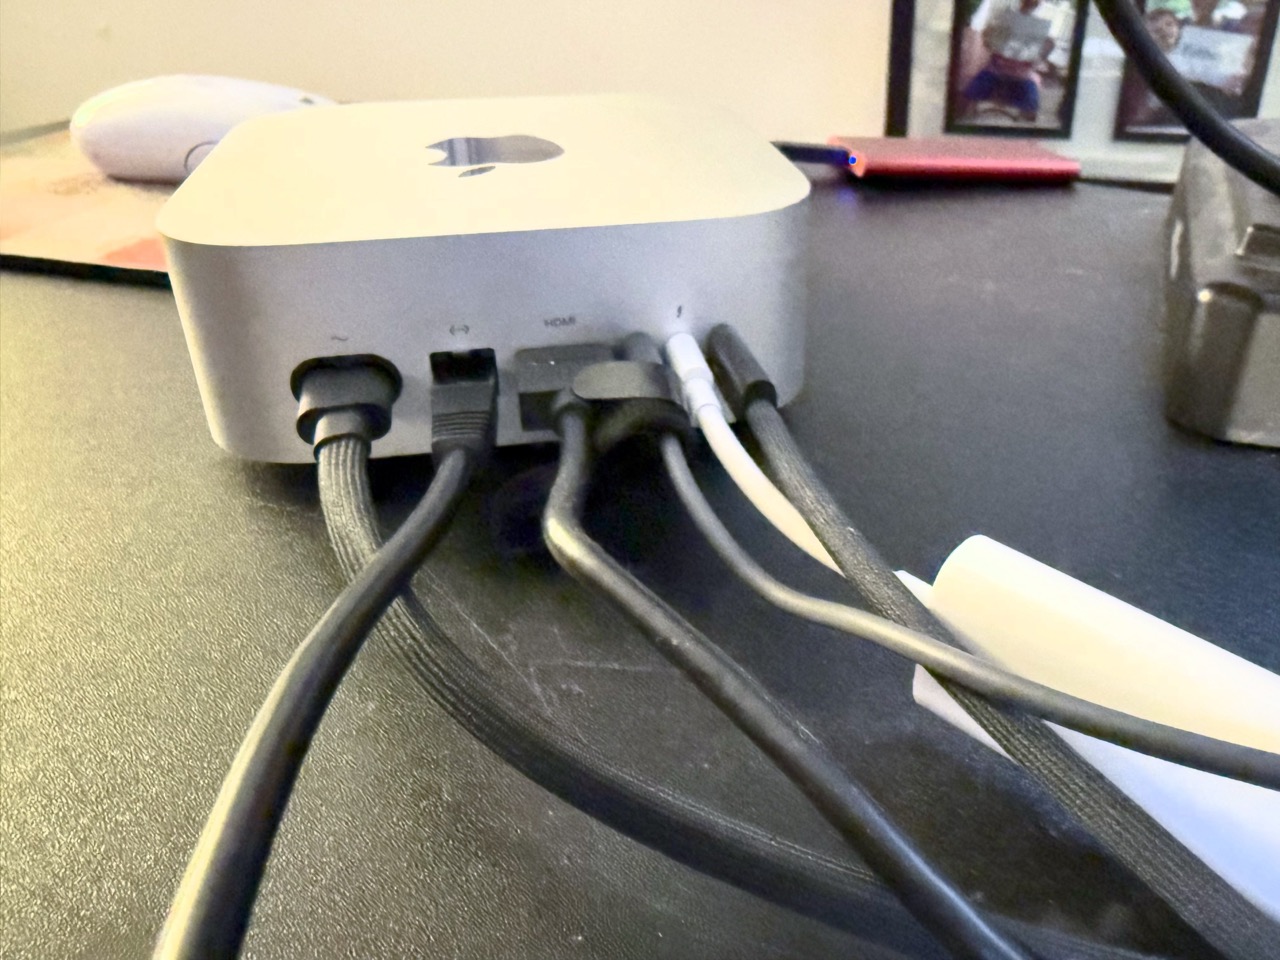
I was happy to see that my old Thunderbolt dock was working just fine with the Apple Thunderbolt to USB-C adapter. That’s how I connect to a USB audio interface in my office edit suite. At home, I’m currently plugging a mini jack from a set of speakers into the front of the Mac mini with the headphone jack. That’s kind of annoying on my desk, so a hub is going to be a necessity there.
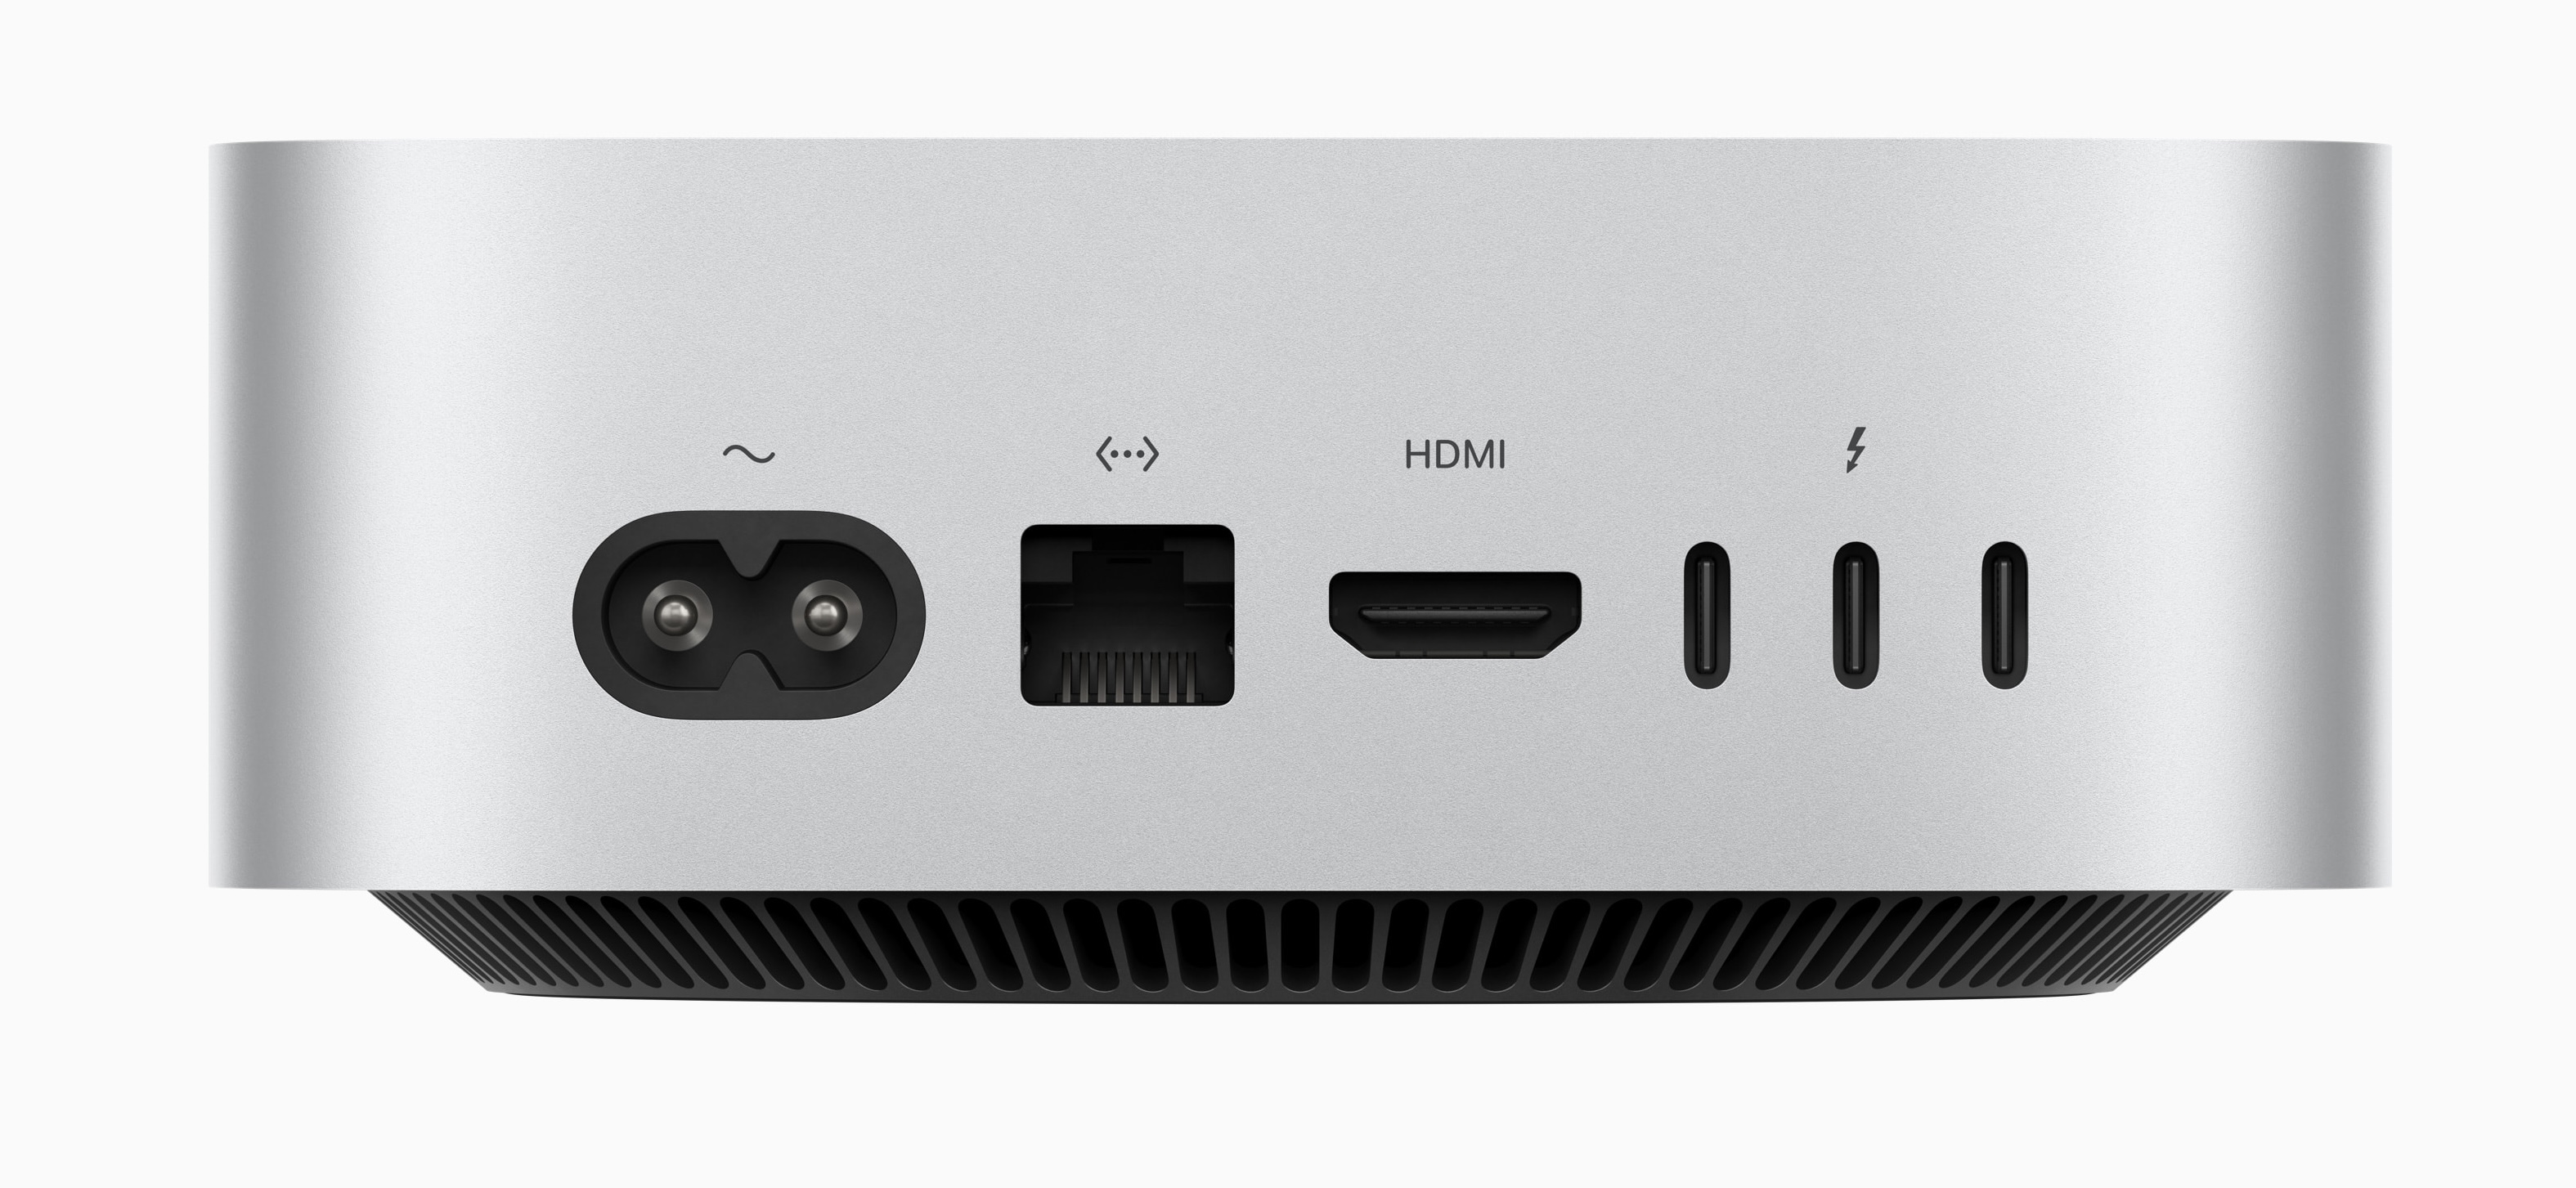
It’s worth noting those three Thunderbolt ports on the back of the M4 Mac minis have brand-new Thunderbolt 5 connections that will provide some fast throughput once peripherals become available. Apple and OWC will already sell you a cable, though. Guess which one is cheaper?
Now the tests
My methodology when testing these machines for post-production tasks is relatively simple: I try to utilize real-world projects with stuff that many of us have to do on a daily basis. I don’t do GeekBench scores or nerdy throughput testing because I don’t have those tools, and I don’t care as much about that as I do about render and output times or frame rate playback. That’s what matters to me as an editor – those are the real-world things that will speed up the various tasks we all have to do.
When testing between different machines, I try to keep the software versions the same, though the OS versions might often be different. For example, the new M4 Mac Mini and the M3 Max MacBook Pro both run MacOS Sequoia 15.1. But that’s not the case with the Mac Studios, as both of those are still on Sonoma 14.1.
Most of the tests are run with media on an external USC-C SSD. That’s not because I always edit off an external SSD (I very often do), but because that’s the easiest way to move the same media in the same project between machines. That said, I think many editors out there do a ton of editing off of external USB-C SSDs, as they are very fast and convenient. So, I consider this a very real-world situation.
The systems
- M4 Pro Mac mini, 48 GB RAM
- 16-inch MacBook Pro M3 Max, 48 GB RAM
- M2 Max Mac Studio, 64 GB RAM
- M1 Ultra Mac Studio, 128 GB RAM
This batch of machines represents a pretty good smattering of different types of Apple Silicon since they were introduced back with the M1s. The big difference here would be the Pro, Max, and Ultra chips. Video professionals will look at adding dedicated encode and decode chips for video codecs that we use regularly in these different chip architectures. Specifically, the H.264 and ProRes media engines are part of what makes the Apple Silicon chips such a seismic leap over the old Intel chips.
One thing worth noting is that the Mac mini maxes out with an M4 Pro chip, which has fewer media engines than Max and Ultra chips.

Compare that to this same chart for the M2 Max studio and you can see both the M2 Max and the M2 Ultra double these media engines.

That’s a lot more memory bandwidth are more media engines. More media engines is better right? It all depends on your tasks and how much money do you have to spend.
What does that mean in practical usage in the edit suite? We can see some direct comparisons in one of my older articles, comparing different Apple silicon Macs. And then compare that to some of the numbers below, but I think it often depends on your operation and whether the software is pumping a lot of the work through these media engines or just offloading work to the CPU and GPU (or some combination thereof).

I don’t know exactly what to say about the performance courses versus efficiency courses and all that kind of stuff. I’d like to find someone to interview who really knows the details of how some of the stuff works with the editing software that we use. I should put that on my to-do list.
The tests
Most of these tests are based on real jobs that I am currently working on or recently completed jobs where I had to do similar outputs. For simplicity’s sake and to keep things convenient between machines, all of these jobs ran the same way: Media was on a connected external SSD drive, and any outputs were exported to the Movies folder of the system I was testing.
Topaz Video AI – Upscale and deinterlace 3 minute 25 second 720×486 ProRes LT clip to 1080p H.264 .mov
As luck would have it, I’ve been testing upscaling in Topaz Video AI by taking a completed program originally edited in DV that has been transcoded to ProRes LT and then upressing that to 1080. This is for a potential “set it and forget it” operation, taking a 90-minute standard definition show and letting Topaz up-res that to 1080 HD. Well, I haven’t done that yet, but I did do a few tests with a shorter program.

Topaz is a really deep program because there are a lot of different settings that you can mess with to get it working its magic. The latest versions have been really good in producing quality results with minimal effort in the settings. I put minimal effort into these settings, just choosing a preset with a matching frame rate to go from standard definition to 1920×1080 HD.
Time in minutes:seconds
| M4 Pro Mac mini | 5:32 |
| M3 Max MacBook | 8:27 |
| M2 Max Mac Studio | 5:12 |
| M1 Ultra Mac Studio | 6:02 |
It’s fun to watch Topaz, as it gives you some good feedback on how many frames per second it is outputting during operation. On most machines, it throttles up and back. And I often wonder if that depends on what complexity it encounters in the frame.
I never cease to be amazed at the output that Topaz can produce. It’s also an application that the developers seem to be constantly updating and improving. Good work Topaz team.
30-minute UHD timeline with BITC to 1080 H264 mp4
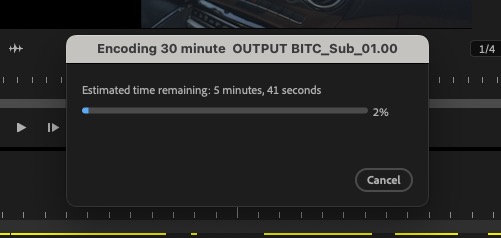
This was an unscripted shoot where the production was running two cameras with secondary audio. We cut in Adobe Premiere Pro. Once everything was synced up, I had to make burn-in timecode exports of the angles into one H264 where we could see both angles as well as the source timecode of those angles. I used Syncalia to sync everything up, then I would just scale each angle down and fit them both on screen and apply Premiere’s data burn-in filter, targeting each video track.
Time in minutes:seconds
| M4 Pro Mac mini Adobe Premiere Pro 25.0.0 | 11:12 |
| M2 Max Mac Studio Adobe Premiere Pro
25.0.0 |
6:49 |
| M3 Max MacBook Pro Adobe Premiere Pro 25.0.0 | 6:41 |
| M1 Ultra Mac Studio Adobe Premiere Pro 25.0.0 | 4:24 |
The M4 Mac mini didn’t fare as well with this intensive output but looking the chip comparison charts above, it has only one H.264 media encode engine vs two and four up to the Ultra. I guess that makes a difference.
One hour, 29 minute, 1080 ProRes documentary show scene edit detection

This wasn’t an actual operation for a real job, but I did take a real job and ran scene edit detection to see exactly how long it would take. This was an episode of a 90-minute documentary series that had a lot of edits.
Time in minutes:seconds
| M4 Pro Mac mini Adobe Premiere Pro 25.0.0 | 3:35 |
| M4 Pro Mac mini DaVinci Resolve Studio 19 | 5:28 |
| M3 Max MacBook Pro Adobe Premiere Pro 25.0.0 | 3:36 |
| M3 Max MacBook Pro DaVinci Resolve Studio 19 | 4:30 |
| M2 Max Mac Studio Adobe Premiere Pro 25.0.0 | 4:05 |
| M2 Max Mac Studio DaVinci Resolve Studio 19 | 5:14 |
| M1 Ultra Mac Studio Adobe Premiere Pro 25.0.0 | 7:18 |
| M1 Ultra Mac Studio DaVinci Resolve Studio 19 | 8:33 |
The M4 Mac mini did pretty well here. Does scene edit detection require those performance cores to get really involved?
Out of Curiosity, I checked an EDL export from both of the above scene detection operations on the M4 Mac mini scene detect operation. Resolve found 49 more edits than Premiere did, but I don’t know which one was more accurate. Just spot-checking the results in both applications, they were pretty spot on.
One hour, 36 minute mixed format documentary timeline, picture export to 1080 ProRes
This was a documentary project of many different formats, including 4K from 3-4 different cameras, 1080 footage, archival material, and some graphics. Pretty standard stuff.
Time in minutes:seconds
| M4 Pro Mac mini Adobe Premiere Pro 25.0.0 | 18:12 |
| M4 Pro Mac mini DaVinci Resolve Studio 19 | 10:06 |
| M3 Max MacBook Pro Adobe Premiere Pro 25.0.0 | 14:44 |
| M3 Max MacBook Pro DaVinci Resolve Studio 19 | 9:58 |
| M2 Max Mac Studio Adobe Premiere Pro 25.0.0 | 20:35 |
| M2 Max Mac Studio DaVinci Resolve Studio 19 | 10:21 |
| M1 Ultra Mac Studio Adobe Premiere Pro 25.0.0 | 16:59 |
| M1 Ultra Mac Studio DaVinci Resolve Studio 19 | 10:35 |
What strikes me most here is how much faster DaVinci Resolve is at encoding than Adobe Premiere Pro.
3 hours 1080 ProRes concert output to H264 via Apple Compressor

This was a pretty simple one. A 3-hour concert, ProRes master, that I had to output at a high bitrate of 1080p H.264. This was a long show, and I’m always curious about different encoding times on these big programs.
| M4 Pro Mac mini | 50 minutes 15 seconds |
| M2 Max Mac Studio | 31 minutes 12 seconds |
| M3 Max MacBook | 29 minutes 3 seconds |
| M1 Ultra Mac Studio | 16 minutes 1 second |
I use Compressor a lot for quick encodes because it is quick to use, quick to encode and quick to launch. I was curious how Adobe Media Encoder would handle this long export so I installed the latest AME beta and ran it as well.
M4 Pro Mac mini with Adobe Media Encoder 25 beta – 24 minutes and 22 seconds
That was a rather disappointing time for the new Mac mini with Compressor.
2 minutes 42 seconds 1080 Canon media, corporate project export to H264
This is a silly little output I know because it’s such a short project and the times aren’t that much different. It’s probably the only project I have that exists in all 4 major NLEs, so I had to give it a try!
| M4 Pro Mac mini Adobe Premiere Pro 25.0.0 | 17 seconds |
| M4 Pro Mac mini DaVinci Resolve Studio 19 | 18 seconds |
| M4 Pro Mac mini Final Cut Pro 10.8.1 | 20 seconds |
| Avid Media Composer | I ran out of time to install Avid |
| M3 MacBook Pro Adobe Premiere Pro 25.0.0 | 15 seconds |
| M3 MacBook Pro DaVinci Resolve Studio 19 | 18 seconds |
| M3 MacBook Pro Final Cut Pro 10.8.1 | 12 seconds |
| Avid Media Composer |  |
| M2 Max Mac Studio Adobe Premiere Pro 25.0.0 | 16 seconds |
| M2 Max Mac Studio DaVinci Resolve Studio 19 | 20 seconds |
| M2 Max Mac Studio Final Cut Pro 10.8.1 | 14 seconds |
| M1 Ultra Mac Studio Adobe Premiere Pro 25.0.0 | 10 seconds |
| M1 Ultra Mac Studio DaVinci Resolve Studio 19 | 21 seconds |
| M1 Ultra Mac Studio Final Cut Pro | 9 seconds |
| Avid Media Composer |  |
Observations from these tests
- The M4 Mac Mini stayed pretty much silent during these heavy encode operations.
- The M3 Max MacBook Pro, on the other hand, really spun up the fans to keep it cool and can get quite loud in a quiet room.
- M4 Mac Mini has new cooling architecture similar to the Mac Studio so I would expect it to stay cooler than the old Mac mini but I can’t remember if kicking on fans much either.
And that “editing feel?”
Of course, editing isn’t only about rendering and exporting; a lot of it is about timeline playback and the overall “editing feel.” That’s a trickier thing to test – a bit more subjective and depends a lot on the formats you’re working with, effects you might have applied, and, of course, the system you are working on. Part of that system you’re working on depends on the drive speed from which you’re playing the media back.
I broke out some good old super high-res media that includes some Blackmagic Raw footage I downloaded from the internet and some 8K Red R3D files from my good friend Philip Grossman.
The 8K RED footage is a beast, and while you’d never work with at full resolution, I was curious to see what kind of frame rate I would get on the playback. The original footage was 59.94.

The M4 mini maxed out at about 25 frames per second in Resolve on some of Philip’s giant RED footage.

Premiere did a better job and was able to actually play it back at full frame rate for brief periods after first dropping a few frames.
However, once I lowered Resolve’s timeline resolution, the M4 mini did a good job of playing it back, as did all of the 8K, 6K, and 4K braw footage. But this type of stuff is a bit of an outlier, as you’re not going to do the creative edit at those full resolutions, and you’ll most likely create proxies in those situations.
I did have time to take almost an entire Edit through the creative stage on the M4 Mac Mini. This was a 5-minute corporate piece that incorporated several days of shooting on an Alexa to 4K ProRes HQ, as well as a bit of iPhone footage. This edit was done in DaVinci Resolve with an ARRI LUT applied to the footage, as well as the timeline output blanking set to a 2.39 matte. I edited for around 3 days with a number of outputs along the way, and it was a completely buttery smooth process. I would expect that with any M-Series Mac, the machines are fast and ProRes is the perfect editorial codec.
View this post on Instagram
What’s great is there was no hiccup and no drama, and that tells me that if you are an offline craft editor or you don’t need the bleeding edge of an Ultra chip In a high-end Mac studio, you can get a lot of post-production work done on one of these new M4 Mac minis.
Is the power button really an issue because it’s on the bottom?
For me, this has been a complete non-issue. While you can’t slip your finger under the M4 Mac Mini without lifting the corner up to get to the power button, it’s really easy to do just that even with every port in the rear of the new Mac Mini full of cables (including an Ethernet cable and a dock), I was still easily able to lift it up really quickly and hit the power button. I’m not a fanatical shut-my-mac-down-every-night kind of person, but I do tend to shut it down, and it was never an issue to power it back up. I also had to reduce the system security to be able to install some of the tools I use in post-production, and that required holding down the power button to get to the recovery startup screen. That was also very easy and a non-issue.
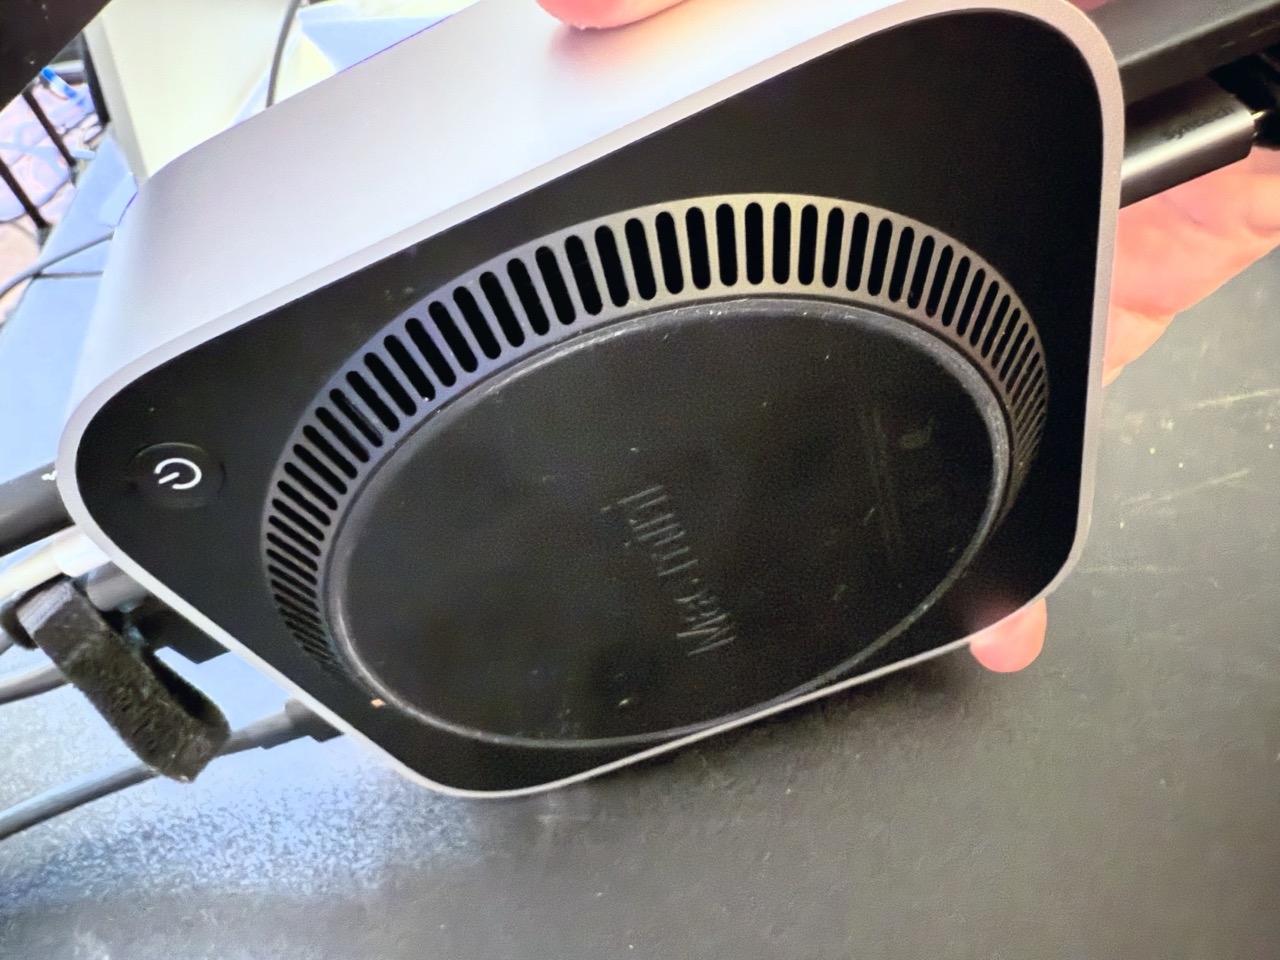
If you do plan to encase your Mac mini in some kind of rack or in a space where you can’t get easy access to the power button, I would advise first testing out your keyboard to make sure you can start up the Mac Mini via keyboard. And if at all possible, just be sure you can get a little bit of access to it to reach that power button if need be. All the scuttlebutt over the location of the power button on the bottom of the machine read to me like much ado about nothing. Now that I’ve had to use that power button, it truly is much ado about nothing for most of us.
New Mac Mini has the power button on the bottom… so Ivan Kulashov is 3D printing a “fix.” https://t.co/U01RhfbUEb pic.twitter.com/dM1h8hjbdg
— Michael The Geek (@MichaelTheGeek) November 1, 2024

How to turn on the Mac Mini instructions.
The dumbest power button placement everpic.twitter.com/HPR0SglZms
— I Hate Apple (@iHateApplee) November 5, 2024

Not sure why everyone is annoyed with power button placement in new mac mini. Just keep it upside down on the table bro pic.twitter.com/BELtmjtasw
— naren.io (@DudeWhoCode) November 1, 2024

I’ve heard a couple of theories about why this might be. One is that people were accidentally hitting the power button with cable management on the Mac Studio (but I never have). Another is that Apple wanted to discourage stacking of the machines. My bet is that they stuffed enough stuff into such a little space that there just wasn’t much space left.
What about an M4 Mac Mini vs a Mac Studio when it comes to spending my cash?
A Mac Mini will obviously have much less power than a Mac Studio. While you can’t get the higher-end Max or Ultra chip in an M4 Mac Mini, I think what you do get is and amazing bang for the buck. You can quickly price an M4 Mac mini in low-end Mac Studio territory, but to do that, you have to really up the RAM and get a big internal SSD. An M4 Pro Mac mini with 64 GB of RAM and a 1 TB internal hard drive can be had for $2,200. I think that’s a good, affordable sweet spot, especially for a second machine in your home edit suite or for the editor who can’t afford to go all out on a Mac Studio.
I was having a debate with a colleague who said he would never go below a 2TB hard drive on an M-series Mac because you can’t upgrade the hard drive after purchase. Two terabytes would be nice, but I disagreed and said I would happily stick with the 1TB because most of my editing media is kept on an external RAID or external SSDs. If you’re diligent with your system management, you are able to keep the drive clear of unneeded media, ballooning caches, and applications you no longer need.
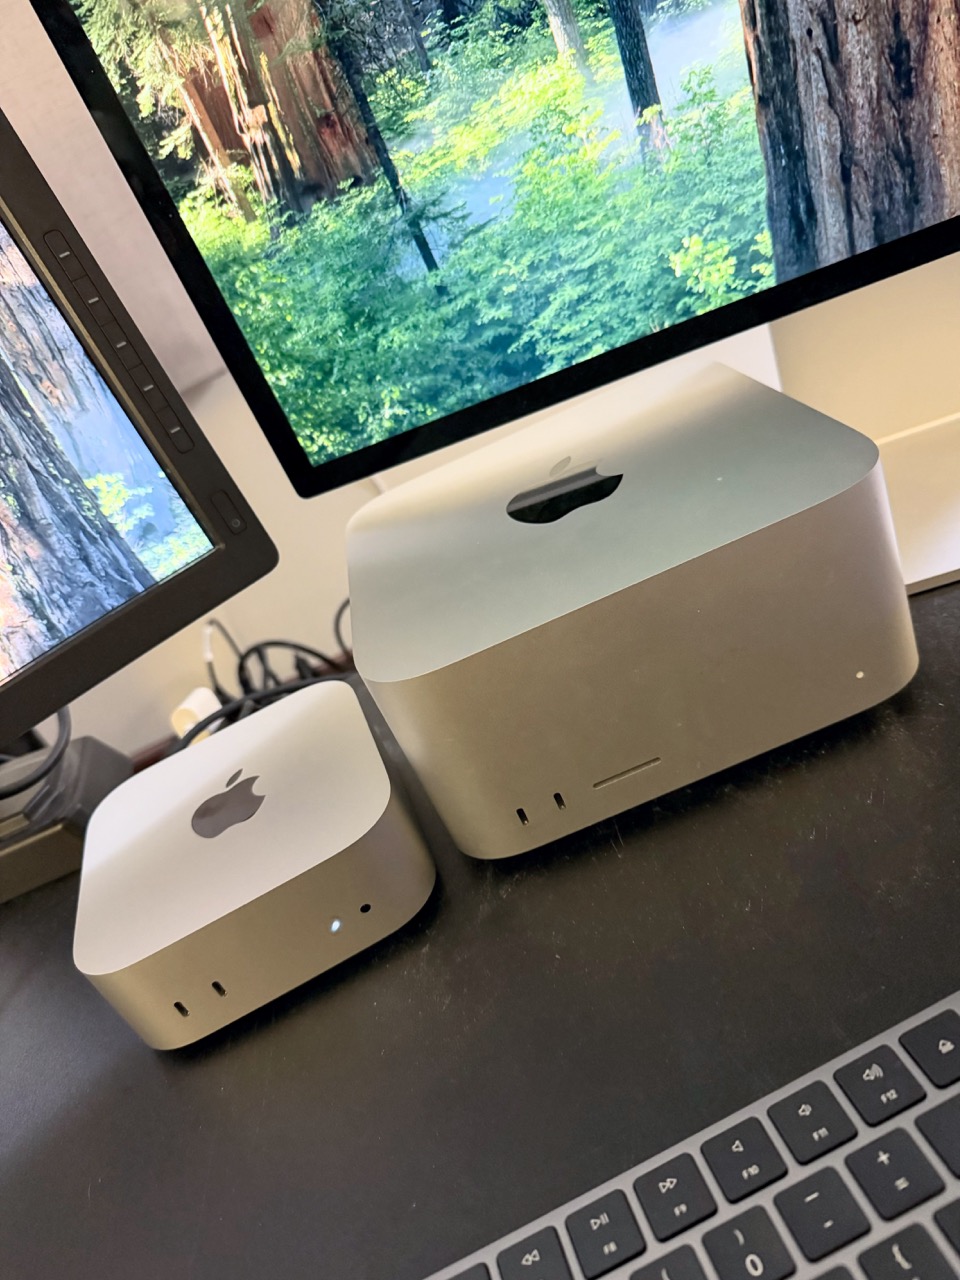
An M2 Max Mac Studio with the same RAM and hard drive option is $2600. (There is no option for the lower-end M2 Pro chip in a Mac Studio. They begin with a Max and go up to an Ultra.) That’s not a whole lot more, but you’re getting an older chip architecture. Then again, looking at some of the output times above the M4 Mac Mini, it’s not that much slower, and in some cases, faster.
You do get more ports on a Mac Studio as well as an SD card slot. One thing I was really excited about with the Mac Studio Ultra is that all 6 ports are Thunderbolt, including 2 Thunderbolt ports on the front of the Ultra Studio machines. But after using it for a couple of years now, I have found I’ve rarely plugged Thunderbolt peripherals into the front, as I’m almost always using USB SSD drives. So I don’t think that’s a deal breaker, chalk one up for an M4 Mac mini.
So I think what sums this review up more than anything else is what I said above an M4 Pro Mac mini is a tremendous bang for the buck.

Filmtools
Filmmakers go-to destination for pre-production, production & post production equipment!
Shop Now


