This is part 2 of a three-part review; there’s more in part 1 and part 3
Display
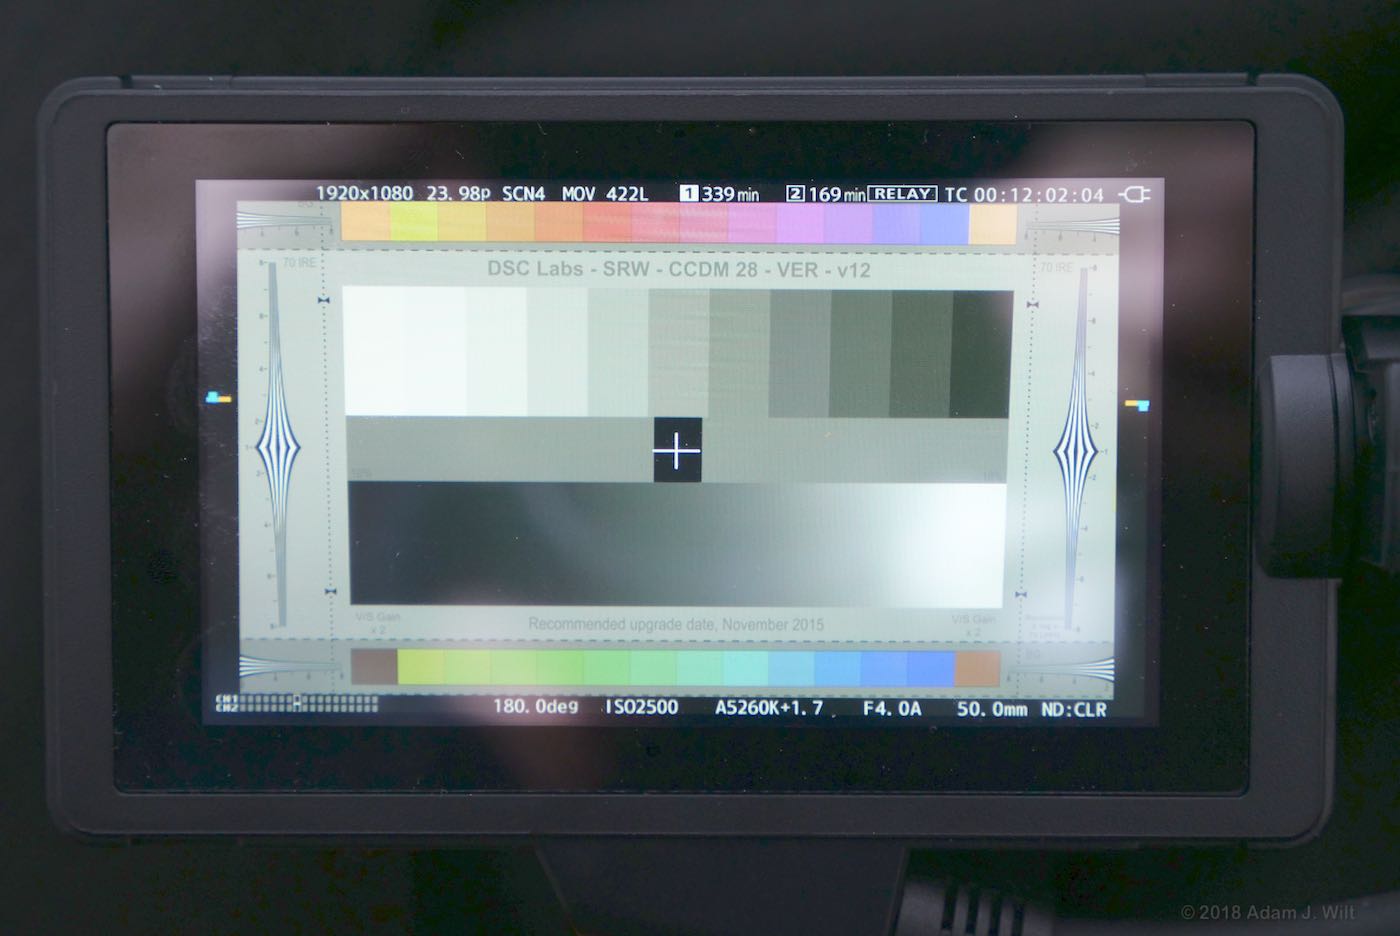
The LCD monitor is a 16×9 panel in which a 17×9 DCI image is shown letterboxed, and a 16×9 image is shown with the same vertical letterbox and similar spaces on either side. This slight inset allows camera data to display outside the picture, so you’re free to compose and frame using a clean image.

A unique artificial horizon for camera leveling appears in the lateral margins, using colored indicators for both pitch and roll. Like the marginal telemetry, these unobtrusive markers give you useful information without stomping on your image.


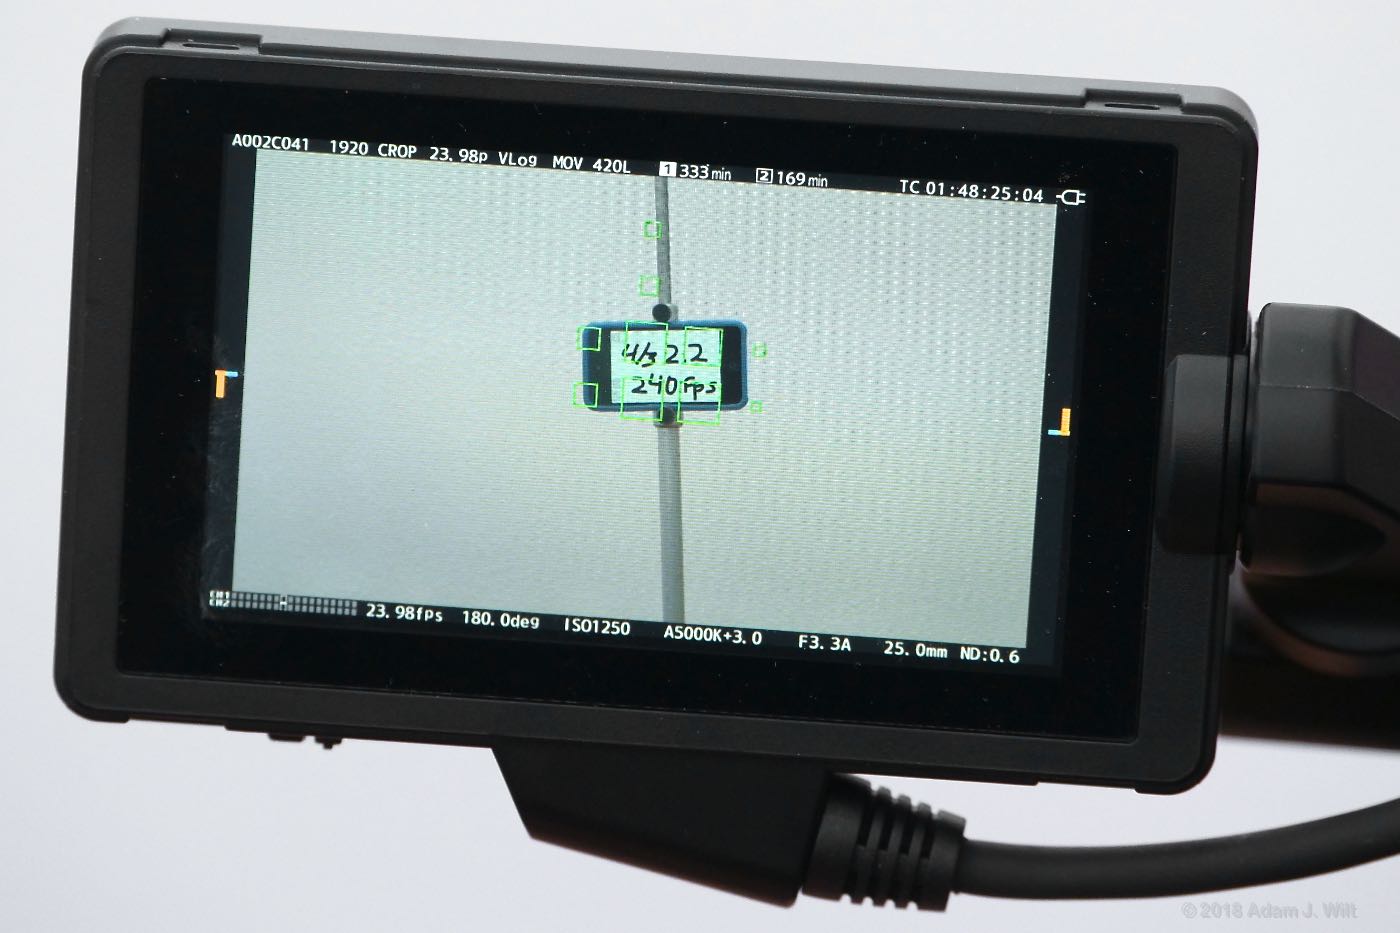
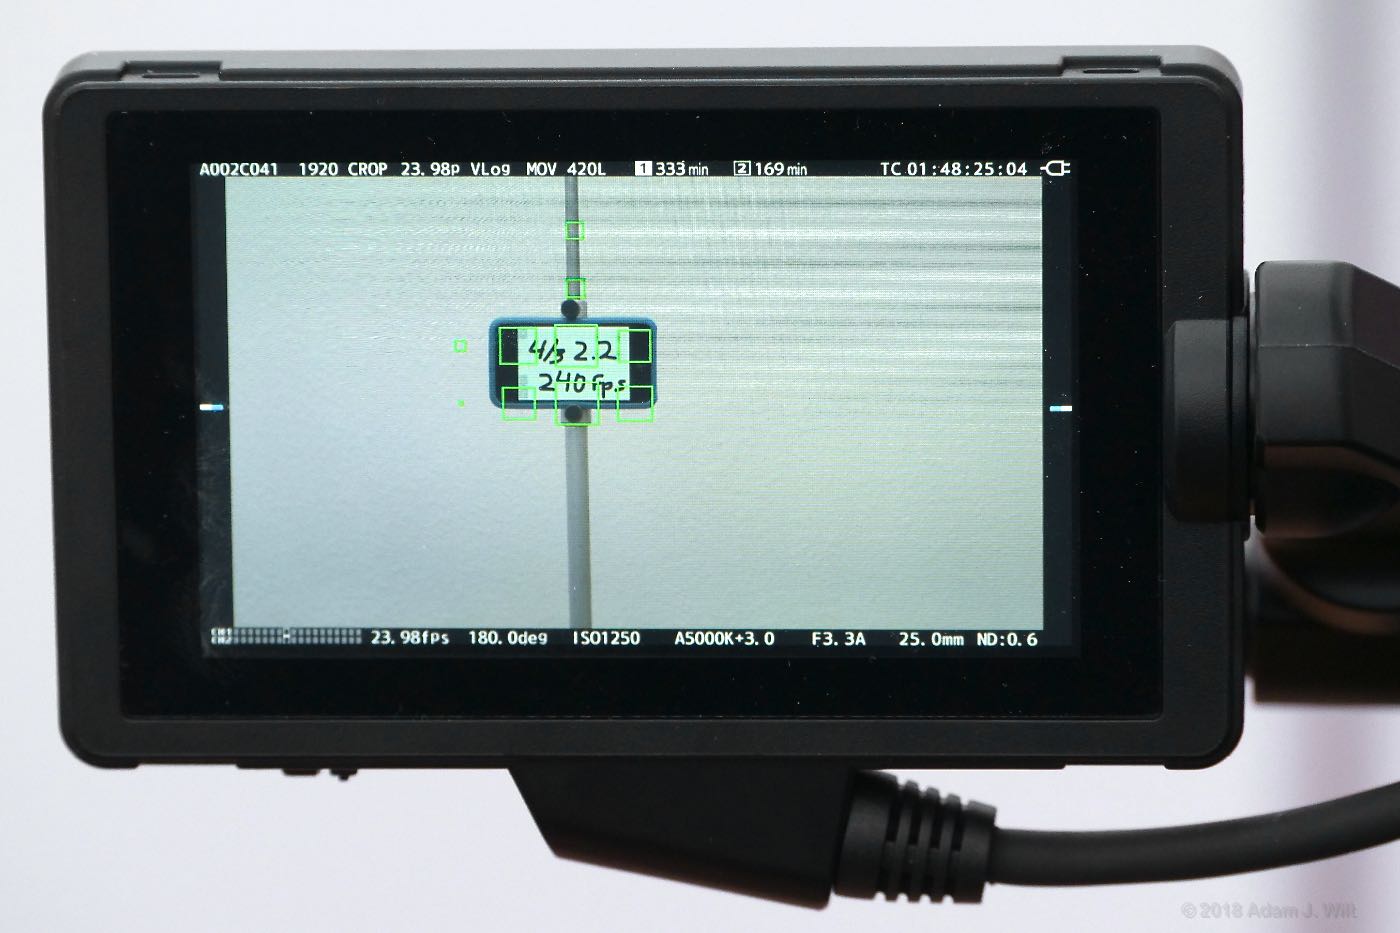
The monitor only resolves about 500 TVl/ph but the EVA1 offers a good selection of focusing aids: three levels of digital peaking in a variety of colors, Panasonic’s unusual but highly functional “focus squares”, and one of the best image-mag (FOCUS EXPAND) modes around. At the press of a button you can punch in for a 2x, 3x, or 4x blow-up, and a spin of either menu wheel—on the body or on the grip—cycles the magnified area though every part of the screen. Best of all, the expanded mode is available while recording.
I soon became accustomed to (or spoiled by, more like it) punching in while rolling, flicking the grip’s wheel until my area of interest was centered, focusing, and bopping back out to the full image, in less time that it takes to read this sentence.
The targeted area is remembered for the next time you punch in, though it re-centers when the camera is power cycled.
You can turn on a small WFM and/or vectorscope in the corner of the image. The ‘scopes show what the signal is doing, not what the display is showing, so if you’re recording V-Log you’ll see V-Log levels on the WFM even if you’re monitoring in V-709. There’s also a spot meter function, displaying the signal level of a spot in the center of the screen. Dual zebras round out the exposure-monitoring tools.
The default peak white on the monitor is about 200 nits but can be dimmed to 100 nits or brightened to 300 nits. You can assign POWER LCD to a button and boost brightness to about 440 nits, but doing so may drain the battery in five minutes flat, sear your eyeballs beyond repair, and cause the LCD to melt like ice cream on a hot, hot summer day (note: Panasonic denies that any of those things will actually happen. Probably). By comparison, iPhones typically top out at 500–650 nits. The touchscreen overlay adds some reflective glare, so the monitor can be difficult to use in bright conditions. The supplied sunshade helps to a certain extent but outdoor shooters will want to supplement it, even if it’s just by wearing a long-billed baseball cap to shade the screen.
Outputs
Both SDI and HDMI are provided and both can be active at the same time. Both feeds can output 1080i and 1080p and true 4K; SDI also allows true 2K. The SDI feed tops out at 4K/30p while HDMI will output 4K/60p. Each output can convey timecode and recording triggers. If you’re shooting V-Log, you can enable a V-709 LUT for either or both output as well as for the camera’s own LCD. Both HDMI and SDI carry embedded audio.
Each output can be set to display camera data, markers, and/or menus. The SDI output (but not the HDMI feed) can be configured to echo the LCD monitor with all its added conveniences—‘scopes, peaking, focus squares, zebras, FOCUS EXPAND, and the artificial horizon—making an SDI EVF the way to go if you’re planning on adding a viewfinder.
There’s a TC IN/OUT BNC for timecode, and a 3.5mm headphone jack, but there’s no genlock capability.
While there’s a pair of USB ports at the back of the camera, the HOST port is (at least as of today) solely for the use of the Wi-Fi dongle and the SERVICE port is for factory service uses only. There’s no way to hook the EVA1 up to a Mac, PC, or external disk for media transfer.
Menus and Controls
EVA1 has a straightforward and rational menu system, with reasonably intuitive groupings of items. I found that, after an initial familiarization period, I rarely wound up hunting randomly for any particular setting. Your mileage may vary, but I found these menus to be more logical and less frustrating than on most other cameras of similar complexity.
If there’s any “gotcha”, it’s that changes to one parameter may affect another in unexpected ways. For example, when I change SYSTEM SETTINGS > SYSTEM MODE > MAIN PIXEL from 3840×2160 to 1920×1080, OUTPUT SETTINGS > HDMI OUT also gets bumped down to 1920×1080, as is right and proper. But if I then set MAIN PIXEL back to 3840×2160, HDMI OUT stays stubbornly at 1920×1080.
This isn’t wrong; arguably it’s the correct thing to do—don’t change things behind the user’s back that you don’t have to change—but if you naively expect output settings to follow system settings you might be disappointed to come back from a day’s shoot with an external recorder full of HD clips instead of UHD clips. (Not that I would ever be so foolish, of course; I’m speaking hypothetically. Besides, I caught my mistake after only a couple of shots.)
Menus are accessed by pressing the MENU button on the body or on the handgrip, or by pressing on the touchscreen for half a second (long enough you’re unlikely to hit it by accident). Menus are then navigated by spinning the control wheel on the body, the wheel on the grip, or by onscreen taps. If you select a camera parameter to adjust, the screen flips back to picture with the adjustment controls on the side, so you can see the effect of what you’re doing—and again, you can use either of the control wheels or screen taps to twiddle that control.
In this way the camera can be used like any other camera, with appropriately-assigned user buttons and switches and the occasional menu-dive. However, you may find yourself a control or two short of what you need; the USER position on the control wheel, for example, can adjust shutter angle, frame rate, or audio monitor volume—but only one of those at a time.
Fortunately, the EVA1 has a VariCam trick up its sleeve: press the HOME button to display the Six-Button Side Panel (SBSP).
The Six-Button Side Panel originated (as far as I can tell) with the Sony F23 a decade ago, and modern variants appear on many high-end cine cameras: ARRI Alexa, Sony F5/55, Canon C700, and current VariCams, to name a few. It’s a large status display with six action buttons, three above and three below, mounted on one or both sides of the camera or on a separate control panel. Usually there’s an associated dial or control wheel for adjusting settings, too. A SBSP presents most of the commonly-needed controls and readouts with quick access to important functions, minimizing menu-diving.
The EVA1’s SBSP looks almost exactly like the one on the VariCam LT, but it’s a monitor display mode instead of a dedicated control surface. Instead of six action buttons, the EVA1 gives you direct touchscreen access: tap any of the six white tabs to display the appropriate submenu or to adjust a setting directly (if the touchscreen isn’t convenient, use one of the control wheels to cycle through the tabs—the selected one will turn yellow—and click the wheel to select it). With frame rate, color settings, shutter angle, exposure index, audio settings, and white balance immediately available, most common configuration tasks can be done without ever cracking open a menu.
Power
The camera comes with a dual battery charger, and the supplied AC adaptor is used for either the charger or the camera—you can’t charge a battery and power the camera at the same time.
Fortunately the batteries last a good long time: the stock battery is rated for 2 hours 50 minutes, and that seemed to be accurate in my tests. Optional batteries survive for 4 hours 15 minutes or 5 hours 40 minutes (the big battery in the picture is one of those 5+ hour batteries).
Handling and Operation
The EVA1 is a chunky little handheld camera, best stabilized with a “tripod grip”: body pressed against the shoulder, right hand on the handgrip, left hand cradling the body or lens. With a lightweight lens and minimal added hardware, the camera is comfortably operable for reasonably long periods of time, but piling on monitor/recorders, wireless transmitter/receivers, and other such gumpf results in a heavier and more tiring beast. This isn’t to fault the EVA1 in particular; it’s a common problem with cameras of this form factor.
If you choose to operate this way, be advised that any I/O cables you plug in stick out the back of the camera, limiting your ability to clutch it to your chest.
For those desiring proper shoulder mounting, build-up kits are already available from Shape and Zacuto. Wooden Camera makes a handgrip relocator. More options are surely in the works.
Startup and Mode-Switching
Eight seconds elapse between switching power on and being able to record. Switching sensor modes takes perhaps four or five seconds. Even a reboot, needed to change system frequency, is completed in ten seconds or less. It’s a bit slower than a GH5, but much faster than VariCam LT, and fast enough that I never felt I was waiting for the camera.
White Balance Setting (and other controls, too)
Like the VariCams, the EVA1 doesn’t give you an endlessly-scrolling list of all possible white balance settings (or shutter angles, or frame rates). Instead, it gives you a short list of useful values, which you can edit as you see fit. Pressing the ADD button in the appropriate menu returns you to the live-view image with color-temperature adjustment buttons, and a vectorscope thoughtfully provided in the lower right corner. Once you’ve set temperature, you can adjust green/magenta tint, too. You can save up to 12 different color temperature/tint combos in the list.
By the same token, you can save 12 different shutter angles and a stonking 150 different frame rates into their respective lists.
These stored white balances, shutter speeds, and frame rates are then available using the control wheel on the camera or grip, or the appropriate tab in the SBSP (HOME) screen. Once you grok the concept of having quick-access lists of frequently used values instead of having to scroll through all possible values, adjusting the EVA1 becomes fast and easy, and you’ll miss it when you have to work with a more conventional camera.
At the bottom of the white balance list—scrolling down, that is—is an “A” value you set by pressing the AWB button while aimed at a color-neutral surface. If you want to add that AWB value to your saved list, go ahead: just ADD the value by clicking through the temperature and tint values shown without changing them. Again, it’s a bit different from the usual PRESET/A/B switch settings, but it’s just as capable.
If you’re not shooting V-Log, you get one further setting: ATW. Auto-Tracking White uses a small ambient-light sensor on the front of the camera to continuously determine and adjust white balance; it reads the light the way an incident meter would, so it’s not overly affected by colors in front of the lens.
Focusing
I’ve already mentioned the manual focusing aids, which I feel are among the best in the business.
The EVA1 also offers push-to-set autofocus with compatible lenses, but it’s really a setup function, not a live-shooting utility. The EVA1 uses contrast-detection AF, without the GH5’s “depth from defocus” predictive capabilities, so autofocusing is an iterative, trial-and-error process with the camera adjusting the lens repeatedly and seeing whether focus gets better or worse. When you press the AF button (button #1 by default), the focus will seek back and forth perhaps a couple of times, then fine-tune on the final position in a series of small steps, during which the focus motor emits a faint chuckling noise. It often takes a couple of seconds to run; it always throws focus off initially; and it doesn’t always wind up with the subject in focus, especially if the subject is moving during the attempt. I found it to be useful on test charts, less so on real-world subjects.
If you need autofocus during shooting, the EVA1 isn’t the camera to use: a GH5 is a much better bet despite its temperamental autofocusing, or one of the Canon DPAF-equipped cine cameras like the C200 (a very different camera overall, despite the comparable form factor and price—don’t just say, “well, the C200 has DPAF so that’s the one to get”, unless AF is the most important thing in a camera. In some ways the C200 wipes the floor with the EVA1; in other ways the EVA1 totally pwns the C200. It’s good to have choices!).
Exposure
As mentioned the EVA1 offers zebras, a spot meter, and a waveform monitor for exposure control. A three-stage internal ND helps keep apertures within reason, though with a maximum value of ND 1.2 you might want to carry an additional filter for bright days. While the base ISO of 800 can be dialed down to 200, you’ll lose two stops of highlight headroom by doing so (mind you, the camera has 14+ stops of dynamic range to begin with, so cutting that down to 12+ stops isn’t quite the end of the world).
You can turn on auto-iris with compatible EF lenses by clicking the IRIS wheel in, but depending on the lens used that may not be especially usable.
Many stills lenses, including two Sigma and two Canon lenses I tested with, aren’t designed for smooth, quiet iris changes. Instead, the iris will change in a series of small, discrete, and noisy steps: the lens will rattle or buzz as the aperture changes. Even though the steps might be very fine—the Sigma 18-35mm DC f/1.8 supplied for the review has eight steps per stop, while my Canon 24-70mm F/2.8 EF L has only four—the nearly-instantaneous changes, desirable for still-camera use, are visible in the picture as sudden jumps in brightness, and audible in the soundtrack whenever a mike is close to the camera.
However, my Canon 70-200mm f/2.8 EF L II smoothly adjusted its iris as cleanly, unobtrusively, and silently as any video lens would, so clearly the EVA1 can do it if the lens allows it. You’ll want to test lenses for auto-iris behavior on the EVA1 before you go running-and-gunning with auto-iris turned on.
Image Stabilization
If your lens has optical image stabilization and it can be controlled with a switch on the lens, it will work on the EVA1. If your lens doesn’t have OIS, or you switch it off, you can use electronic image stabilization instead.
EIS crops the image slightly so the camera can pan-and-scan across the face of the sensor, but as the camera is considerably oversampled this cropping has little impact on image resolution. EIS images suffer (as all EIS images do) from momentary microblurring when the camera wiggles, and it’s not available in the 4/3 crop mode, but it’s quite effective otherwise.
Purists may scoff at the use of EIS (along with autofocus and autoexposure) but it’s a useful thing to have in your toolkit in case of emergencies. It’s better to have it and never need it, than to not have have it and find yourself with a wobbly tripod, a long lens, and a must-get shot.
VFR
Variable Frame Rates from 1–60fps can be had at 4K / UHD frame sizes; to 120fps in 2K / FHD using the full S35mm sensor in “mix” mode; and to 240fps in a 4/3” “crop&mix” mode. Available rates depend on the SENSOR MODE (S35 5.7K, S35 MIX 2.8K, or 4/3 CROP&MIX 2.2K), MAIN PIXEL (4096×2160, 3840×2160, 2048×1080, or 1920×1080), and MAIN CODEC (too many options to list) settings. Once you pick those, your image-rendering qualities are set; there aren’t any breakpoints where changing the frame rate triggers an unannounced change in scanning mode or effective sensor size. The manual has a handy table of these speeds ‘n’ feeds.
Once you’ve selected those settings, choosing a frame rate is as quick and easy as changing shutter angles or white balances.
Audio
The EVA1 has the important realtime audio controls on physical knobs and switches: auto/manual gain, and gain pots for both channels. Anything you need to adjust in a hurry is right there on the side of the camera. Everything else—mike vs. line, baseline levels, phantom power, signal routing—can be done in the menus or the HOME screen.
By default, the USER setting on the control wheel’s three-way switch adjusts monitor volume.
Etc.
Each status LED can be switched off individually, so if you don’t care for front tally, rear tally, card status, and/or power lamps, you can turn ‘em off and keep your camera blissfully dark.
The IR filter can be retracted for low-light infrared shooting.
The AC supply’s coax plug snaps firmly into its socket, so it’s less likely to come undone than the same sort of connection on many other cameras. It takes a reassuringly firm pull to pop the plug out.
When not shooting V-Log the EVA1 offers five Scene Files with extensive picture adjustments, including standard matrix controls as well a 16-vector color corrector.
There’s even more in part 3…

