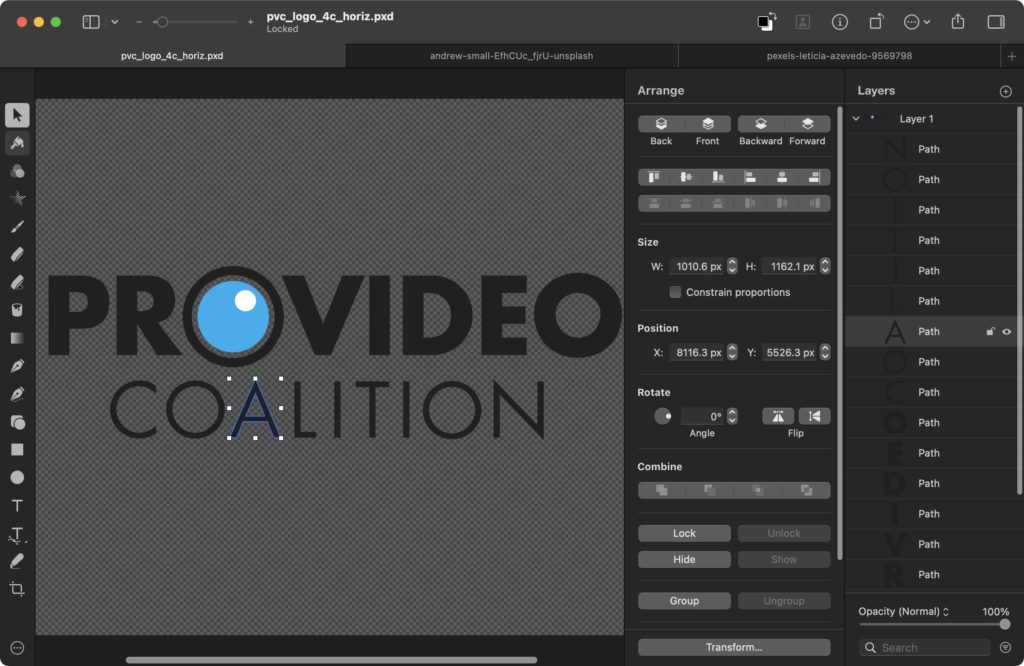
Subscriptions are polarizing, and although Adobe makes some excellent apps, if you’d rather buy your software outright, you may well need some kind of Photoshop replacement. Since Adobe went subscription-only, this market has grown, and Pixelmator Pro is a solid option with new and unique advantages — especially if you’re in the Final Cut Pro and Motion world. Let’s take a look at the whole app, with a special focus on how you can use it to augment professional video and animation workflows.
Overview
Pixelmator Pro is primarily a photo editor, but like Affinity Photo, it’s not just that. While Adobe’s big design apps remain focused on photos or design (not both), Pixelmator Pro is happy to also offer vector-based features traditionally covered by design programs like Adobe Illustrator.
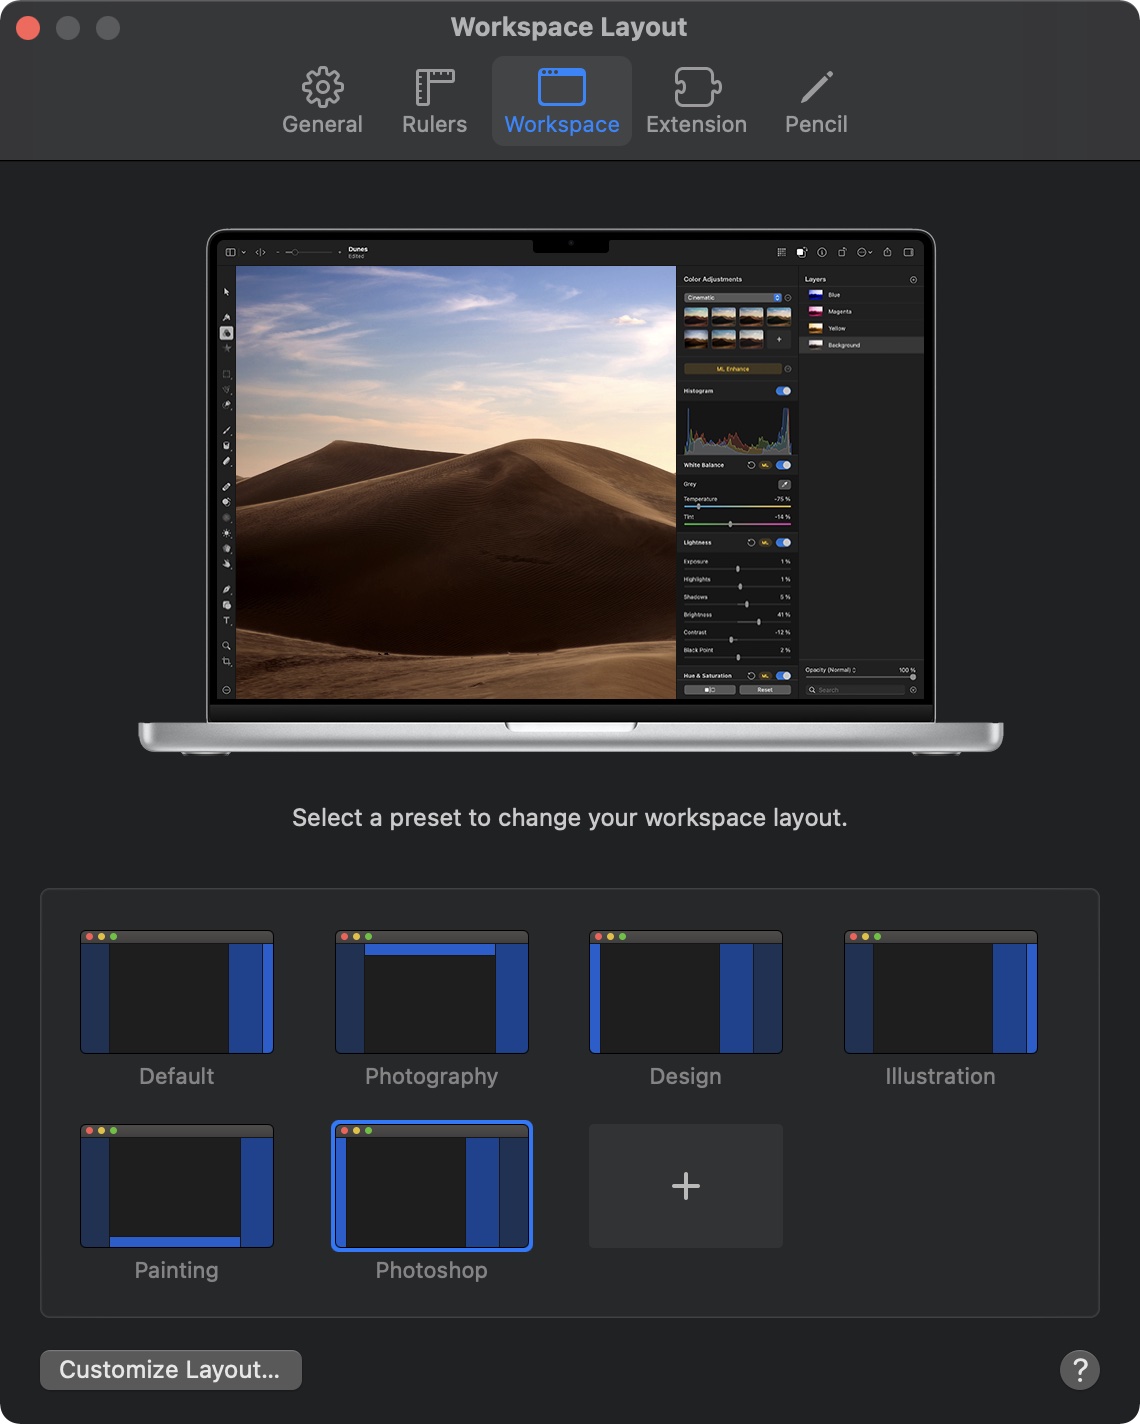
The user interface is flexible, so if you’d prefer it to work like Photoshop, you can choose a layout with a selection of familiar tools on the left, and other panels on the right. Other options, based around photography or painting, change the tools around and put the Layers pane on the left — and you can make your own. It’s up to you which tools you want accessible and where you’d like to keep your panels, so experiment. There’s also a Tools menu at the top where you can always find everything else.
Changing tools changes the main Tool Options panel, where you’ll find the sliders and other settings you need to perform color correction, size and brush style to control how the Brush tool works, font, size and spacing controls for the Text tool, and arrange options for organizing many layers at once. It’s a little like the Properties panel you’d find in Illustrator or InDesign, but often more focused on the tool than an object you have selected. It works well, and doesn’t take long to get used to. If you’ve got years of muscle memory from Photoshop, you’ll find that many of the same shortcuts work the same way here.
Basic Workflows
Video editors probably have slightly different needs to most other users. Typical tasks I might need to perform include correcting an image that needs to be used in a video, creating a YouTube thumbnail, preparing a logo that needs to be shown or perhaps animated, and cleaning up or redacting parts of provided artwork. Your NLE can handle some of these tasks, but if you’ve ever cropped large rectangles in an effort to cover up some part of an image, you’ll know that it’s a messy process. It’s much easier to tackle these tasks in a dedicated app, and Pixelmator Pro can handle many of them.
As you’d expect, you can open a variety of image formats, correct or duplicate the existing layers, create new pixel, vector or text-based elements, save a layered file in a native format, and export to a selection of other formats for use in other apps.
If you’re given a photo and need to retouch it, you’ll find a selection of repair and clone tools, and they’ll tackle most tasks quickly and easily. For common scaling and cropping jobs, you can perform them manually, or use tools powered by Machine Learning: a denoiser, a super-resolution upscaler, an auto-reframing crop tool, a color enhancer and a color matcher. As with any ML-based tools, the results are frequently good but not always perfect. That’s to be expected and is still an overall win that’ll save you time, and you can expect ML tools to improve as the training set increases.
Color adjustments also include machine learning, and the huge feature set here allows for ML-powered “auto” options in several important color correction categories, including (deep breath): White Balance, Lightness, Hue & Saturation, Selective Color, and Color Balance (3-way wheels!). Also included are manual controls over Levels, Curves, Replace Color, Custom LUT, Vignette, Sharpen, Grain, and a few more for good measure. It’s great to have fine control over all these separate items with auto controls too, and there’s even a before/after switch.
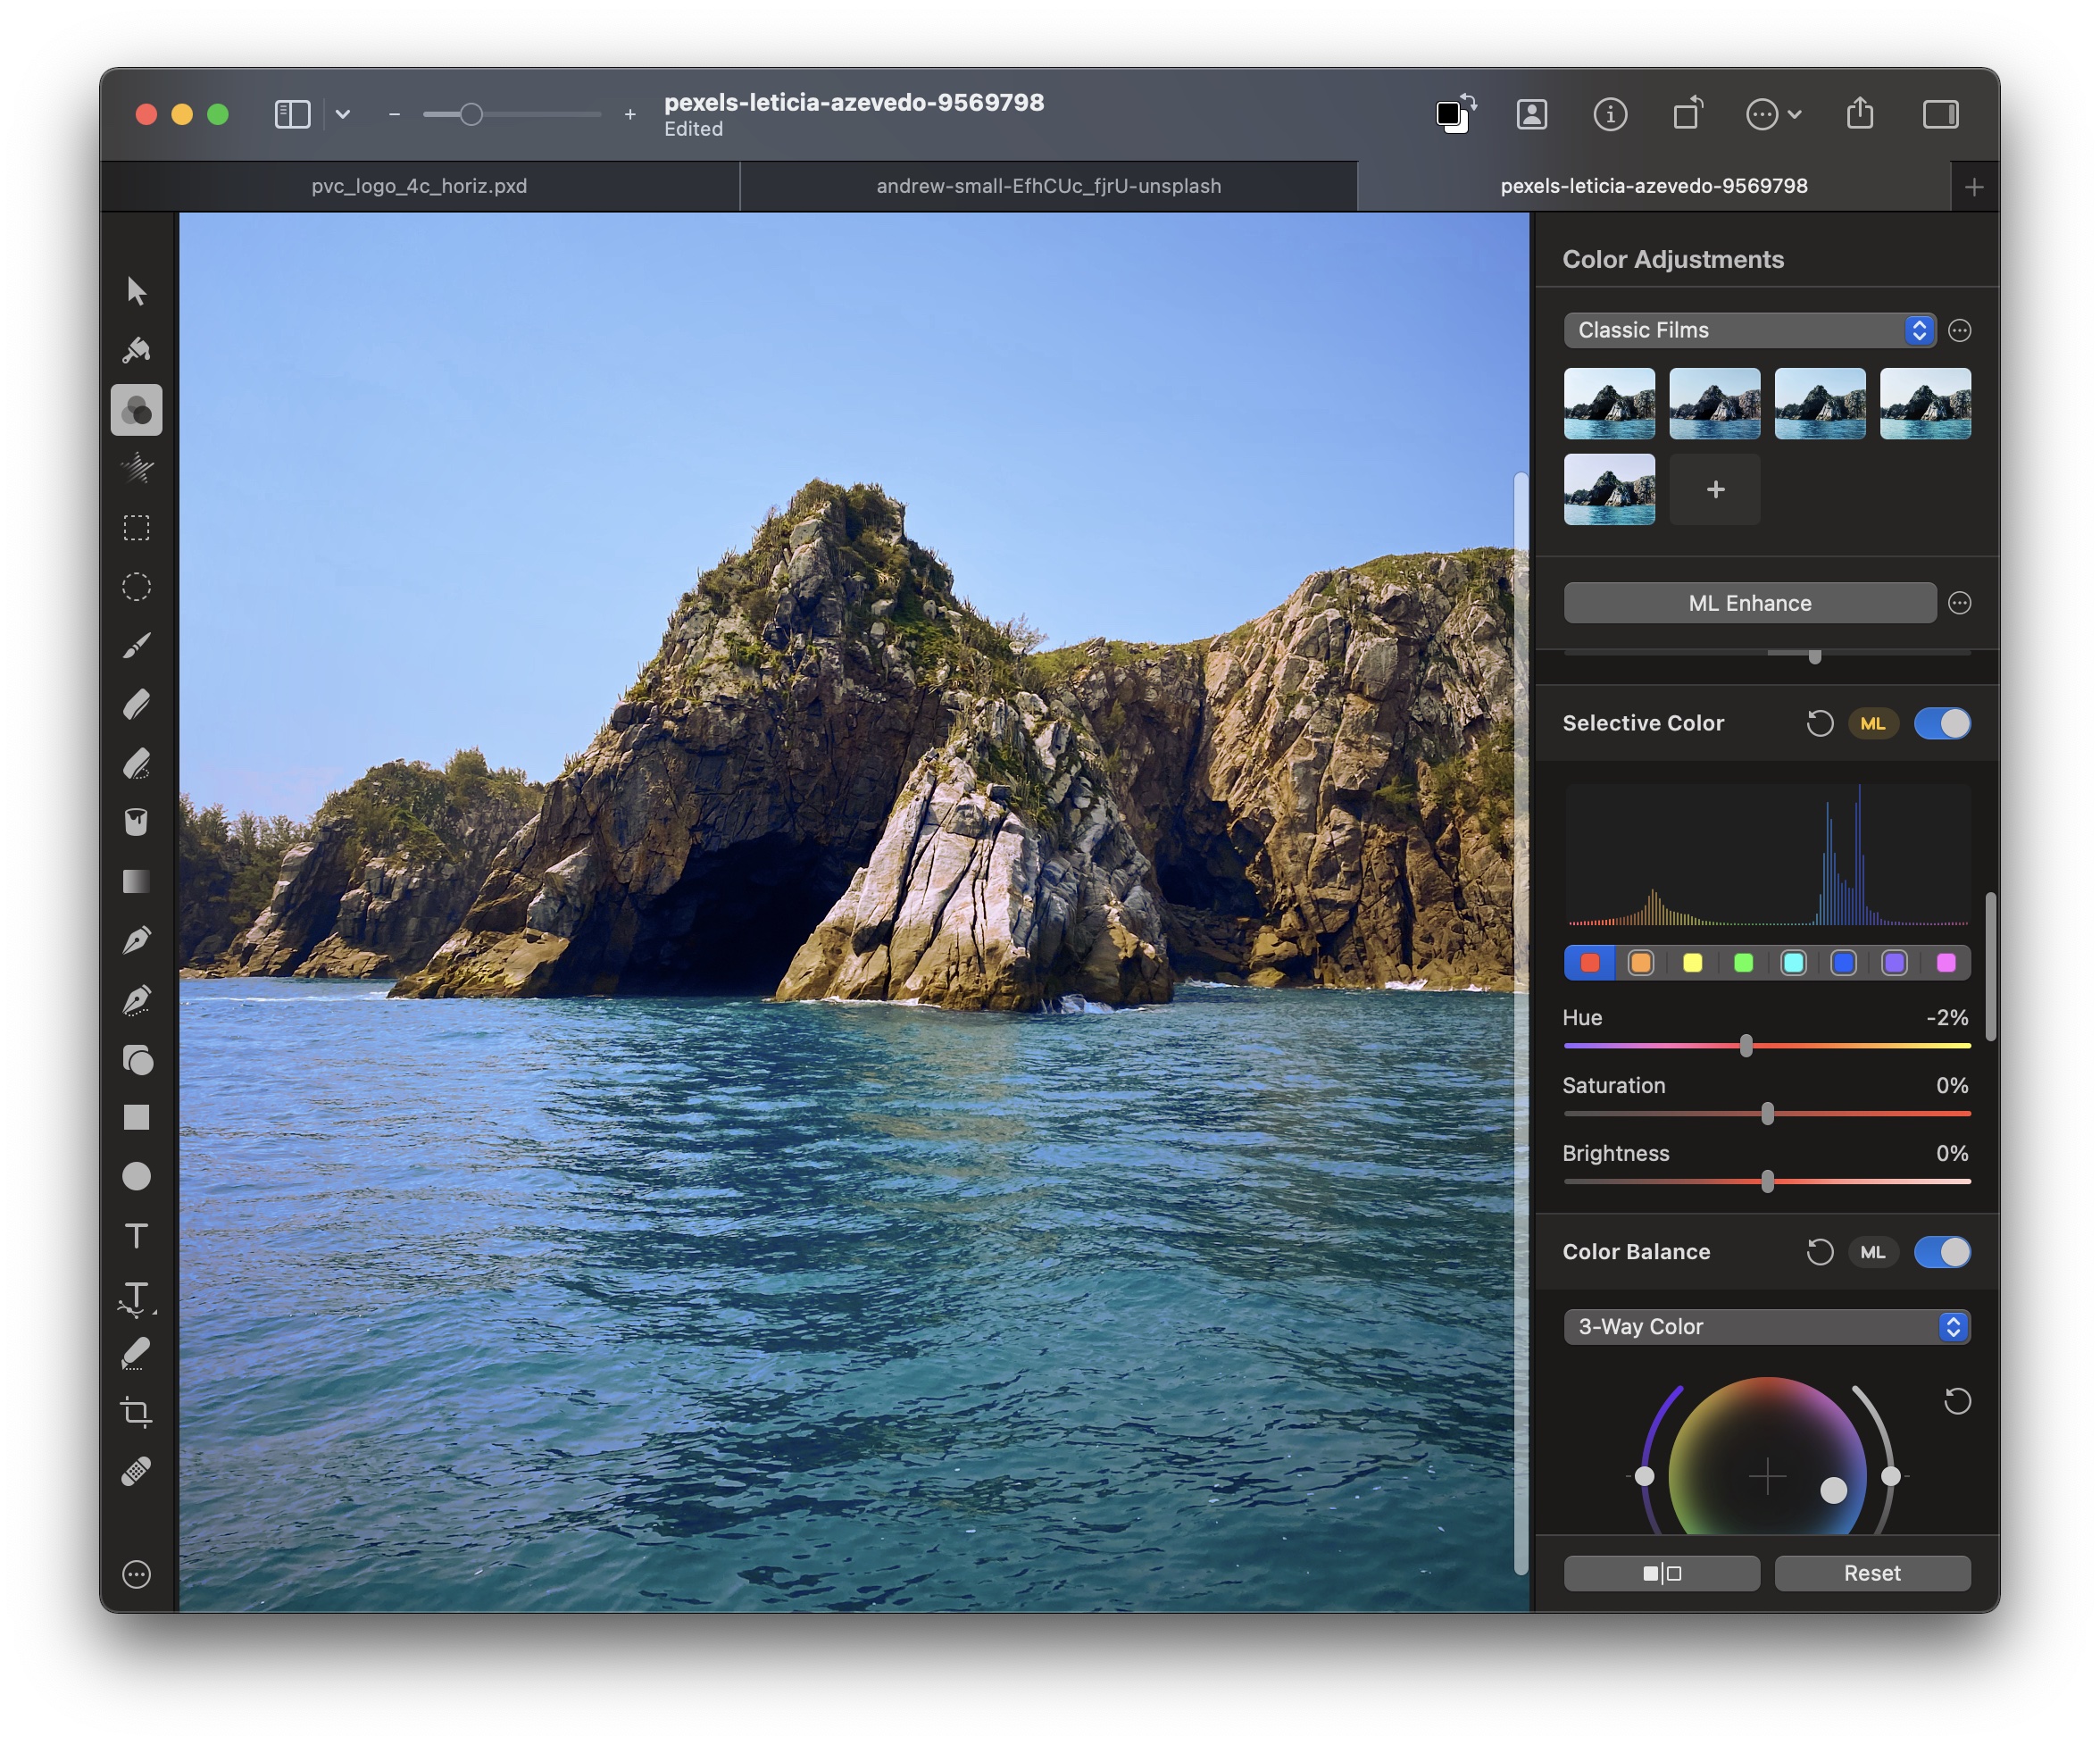
While you can of course use these tools to correct images for use in your videos, you can also use the tools here to generate a LUT that you can import back into your NLE of choice. Export a few sample images, correct them to taste, then apply the LUT that created the look to as many clips as you wish. This workflow is common to a few apps now, and it’s great to see it supported here.
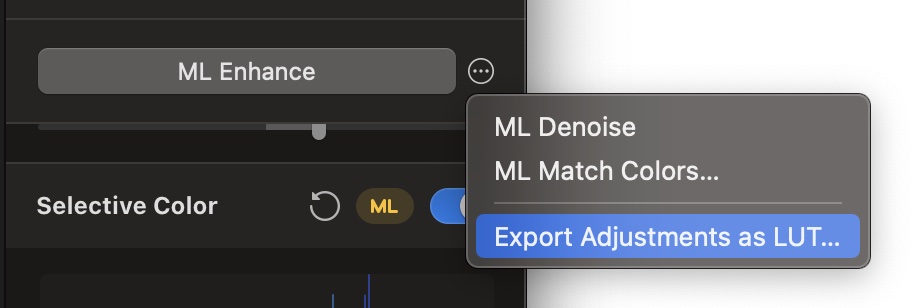
The only feature missing here, not that important for video editors but more vital to a professional retouching workflow, is adjustment layers. Happily, they’re coming to the app in 2022.
Creating Selections and Compositing
Separating an object or a logo from its background is another common task you might face, and Pixelmator Pro has new tools to help with this too. As well as the new Magic Background Eraser (very quick for simple objects) there’s a quick selection tool and a color selection tool for quickly grabbing areas of similar color and a “select subject” feature. The select and mask workspace lets you finesse a selection further, with manual and automatic controls, then convert the selection to a layer mask. (This workspace isn’t quite as advanced as Photoshop’s version, but it’ll be fine for many tasks, and you can apply it to existing masks to refine them too.)
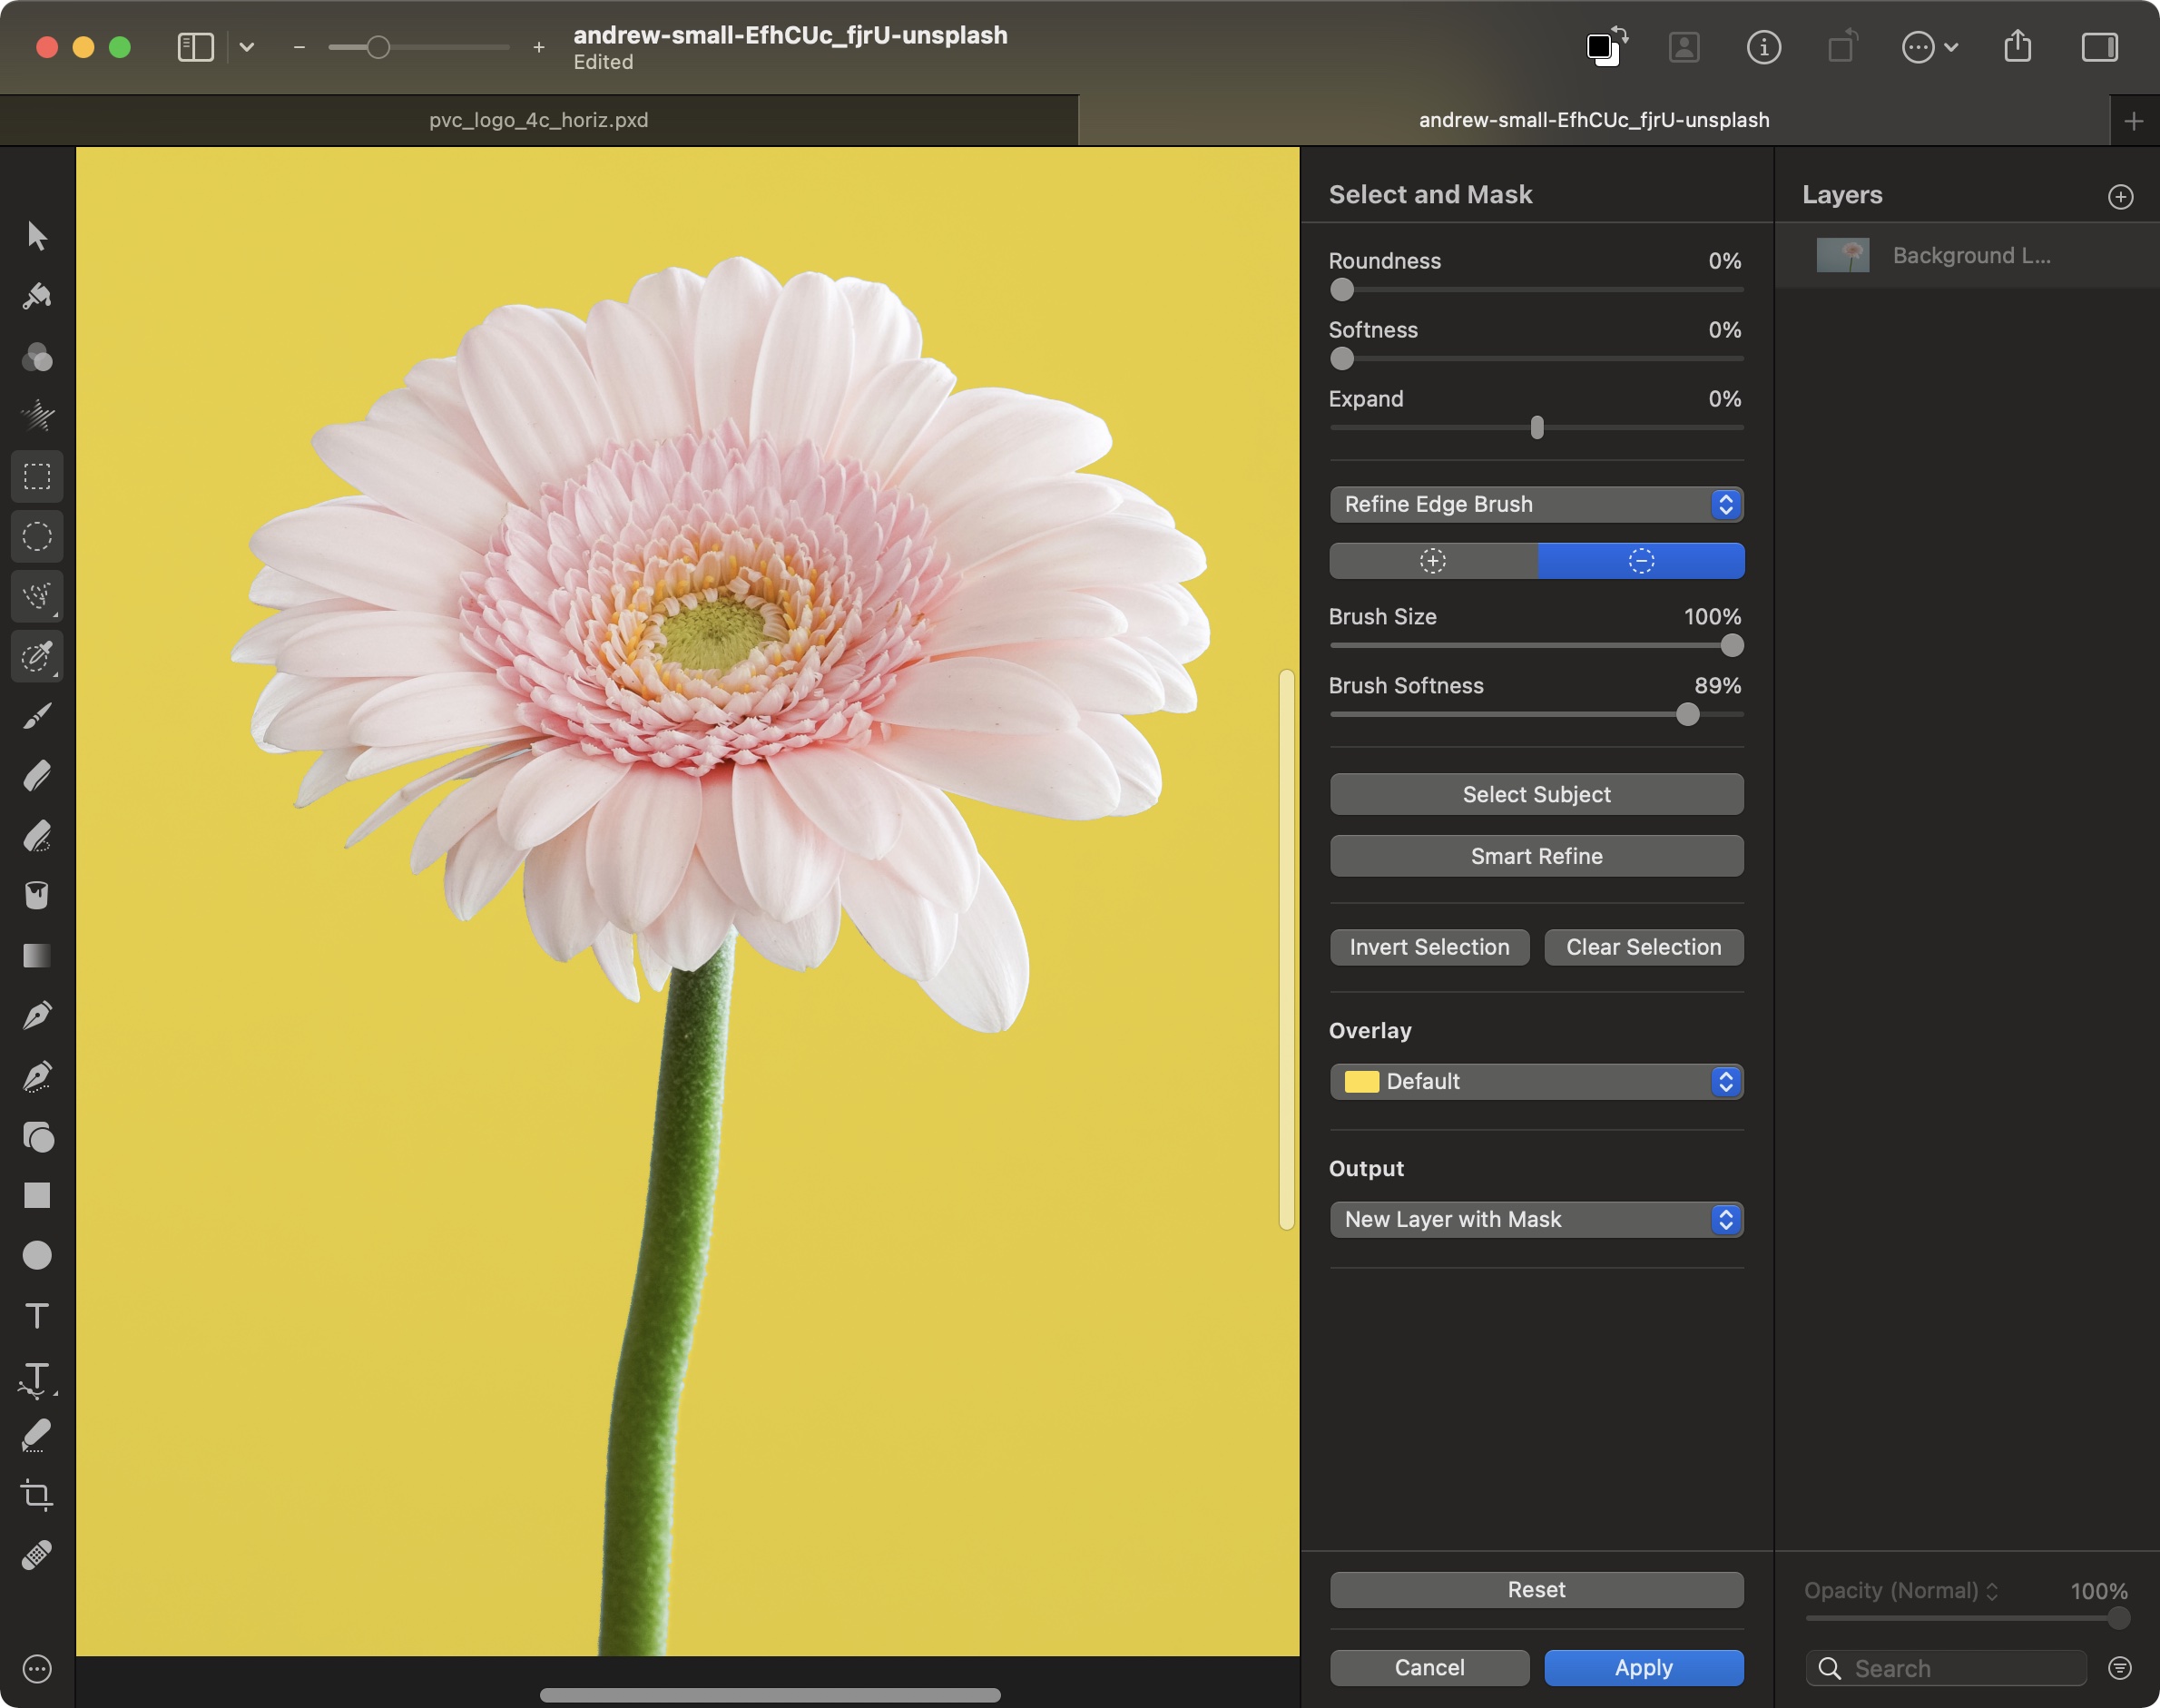
Mask support is comprehensive, including layer masks (on single layers and groups) and clipping masks (using one layer’s visibility as a mask for the layer above). Even relatively obscure Photoshop shortcuts like ⇧-clicking a mask to disable it and ⌘-clicking a mask to load it as a selection work just fine here. Your muscle memory is not lost.
The big one: preparing for animation in Motion
![]()
Pixelmator Pro is mostly known for its strength in image manipulation, but there’s a wealth of resolution-independent vector tools here as well. While most video editors won’t need to add vector shapes or play with vector paths, these features combine with the new Motion project export option to enable all kinds of new workflows.
Before this version, the easiest way to import any complex, separately-layered artwork into Motion was to convert it to a layered Photoshop file, make sure any masks were flattened into each layer (as Motion can’t read them), and then import that layered file into Motion. One big downside of this approach is that vector artwork must be rasterized, limiting the amount of scaling that’s possible.
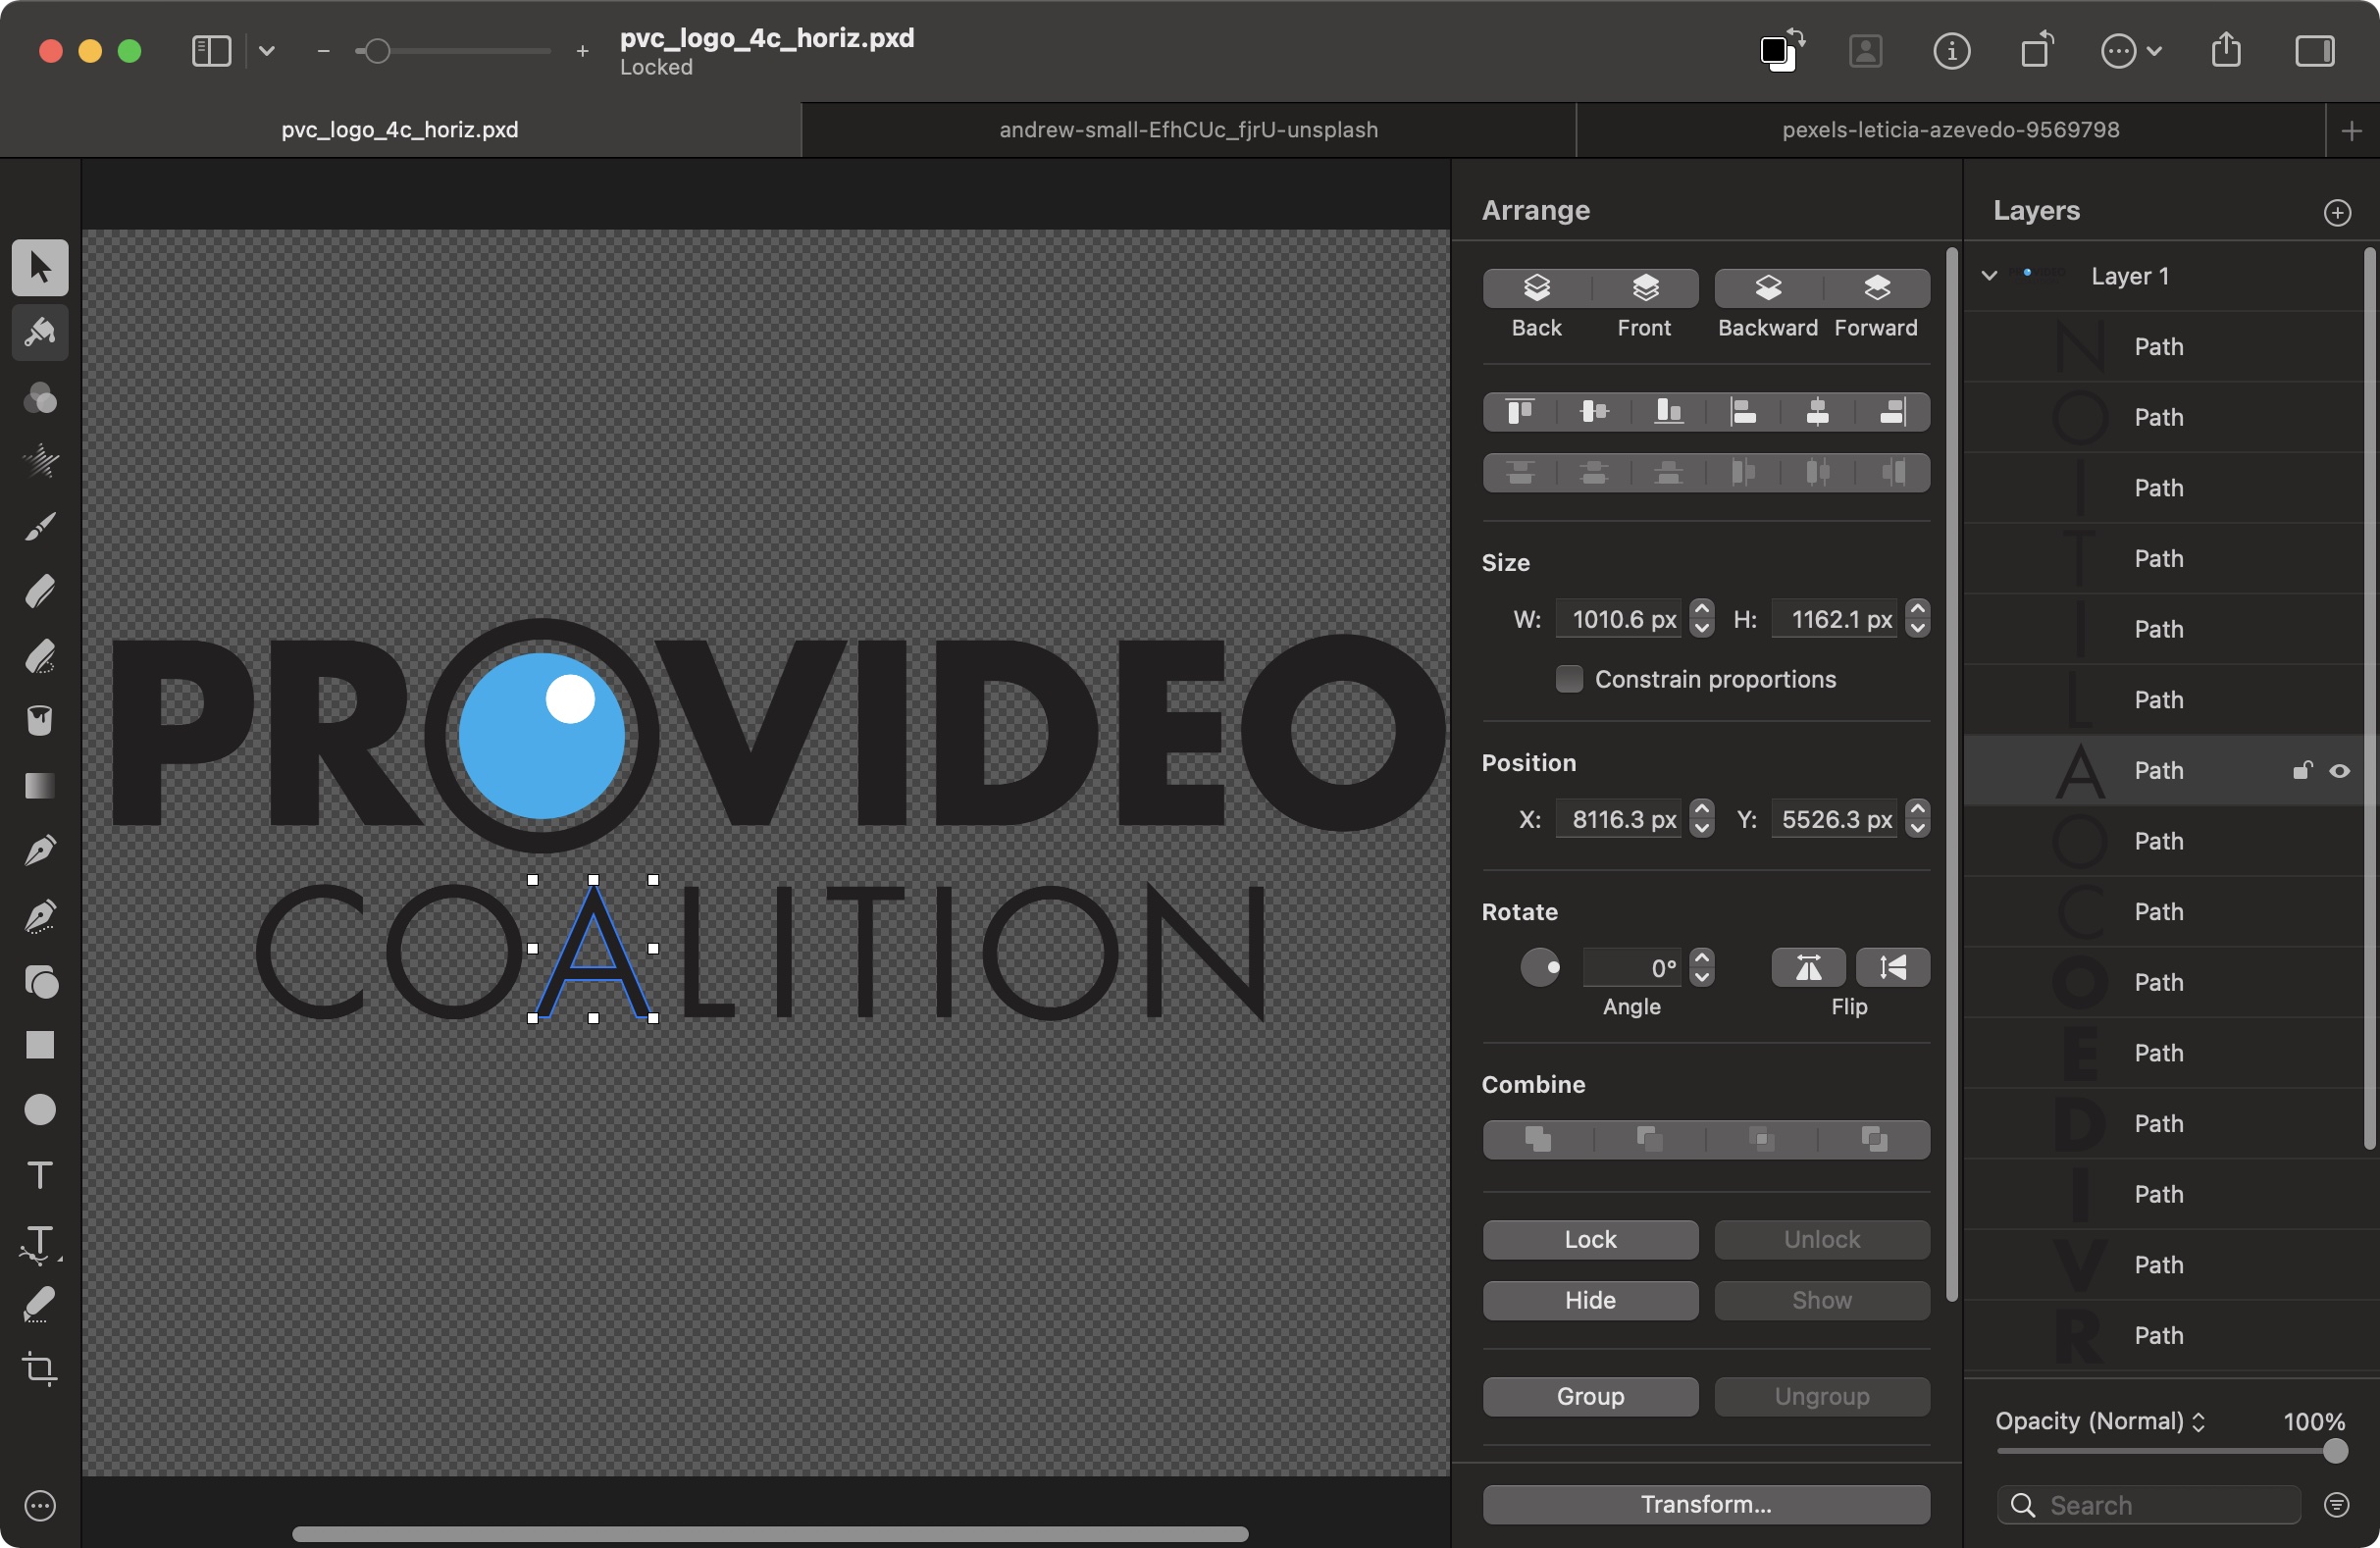
With those limitations in mind, the old-school “via PSD” process does let you import each layer as a separate element, able to be animated or revealed independently. If you do this from Photoshop or Illustrator, the existing layer structure, if any, will be maintained. That’s OK, but if you go via Pixelmator Pro instead, its smart interpretation of SVG files means that each element will automatically become a separate layer — very handy indeed.
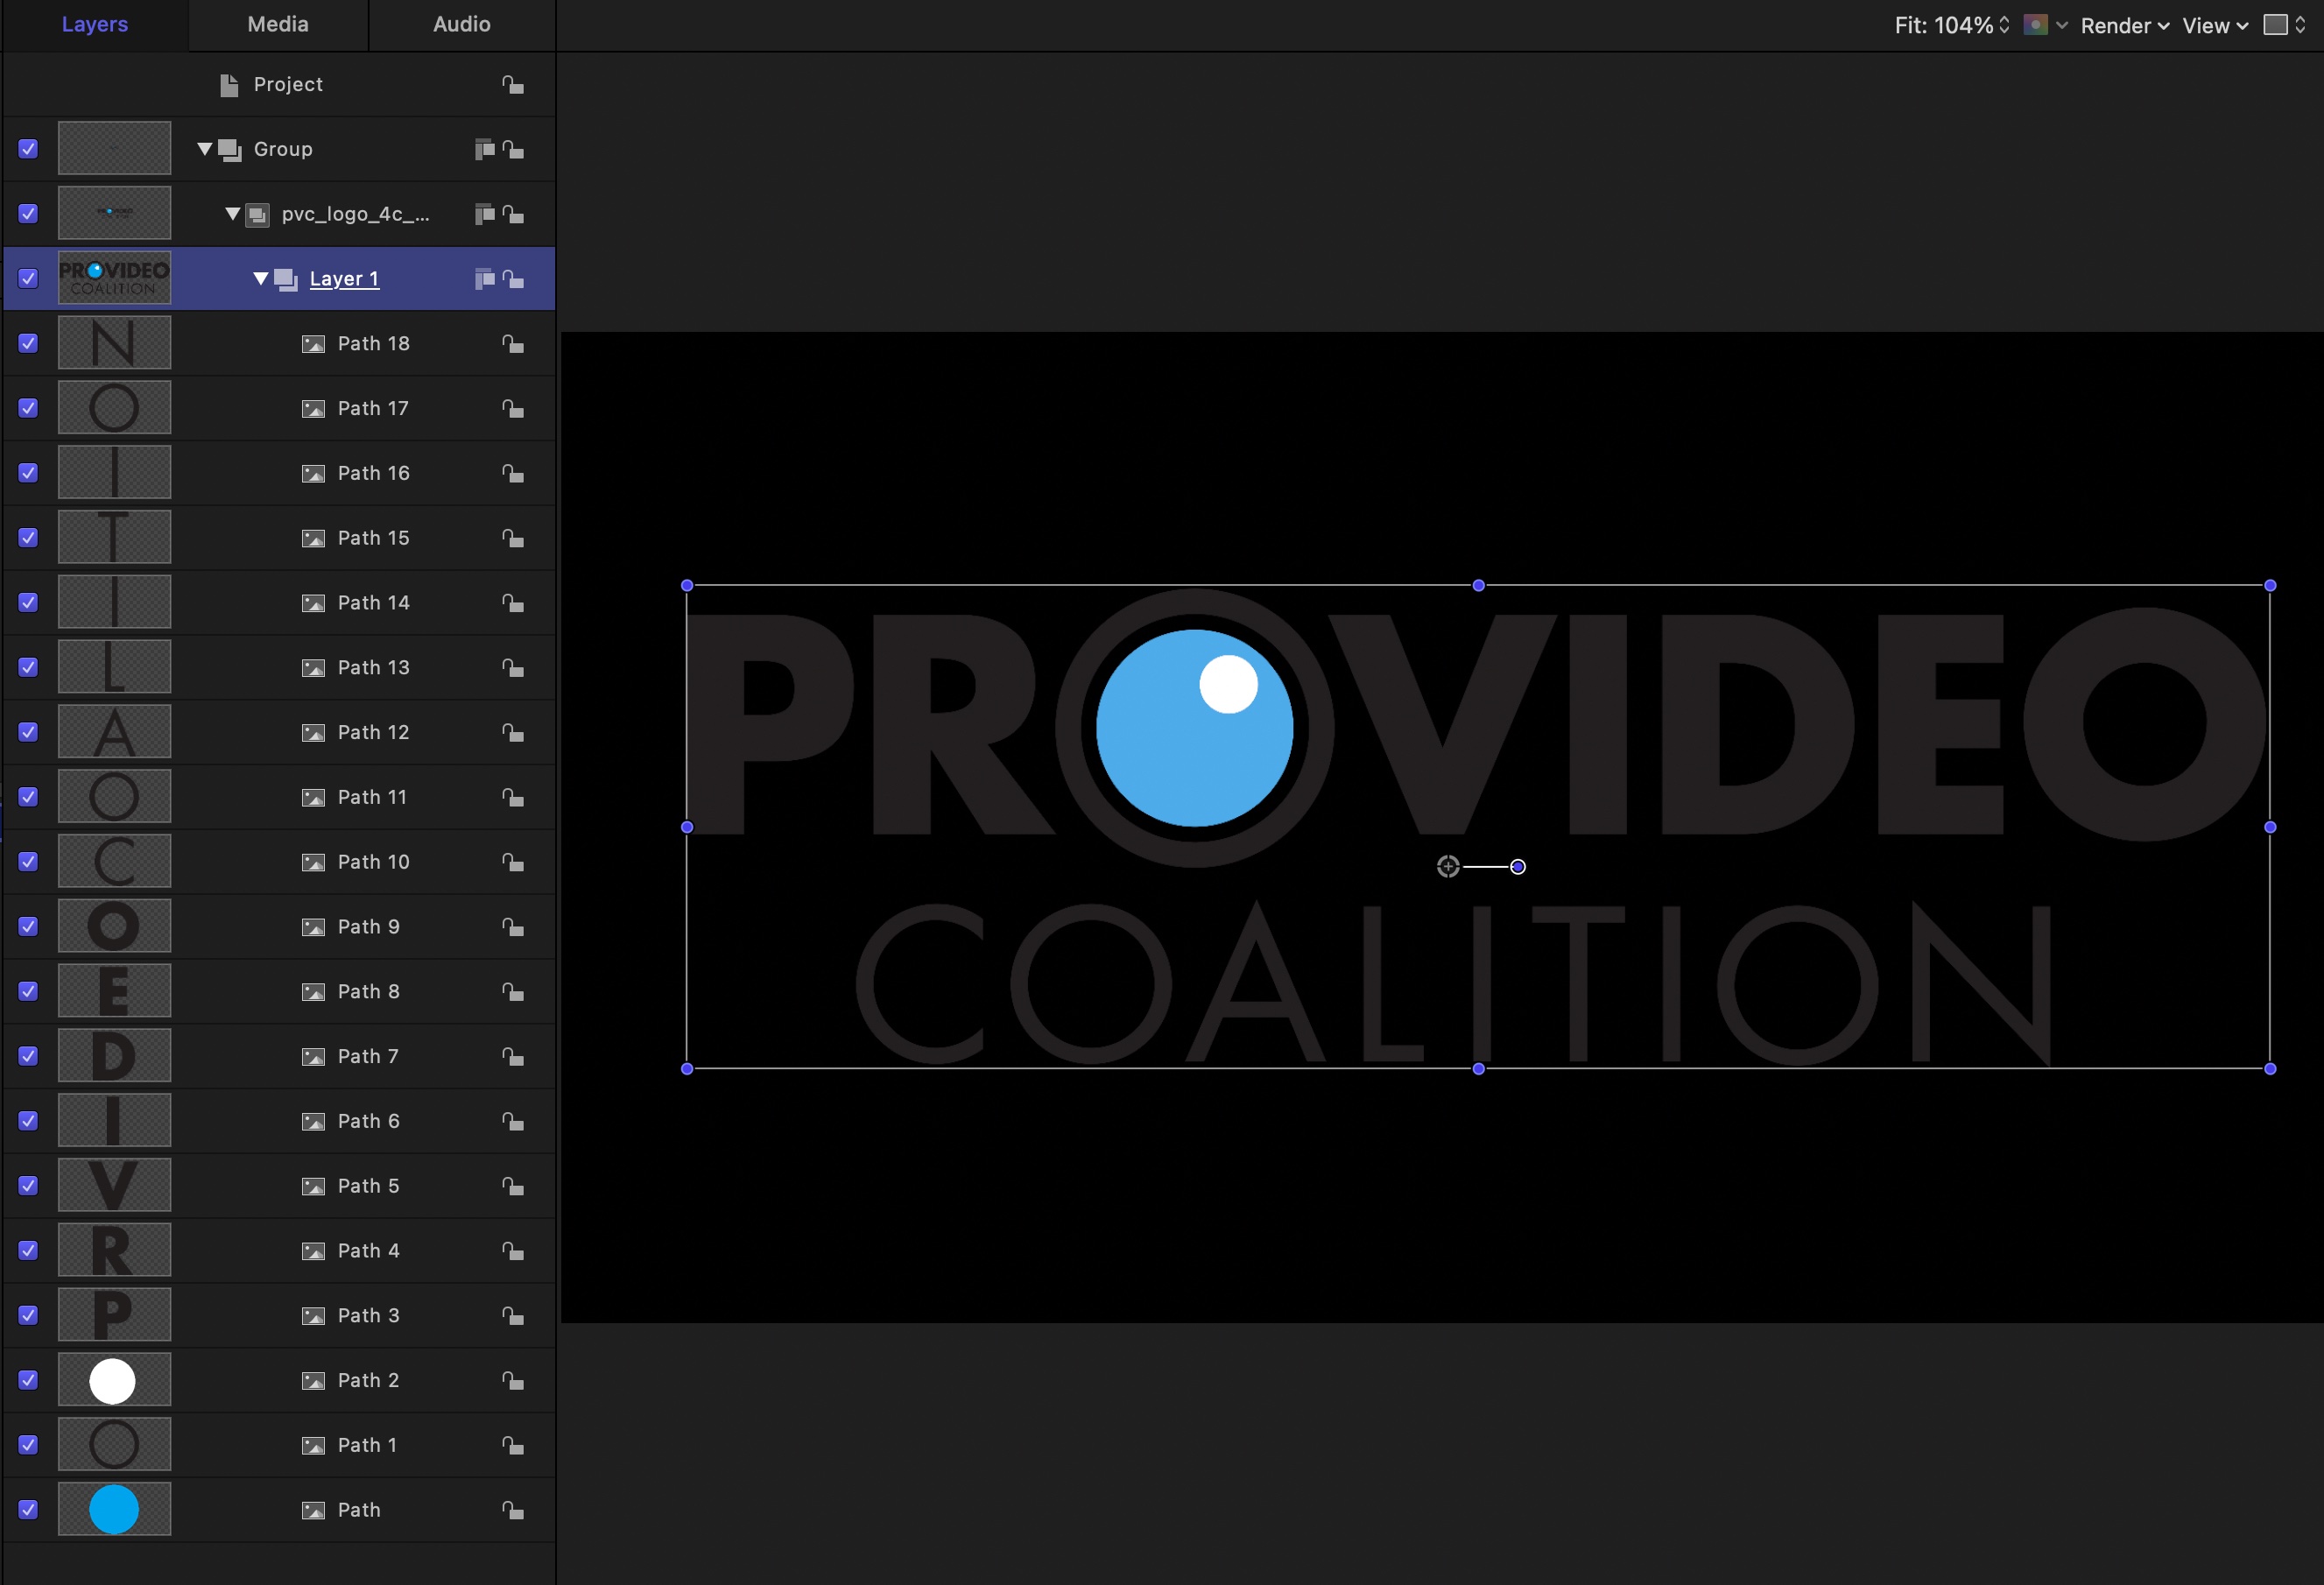
This is still a supported workflow, and it’s the way to go if you need multi-layer support in Final Cut Pro rather than Motion. As neither FCP nor Motion understand layer masks in PSDs, be sure to check the “Optimize for Final Cut Pro” box to flatten layer masks into each layer. So far this is an improvement on existing workflows, as far less layer manipulation is needed, but we can do better.
Moving to vector import, it’s long been possible to use a script (which I modified and gave away for free at motionally.com) to turn a layered Illustrator file into a series of separate PDF files. This process maintains vector shapes and also the relative positioning of each separate layer. But it’s a little inconvenient, it requires Illustrator, and while the vector artwork doesn’t get rasterized, it’s not truly a Motion shape. That limit means you can’t change fills to outlines, use behaviors to change the shapes, or manipulate the shape points manually, and moving all the elements to their own layers can be tedious.
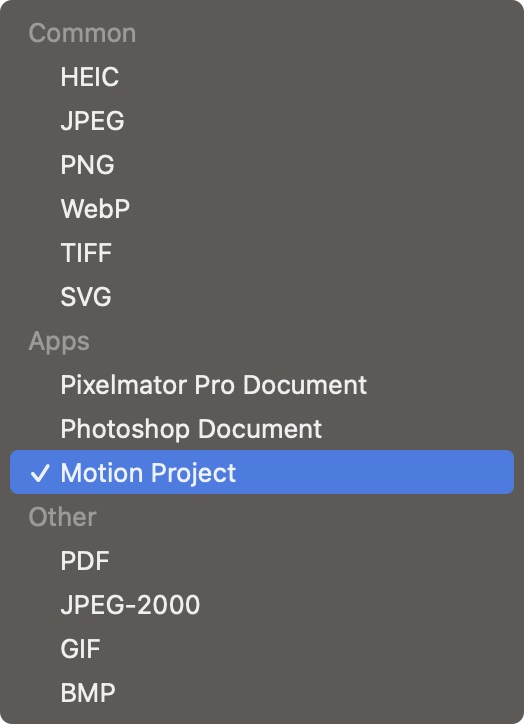
All that’s changed now that Pixelmator Pro can export to Motion. Not only are separate elements maintained (each pixel-based layer and each vector shape) but each individual component in a shape now translates directly to a native Motion shape — even components within complex compound shapes.
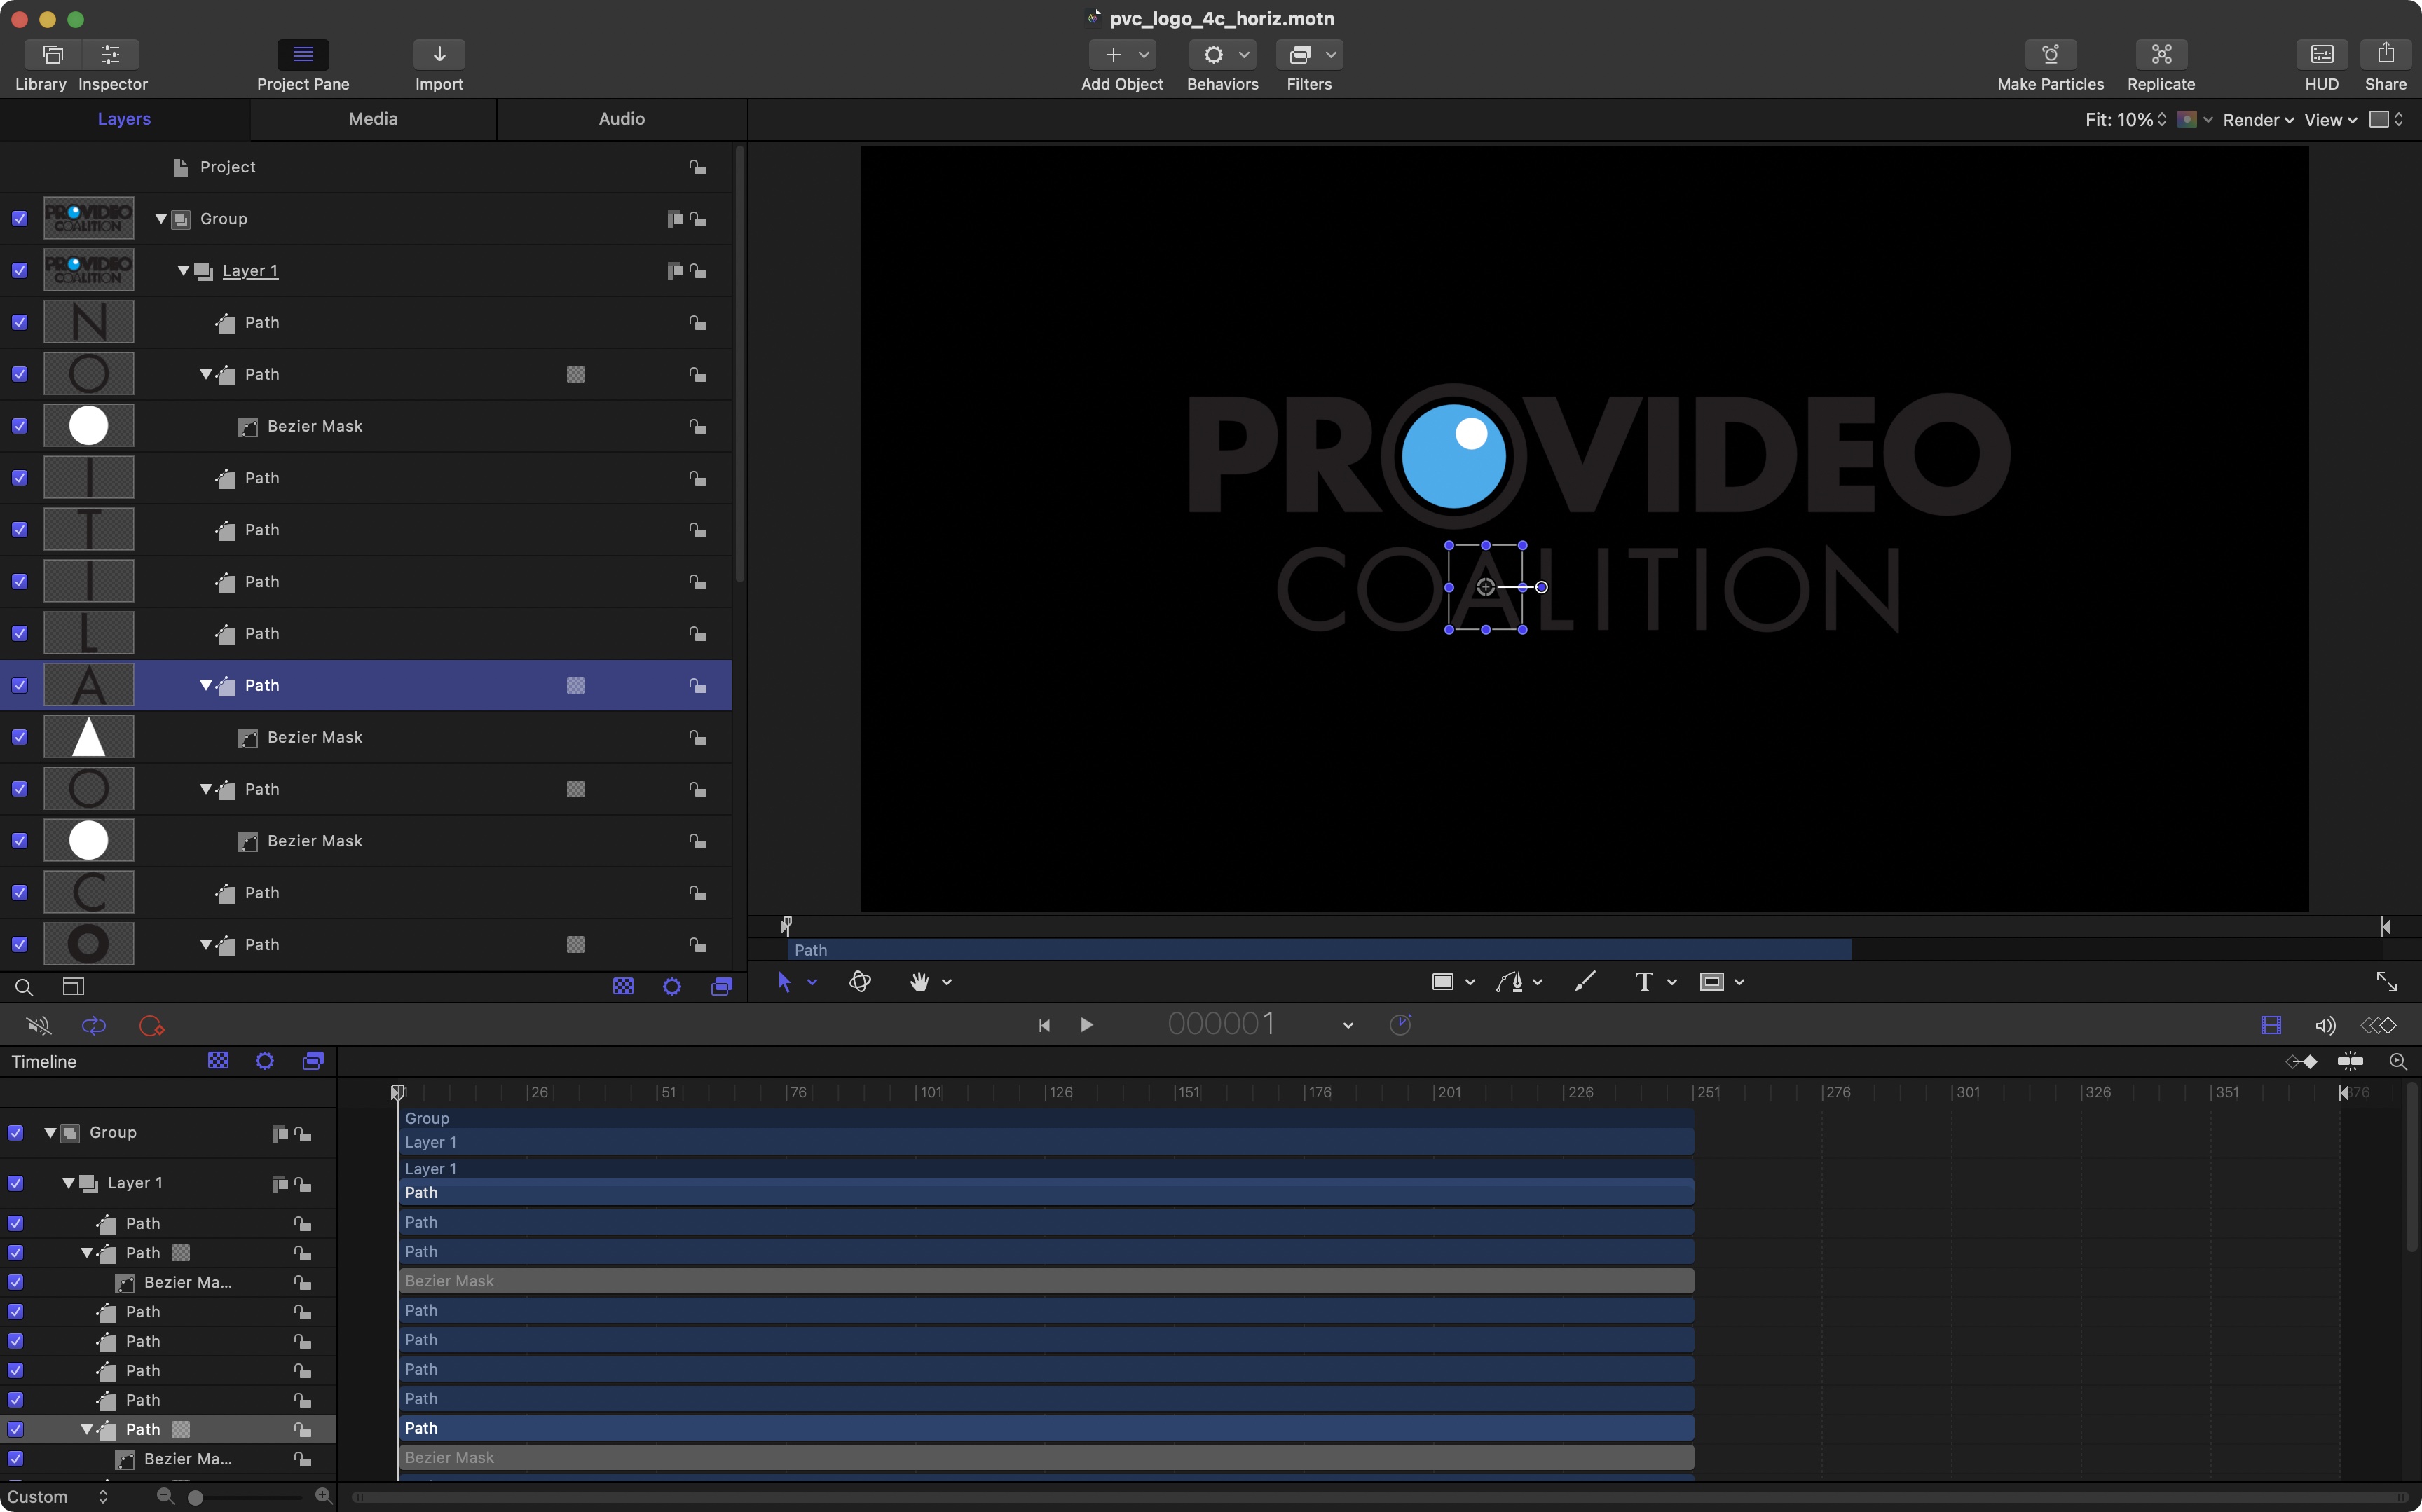
You can move points, wriggle them, draw them on, erase them, or use the huge Motion library of line styles for something wild. Logos don’t know what they’ve got coming.
And it’s not just shapes; most other aspects of a design will carry straight across into Motion, including plain text, text on a path, groups, and masks. Even blurs and drop shadows translate across, and there’s no messing around with scripts or complex folders full of separate files.
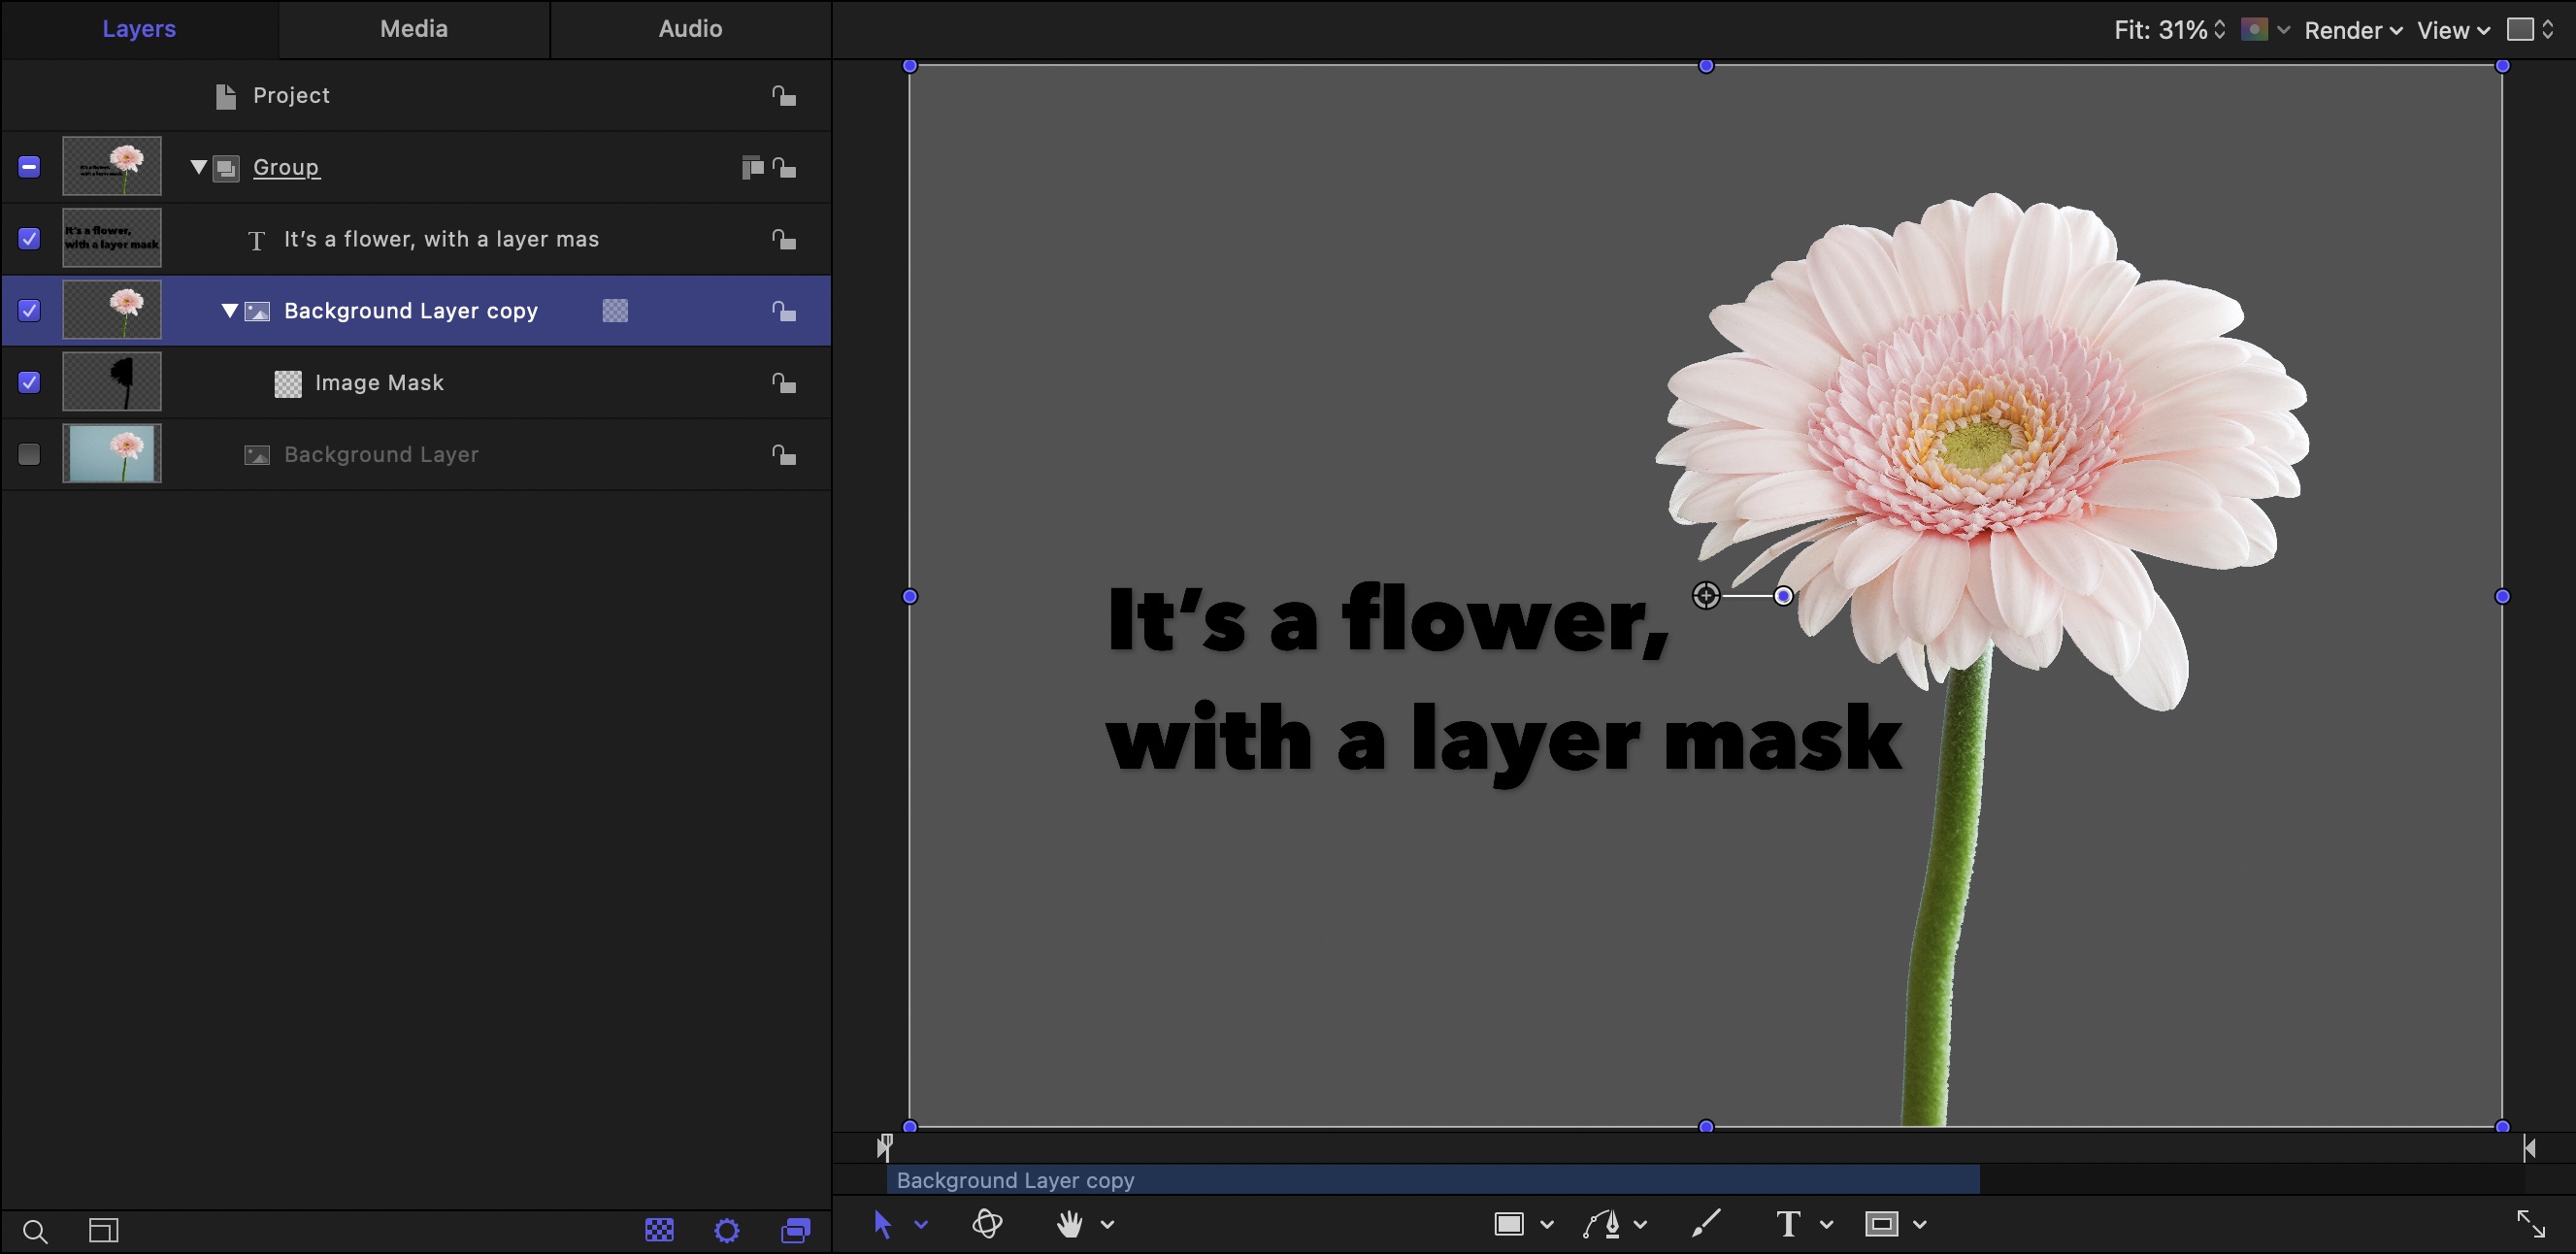
Finally, if you make use of layer masks, you no longer need to flatten them when exporting to Motion; Pixelmator Pro brings them across just fine. Whole new styles of animation are suddenly possible.
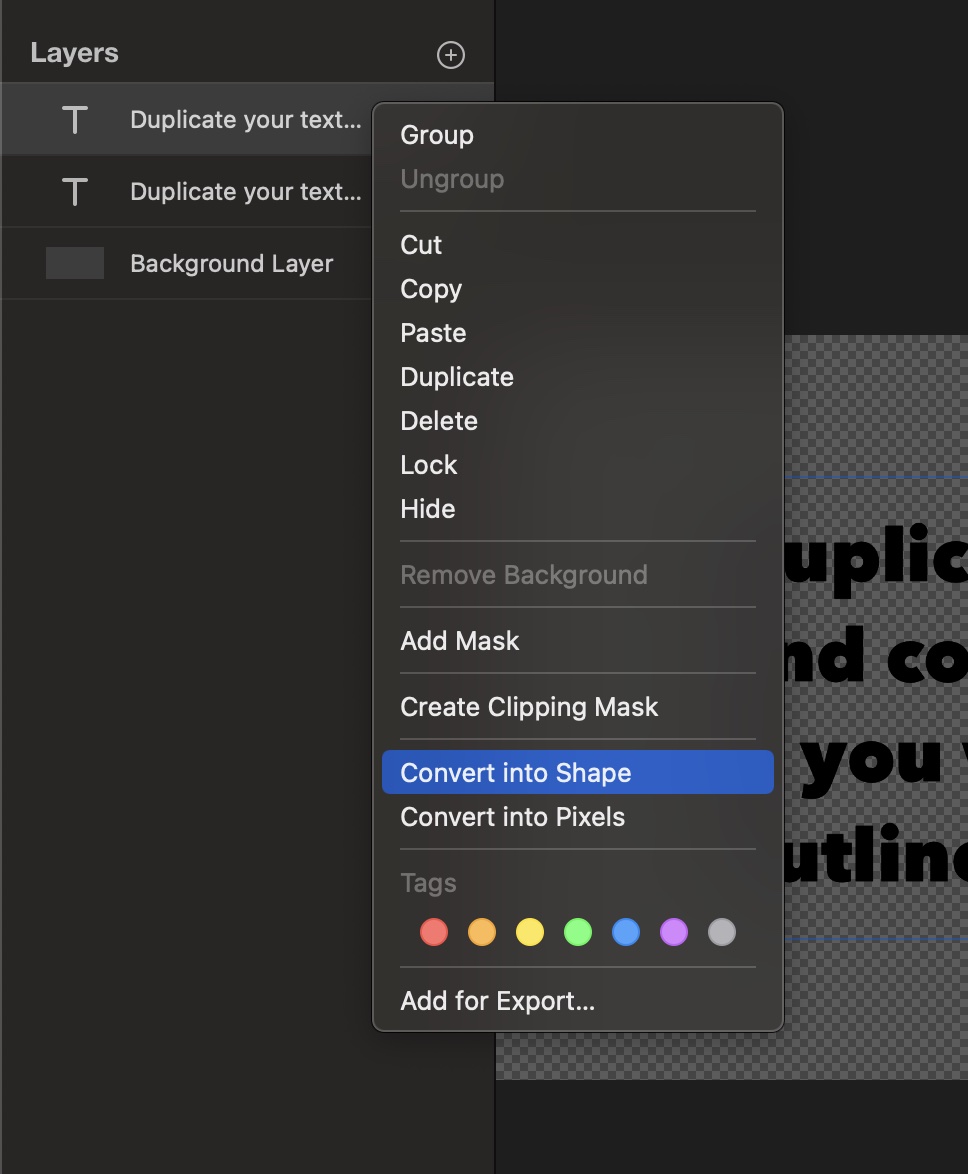
A quick tip: text and shapes are different kinds of objects, and Motion can’t change one to the other. So, if you want to animate outlines and also use a text behavior to reveal the letters, you’ll want to export both. Duplicate the text layer, then right-click it and choose Convert to Shape. Export, then in Motion, add a “Write On” behavior to the shape outlines and one of the text behaviors to the regular text.
One wrinkle is that if you’re working with provided vector artwork, Pixelmator Pro can’t read AI or PDF vector files just yet — only SVG. While native AI/PDF read support is coming soon, the free Vectornator can read those formats and export to SVG, so there’s a free and simple workaround for now.
Conclusion
If you’re a video editor trying to avoid subscriptions, Pixelmator Pro is a photo editing app you should seriously consider, but if you’re a Motion-based animator, you should definitely pick it up. Next time you need to animate a logo it’ll save you a heap of time, and you’ll finally be able to use existing artwork with all the possibilities of Motion shapes. It’s also a very capable image editor in its own right, and under capable, active development. I wish I’d had this years ago! Available from the Mac App Store (Mac App Store link)
I told you logos don’t know what they’ve got coming.

Filmtools
Filmmakers go-to destination for pre-production, production & post production equipment!
Shop Now