Shooting with modern digital cinema cameras, at least from a workflow perspective, is objectively better than the film ways of old. There’s absolutely zero guessing on-set; everyone from the DP and Director to Costumes, Makeup, and the Production Designers can all see exactly what the final frame is going to look like right on the day. There aren’t dailies anymore because they happen the second you hit “record”. You shouldn’t have to go back and do reshoots because something was under-exposed or a prosthetic didn’t look right, you’ll see it immediately. PLUS there’s no generational quality loss, or degradation due to handling or running through a projector; it’s the same image from set to screen. There can also be a lot more flexibility with the image in post, versus film where your image is more or less baked in once you start rolling. On top of that you’ve got longer record times, smaller camera builds, and (assuming everything goes well) no downtime. You’ve got ultimate control, and for a fraction of the price. However, the look of most digital cameras can often leave something to be desired.
Digital Cinema has only really been around since the early 2000s in inception, and 2010 in earnest with the release of the ALEXA (the RED One was a rocky start but a huge release as well, obviously). That’s not a ton of time to perfect the image, but even so the image has been honed to an astounding degree in that short amount of time. Film has had 100 years! The HDW-F900 that shot Attack of the Clones (technically not the first digital feature, but probably the biggest “first” one) didn’t even have a Log Gamma option, just a few “Hyper Gammas” which were essentially flavors of Rec709 and then the standard camcorder-style adjustments like Knee and Black Level and whatnot. As far as I can tell the first camera to have Log functionality was a different Sony camera, the F23. In any case, right around the time the ALEXA came out, Blackmagic bought DaVinci and now we’ve got what used to be a $30,000 system for free (or a few hundred bucks if you get the Studio version) meaning that no matter what camera you shoot on, even if the look is baked-in, you’ve got a robust tool set for which to manipulate that image in post that’s easily attainable and simple enough to use. You can do almost anything!
There’s a few “film emulation” tools out there and I’ve been lucky enough to be able to test out a handful of them. While I still can’t test their accuracy (in the sense that I personally can’t shoot the film in question being emulated, plus a digital version with the emulation applied, and compare) I don’t think that actually matters too much as no one sitting in a theater or at home would do the Rick Dalton point and go “Ooh ooh! 5247!”. What we’re really looking for in any emulation is a “vibe” that reminds us of what we remember film looking or “feeling” like emotionally. If it’s accurate, awesome, but I could argue that people don’t actually want their footage to look 100% accurate to film, as a lot of time that can mean lower dynamic range, milky shadows, intense/distracting grain, or other artifacts that are less romantic and more distracting. What people really want, I’d wager, is a replication of “perfectly processed” film. No one wants to go back to the era of getting your film from the lab and it’s completely fogged, or under exposed or whatever (not that it ever happened that much, but it could!). Digital lets us nail our exposure and look every time, and then post lets us zhush it up (and even degrade it) to taste. As Steve Yedlin has pointed out over and over (do I name drop him enough?) we can replicate a photochemical look easily, there’s no reason to take on the difficulties of shooting that way if we don’t have to. It can be an enjoyable exercise and experience, but it’s not necessary to get “that look”.
So anyway, you can use a program/plugin to do that, some LUTs from the internet, or you can use the tools already built in to your program (likely Resolve or Baselight). The problem with the latter method is you have to actually have skills. WELL NO LONGER!
Pixel Tools Post, founded by Jason Bowdach C.S.I., has created a new set of Powergrades for DaVinci Resolve called Filmlab (he’s also got a great writeup about film emulation here). At the time of this writing there’s only one “film look” (with more to come) but it’s entirely built in Resolve with its native tools, and there’s a ton of extra features within the pack beyond the “look” Powergrade. The upshot with this is 1) you get to see exactly what each node is doing and can adjust anything as you see fit, B) it doesn’t slow your system down like other plugin-based film emulations tend to do, and iii) you can see right there what tools and adjustments a professional colorist is making, which is educational in its own right. From the product page, the collection includes:
- Over 34+ Unique PowerGrade presets developed entirely within DaVinci Resolve 17
- Built around the timeless Kodak 2383 Print Stock (with more coming soon!)
- Scene-Referred Arri Log C color pipeline supports SDR, HDR, and Cinema-DCI P3
- Wide Camera Support – RED, Arri, BMD, Panasonic, Sony, Fuji, Canon, and Rec709
- Unique Drag & Drop Photochemical Look Creation Workflow
- Includes 3 Presets for Grain, Halation, Gate Weave, and Diffusion
- “No Hassle” Licensing, Instant Download
- No Additional Plug-Ins Required, seriously!
- Compatible with Windows & Mac Versions
- Free Updates for One Year – includes new stocks!
So to start, the Film Look. The main “full package” Powergrade is based around the Kodak 2383 Print Stock. You may have seen those numbers elsewhere online, and I’d say it’s probably the more popular “film emulation” out there, but there’s some misconceptions about what it’s for. Slapping a “2383” LUT on your footage does not give you the “film look”. If you don’t know, there are two film stocks that are used to get the final look of a movie: There’s the negative, which is what goes in the camera, and then there’s the print stock, which is what you watch in a theater. The print stock isn’t an exact copy of the negative, you can think of it as a LUT that goes over the original footage which (among other things) sets the contrast and changes the colors a bit. There’d be a bunch of back and forth between the filmmakers and the lab to make sure this change wasn’t simply arbitrary, but also the Cinematographer would (after doing plenty of test shoots) choose and expose their negative in a way that got them the look they wanted once the film was printed. That’s a gross oversimplification but for our needs here, there ya go.
There have been a bunch of Print Films made over the years, and way more negative films, but today there’s only 2383 left. You’ll often see Kodak 2393 and Fuji 3510 in programs or in LUT form, as they’re relatively new, but both have been discontinued. Fuji doesn’t even make motion picture stock anymore, pulling out of the game in 2013.
With all that info, we can get in to what this Powergrade (and associated “tools”) is/are for. You’re getting a “Film Print look”, as opposed to a specific “Film Stock look”, which is closer to the reality of modern production than trying to emulate any one particular negative stock from the past (or 5219, which is kind of the only negative stock around today). Your “negative” is whatever camera you use, along with any base grading you do, and then Filmlab takes care of the photochemical print stock look on top of that. Make sense?
I actually asked Jason about his process when it came to creating this set of tools, and he had this to say:
I think it’s worth mentioning that film and its multiple development processes can have many looks, and what people think “film” looks like is a bit of a moving target. In fact, many people’s memory of “film” is actually some hybrid of film & digital intermediate processes, which only complicates the matter. With that in mind, we developed our Kodak 2383 print emulation using several strategies – the main one being chart matching to footage captured on film and digital and digging through a few Kodak technical white papers (seriously!). We also reverse-engineered the built-in look-up tables included with DaVinci Resolve, as it’s a very popular request by clients, and integrated some of the DNA of that look into our emulation. After we matched the look “synthetically” on charts, the emulation was applied to a variety of test footage captured on different cameras at differing exposures to ensure it scaled properly. If the tests showed any quirks or issues not present during the synthetic tests, we modified the look to account for that issue and it went back to synthetic testing on charts, rinse and repeat.
So, we’ve got the main Powergrade, which is the 2383 look we talked about, but then we’ve got the separate tools and even blank node trees that you can use as you see fit, including 3 strengths of Grain, Halation, Gate Weave, and Diffusion (among other color-specific nodes). The thing I love about this pack is while each tool is built in to Resolve, they’ve all been adjusted by a professional colorist, meaning you can use each node or grade as a learning device by seeing what’s been changed, A/B-ing it against the stock settings, and seeing objectively what difference that makes (and spot checking your own workflow against an “ideal”). So for instance, the Grain OFX in Resolve has always looked like a slapped-on overlay to me and not “engrained” (ha) into the footage, but here the work has been done for you to blend it nicely. And like the 2383 look, it’s not even just a “preset” for the Grain OFX, it’s a compound node with some additional things done to make it look more realistic.
On that note, there is a 2383 LUT right there in Resolve if you want it. What people screw up is they don’t know it’s built for Cineon/709 and just slap it over anything, don’t like the look, and then never touch it again. Give it a shot with a proper CST some time! Filmlab doesn’t use that.
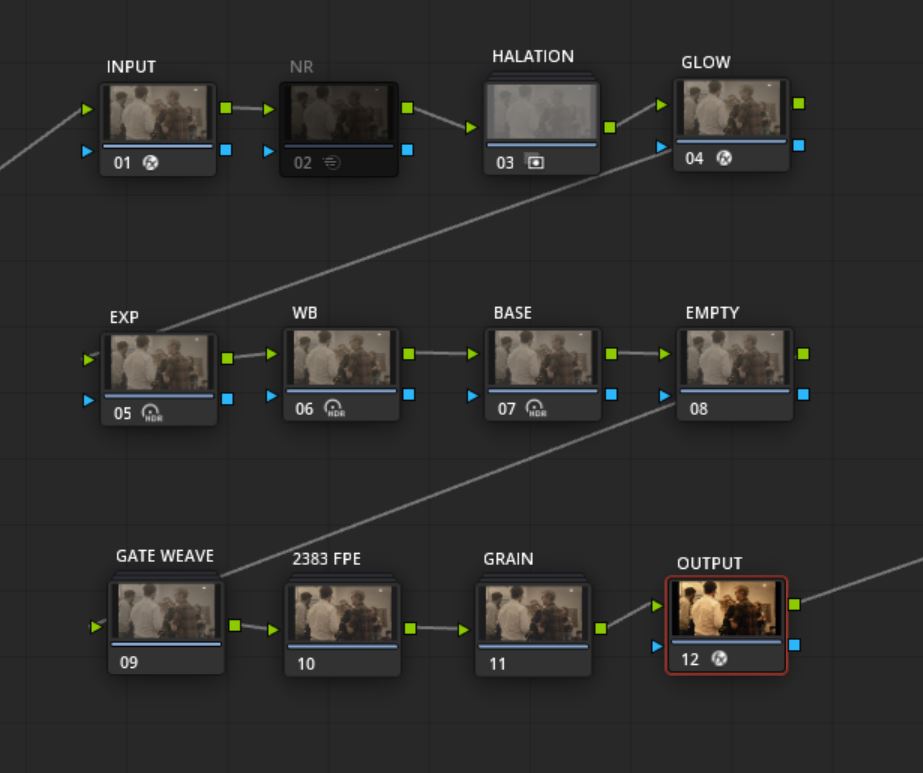
Here, Filmlab has a thick compound node containing all kinds of adjustments, curves, and tweaks to match the print stock in a way a LUT may not (or at the very least in a way that allows for granular customizability that a LUT doesn’t). It also contains a Kodak 250D Negative node in there! I won’t share what’s in the sauce, but it’s fascinating to see what each node does and to dig deep into the settings changed, as well as adjust them to taste. I can spend hours in Resolve just tinkering around with images, and have a whole timeline of clips saved as my test subjects so I’m constantly working with footage I know to more objectively understand what any changes may be doing, and what the limitations may be. It’s also far better to have every step of the look spread out in individual nodes like this because if there’s ever something that looks wrong, you can drill down and figure out exactly what adjustment is doing that and back it off or modify it. Or even if it doesn’t look “wrong” but you want to change the way, maybe, skin tones look: that’s incredibly easy because it’s all just done with regular Resolve nodes and adjustments.
Another advantage to this Powergrade Pack is, obviously, the ability to mix and match. Add your own spin on literally anything! Borrow a node or two from the 2383 Compound Node and make your own look! Add another plugin in there or replace a node with a LUT or something! Do whatever you want! I’ve been using the Filmlab tools on literally every project I’ve shot over the past 3 months and I’ve loved it. Sometimes the whole “main look” grade is the right tool for the job, sometimes I only need halation or grain, and sometimes I’ll Frankenstein the 2383 Compound Node out, taking a few of the adjustments in there that are more subtle and combining them with a few looks I designed for myself in the past that take away the “digital edge” of some colors. Really the only thing I kind of compulsively remove from the full tree is the “gate weave” parameter, just because I don’t personally like weave. And since you’re “modeled” a proper workflow with the 2383 Look, you can intuit where to replace or swap various adjustments while maintaining a good imaging pipeline (or you can use the blank node trees, as that’s what they’re intended for).
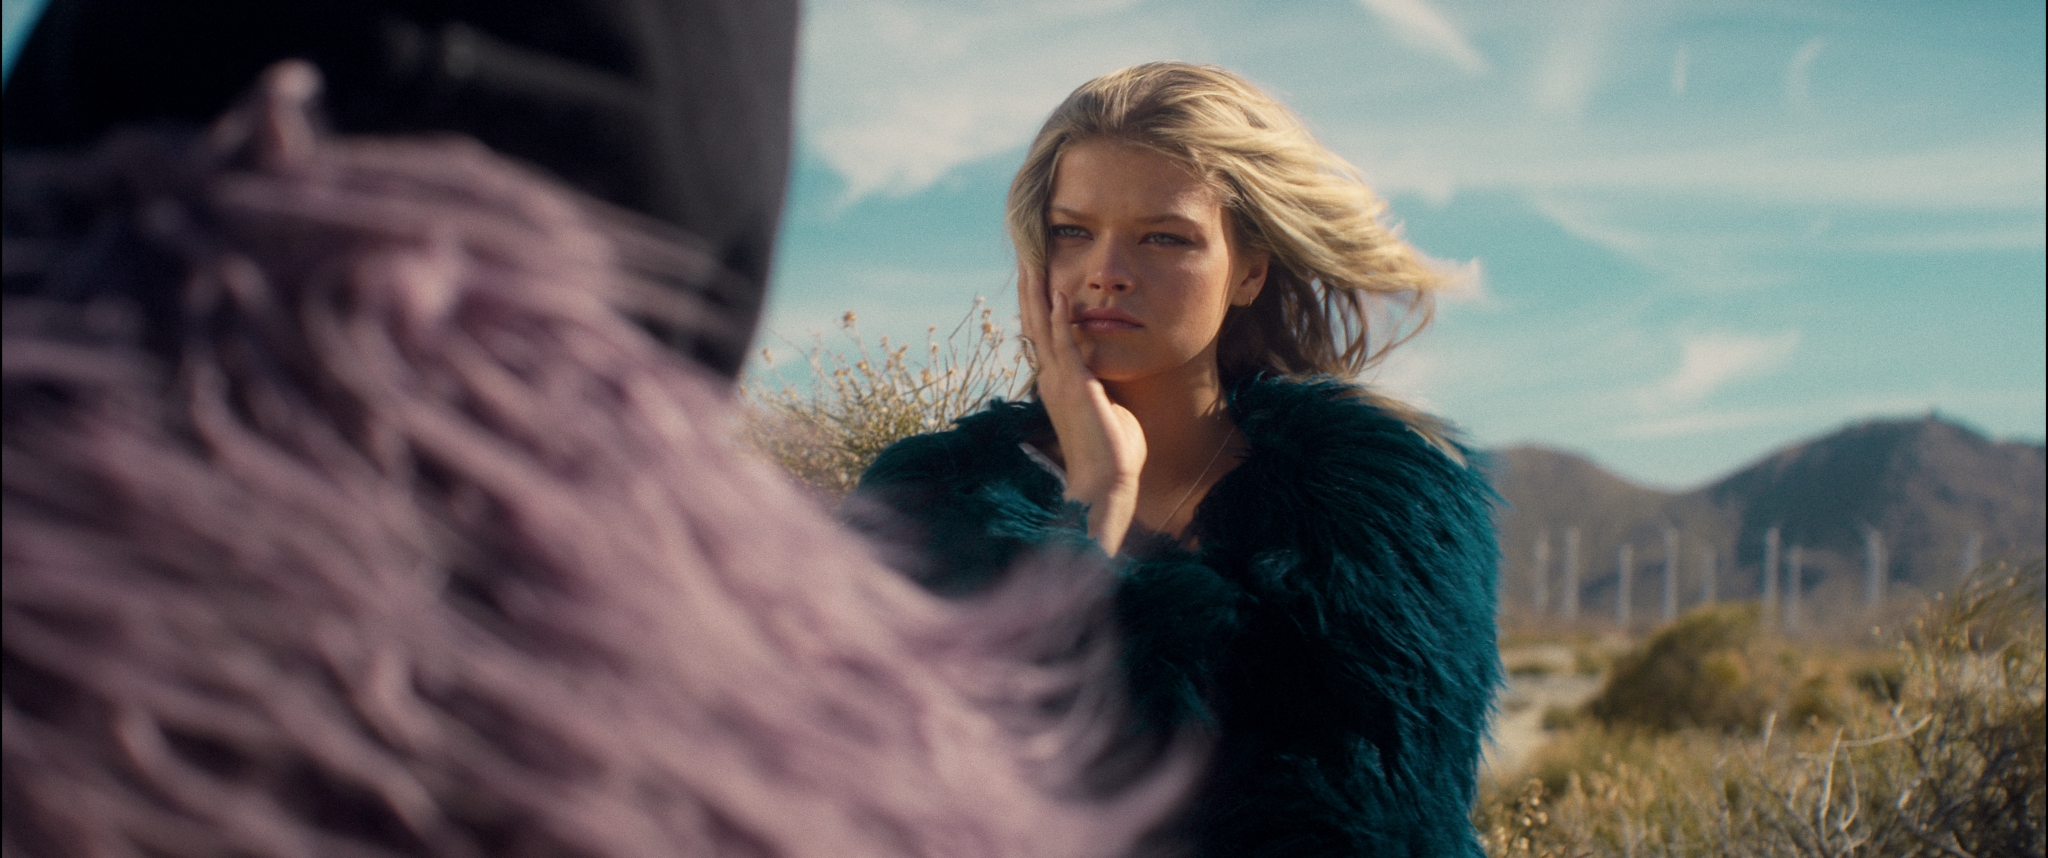
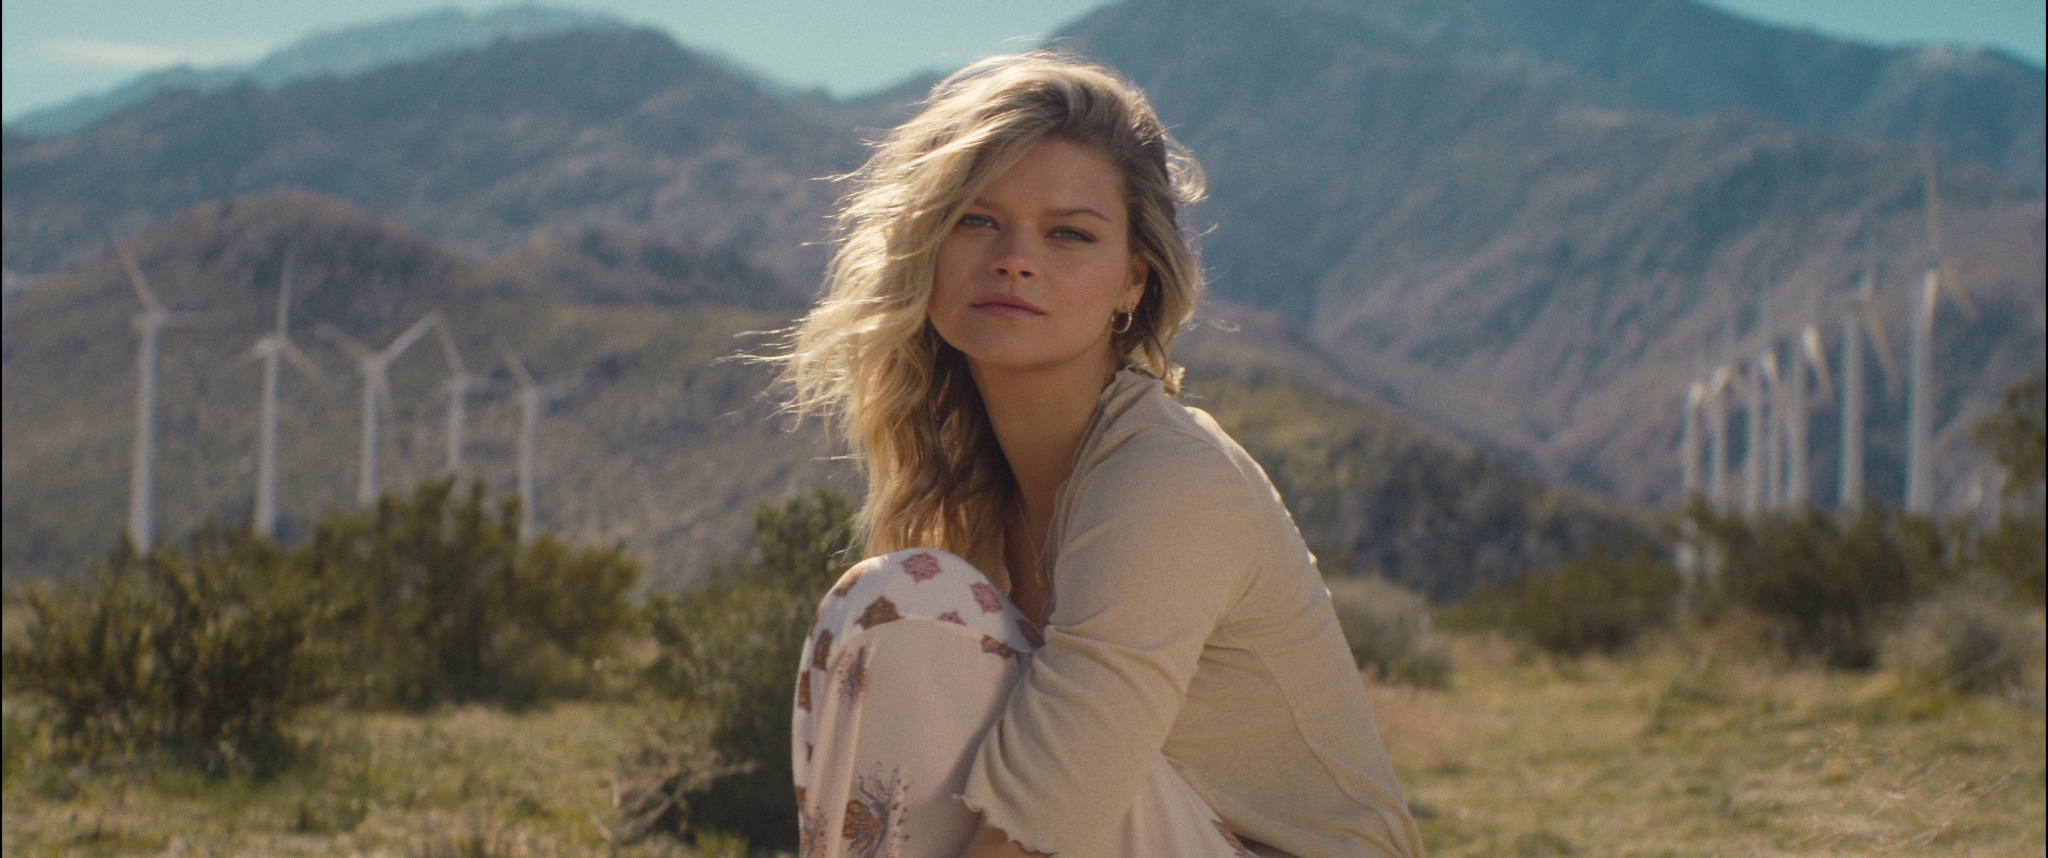
Below I’ve got some stills from the old C500 test shoot I did, featuring Kara Solek, graded using the 2383 Powergrade kind of “straight up” with nothing but exposure and white balance changes:
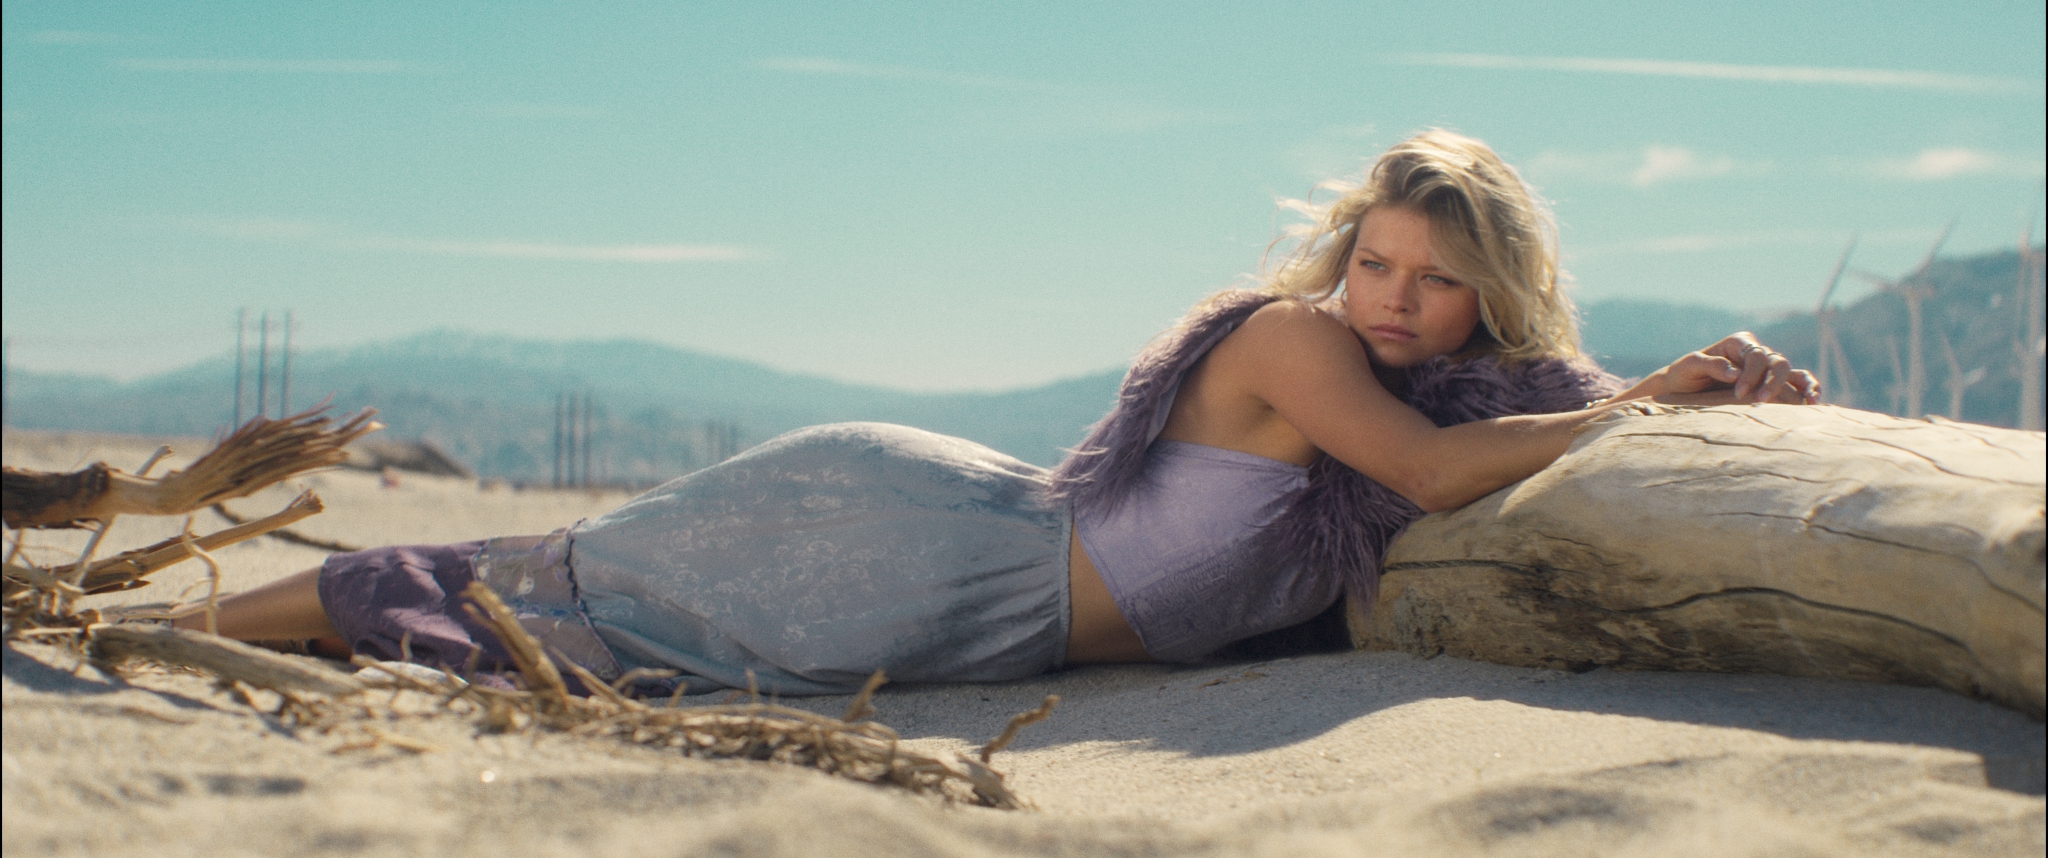
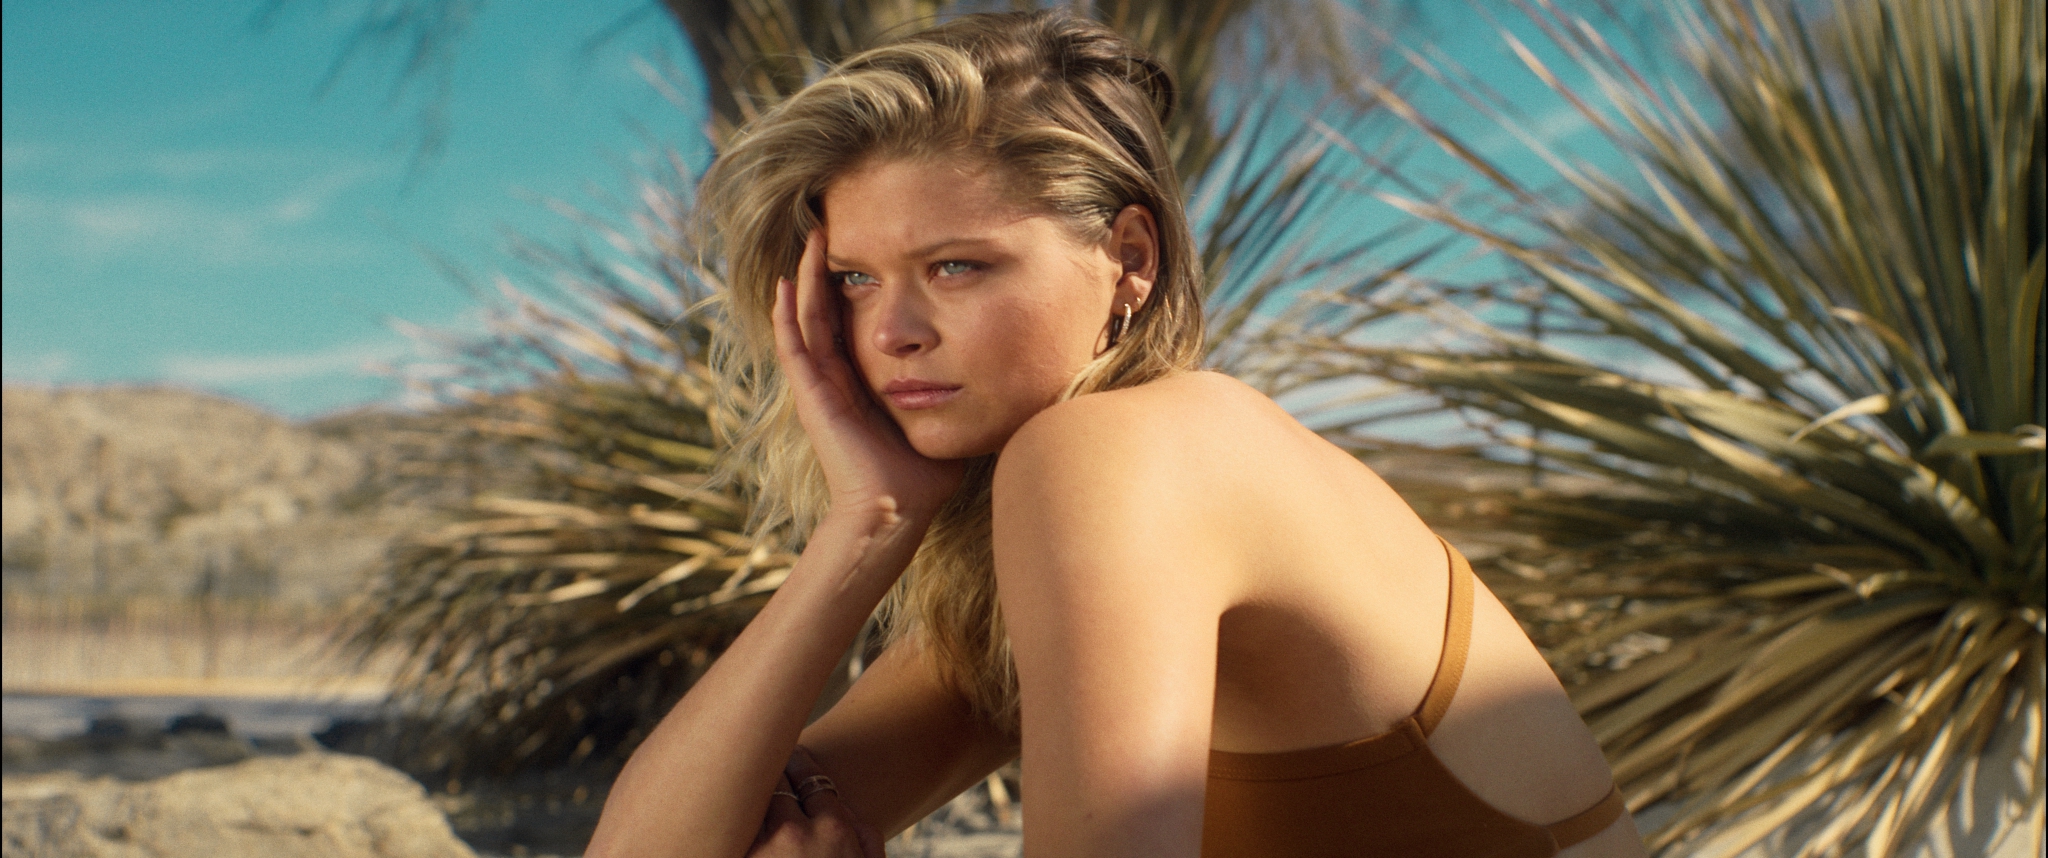
Honestly this collection has been more fun (and more useful) than some of the other tools I’ve tested just simply because it’s so modular. It’s like the Open Source version of Film Emulation, except you have to buy it. Nothing is “Black Boxed” or obfuscated, you can see right there what each node is doing using the tools you’re used to and understand. If, for whatever reason, one of the nodes is doing something funky to your image, you don’t have to remove it outright, you can adjust it until it looks correct. And, again, you’re using those native tools so your system won’t bog down, it’ll work with Mac or PC, and there’s no additional tools or programs needed.
Overall I’ve found the Film lab Powergrades to not only be a fantastic daily driver for me, but also something that has helped me learn more about Resolve which has been awesome. It’s also, interestingly enough, been a bit of a confidence boost as I can see a few things in here that I’ve already been doing or discovered on my own!

Filmtools
Filmmakers go-to destination for pre-production, production & post production equipment!
Shop Now