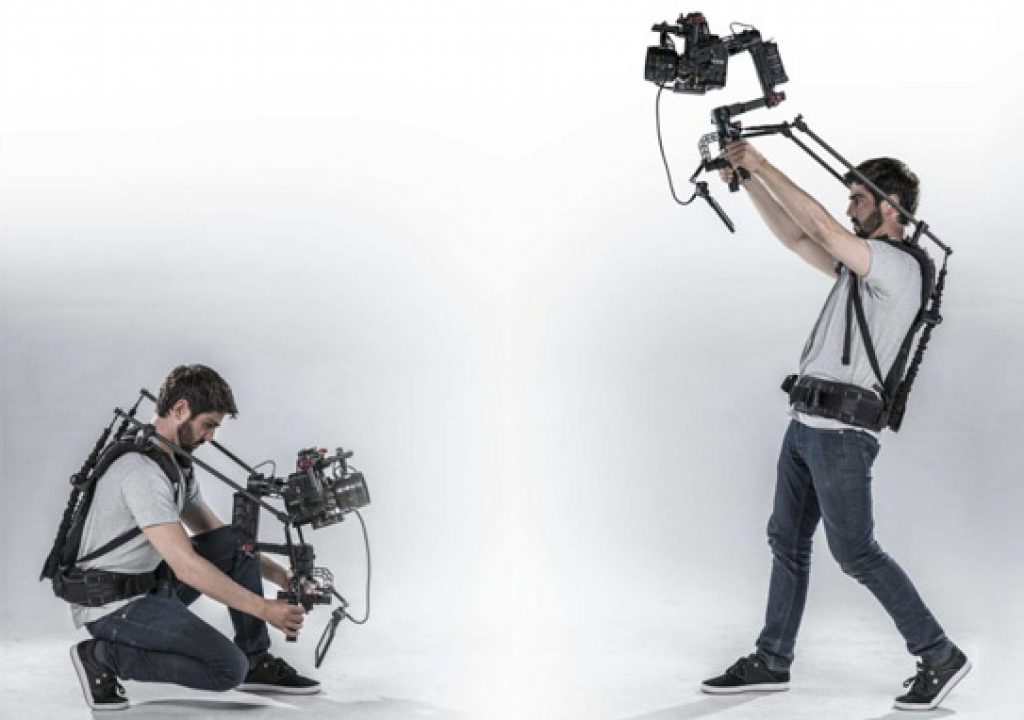
Camera gimbals like the Freefly Movi and DJI Ronin are wonderful tools, but if you pair them with any camera that’s bigger than a DSLR, you quickly realize they’re H-E-A-V-Y, and a challenge to operate for any appreciable amount of time. You might not notice it when you’re testing a gimbal in a camera store, or at a tradeshow. You DO notice it when you’ve been holding the rig for 10 minutes straight, and you REALLY notice it by lunch time. Fatigue is inevitable, and it can detract from the smoothness of your shots, and your ability to stay focused on the creative work.
Enter the Ready Rig GS: it’s a $1999 body-vest and dual-arm system designed specifically for gimbals, and it makes carrying one far less taxing. Using the Ready Rig, I found the thought “Oh, man, I’m tired” or “Please, Mr. Director, call ‘Cut!’” doesn’t really cross my mind anymore. Carrying the gimbal around set, blocking with the director and talent, framing up the shot and working through multiple takes is far easier…I wouldn’t say effortless, but easy enough to get through a solid day of gimbal work with some energy to spare.
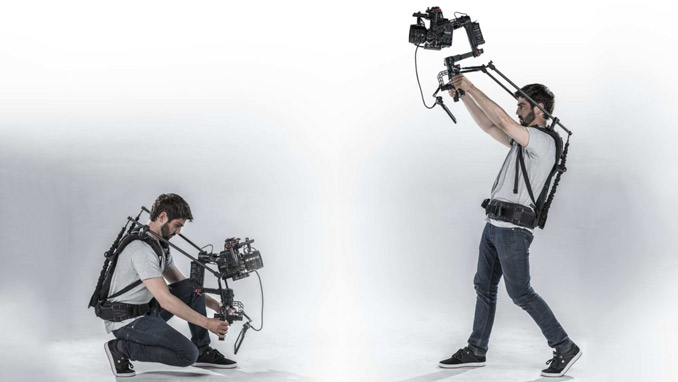
The Ready Rig works by distributing the weight of the gimbal away from your mere flesh-and-blood arms to its own sturdy, carbon fiber arms, which then transfer the weight to your shoulders and hips. The Rig has thick padding in those areas, so all you really feel is the dull pressure of gravity pulling the weight down on the bulk of your body. The gimbal really just hangs there (more like floats) in front of you, and you barely have to work to move the camera within a sweet spot between your head and your waist. Your arms start to work harder to push the rig over your head or towards your feet, but still nothing close to what they’d be doing if you were holding the gimbal on your own.
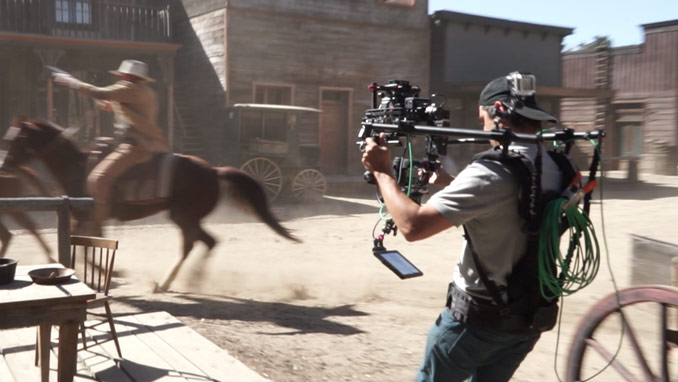
And since most of the Rig’s weight is supported by your body’s center instead of your extremities, I found that it produces smoother shots than if you were holding the gimbal by yourself, especially when you’re moving slowly. You have a lot more reserve strength to apply feathering to moves, ramping up from stand-still or ramping down to a stop more gracefully than if your arms were carrying everything. Walking with the Rig also feels a little smoother to me, at least with a little practice. You learn to push the Rig away from you as you start to walk, and get a feel for how to use your arms to dampen any of the vertical bounce that can creep in when walking with a gimbal.
At any rate, I bought a Ready Rig GS to use with a Mov M15 gimbal and Canon C300 Mk II camera (typically about 12 pounds of weight for camera/gimbal) and used it with great results over several months. Here are some impressions…

SETTING UP THE READY RIG
Setting up the 10 pound Ready Rig is easy. First, you attach shoulder pads to the Rig’s sturdy, aluminum backplate with a couple of beefy thumb screws, and then slide the Rig’s carbon fiber arms into swiveling mounts on the shoulder pads. Then you’ll use another set of thumb screws to attach a rear-mounted tension cable into the back of each rod, which is what gives the arms their “lift” power to suspend your gimbal.
You’re done assembling the Rig itself — it’s about two minutes of work, requiring no tools, but the first time around you’ll also spend about ten minutes adjusting the height of the shoulder pads and hip belt on the backplate to match your frame, and also adjusting the position of the Rig’s arms in their swiveling mounts to properly balance the weight of your gimbal. All those tweaks are a one-time deal, though, as long as you’re working with the same gimbal and camera going forward. (By the way, the Ready Rig comes with a large soft travel bag which has you take off the arms and shoulder pads for packing, but I started to travel to local jobs with the Rig already assembled, since it doesn’t take any more cargo volume in my van or car than the packed bag).
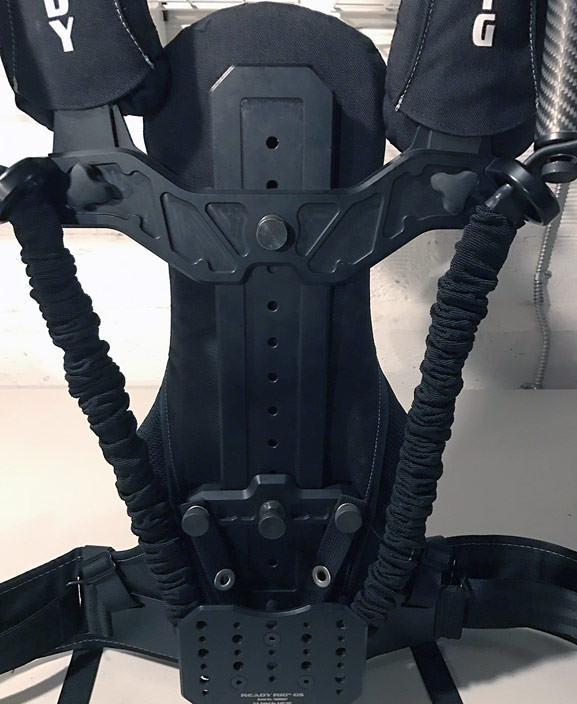
The biggest adjustments you’ll make for your body are simply sliding the shoulder pads and waist belt into different positions on the backplate.
Attaching your gimbal to the Ready Rig is also pretty straightforward. The Rig includes two sturdy Velcro straps with metal rings at the end. You’ll double-wrap a strap on each end of your gimbal’s handle bars (they can live there forever, no real need to take them off again). Next, you just slip the straps’ metal rings into locking receivers on the end of each arm. You can do all of this without anyone’s help, as long as you have somewhere to hang your gimbal, and it takes about 30 seconds to attach (or detach) the gimbal, so the Ready Rig isn’t likely to slow you down on set.
Speaking of being on set, I’ll say that the Ready Rig might look a little unwieldy when you see it in pictures, but in practice, it really doesn’t increase your footprint by much on set, and it’s narrow enough to fit through standard doorways, navigate around tight corners, and do just about everything else you could do if you were handholding the gimbal. The only maneuverability that’s diminished is being able to walk while dropping the camera way low at your feet without crouching, which is useful when you want to hit that low point and then return to a higher position in a single walking shot. You can do it with the Ready Rig if you’re good at smoothly coming out of a crouch while walking, but that’s definitely not as easy to do versus just handholding the gimbal.
OPTIONAL “PROARMS” (GET THEM)
The standard Ready Rig, priced at $1999, includes single-stage carbon fiber arms that are 25″ long, and give you a range of movement from your head to your waist. But your can order your rig with a ProArms option ($2598), which I would recommend heartily to anyone who can stretch their budget a bit. The ProArms are thicker, and feature a 2-stage design that goes from 23″ collapsed to 37″ fully extended. They give you a very wide range of movement as far as gimbal rigs go and create opportunities for new kinds of shots by turning you into a bit of a human jib. You can also extend or collapse the ProArms yourself as you wear the Rig (there’s a lock on the end of the first stage that works like tripod stage lock) so it’s very quick to dial in the range you want and keep working.
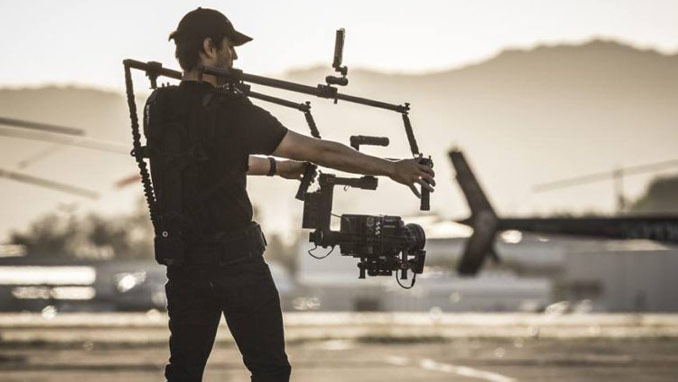
The ProArms give you an extra foot of reach versus the Ready Rig’s standard configuration.
A bonus: Each ProArm also features a mounting bracket with 1/4-20” and 3/8” screw holes for attaching a monitor or other accessories. I tried mounting my SmallHD 5” monitor to a ProArm, instead of its usual spot atop my Movi’s handlebars, and found that it was an improvement. Having the monitor closer to my eyes gave me a few more inches of vertical movement before I couldn’t see the screen anymore.
So I would ultimately recommend investing in the ProArms, but you don’t have to make the decision immediately: existing Ready Rig owners can upgrade to them for $699.
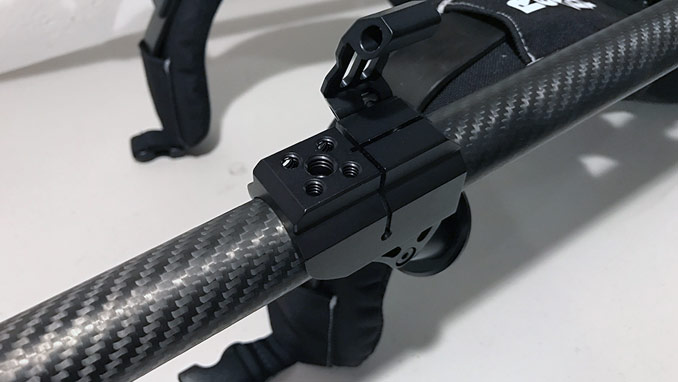
Put a monitor quick-release plate on one of your ProArms. You might also need a longer monitor cable depending on how you set up your rig.
SUMMING IT UP
There are a number of other gimbal support rigs you can consider, but in my experience, they’re either too expensive, too complicated or they don’t give you the same range of movement that the Ready Rig with ProArms gives you. For instance, Walter Klassen makes the Slingshot, which has amazing range of movement, but costs $7500! There’s also the Easyrig Vario 5 (about $5000), but it has what I consider to be an unwieldy footprint with a large pole hovering nearly a foot above your head, and it also has a single connection point to your gimbal, making it a little harder to keep stable without additional accessories. Then there’s Tilta, which makes the Armor-Man 2 support rig, which is about the same cost as the Ready Rig and gets bonus points for looking like a prop from an Iron Man movie. But it’s harder to set up and adjust than the Ready Rig, has a bigger footprint, and less range of movement when compared to the Rig’s ProArms.
To me, the Ready Rig has the best blend of the best features: good performance/range, small footprint, ease of use, and cost. It also has a very responsive, communicative company behind it — the Los Angeles company, including founder Alessandro Di Leo, is easy to reach on the phone, by text or email, and has also put together a bunch of helpful videos for getting newcomers up and running quickly. There are also videos showing sample footage taken with the Rig, such as right here.
Spending $2000-$2600 is never an easy thing, but if your gimbal is flying a camera the size of a Canon C300 or heavier, and you’re expecting to hold the gimbal for more than a couple of minutes at a time, then the Ready Rig GS should be the next item on your wish list. It really is necessary to get the most out of your gear.
Pros
- Significantly cuts down on fatigue when shooting with a gimbal
- Increases shot smoothness in many cases
- Good range of movement, especially with ProArms
- Quick, easy set up and operation
- Affordable by gimbal rig standards
- Supportive company
Cons
- More money to spend on making a gimbal work well!

Filmtools
Filmmakers go-to destination for pre-production, production & post production equipment!
Shop Now