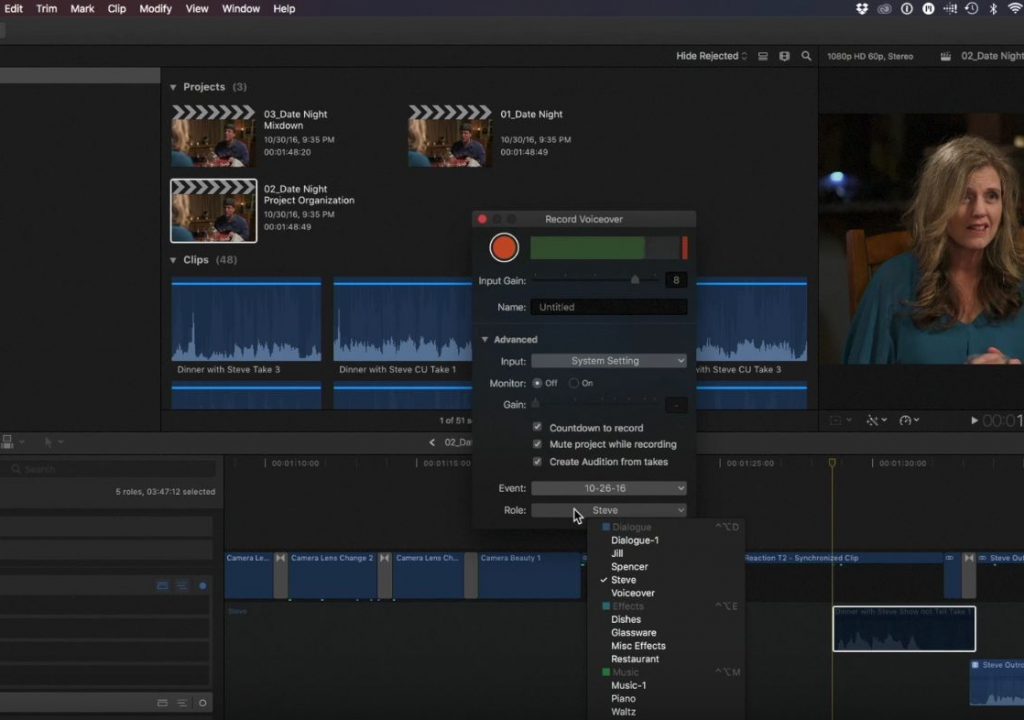
This week on MacBreak Studio, Ripple Training’s Steve Martin shows us how you can assign roles automatically when recording voiceover in Final Cut Pro X.
The ability to record voiceover directly into Final Cut itself is not new, and the command can be found under the Window menu. There, you can choose a microphone source, decide if you want to monitor the audio, and adjust the gain. There is an optional countdown before recording starts, you can choose to mute the project while recording, and you can even create an Audition that contains each of your takes. These three features are checked on by default, and I tend to use all three.
The new feature in this dialog is a Role pop-up menu, in which you can assign any available sub-role. Since roles and sub-roles are Library-specific, anything that you have created for the current library will appear in this list, including roles assigned automatically upon import from iXML data embedded in clips.
In Steve’s demo above, he first expands his audio lanes so that each role is placed in its own lane. He then chooses his previously created “Voiceover” role from the Record Voiceover dialog, and proceeds to record a new take for the scene. Because his character has his back to the camera, he doesn’t have to worry about matching the lip movements, making his job much easier.
After recording, the new audio clip is automatically assigned the correct role, and appears in the lane for that role. He didn’t show it, but if he were to record again, the new recording would be added to the same location as another clip inside a new audition clip so that he could then easily switch between the different takes, even during playback, to select the one that works best.
Steve’s fully updated Sound Editing in Final Cut Pro X tutorial should be out next week, so be sure to check it out.

Filmtools
Filmmakers go-to destination for pre-production, production & post production equipment!
Shop Now


