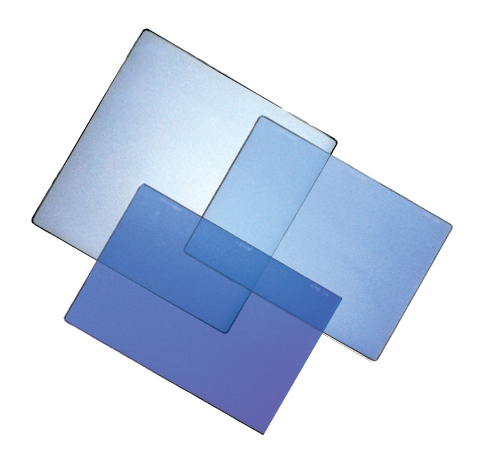
The RED can capture some pretty amazing images in 5600k daylight, but it stumbles a bit when shooting in 3200k tungsten light. The Schneider CTB’s help it get back on its feet.
I’ve written a couple of articles (here and here) about how silicon sensors are least sensitive to blue light, making them naturally daylight balanced: the lack of blue in tungsten light means the blue channel’s gain has to be increased to achieve white balance, resulting in a noisy blue channel. Daylight contains more than enough blue to create a solid noise-free exposure, so no gain has to be added to any channel for a proper white balance. (This assumes you are using your camera’s D5600 mode.)
Most cameras hide this blue channel weakness, but the RED does not. Under tungsten light the blue channel can be starved to the point where all sorts of interesting noise artifacts can pop up, and the red channel is overexposed such that it can clip a stop or more sooner than either of the other channels, limiting the camera’s overall latitude. Schneider Optics has developed a series of filters specifically designed to increase blue channel exposure (and reduce blue channel noise) under tungsten light, and they come in three different strengths depending on how much exposure you can afford to sacrifice. “We designed these filters specifically for low light use,” says Bob Zupka of Schneider Optics. “Just pick the strength you need based on the amount of light you have to work with.” They are intended to closely match the effects of Lee 1/8, 1/4 and 1/2 CTB gels.
I tested these filters on a RED camera by filling the frame with a tungsten-lit gray card. This allowed me to create three distinct peaks on the histogram, one for each color channel, for ease of comparison. With the camera set at 5600k, here’s what the 3200k gray card looked like:
Under daylight these three peaks will line up to where they almost completely overlap each other. That’s a “proper” white balance. In this histogram we can see that tungsten light contains more red and less blue than the camera would see in daylight.
The overexposed red channel means that bright neutral-colored objects (white or light gray) will cause the red channel to clip a stop or more before the other channels, limiting the camera’s overexposure latitude under tungsten light. A red-colored object will clip even sooner as color saturation pushes a channel closer to clipping: a channel’s value is affected by both brightness AND saturation.
For example, the red saturation in both of these images is exactly the same:
These are rendered in 8-bit color, and red is set at 128, out of 256 total steps, in both squares. The only difference between these two squares is that the gray one contains equal amounts of green and blue also.
These two squares contain the maximum amount of red allowed in 8-bit color. If we were able to add one more red bit to either square the red channel would be clipped. Note that the red channel alone appears darker than the mixture of red, green and blue in the white square, and yet this red is right on the edge of clipping.
This illustrates an alternate way of looking at exposure: rather than just considering how bright something is, think also about how much color it contains. Too much color can cause a color channel to clip because you’re trying to force more color saturation into a color channel than it can handle. This is why it’s a good idea to keep an eye on the RED’s RGB histogram: it’s not enough to see if overall illumination is clipping–you have to keep an eye on color saturation as well!
Once you clip a channel… well, things get ugly fast. There are highlight recovery tools in Red Alert (DRX) and REDCine (Highlight) that will attempt to pull detail from the unclipped channels into a clipped channel, but there’s a limit as to how much a clipped channel can be repaired.
In the histogram above the blue channel is already underexposed a bit so we can expect to see excess noise in any dark areas that contain blue. In this article I did a test where I shot a person in a dark gray sweatshirt under tungsten light with and without a blue filter. The shot with the blue filter showed less noise in the dark areas of the shirt because the blue channel received a beefier exposure. Note that this is NOT because I added blue by adding a blue filter. Colored filters only remove color, they don’t add it–which is why there’s always an exposure compensation involved. In this case I didn’t add blue; instead I removed red and opened the lens aperture to compensate, which increased the amount of blue light hitting the sensor. This is how it works:
While white balancing most other cameras will result in the camera adjusting the red, green and blue gains to match, the RED white balance is a meta tag only. That means it affects only how the image is displayed, but doesn’t affect the image data at all. The image may appear white balanced but underneath, in the raw data, it is not. And given the “not so great” quality of the RED’s monitoring outputs you may not discover problems until post.
The test results are on page two…
Once again, here’s the histogram and gray card under tungsten light and without any filtration:
Red is way ahead of the other channels, meaning that it will clip sooner under tungsten light than in daylight if the camera shoots either a bright neutral tone or a saturated red object.
Let’s take a look at the first, and lightest, CTB filter:
SCHNEIDER 1/8 CTB FILTER
MY METER SAYS: OPEN UP 1/3 STOPThe 1/8 CTB filter is a very light blue, but we can already see the effect it is having on the camera’s white balance: the red peak has moved considerably to the left, showing less exposure in that channel, while green moved a little bit and blue barely moved at all. In theory a blue filter shouldn’t affect the blue channel much because it is passing blue and absorbing the other colors.
By tightening up this grouping we’ve given ourselves a little bit more overexposure latitude, as the red channel will be slightly less likely to clip when shooting bright white or red objects.
The next darker filter is:
SCHNEIDER 1/4 CTB FILTER
MY METER SAYS: OPEN UP 1/2 STOPThe 1/4 CTB filter is absorbing a lot more red. Blue and green are almost in alignment, and the overall grouping is a lot tighter. This filter will allow for even greater overexposure latitude, keeping red from clipping a lot sooner than the other colors and reducing noise in the blue channel due to better blue exposure when the T-stop is opened to compensate for light loss.
Once again, notice that blue has barely moved at all. The changes are most significant in the red and green channels.
The heaviest filter is:
SCHNEIDER 1/2 CTB FILTER
MY METER SAYS: OPEN UP 2/3 STOPThis is an excellent grouping. Blue and green are essentially in balance, and red is only about a half stop ahead of the other channels. While red will still clip a half stop sooner than blue or green, that’s considerably better than clipping one-and-a-half stops sooner–plus the blue channel is getting as much exposure as the green channel, which means it will be a lot less noisy when the exposure is increased to compensate for the reduction in red and green light.
A Wratten 80A filter would bring the peaks into complete alignment but at the cost of another stop of light. I almost never have that much leeway when shooting under tungsten light, and my past experiments with the 80D filter (which falls between the 1/4 and 1/2 CTB filters in strength) show that half correction to daylight is plenty of compensation under most circumstances.
Schneider CTB filters are available from, among other places, Filmtools.
Art Adams is a DP who leads a colorful life. His website is at www.artadams.net.

