Note: this is the third in a series featuring one After Effects script per week, now appearing at the beginning of each week. For an overview on scripts, check out the debut post.
You are planning out an animation, or perhaps you’re at the 11th hour refining it for a deadline, and you realize that some real 3D elements such as extruded and beveled text would add to the look of what you’re doing. But for whatever reason – and there are many – it’s not convenient to use an external tool to create 3D text. Maybe you are working somewhere that the basic installation of After Effects is all you have to work with. Or maybe you have a bunch of other options, including a copy of Cinema 4D, but because you’ve already created the design and animation right in After Effects, and like working that way, the idea of bringing in a third-party tool just sounds like it will obstruct your process.
Adobe After Effects has been a 3D application for a long time without ever really allowing you to work with layers that themselves have 3D depth. Yes, plug-ins such as Particular create true 3D particles, and there are even ways to get a 3D model on a layer (Zaxwerks Invigrator will extrude a logo, and Plexus (which despite appearing at aescripts.com is a plug-in) and the upcoming Element import .obj files). But After Effects itself has long been what is often called a “2.5D” app, with the “postcards in space” model whereby a layer can inhabit true 3D space while itself being 2D. This has led to a number of compensation methods, including the rather clever trick of stacking a set of these 2.5D layers so that together, the stack has 3D depth.
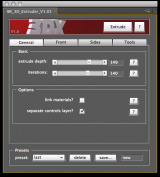
3D Extruder takes this simple concept of extruding by creating a stack about as far as it could possibly go in After Effects, and fully automates what is otherwise a rather tedious manual set-up that usually involves a bunch of offset expressions and expression controllers. The UI resides in a panel, where you create initial settings that are then tweaked via specific controls directly on layers.
The result is convincing provided you play within the sandbox that 3D Extruder and After Effects provide. Extrusions, with bevels and control over front & back faces as well as side shading, are predominantly (but by no means exclusively) useful to create 3D logos. Any layer that requires depth that has flat faces in Z is a candidate. It’s helpful if you never see the object edge-on, as that’s where this trick tends to break unless you really layer-up in Z, which will slow things down a bit.
The advantages of this approach are multifold. At $29.95, this script is less expensive than the competition. Secondly, you are still solidly in the After Effects way of doing things here, and the workflow and responsiveness of the application are perfectly acceptable with this method. There’s no wrestling to make 3D layers behave with a camera animation you created directly in After Effects, no rendering in a separate app, no painful waiting for the 3D model imported into After Effects – say, from a Photoshop file – simply to update, and the pre=comped 3D model is fully interactive with After Effects cameras, lights, and animation properties.
Sure, it’s a kludge compared to real 3D objects. If After Effects allowed you to create even simple 3D layers with actual Z depth, you wouldn’t have much reason to choose this method. But once you have an animation set up with this script, you can re-open and render the resulting project on any system that has After Effects installed, without the need to add any plug-ins (or indeed without the need for this script to be installed, since all it does is to set up a series of fixed and adjustable expressions). Therefore it’s likely to be a quicker way than most alternatives today, and one that doesn’t rely on third-party software to re-edit.
If you’re curious to learn more, check out the 20 minute quick-start video.


