While you might have blurred out a background or sharpened a little to save a slightly misfocused shot, there’s more to sharpening and blurring than you may have considered. In this article, we’ll look at the algorithms behind basic and more complex operations, examine how different techniques are being used in video productions today, and look at how you can use the best tech to make your videos as crisp or as soft as you like. Let’s dig in.
The basics, with math
Blurring is averaging, to remove fine (AKA high frequency) detail. Conversely, sharpening emphasizes the differences between pixels, to enhance fine detail.
Different algorithms do things in different ways, with different tradeoffs. Unfortunately, the way it’s being done today is often less than ideal, and as video professionals, we probably should be looking at smarter approaches.
While there are many blur algorithms, a common, fast and widely used option is the Gaussian Blur. Essentially, it’s a non-uniform low-pass filter that applies a weighted average to pixels in an image. Usually this is implemented with a convolution kernel, which you can think of as a small grid (think 5×5 pixels) that repeatedly passes across the image, changing the central pixel value based on the values of nearby pixels.
Explaining exactly how this works is beyond the scope of this article, and also not easy to understand unless you’re into algebra. If you’d like to dig in, check out Wikipedia, and ScienceDirect, and and implementation with matrices on StackExchange.
Unsharp Mask is similar. Like a Gaussian Blur, it’s usually implemented as a convolution kernel, though with a different equation. If you have a copy of Photoshop handy, you can see how the magic happens.
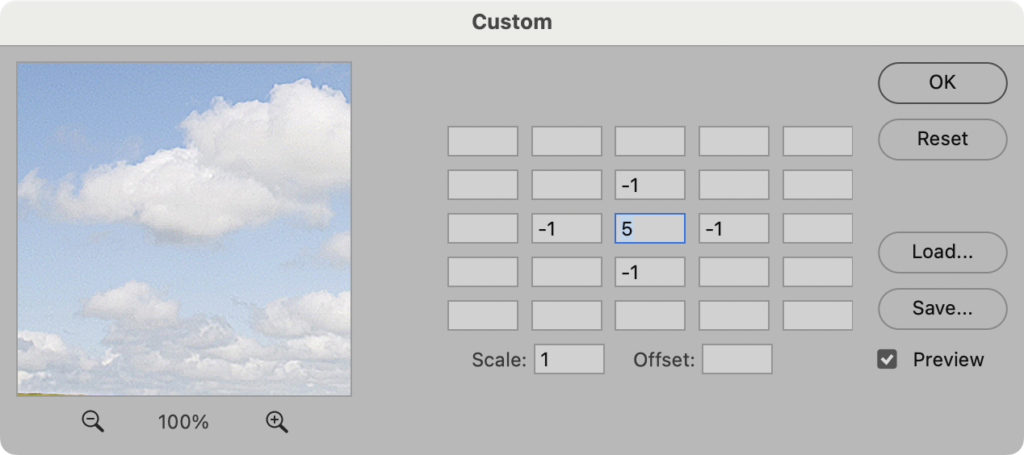
Open an image, then choose Filter > Other > Custom. This is a convolution kernel, and the numbers you enter in this dialog box will be applied across the whole image. If you’ve never changed these options, leave it on defaults: 5 in the middle, surrounded by -1 in the boxes above, below, left and right of it. Try different numbers to see different effects. While it’s great to still have this low-level tool, the built-in Unsharp Mask will give you more control, more quickly. Beware, though — too much sharpening results in halos around edges.
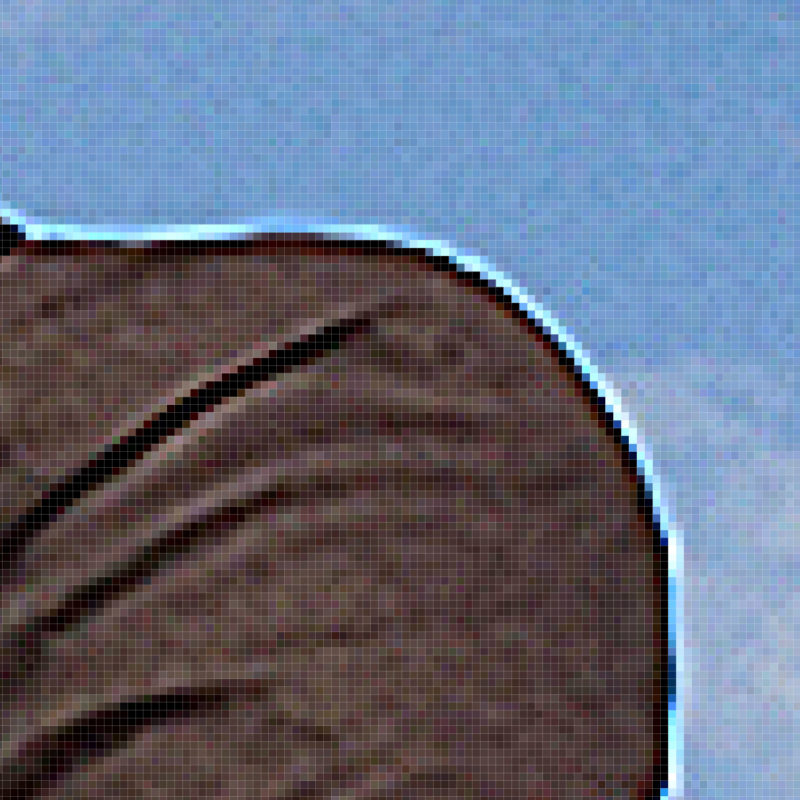
Some sharpening algorithms take a copy of the image, apply Gaussian Blur, and then add the difference between the original image and the blurred image back onto the original. Here’s a lecture from Stanford if you want to dig into that. Other algorithms average using a Median rather than a Mean, or detect the edges in an image and apply sharpening and blurring more selectively.
At the end of the day, you’ll want to choose a filter which gives you control, because oversharpening or indiscriminate blurring causes problems that can be hard to correct. That’s one of the main issues which shooting in Log — especially on iPhone — avoids.
Log video and sharpening
Most cameras routinely apply some sort of sharpening to the images they capture, and this is most obvious with footage from phones. As these devices are designed to be used by regular humans, and their footage designed to usually be seen on phones, you can understand why sharpening on phone footage is usually pretty heavy-handed.
Unfortunately, when you look at regular phone footage in detail, on a larger screen, you see the artifacts that excess sharpening inflicts. Haloing is often visible around fine details, some textures look a little crisper than they should, and all this extra detail — on a shot where most things are in focus — means that compression artifacts are more likely to be visible too.
When the iPhone 15 Pro introduced Apple Log mode, all that excess sharpening disappeared, and suddenly phone footage could look a lot more like clean, mirrorless footage. (Tone mapping is also turned off by Log mode, but the sharpening is most obvious.) If you’ve shot Log on a recent iPhone you’ll appreciate the difference, but when the Spatial Camera app recently introduced a Log option for Spatial video on modern iPhones, I was blown away by how much better it looked than non-Log SDR or HDR Spatial clips.
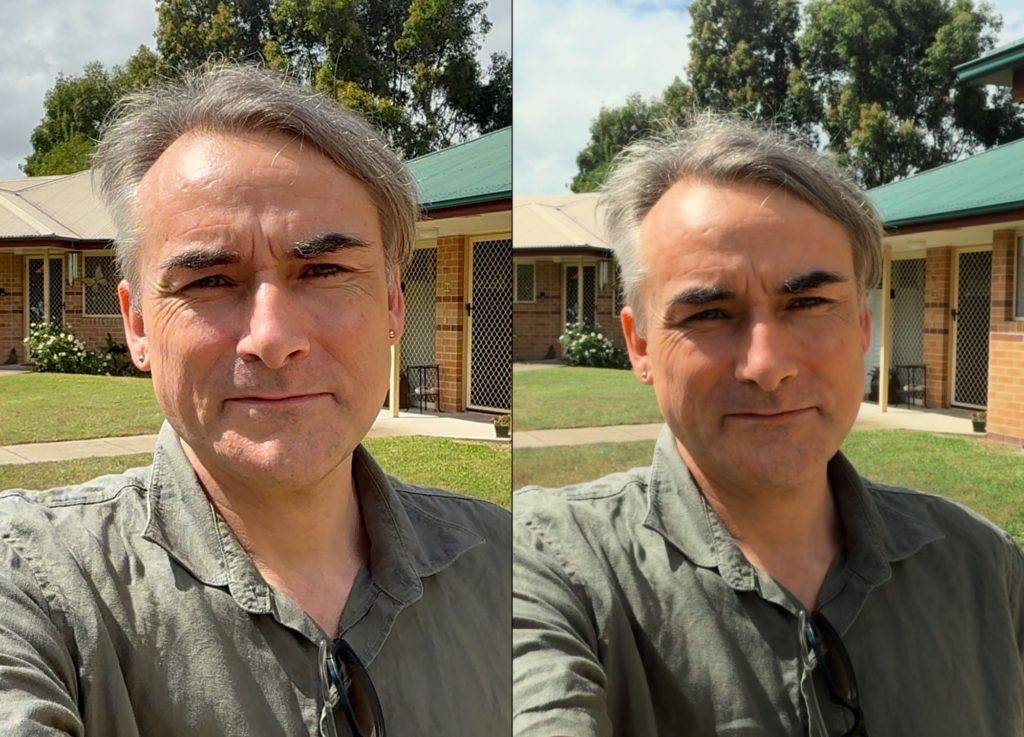
The ultra-wide camera is heavily cropped to provide one of the two stereo eyes in Spatial clips, and normally, it’s sharpened after that crop. Sometimes this looks OK; often it’s terrible. With the new 4K Spatial Log option, suddenly both angles look much more natural, cleaner and less “consumer-y”. It’s a massive improvement, and one hopefully adopted by other apps soon.
While phones are best known for excessive sharpening, regular mirrorless cameras apply it too, and often in a different way (or not at all) in Log mode. For example, if you poke through the custom picture style settings in a GH6 or GH7, you’ll see a sharpness slider set to 0. But that 0 doesn’t mean “no sharpening”! No, the slider’s range in all modes other than Log is from -5 to +5. Zero means “some sharpening” while -5 is what you need for nothing at all.
This can catch you out if you shoot in Log, because the Log sharpness range is from 0 to 10 instead of -5 to +5. The default of 0, for Log, does mean no sharpening at all. So, if you want a totally unsharpened image, choose the option all the way to the left, whatever it’s labeled, no matter what mode you’re in.
While I haven’t seen any sharpening artifacts in the middle of the range, you may want to match another camera’s style, or do all your sharpening in post; if that’s you, head all the way to the left. While the middle of the range should be OK, I wouldn’t turn sharpening up in camera, because it’s hard to fix problems created at the source. Add it in post if you need to.
Where blurring goes wrong
“Just because you can, doesn’t mean you should” is a maxim that applies to many things. In recent years, it’s become commonplace to apply blurring underneath people’s eyes, in an effort to reduce the visibility of both wrinkles and bags under those eyes. And as much as I’d argue it would be healthier as a society to accept aging as natural, if you’re going to do it anyway, it should be done properly. Marvel movies (apparently) routinely smooth everyone’s skin, but because it’s done well, it doesn’t stand out as “wrong”.
You will be unsurprised to discover that skin smoothing is not always done properly. The simplest approach, tracking the area under eyes and whacking a fat Gaussian Blur onto it, looks terrible — especially if there’s any grain in the rest of the shot, or texture in the rest of that actor’s face. I’ve seen this in a handful of shows over the last few years, and it’s been an annoying distraction from some otherwise good shows like Netflix’s Dead to Me. Thankfully, this mistake is less common than it used to be, and it’s also something which is often fixed after a show’s release. Today, Dead to Me looks fine, but at launch, both leads had blurry patches come and go under their eyes.
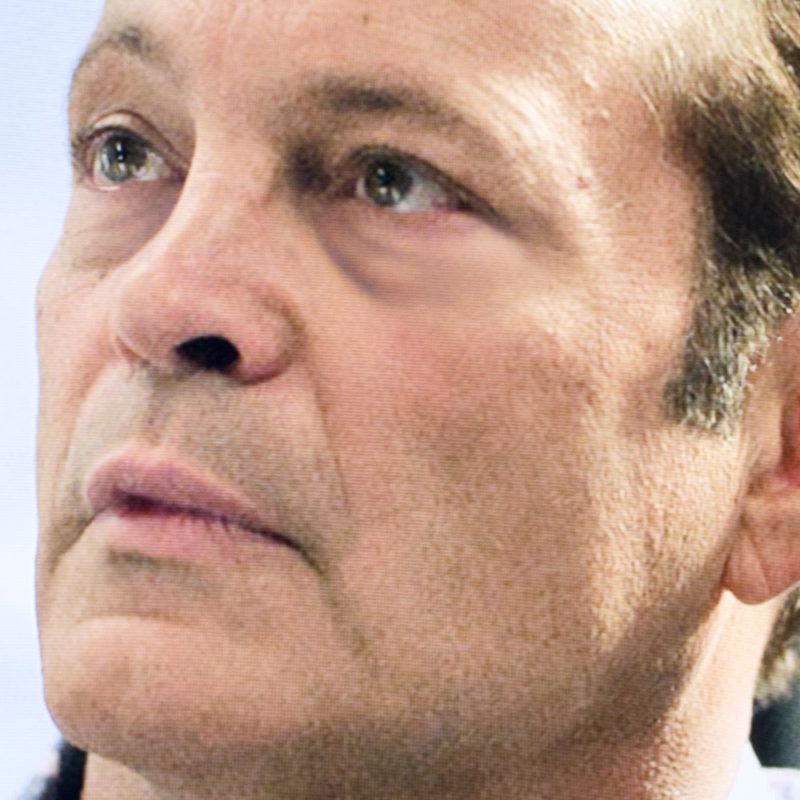
In the “Suspect: Season 1” trailer for the Apple TV+ show Bad Monkey (recommended, though not for kids) there’s still one quick shot that looks over-processed, at about 1:54. This is the kind of thing I mean — blurry, unnatural zones that look softer than the rest of an actor’s face. Surely there’s a better way?
Smarter, more selective approaches
There are many clever ways to apply blurring and sharpening, some of which are in the domain of custom plug-ins, others which you could build yourself in Motion (for use in Final Cut Pro) or in DaVinci Resolve with a fancy node tree. If you need to sharpen (to correct for missed focus) or to blur (to make people look younger) then you can do better than just adding a simple filter.
Clever approaches to sharpening often start by limiting where sharpening is applied. For example, you could use another filter to detect high contrast edges, then only sharpen those areas. This way, flat areas of skin retain their natural texture, while edges pop. Maybe it’s worth using a shape mask with a heavy feather to restrict a filter to just part of the frame?
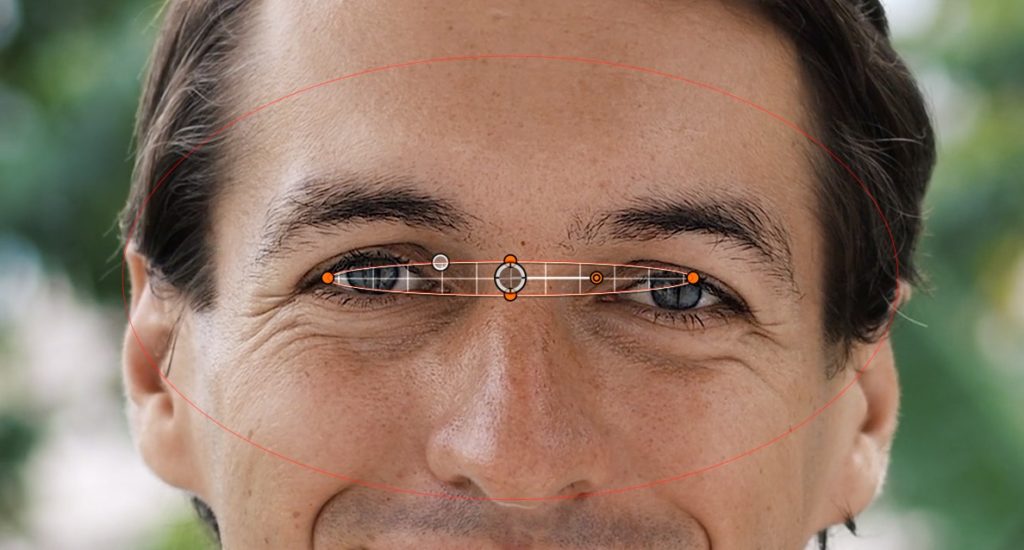
A smarter approach to blurring might start by limiting blur to a tighter color range, to only affect skin tones. It’s also important to add back the natural noise or grain which a blur takes away, because too much smoothness is a dead giveaway. Also remember that Gaussian Blur is far from the only option; Photoshop has a few options for smarter blurs, and here’s a USC Berkeley paper discussing something even fancier.
If you have more time, a technique called Frequency Separation allows a retoucher to retain low frequency detail (like skin texture) while reducing high frequency detail (like wrinkles). While similar techniques are used in mobile apps to smooth skin, this tech hasn’t yet been built in to mainstream NLEs.
One similar trick you can apply today in video is to use Clarity in an unexpected way. Clarity is a contrast-boosting technique that works over larger areas, and can be found in Lightroom, Photoshop’s Camera Raw, and Pixelmator Pro. While it can definitely be overdone, in general its effects are more gentle (and less likely to create halos) than an Unsharp Mask. Crucially, Clarity can be turned down, not just up, and when applied to skin, can soften the appearance of wrinkles while retaining skin texture.
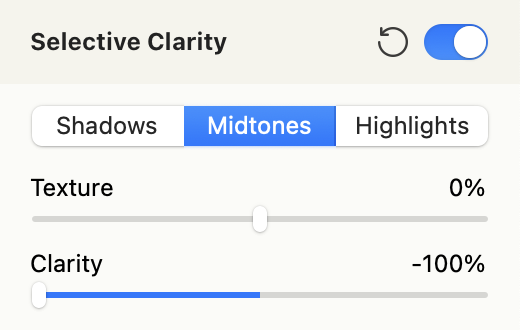
Pixelmator Pro’s implementation allows it to be applied to only midtones, and because this app can process videos, you could use this to create a smoother version of any shot, then use masks and keys to blend it with the original in any NLE.
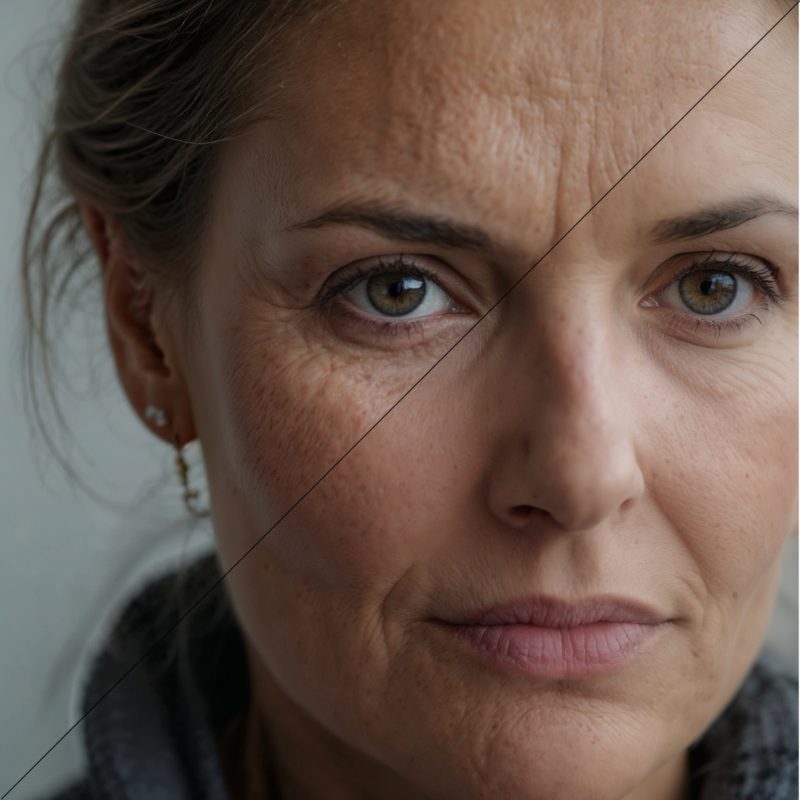
Lastly, AI is likely to have a larger future role in selective sharpening and blurring. Simple algorithms that detect edges or colors can only do so much, while machine learning models can recognise not just faces, but specific parts of faces, and make much smarter decisions. ML-based algorithms are widespread for still image upscaling and are becoming more common for video work too.
Conclusion
Blurring and sharpening isn’t new, but progress continues. If a make-up artist or DOP couldn’t work their magic on set, sometimes that job may fall to you, and their importance shouldn’t be overlooked. Whether the application is faking a shallow depth of field by blurring a background, or sharpening eyelashes in a makeup commercial, “improving” reality is often a job we’re tasked to do.
High-end feature films have been doing a great job of this for a while, and many mobile apps are only a little behind. Sooner or later, I’d expect similar tech to turn up in mainstream NLEs, and clients to request this work more regularly. Today, if you want to finely control sharpness and blur in your videos, you’ll have to get your hands a little dirty — but you do have options.

Filmtools
Filmmakers go-to destination for pre-production, production & post production equipment!
Shop Now


