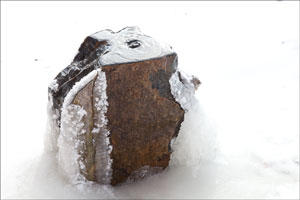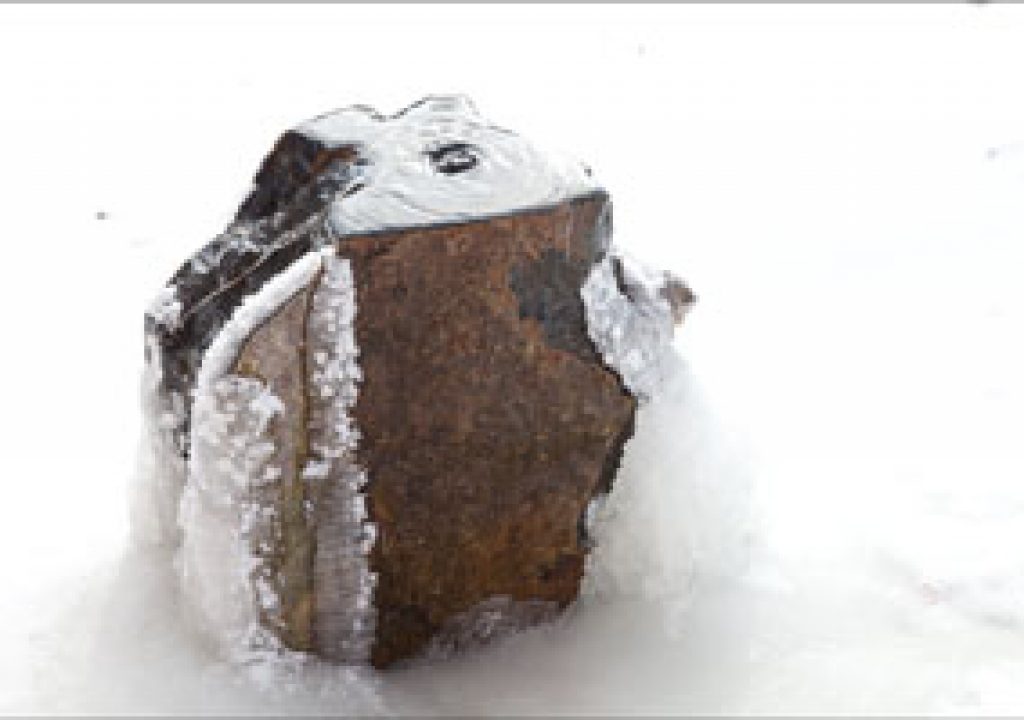
Default JPEG image on the left; processed Camera Raw image on the right.
A few years ago, I made a decision: I was going to save every image I shot using the Camera Raw file format. This decision is as automatic as waking up for professional photographers, but may bring apprehension for many amateur and semi-pro shooters. Indeed, I dare say more are creating multi-image HDR files (thanks to the profusion of tools available today – even for cell phone cameras!) than using Camera Raw. Therefore, I'd like to walk through how Camera Raw saved what would have been an otherwise unusable shot in hopes that it helps convert a few more into taking advantage of this format.{C}
First: Some Background for the Uninitiated
In most medium-quality and all high-end digital cameras, the image sensor captures more visual information in terms of lights, darks, and shadings of color than is saved to a typical JPEG file. The camera has to make decisions on what to keep, what to throw away, and what to bend to try to fit into a JPEG file's limited capabilities (which are even more limited if you've left the camera at its default sRGB color profile).
Many of these cameras offer options to keep more if not all of the sensor's valuable information by saving the image to a Camera Raw file instead. The better the sensor in your camera, the more information that Camera Raw file will contains – just waiting to be exploited in the name of either recovering realism or creating images that are richer than reality.
It's tempting to think that you only need Camera Raw for “real” photos (i.e. ones clients are hopefully paying for), and that it's not important for “casual” shots such as those taken on hikes. And who has time to tweak every shot in a Camera Raw dialog before they even open it? However, my feeling (and experience) is that sometimes you encounter a potential shot under casual circumstances that you really want to be a keeper – so why let your camera throw portions of it away before it even hits your memory card?
Snow and Ice
Like many, we were recently hit with heavy snows and sub-zero temperatures. The results were really quite amazing – especially around our heated, constantly-recirculating water features. I ran out quickly with my Canon 5D mkII and snapped off a few photos in semi-automatic mode before I became a human popsicle. When I got back inside and looked at the unprocessed images in Adobe Bridge, I was deeply disappointed: They were quite blown out. Below is one such untreated Camera Raw image. Below the photo is a histogram that shows the distribution of color values is on the right. In most cases, you would prefer that these values be well-distributed across the histogram's width, and not too crowded to either end; the crowding to the right – including the warning indicator illuminated in the upper right corner – confirms that this image is way too bright:
original image
What follows is an explanation of how I recovered a useable shot out of this blown-out original. It's not an entirely accurate blow-by-blow, as making adjustments in the Adobe Camera Raw dialog tend to be iterative: You tweak this, see what effect it has, then go back and tweak that to compensate. However, I can tell you that it took less time to actually perform these adjustments that it will take you to read about them. Also, this is certainly not the only “solution” – just as art is subjective, there's more than one way to create a pleasing image from what your camera sensor presents you with.
The Road to Recovery
Since the image was blown out, my first step was to reduce the Exposure setting (which I would have done manually when I shot the image if I wasn't afraid of getting frostbite). Reducing it by a full stop reveals detail in the snow and on top of the rock that were previously washed out or clipped at full white:
Exposure: -1.00
You can see from the histogram above how the Recovery parameter took some of the values crowded into the highlights on the right and separated them into their own peak comfortably below the highlights. In the image, this can be seen as shadows reappearing in the snow, and separation between the ice and the surrounding show.
Next, I have a personal preference for a high degree of contrast in my images, so I tend to experiment with increasing the Contrast slider to see what I can get away with. This is the result of cranking it all the way up:
Contrast: +100
I like what it did to the top surface of the rock; it also helped separate the ice from the rock's vertical faces. However, as a result I also lost details in snow as well as in the dark rock face. First, let's work on recovering the details in the highlights by increasing the Recovery slider:
Recovery: +100
Next, let's elevate the information buried in those shadows by increasing the lifesaving Fill Light parameter:
Fill Light: +60
By studying the histogram, we can see how the previous peak in the shadows at the left have now been distributed across the lower quarter to third of the value scale. This is seen visually as the separation of the colors in the rock's unpolished face compared to its darker polished sides and top.
I know it seems like I am doing a push-me-pull-you by first increasing the contrast, then apparently undoing its effects by increasing Recovery and Fill Light – but I was unable to get the same separation of values otherwise. It is instructive to compare the histograms from before the contrast adjustment (left) to the histogram after the recovery and fill light tweaks (right). Much better separation was achieved as a result:
(Of course, I welcome learning a better way to accomplish this same result; I suspect more time spent in the Tone Curves would have been one solution).
The resulting histogram also tells me that by adding in so much fill light, I've raised my black point as well. To re-ground it, I carefully increased the Black level until the left portion of the histogram curve nearly reached all the back to the left extreme again. Among other things, this really improves the water ripples on the top of the rock, grounding the darks where the water is thin while allowing the specular highlights to remain near white:
Blacks: +29
Now we enter the subtle enhancement phase. Following on from with my personal taste for high contrast, I like to increase the Clarity parameter to give a more defined edge to my objects; it was particularly useful here to help further separate the rock from the snow.
I also like to add a touch of Vibrance (a kinder, gentler alternative to Saturation) to help the colors pop a little. I like what it did to the rock face; I'm still debating the blue cast in the shadows in the snow – it's a reflection of the blue from the partly-cloudy sky, but I feel the snow would look more realistic as shades of gray:
Clarity: +38; Vibrance: +50
Aside from the snow shadow color issue (which I could have cured with more carefully targeted corrections), the only thing still annoying me is the lack of contrast in the snow behind the rock. Truth be told, there wasn't much there in the real world; the wind-smoothed snow was smooth, and the diffuse light on the partly cloudy day wasn't helping develop what few shadows there were to be had.
All of the adjustments so far had been under the Basic tab in the Adobe Camera Raw dialog; a trip under the Tone Curve tab would be required to tease more detail out of the grayscale values. A mild decrease in the Highlights helped define the shadows without washing away too much of my hard-won contrast:
Highlights: -25
(I also made some tweaks in sharpness and noise reduction, but those are not evident in these lower-resolution online images.)
Back in the Real World
These adjustments were a lot more drastic than are typically required; I picked an extreme example to help illustrate a point. And one more experienced in digital darkroom skills could have take this image much further than I did. Either way, it's better to light a scene and set up your camera's exposure to capture a good image to start with and then merely enhance it after the fact. However, that was not an option in this particular run-and-gun situation. Also, I should emphasize that there is no way I could have recovered this much detail from the JPEG the camera saved; large portions of the highlights would be gone forever, and I probably would have had issues with posterization in trying to recover other details.
Is Camera Raw a magic bullet? Not always; sometimes the actual exposure is just too far out of range to recover useful information without unpleasant posterization or noise. Also, not all Camera Raw files are created equal: They are heavily dependent on the quality of your camera's sensor. I can recover quite a bit from shots taken with the 5D and it's sensitive full-frame sensor; I can recover only a slight amount of detail from Camera Raw files saved by my considerably less expensive Panasonic FZ35. Still, the Camera Raw version is far better than the JPEG files either camera saves.
In short: If you're a semi-pro or serious amateur looking to raise your game, becoming comfortable with the Camera Raw workflow is one very important step you should take.
Our photographs and artwork, as well as content contained in our books, videos, blogs, and articles for other sites are all copyright Crish Design, except where otherwise attributed. Other examples of my mixed media work may be found on my artist web site.

