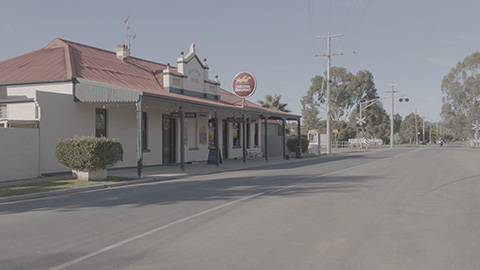
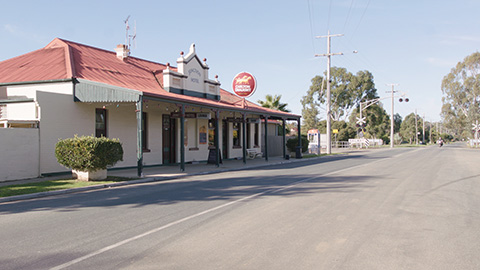
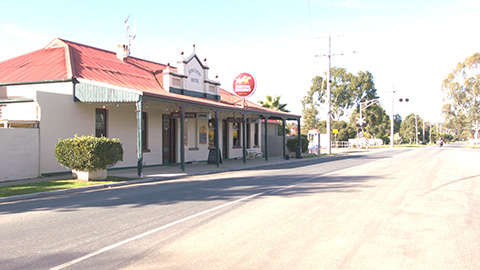
Color management in Resolve can be frustrating. In theory it should be a great alternative to using LUTs, but in practice it can produce surprising results with the blacks lifted and the whites going through the roof. Here’s an example of a Log encoded Arri Alexa clip:


You can manually correct this, of course, but it’s complicated and takes time, and time is a luxury for a colorist. When you’re grading several hundred clips a day, you want a decent image “out of the box” so you can get on with the creative work.
These two articles are about getting Resolve’s Color Management to work as efficiently as LUTs. In the second article, I’ll be proposing two methods to do this, each with slightly different results. But for either method to work you need to get Color Management set up correctly, so that’s what this first article is about.
Don’t be put off by the length of the article, by the way. There’s nothing complicated about using Color Management. On the contrary, it’s dead simple, as you’ll see if you skip to the “To sum up” section at the end. But to get the most out of it, there’s a lot to explain!
The basics of color space, LUTs and color management
There’s neither the time nor the space in this article to explain color spaces in any depth, but here’s a very brief summary of what we’re trying to deal with.
Color Management is all about converting from one color space to another. A camera’s color space is the range of colors and contrasts its sensor can capture (see the footnote at the end of this article for a fuller explanation). Consumer cameras have a small color space, high-end cameras have a much larger one. Camera sensors differ from one manufacturer to another and the technology improves all the time, so there are a bewildering number of camera color spaces around.
The color space of a display (TV screen, monitor, cinema projector, etc.) is the range of colors and contrasts the display can reproduce. Unlike cameras, where the unique capabilities of a sensor are a selling point, display color spaces are defined by international standards. The standard color space for broadcast television is known as Rec709 2.4, and for cinema projection it’s P3-DCI.
When the camera color space and the display color space are the same, nothing needs to be converted. That’s the case for most cameras, including smartphones, DSLRs and even some professional models. They all record in Rec709 2.4 color space, so they don’t need to be color managed.
The problem is that the color spaces of high-end cameras are larger than both Rec709 2.4 and P3-DCI. Recording in a small color space would limit their performance. The solution to that is Log encoding, essentially a method of conserving the full range of a camera’s color space for both contrasts and color. The Log footage then needs to be converted in one way or another to the display color space, either by Look Up Tables (LUTs) or by Color Management.
LUTs are versatile and easy to use, but using a table with a limited number of input and output values to convert a large color space to a small one is like pushing the signal through a grid. A lot of information in the original signal gets rounded off or clipped.
Color Management uses math equations rather than tables to do the conversion, so the full, original signal remains available throughout the grade.
Color Management in Resolve
Color Management is applied to the entire project, so it needs to be activated in the Project Settings.
To do this, go to Project Settings > Color Management, and change the Color Science drop-down menu to DaVinci YRGB Color Managed. The Input, Timeline and Output settings all then become active. Each one has a drop-down menu with a list of color spaces to choose from.
Setting the Input color space
The Input color space is the camera color space, the color space your footage was filmed in. In previous versions of Resolve, you would usually change the setting here to the color space of your source clips. All clips in the Media Pool were assigned by default to the Project input color space, so whatever you chose here would automatically be applied to them.
In Resolve 15, there’s been a major change: clips imported to the Media Pool are assigned by default to Rec709 2.4, so the Project color space doesn’t automatically apply to them. You have to manually assign the color space for each clip. That means there’s not much point in changing the Input color space in Project Settings, you can leave it at the default Rec709 2.4.
To manually assign a color space to a clip, right-click on the clip either in the Media Pool or in the Color page timeline and choose the appropriate setting in Input Color Space (this option only appears in the contextual menu when Color Management has been activated in the Project Settings).
The process may sound laborious, but in practice it’s not. You can select any number of clips and change the Input Color Space for them all at the same time. If you have sources from different cameras, you can probably separate them out using Smart Bins based on the codecs. For any clips that are natively Rec709 2.4 (usually any clips that aren’t Log) you don’t need to do anything, they’re already assigned to the correct color space.
Setting the Output color space
While you’re grading, this should correspond to the color space of your display. That’s true whatever kind of project you’re working on and whatever display you’re using, be it a monitor calibrated for Rec709 2.4, a cinema projector working in P3-DCI, or an iMac (usually sRGB color space). That way, you can actually see what you’re doing.
If you decide to switch to a different display in the middle of your grade – you may have done some initial work on an iMac, moved to a professional Rec709 2.4 suite, then want to see what the grade looks like on a P3-DCI projector – change the Output color space each time to match the new display. Resolve’s Color Management will take care of the necessary conversions, and the grade should look the same on each of the displays. That’s the beauty of Color Management, and one of the main advantages of using it.
Similarly, once you’ve finished your grade you can change the Output to deliver to different standards. For example, if you’ve graded in Rec709 2.4 for broadcast TV and want to export a version for the web you can switch the Output color space to Rec709 2.2 or to sRGB.
The Output color space is also the color space of your scopes, so the signal on the scopes will change when you select a different output. This is normal behavior and nothing to worry about!
Setting the Timeline color space
This is Resolve’s working color space, and I’ve left it till last because it’s a strange beast, very different from the other two.
If you haven’t done any grading, it’s transparent. You can change the Timeline color space as much as you like, nothing will change in the picture. It only kicks in when you start grading.
While you’re grading, the Timeline color space affects everything you do. It defines the range of colors and contrasts you work with, and it’s the reference color space for all your controls. Any changes you make to gain, contrast, saturation, etc. are made in relation to that color space.
If the idea of a reference color space sounds obscure, think of it this way: When you adjust a control like Lift from 0.00 to 0.05, those numbers need to refer to something if they’re to make any sense. To draw an analogy, imagine opening a spreadsheet with numbers on it but no mention of whether these numbers are yens, dollars or euros. You need to know which currency the numbers refer to to know how much they’re worth. And switching from one reference to another – dollars to yens, for example – would change the amount considerably!
Similarly in Resolve, when you adjust a control, the reference for the numbers is the Timeline color space. If you change the color space the same numbers will give a different result.
Here’s an example with some Log footage. The two images below have exactly the same correction applied to them: Gain reduced to 0.40. To the left, the Timeline color space is Rec 709 2.4. To the right it’s been changed to Rec 709 (Scene), which has a lighter gamma of about 1.9. The grade is the same but the result is very different.
The crucial point to take away from this is that you must never change the Timeline color space once you’ve started grading. If you do, it will alter every single grade you’ve made.
It also means that the Timeline color space will influence the way your grading controls behave and feel. You may have to push a contrast or adjust a color balance differently to achieve the same result in another color space.
So which Timeline color space should you choose? The obvious answer is to set it to the color space you’re delivering to: Rec709 2.4 for broadcast TV or P3-DCI for cinema.
Those two color spaces are interesting to compare as choices for a Timeline color space because they don’t have the same white point. The white point is the starting point for any changes you make to color, so if you grade in one of the two color spaces and then switch to the other, you’ll see a shift in the hues. This will be more or less pronounced depending on the amount and type of changes you’ve made to the grade.
Resolve’s default color space
Resolve needs a color space to function, even when Color Management is turned off. All media has a color space of some sort, the Timeline controls need a reference, the Output color space has to be something. Resolve’s default color space when Color Management off is Rec709 2.4 for everything: Input, Timeline and Output. That’s also what’s assigned by default to all three when you turn Color Management on. It’s also the default for all imported media in version 15.
That means that Color Management is “transparent” when you first turn it on. It won’t alter anything you’ve done so far. You can activate it at any time to use the Output color space for a new display or to export to different versions. You can also activate it and assign an input color space to just a few clips. Mix and match as you wish, with some clips color managed and others using LUTs.
To sum up
After the detailed explanations, here’s a summary of the standard set-up:
- In Project Settings > Color Management, switch Color Science to DaVinci YRGB Color Managed
- Leave Input color space set to Rec709 2.4, set the Timeline to Rec709 2.4 for broadcast TV or to P3-DCI for cinema, and the Output to the color space of your calibrated display. Save settings.
- In the Media Pool, select all clips with the same color space, right click and assign the correct color space in Input Color Space. Repeat for clips with a different color spaces. Do nothing for clips with native Rec709 2.4 color space (the usual standard for any clips that aren’t Log).
And that’s it. Well almost. The result you get is the one shown at the beginning of this article. It doesn’t always look good “out of the box”, so that’s what we need to fix next and the subject of the second article. It’s surprisingly easy, by the way!
A footnote to clarify technical terms for color spaces
My explanation of color spaces in this article uses the terms “colors” and “contrasts” to simplify things. By “range of colors”, what I mean is the range of hues and saturations, also known as gamut. By “range of contrasts” I mean the range of light from shadows to highlights that a camera can capture without over or underexposing (a.k.a. Dynamic Range) as well as the type of contrast applied to it. In color management, this is generally referred to as gamma.
Color space is both gamut and gamma, but whenever Resolve separates the two with individual controls for each one, it labels them “color space” and “gamma” respectively. So in these cases, “color space” means gamut only. This is fairly common practice, by the way. A lot of articles and tutorials use the term “color space” to mean gamut only and treat gamma as something different.
Other articles in the series Solutions to Resolve:
- The key to precise sharpening and noise reduction in DaVinci Resolve
- The key to accurate shot match in DaVinci Resolve’s Color Trace
- Unexpected clipping in DaVinci Resolve and how to avoid it
- Full data and video levels in DaVinci Resolve – don’t clip your proxies and transcodes
A French version of this article can be found on the author’s website, www.pixelupdate.com at the following link: http://www.pixelupdate.com/color_management_1/

