This short series of articles is about various aspects of Resolve that are important but not as well known as they should be. They don’t often come up in tutorials and I’ve discovered in the course of my teaching that even some confirmed editors and colorists are not aware of them.
The four articles are bit of a mixed bag, some of them working tips, others more fundamental as to how Resolve works. Each of them is independent with no relation to the others. I’ve tried to provide sufficient background information to make them clear for beginners as well as professionals, so pick, skip and choose whatever you find useful!
I work for Blackmagic as a Master Trainer, but Blackmagic hasn’t commissioned these articles, they’re my own initiative.
The four articles are:
The key to precise sharpening and noise reduction in DaVinci Resolve
Sharpening can be tricky to get right. You rarely want to sharpen all the details in a picture, just some of them – the eyes, for example, but not the skin.

Resolve has tools to do this, the “Level” and “Coring Softness” controls at the bottom of the sharpening palette. “Level” is a threshold for details. Raise it to exclude finer details and keep only the larger ones. “Coring Softness” will create a soft transition around the threshold rather than an abrupt cut-off.
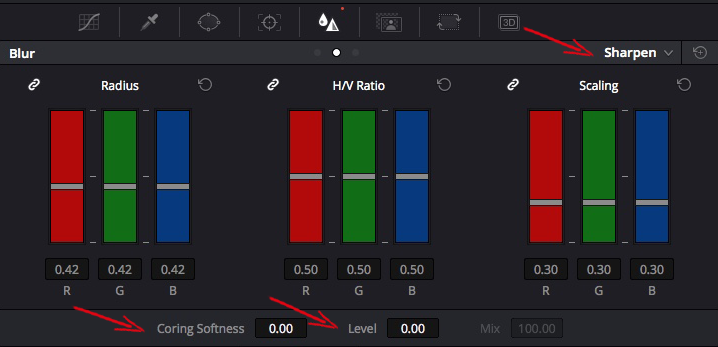
The problem is that it’s never easy to see what you’re doing with these controls and to get the balance between Level and Coring right. That’s where the Highlight A/B mode makes all the difference.
Add some sharpness by bringing the Radius control down a little, and then activate the Highlight button at the top left of the viewer and switch to A/B mode at the top right. Now you can now actually see what you’re doing. Anything that’s neutral grey is not being affected, anything that stands out with contrast is.
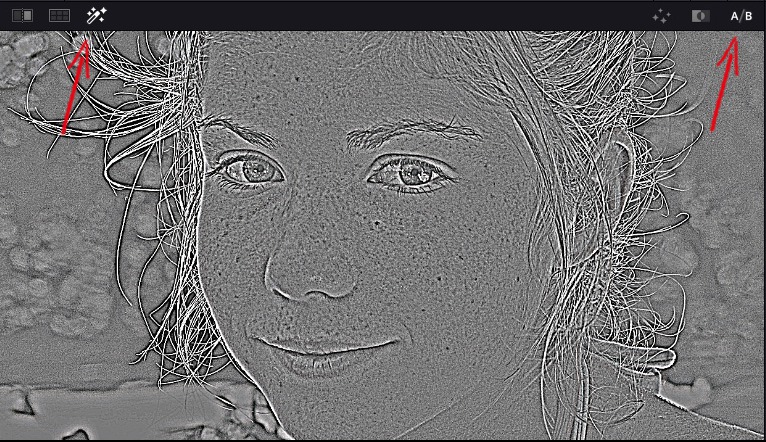
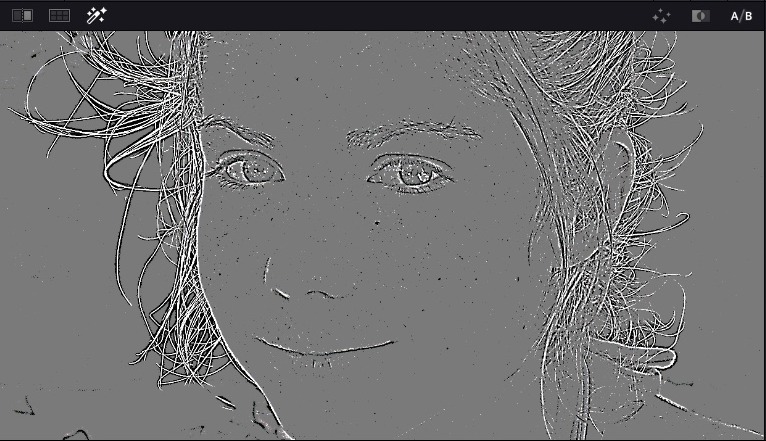
Once you’re found the right balance between Level and Coring, leave the Highlight mode and watch the image to decide how much Radius and Scaling to use. Highlight A/B will show you what you are affecting and where to look, but it’s no substitute for your eyes when deciding how much sharpening to apply!
So what exactly does the A/B mode do? It shows you the difference the corrections in a node are making to the picture. If there are no corrections, the screen will be a uniform grey, but as soon as you add a correction, this will stand out against the grey background.
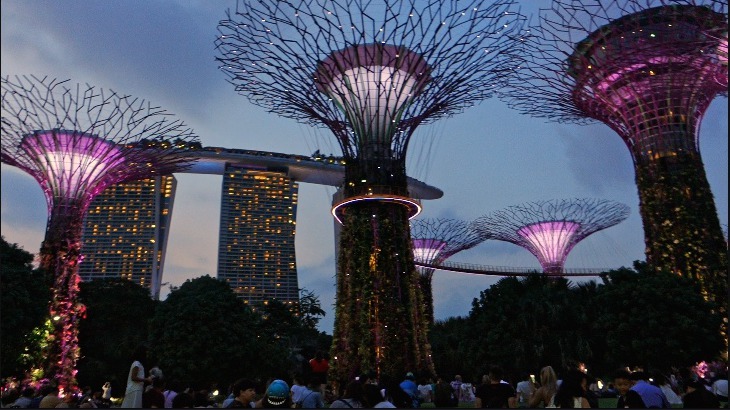
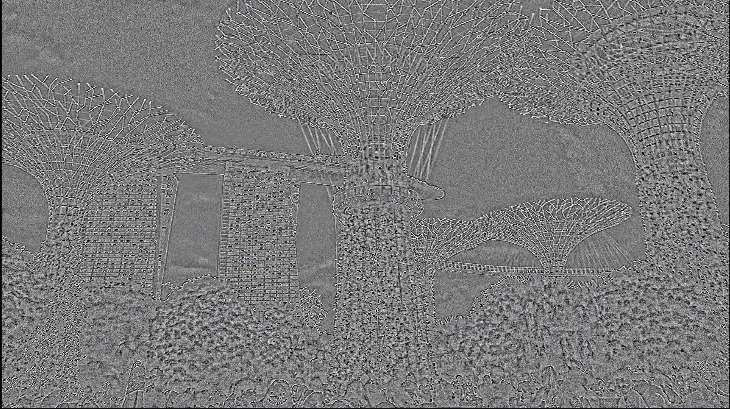
A/B is particularly useful whenever you have to set a threshold for an effect. Take spatial noise reduction, for example. Typically a colorist will raise the luma and chroma thresholds until the noise she or he wants to remove from the picture disappears. But that level may also be affecting other parts of the image that should be left alone. In this shot of the Supertrees in Singapore, the aim is to reduce noise in the shadows without affecting the details of the trees. The A/B mode will show you if the threshold is set too high.

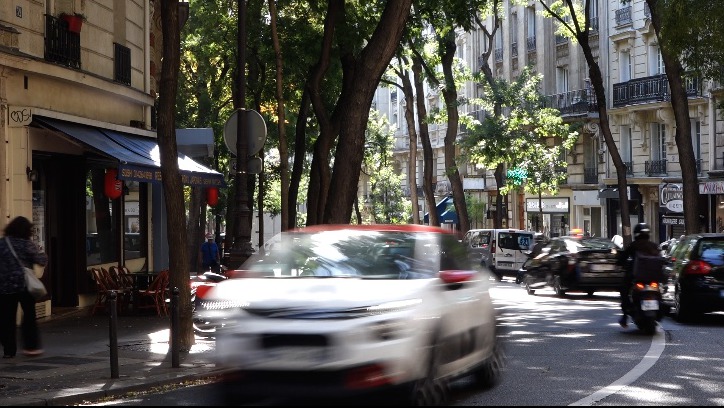
The A/B mode is useful too with temporal noise reduction. Temporal noise reduction works by comparing frames before and after the frame you’re on. If a pixel is different in the next and previous frames, there’s a good chance that it’s noise, and if it’s the same it probably isn’t. That of course becomes difficult if things in the picture move! So temporal noise reduction has several controls to identify movement and exclude it from the analysis: Motion Estimation Type, Motion Range and Motion.
The A/B mode helps to decide how to set these controls. You can use it to compare different settings to see which one eliminates movement most effectively for your clip. This example compares no motion detection (Motion Estimation Type set to “None”) with Motion Estimation Type set to “Faster” and two variants of Motion Range: “Small” and “Large”.
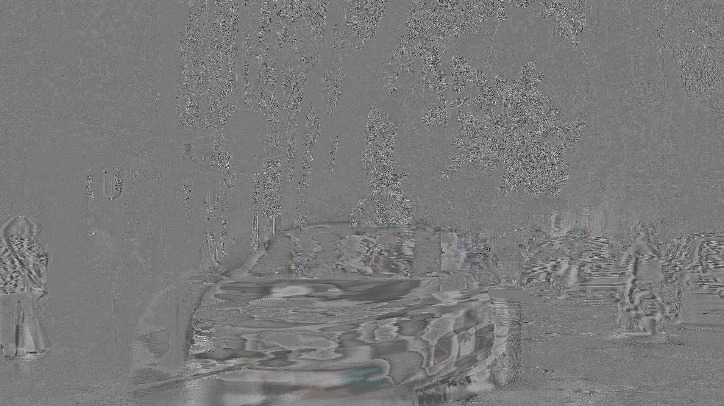
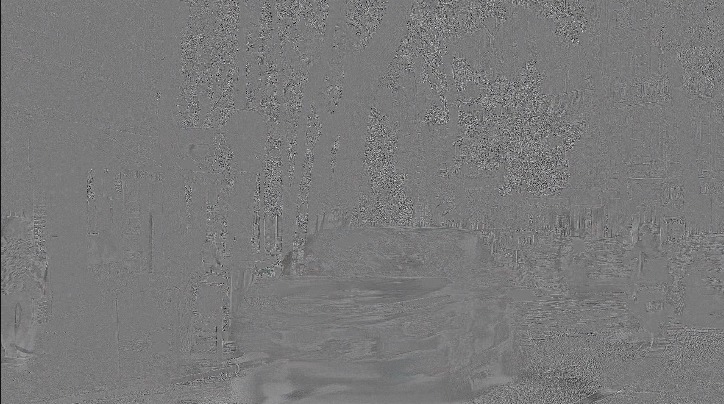
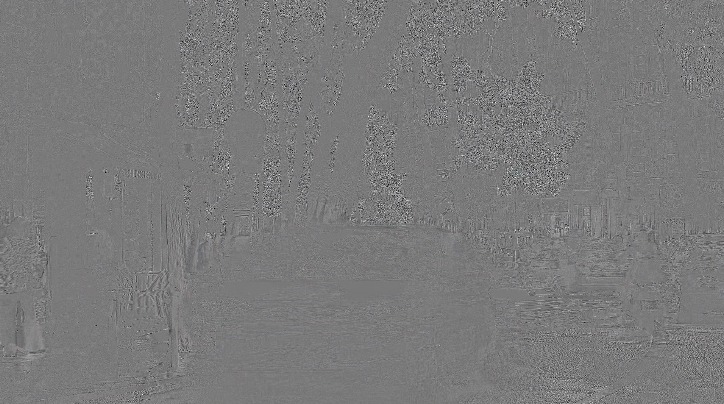
As with sharpness, the A/B mode is not going to show you exactly how much noise reduction to apply. It may in fact be fine to affect some picture details and motion, only the picture itself can tell you that. What the A/B mode does do is to help control what you’re doing, and show you where to look and what to look for while you’re adjusting the levels.
There are other instances in Resolve when the Highlight A/B mode comes in handy. This could be to set the ranges for Shadow/Midtone/Highlight in Log, to check what’s being affected by the hue-hue curves, or to finely adjust a Resolve FX like Glow. In general, whenever there’s a threshold you’re not sure how to adjust, the A/B mode could well be your answer!
A French version of this article can be found on the author’s website, www.pixelupdate.com at the following link: http://www.pixelupdate.com/a-b_mode/

Filmtools
Filmmakers go-to destination for pre-production, production & post production equipment!
Shop Now