In a perfect world, clients supply gorgeous video clips for you to use in the graphics they’ve hired you to create. When that doesn’t happen, there are a few tricks in our bag for adding punch to these clips. Our goal is not to add “effects” or to make video look like film – but rather to make your client say “How did you make our video took so great?” We covered tinting movies using various tint and tritone effects in Getting Behind The Color Wheel, and those techniques can be combined with the tricks contained in this column.
Midas Modes
Blending modes in After Effects offer some of the coolest “effects” around – yet they take little render time and rarely look gimmicky. When a job calls for layers to be composited on top of each other, video editing systems have only opacity controls to work with, which often results in lackluster imagery).
In After Effects, we rarely composite layers without using blending modes. Instead of Opacity, try compositing the top layers using Overlay or Soft Light instead (see below). If the image is primarily black or white, use Screen – which drops out blacks – or Multiply, which drops out white.


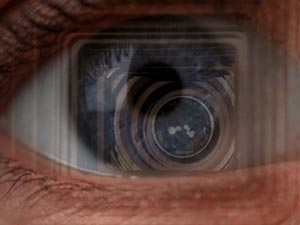
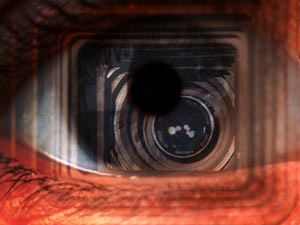
When an image of a camera lens is composited with an eye using just Opacity (left), the result is rather flat. Using Blending modes (right), the final image is much more interesting. Images courtesy TVFX.
You can also duplicate layers and apply different modes to each to enhance different areas. For instance, if your chosen mode reduces the white of the eyes, duplicate the eye layer and place it on top in Add or Screen mode, which highlights the whites. Opacity can be used to turn down layers that are overpowering the mix. We often add contrast to layers using Levels, or if they’re contributing unwanted color to the mix, convert them to grayscale. As an additional tip, if you like the way Overlay works but you wish the layer was stronger in the mix, duplicate the layer – two Overlays can be better than one.
There are no hard and fast rules for which modes to use, as so much depends on the content of the layers. But the surprises are what make Blending modes so creative. If the clips are already of high quality, as in our example, compositing with modes may be all that’s needed .
It’s a Hard Light
Blending modes can also enhance a single movie by compositing the layer back on top of itself. Duplicate the layer, and set the top layer to Hard Light mode – ta da, instant “punch” (see below). Some plug-ins (Compound Arithmetic, Calculations, Composite and Boris AE Composite) will composite a layer on top of itself using a blending mode right inside the plug-in, which is useful if you don’t want to deal with two layers for animation purposes. These plug-ins also allow for the result to be composited on top of other layers below using the regular Blending modes.


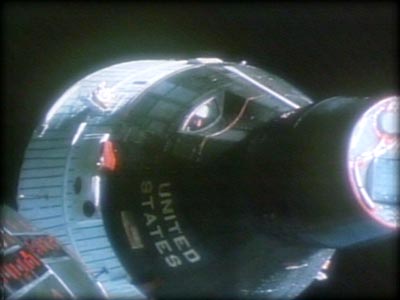
Compositing an image (above left) back on top of itself using the Hard Light Blending mode adds contrast and saturation (above right). NASA images courtesy Artbeats.
An alternative approach is to composite the Hard Light effect in a pre-comp if you need it as one layer. Pre-compose the layer using Option #1, “Leave All Attributes”, and create the Hard Light trick in the pre-comp. This will leave all keyframes and in and out points in the original composition.
next page: the classic “instant sex” technique, plus tricks for smoothing noise and creating soft picture-in-picture effects
Gaussian Modes
For a dreamy filmic look, try this recipe: duplicate the layer, apply Gaussian Blur to the layer on top and set it to Screen mode. The light areas will puff out nicely (see below). Experiment with other modes also: Overlay can add punch and reduce distracting details in a clip. You can reduce the Opacity of the top layer if the effect is too intense or the result too light or dark. The drawback again is that you’ll have two layers to animate, so you may want to set up this effect in a pre-comp also.

Applying Gaussian Blur to a duplicate of the layer and setting it to Screen Mode puffs out the highlights. We described this technique in more detail in an article we wrote for Artbeats.
For one-layer shopping, the Boris AE Gaussian Blur allows you to blur the layer and apply the effected layer back on top of itself using a built-in Blending mode. It even includes some useful new modes like Scale Multiply and Scale Screen. The Apply Mix slider blends in the blending mode compared to the regular blurred effect, while the Mix with Original slider blends back in the uneffected layer (useful if the result is too strong). The Blur Threshold slider can be used to bring back lost details, while PixelChooser allows you to set a matte for the effect, including the luminance values of the layer itself. There’s a lot of nice control here, which makes it all the more surprising that it renders faster than the Adobe Gaussian Blur. We can only hope that some day all effects will have modes and mattes built in.
Denoiser
When the job calls for the use of stock footage, the clips we receive are often nicely composed but heavy on noise picked up from multiple dubs. When the quality is questionable, we reach for the Denoiser plug-in (now part of the Key Correct Pro package). Denoiser averages pixels across frames, reducing video noise particularly in “dark areas of images that pick up chatter from film emulsion or video camera sensors”. It claims to “selectively denoise only the static areas that are locked off, preserving full detail of areas that are in motion”. All we know is that Denoiser manages to smooth out the junk without softening the image too much, and can help a noisy stock footage clip play better within a classy design.
Wide Time
The Wide Time plug-in from Final Effects Complete (now part of Cycore Effects, bundled with After Effects) adds a frame blending effect to a clip without the need to timestretch the movie. We use it for blending frames from timelapse movies, such as rush hour traffic, to soften and blur the frames across time. It can also make it appear that 3D renders originally had lots of motion blur, after the fact.
Ramping Down
One of Photoshop’s best features is being able to add a Layer Mask and use a simple gradient to control a layer’s transparency. In After Effects, if you want to do the equivalent to a movie layer, you need to use a gradient as a Luma Track Matte. Again, it’s probably best to set up the track matte effect in a pre-comp so that you can move the movie and matte as a group. Gradients can be created in After Effects by applying the Ramp effect to a Solid, or you can import grayscale gradients created in Photoshop.
The Alpha Ramp plug-in (from the Image Lounge package) is a real sleeper. It makes circular and linear ramps, but applies them directly to the layer’s alpha channel. If you’ve been creating vignettes with Mask Feather and coming up short, or messing around with Luma Mattes, try Alpha Ramp instead. The gradients are super smooth, and composite beautifully without hard edges.

The Alpha Ramp effect creates a gradient directly in a layer’s alpha channel, which is used to focus attention on desired areas.
We use Alpha Ramp to reduce the distracting uninteresting areas in a layer, thereby bringing out the best features of each image in the mix (see the figure above and to the left). If the area you’re focusing on moves in the frame or changes size, animate the ramp’s centerpoint or width. Applying alpha ramp to every layer may create empty areas in the corners: take advantage of this by creating a background layer that helps to unify the design or reinforce the color scheme.
The content contained in our books, videos, blogs, and articles for other sites are all copyright Crish Design, except where otherwise attributed.

Filmtools
Filmmakers go-to destination for pre-production, production & post production equipment!
Shop Now


