It comes as no surprise that Adobe has a big video tools reveal in store for NAB 2014. All the video apps in the Creative Cloud get updated as the slow and steady advance of their video tools continue. It’s no surprise that Adobe Premiere Pro CC gets my main focus as the NLE keeps getting better. Check out detail on After Effects and the other CC apps as well. While there are signature new features that will get most of the press there’s a lot of utilitarian things that hardcore storytellers will appreciate. No word on exactly when this will ship but keep an eye toward the Creative Cloud.
![]() Yes, the flashy new effects related additions to this updated version of PPro will get lots of press and deservedly so. Things like Master Clip Effects, After Effects text templates and built-in source clip Masking and Tracking are great additions and we’ll touch on them later. But for now … it’s these little things that many craft editors like myself will most appreciate. Under the hood changes which will make a difference in their day to day editing doldrums, much more-so than the effecty ones. These are a lot of the really nice, little updates I noticed while working with this new version.
Yes, the flashy new effects related additions to this updated version of PPro will get lots of press and deservedly so. Things like Master Clip Effects, After Effects text templates and built-in source clip Masking and Tracking are great additions and we’ll touch on them later. But for now … it’s these little things that many craft editors like myself will most appreciate. Under the hood changes which will make a difference in their day to day editing doldrums, much more-so than the effecty ones. These are a lot of the really nice, little updates I noticed while working with this new version.
Additional import options for Premiere project files
When scanning the What’s New doc this first caught my eye. When using it I said a hallelujah. PPro had a bad habit of having to reimport all existing media into your project when sharing a timeline with another editor or even another project. And since you can only open one PPro project at a time this could mean hundreds (or thousands) of duplicate master clips in a project. While there were apparently ways around this (which I was never able to make work) we now have a much more simple option.
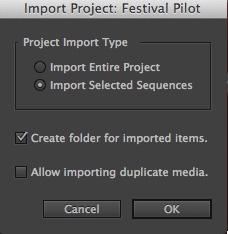
From my initial tests it looks like importing duplicate media is a thing of the past.
Just adding a few checkboxes in this new Import Project dialog box gives the editor options. Might this make the process of bringing in another edit sequence a bit more complex? Yes. Does this go against the philosophy of some other NLEs? Yes. Does is make this important process of bringing in another sequence too complex and confusing? Heavens no.
If you’re smart enough to use Premiere Pro you’re certainly smart enough to deal with a few new menus items and check boxes that allow for more customization of the NLE and better workflows.
Turn off FX Badge setting
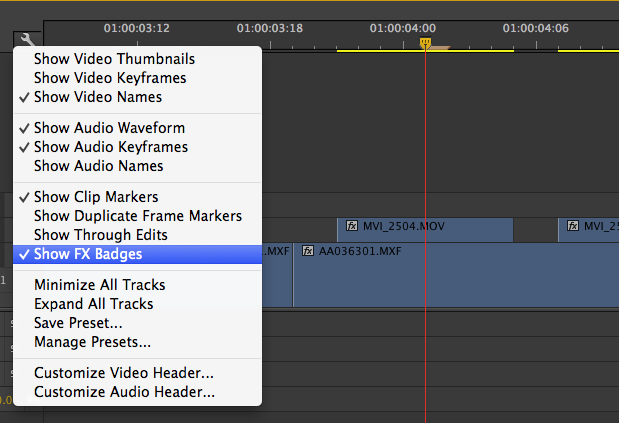
Hey … this is new.
Here’s a welcome little check box that I asked specifically about in my CC review last year calling the FX Badges “annoying little fx buttons.” That may have been a bit harsh but they seemed to get in the way more often than they were useful.
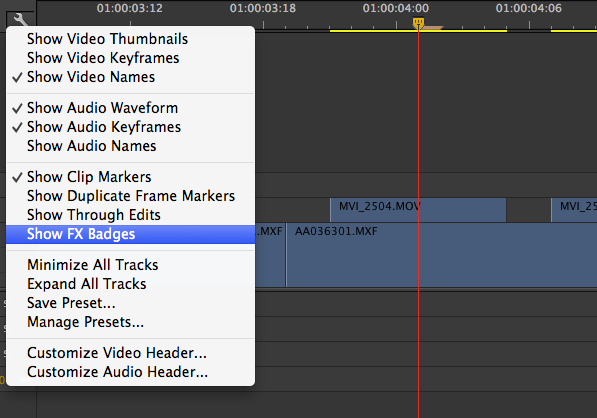
Ahhh … that’s better. Go away FX Badges.
But something else I noticed means you might not have to actually turn those FX Badges off to make them less annoying. They’ve been moved to the left of the clip which is nice. But they also appear to only be accessible via a right+click instead of just a regular click when means they’ll pop-up less when you don’t want them.
Maintain audio pitch while shuttling
Speaking of a little check box that makes a big difference, this update adds pitch corrected audio when scrubbing and JKL shuttling.
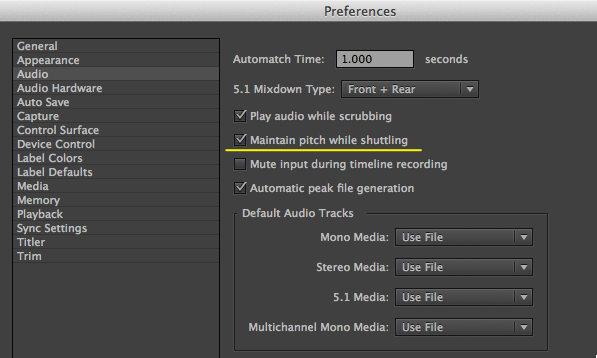
Now the FCPX users will have one less thing to feel superior about.
Pitch correction works well and is especially understandable when playing slomo while holding K and L. The fast shuttling at beyond double time isn’t quite as understandable as FCPX’s fast-shuttle pitch correction but it’s way better than the chipmunks we heard before. I honestly don’t know why anyone would turn this preference off unless performance takes a hit. I didn’t notice any in my testing.
Preserve bin structure on import
This one is pretty self-explanatory from the title and very, very welcome. If you’ve got carefully DIT’d footage coming in from set then keeping those folders all intact upon import can be a big timesaver when it comes to organizing for the edit.
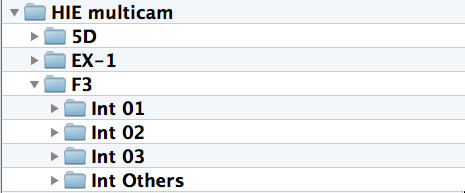
Have you carefully organized your media from the shoot?
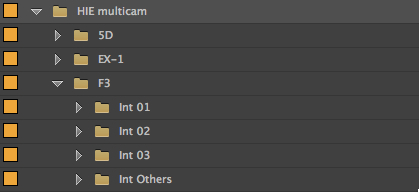
Those folders will now be preserved upon import.
The preserving of the folder structure works both when you use the Media Browser for import as well as dragging a folder in from the Finder (or presumably whatever the Windows equivalent of the Finder is).
Auto-save to Creative Cloud
Another preference checkbox that is pretty easy to understand.
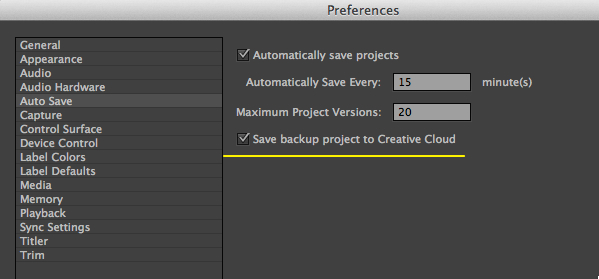
Check that box. Another backup done.
This is a nice security blanket and, if you’re like me, you probably have a lot of unused Creative Could space in your 20 gigs so what better way to fill some of that than to have your PPro project file backed up to the cloud.
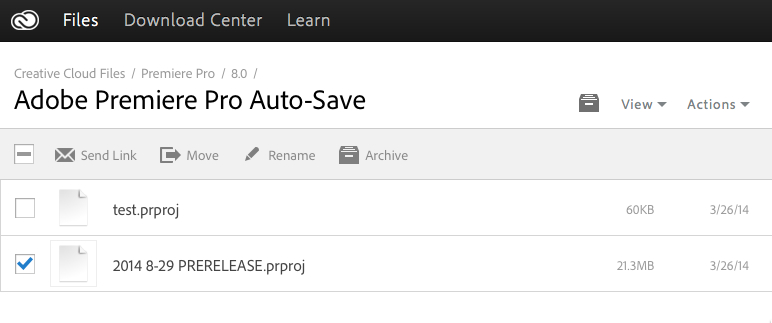
And once the autosave has happened the files can be managed from the Creative Cloud interface.
This looks to be a straight backup of the project file. It might be worth keeping an eye on project file sizes as there have been reports of the Warp Stabilizer causing the project size to balloon but overall this is a nice little addition.
Assign more than one keyboard shortcut to a command
This is a little one that might not affect many users but I’ve run into it before. In most NLEs you can assign a command to one or more keyboard shortcuts but you haven’t been able to in PPro. Now you can.
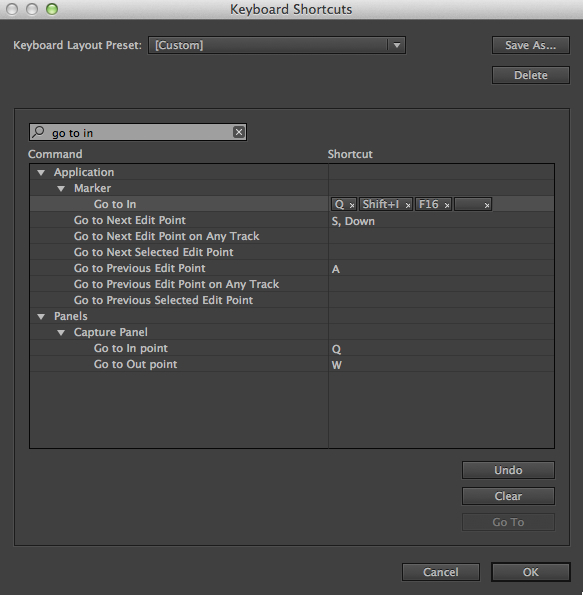
Just click the space next to a keyboard command and you get a blank button. Type a key to assign a new command. That little x gets rid of it.
And the Keyboard Shortcut box has now been assigned a default keyboard short cut of OPTION+COMMAND+K. Now if they could just make it easier to manage the shortcut settings overall. If you change a setting you still have to overwrite your old saved settings by typing the name exactly the same. That’s still a pain. And a visual keyboard map would be even better.
Blackmagic Pocket Cinema Camera support and CinemaDNG Source Settings
BMPCC camera raw CinemaDNG files are supported in this version as are a larger number of CinemaDNG files overall. Blackmagic CinemaDNG files also get a new Source Settings option via a right click on the file or a menu item. The new dialog box let you adjust the look of the file.
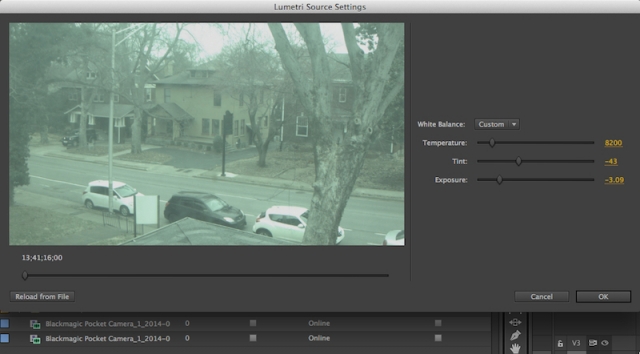
In the version I was using I couldn’t see the Source Settings dialog box image update as I tweaked the settings but the file itself did update upon closing.
Alpha channel transparency viewable in the Source monitor
Do you have a graphic or Quicktime file with an alpha channel? You’ll be able to see that now when loaded in the Source monitor.
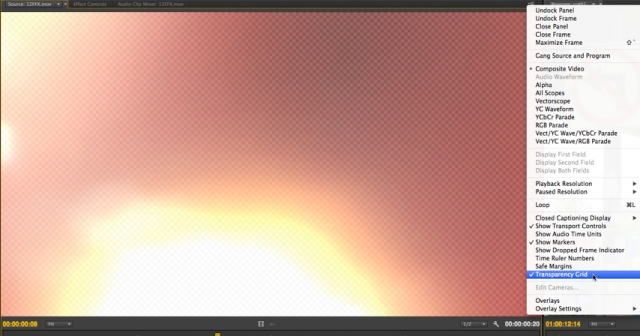
That checkerboard background will be familiar to anyone who uses Adobe products.
Next Page: The biggies as well as quite a few more little things that editors want to know about.
And a few of those biggies
Master Clip Effects
The idea is simple: Apply an Effect to a clip in the Source monitor and every instance of that clip in your edits now have that effect applied. Hit the Effect Controls to tweak the effect. You can also animate those effect parameters on the Source Clip Effect. There's not really any way to illustrate this via a screen grab!
Once that effected source clip is in the timeline you can’t get to the Effect Controls or even see the names of the source-side effects so you’ll have to Match Frame back into the source to tweak them. This is a very nice addition that will save a ton of time. It would be nice if there was a way to see a clip in the bin has a Master Clip Effect applied though. A change of icon color would be a good indicator.
Built-in masking and tracking
Every clip in PPro now has a shape mask built-in to that clip. Just check the Effects Controls from a clip in the timeline and look under the Opacity parameter.
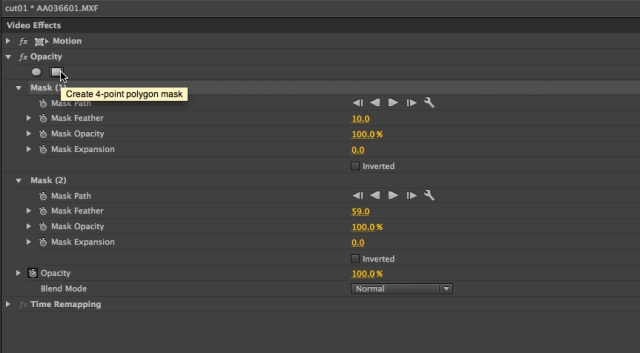
Turn the shape mask button on and viola, instant mask.
Once you turn on a shape mask then head over to the Record window to make adjustments. The mask causes transparency in the clip with the usual making control options. It can also be inverted. The square mask button will let you adjust each of the corner points or the polygon for a custom shape. While I couldn’t seem to add Bézier curves to the handles you can add more control points, rotate the shape and scale it proportionally. You can also add more than one shape by clicking the another shape button to keep adding them.
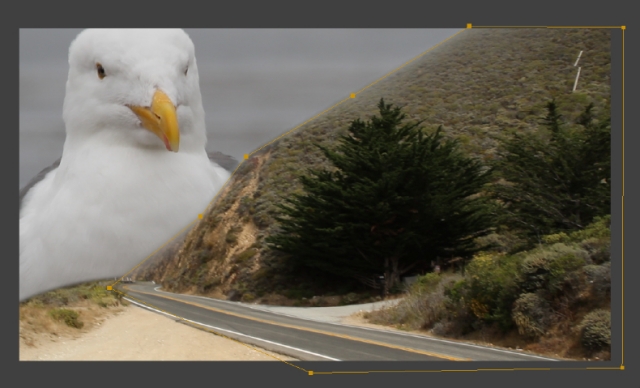
Not the prettiest mask ever made but you can see the shape mask that I made over the mountain. There's also a circle mask in the lower left corner that isn't currently selected.
But it gets better as each mask has object tracking controls. They appear as play and frame step buttons once you twirl down a Mask disclosure triangle. This is an object tracker so no need to define track points like when using a point tracker. I wouldn’t say it’s as good as the tracker in DaVinci Resolve but it works and can always be adjusted manually as tracking adds a keyframe on each frame.
And it still goes one better as the new masking tools aren’t only defined to the opacity of a clip in the timeline. They are also part of many effect filters as well. That makes this new feature most useful.
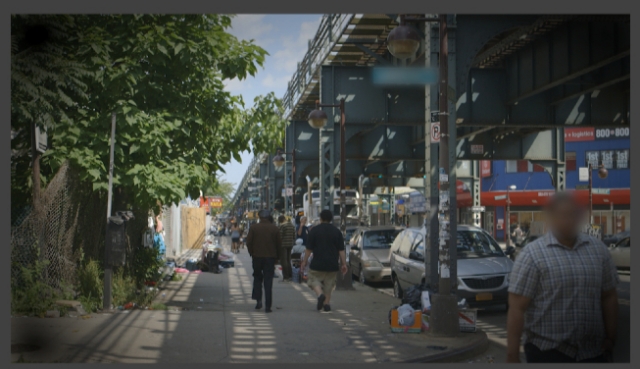
Turn on the mask in an effect like Blur and you can quickly and easily restrict that blur to a specific part of the frame. In the above image I have three masks on a single Gaussian Blur as well as a mask on a black video generator for a vignette.
The first thing that jumps into your mind when you see this effect is: blur license plates or corporate logos! But since this new masking feature is available in a lot of effects besides blurs I think people will figure out how to use it for a lot of different things. It’s not quite the Avid Media Composer Animatte effect which some will probably compare it to. It really does more and less at the same time. It’s its own thing. A welcome addition.
Master Text Templates
Need to make some lower thirds but have a ton of different names? Master Text Templates are the answer as these AE templates brought into PPro will let the editor easily change the text via the Effect Controls.
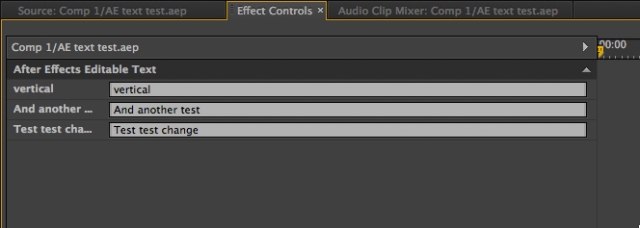
Just check the Effect Controls tab on an AE text template and type away on the exposed parameters to change that text.
The After Effects comp has to be saved as a text template for this to work. And the AE artist can also choose which text layers are editable in PPro by locking layers they don’t want changed.
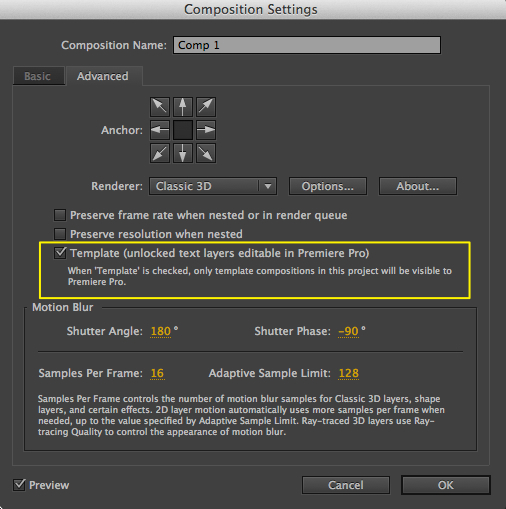
This setting has to be checked in your After Effects comp to have editable text for the text layers that are unlocked.
One thing I noticed is that if you want to have a lot of lower thirds, for example, in your edit you’ll need to duplicate your After Effects text template for each instance of the lower third in which you want to change the text. You can’t cut the single AE comp you’ve imported into PPro into the timeline 20 time and then double+click and edit each of the 20 instances right from the timeline. You’d need to duplicate that AE comp you’ve imported 20 times and change the text in each of those duplicates. Not exactly how I expected it to work but since each After Effect comp is it’s own thing I guess that makes sense. Still a very nice feature to have.
This is going to save some people a ton of time. I’m sure the FCPX crowd will crow that FCPX has had this feature since day one with the Motion effects integration and they will be correct. The PPro/AE crowd will ask what took Adobe so long to make this a reality!
A few other things worth noting
There’s several new things that are mentioned in the New Features Notes that are more ‘under the hood’ improvements that I don’t really see any specific buttons, check-boxes or preferences for. They are things that will hopefully make using PPro a better and more streamlined experience overall. Like many features in the update they aren’t flashy but may turn out to be very important for many workflows. The italicized text below is from the What’s New document.
• Media Browser favorites
To add a favorite location to the Media Browser, select a directory folder in either the right or left pane of the Media Browser. Right-click to bring up the contextual menu and choose “Add to Favorites”. This creates a shortcut to that directory, listing it in a “Favorites” directory at the top of the Media Browser’s left pane.
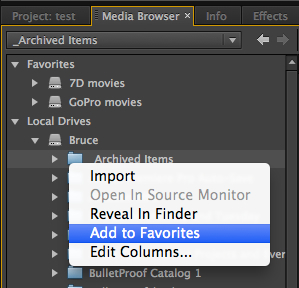
Media Browser favorites will come in handy.
• Reverse match frame
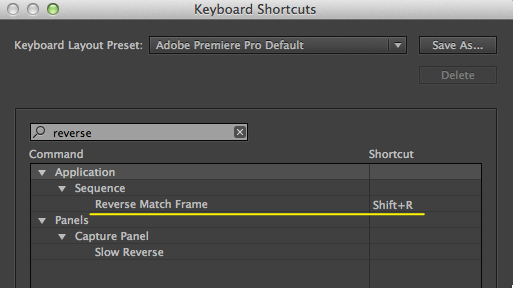
This new command lets you match frame from a Source image frame to where that frame is used in the timeline if that frame of the clip has been cut in.
• Most Recently Used list for media paths to allow switching between systems without relinking
A list of recent file paths for media items has been added the prproj file. This will allow users to switch between systems (including across platforms) and not have to relink media.
I’m not exactly sure what that means but hopefully it means less need to relink overall when moving between edit systems. That seems to be a continuation of media management improvements that have been happening for many PPro releases now.
• Preserve intrinsics and effects when flattening multicam
After flattening, the resulting flattened clip should look the same as in the unflattened multicam sequence. Effects from the single clips within the multicam sequence are preserved (as they were in previous versions) and all the effects that are applied to the multicam sequence clip are added. The non-intrinsic effects can be simply added, the intrinsic effects (like “Opacity” or “Motion”) are merged.
• Track Select Backward
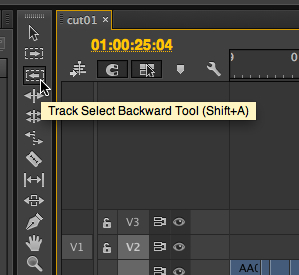
We’ve long had the Track Select Forwards but now we have the same to select everything from the pointer backwards.
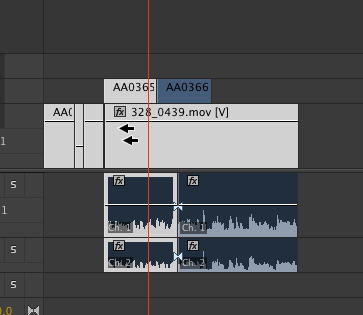
And there’s the new Track Select Backwards tools in action. Also notice the audio waveforms. They now have a much higher contrast in the interface which makes them easier to see. This is nice.
• Metadata database optimizations for performance and searching
The Project Panel Rapid Find will locate clips with XMP Markers, searching terms used in Marker Name or Marker comments. The Project Panel Rapid Find will locate clips using metadata by searching key terms used in Dynamic Media entries. Performance of these searches is greatly improved.
The PPro Filter Bin Content find box at the top a bin is, I think, the “Rapid Find.” This filter box has had the mysterious and who-knows-if-it-actually-did-anything Find Faces removed. But according to the note above the Rapid Find should work better overall as it has been painfully slow. It feels better in the update but I haven’t tried it in any very large projects.
But what it does seem to do now is actually be able to find clips with searched Marker text so this might come in handy. I still really, really wish a search or find in PPro would bring up a new search bin of some sort and not just filter in the Project window.
• Improvements to scratch disk workflows when working over a PC / Mac Networked environment
Improvements for locating scratch disk settings on a network share to enable preview files to be used across multiple systems.
Any mention of scratch disk changes makes me hope that PPro won’t force a scratch disk setting to the user’s documents folder if scratch disks are missing. I did a few tests with this new version and it feels like there might have been some work there. I was able to get the scratch disks setting window to pop-up on project launch sometimes, but not every time. It feels like PPro is remembering some previously set scratch disk paths as I resetting, mounting and unmounting them. Then again maybe this is something PPro has always done and I was just discovering it.

Regardless of this change I still see this message above. Let’s hope it’s gone forever in the next update.
• Manual sync offsets
This feature allows linked clips that are slightly out of sync to be slid back into sync in the Timeline panel, dragged back into the Project panel to create a new project item, and then used like any other sync’d clip, where sliding it out of sync will correctly display the relative offset from the manual sync point.
A “Sync Offset” data column (off by default) has been added to the Project panel, which will display the number of frames (plus or minus) for the audio track item that has been slid the furthest out of sync from the linked video.
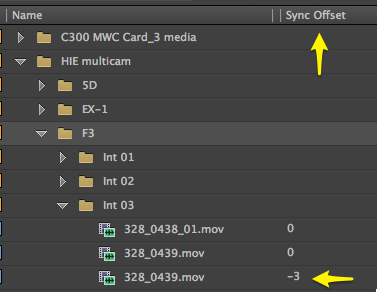
The above clip on the bottom called 328_0439 had the sync slipped in the timeline then dragged back into the bin with a 3 frame sync offset. That’s the –3 indicator in the Sync Offset column. You’d probably want to rename your clip when doing this as PPro doesn’t designate a name change.
• A cleaned up contextual menu in the Project Panel
Right+click on a clip or sequence in the project panel and you’ll now get an Export Media option at the bottom. Overall a lot of less useful things have been removed from this menu. Compare the new menu on the left to the old one on the right.
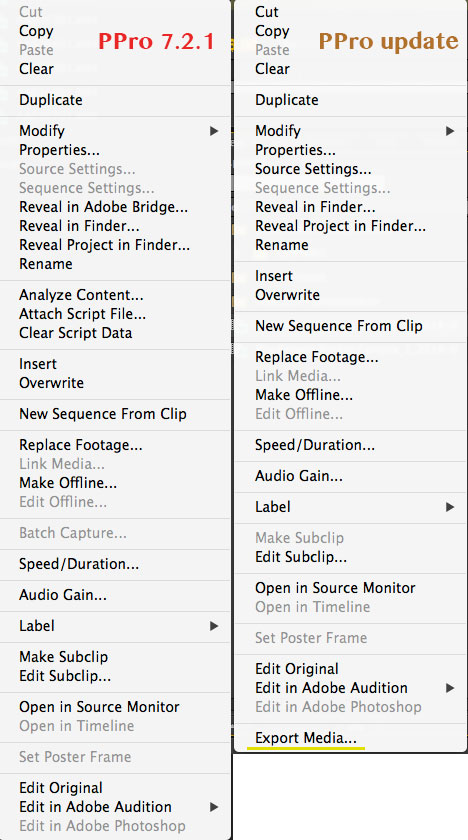
There’s been quite a few things removed from the v7 menu on the left. I like the Export Media option added to the new one on the right.
Wrapup
While we’ve focused on Adobe Premiere Pro CC here in this article all the video apps are seeing an update. Check around the web and you’ll find notes on new features in Prelude, After Effects, SpeedGrade, Media Encoder and Audition. The Adobe engineers have been busy.
Back to PPro: It’s always great to see a good NLE update and this latest addition to Adobe Premiere Pro CC is no exception. After kicking around with this new version of PPro for a week or so I can say there are some significant things that will make the editor’s life easier and the editorial process faster. That’s all I ask for from my NLE updates.
Update: Right as this went to “press” Adobe released a detailed list of new features. Click over to read it all or just check out the bullet list below. The bol text is my emphasis for stuff I want to know more about.
- Intel Iris architectures are supported for Mercury OpenCL.
- Full support for browsing After Effects projects in the Media Browser has been added, and effects compositions within an AEP can be previewed.
- Users can specify a number of frames for the step forward/back command.
- Media Browser project browse has been significantly improved for multi-project workflows.
- A new progress bar appears over the Premiere Pro icon on the Mac OS X dock or Windows taskbar displaying render progress.
- A new Track Select Backwards tool has been added.
- An option to show transparent/alpha elements of a frame as a gray and white grid has been added.
- A preference has been added to maintain audio pitch on scrub and shuttle.
- The Cross-Dissolve transition is now preset capable.
- Lens Distortion Removal presets have been added for Go Pro and DJI cameras, and the Lens Distortion Removal effect has been ported to Mac.
- Multiple transitions can be selected at once and their durations altered simultaneously.
- Red Giant Pluraleyes workflows have been improved.
- Several issues with AAF export have been resolved.
- A Reverse Match Frame command has been added.
- Significant improvements have been made to effects and transitions parity between Windows and Mac.
- ‘Favorites’ can now be created and navigated to in the Media Browser.
- Double-clicking a track item in a sequence will automatically perform a match frame to the playhead position when it is parked on a frame within that item.
- Typekit support has been added to Premiere Pro, allowing quick access to the Typekit website from the Title menu.
- A preference has been added to allow a user’s most recent autosave file to be automatically backed up to Creative Cloud.
- Comment names are displayed in the Marker panel.
- All video and/or all audio tracks can be locked or unlocked with an assigned keyboard shortcut.
- An Export command has been added to the contextual menu for items in the Project Panel.
- Sequences in the Timeline or Project Panel can be made offline with a right-click.
- A keyboard shortcut can be assigned for the Keyboard Shortcuts dialog.
- Sound roll/Sound timecode can be used in an EDL export.
- Audio clip volume keyframing can be nudged up and down with assignable keyboard shortcuts.
- Scratch-disk workflows have been improved, both when moving between platforms and when the previous scratch disk is offline.
- Searching and sorting in the Project Panel has been made dramatically faster.
- A new Set To Frame Size command has been added, preserving the full resolution of media without rasterizing (as with Scale To Frame Size).
- A new popup has been added to audio track headers to allow fast Voice Over recording configuration.
- Dolby Digital and Dolby Digital Plus (stereo only) can be encoded on export.
- The fx badges on track items have been moved to the left of the name, and can now be disabled.
- More than one keyboard shortcut can be assigned to a single command.
- Improvements have been made to AVCi growing files performance.
- An option has been added to not consolidate duplicates on import.
- Manual sync offsets can be committed to a new Project item.
- SCC or MCC caption files can be created without needing to create accompanying media.
- Effects are preserved when using the Flatten Multicam command.
- An option has been added to create a new folder when a sequence or XML is imported.
- The Mosaic effect has been GPU optimized.
- Assignable keyboard shortcuts have been added for toggling audio and video track outputs.
- A preference has been added to disable automatic import of embedded closed caption streams.
- Users can export to AS11 content packages.
- Users can export to certain types of Quvis Wraptor DCP packages.

Filmtools
Filmmakers go-to destination for pre-production, production & post production equipment!
Shop Now


