Removing backgrounds from images was once an art reserved for a few, but the evolution of software has made the process not only automatic but intelligent, as PhotoDirector 10 reveals.
Layer masks, content aware clone and other options allow users to mix content from different origins in a single final image. The evolution of the photo editing software is amazing, for the variety of options we’ve been able to explore in recent years. From complex compositions to the simple replacement of a washed out sky, we now have all the tools needed to do, many times almost automatically, what once took hours, sometimes days of painful painting of areas to be removed.
While we now do it digitally, in a cleaner process, studio and portrait photographers using film have to retouch the final image in a laborious process, including bleaching, cutting and scraping, many times on print. Those brave enough to try it directly on the negative, would follow a process not much different from what we do today in the computer, but riskier because there was no “Undo” if the negative was damaged.

From the old days to Imerge Pro
Retouching prints and negatives concur to the same end but are two different arts and require different approaches. With negatives, it is not advisable to retouch small formats, 35mm included, as the working area is much to small, but anything from 6 x 4.5 cm in medium format is workable, the detail complexity of the image being the only constraint, in some cases. Larger size negatives, up to 8×10 inches (or 20x25cm) are much easier to retouch, but it was/is common sense that an intermediate copy should be used by those not experienced at retouching.
Retouching and removing elements from images started almost as soon as photography became a popular medium, and it continues to this day, and now even smartphones users have access to options that would be considered “magic” or probably “witchcraft” two centuries ago. I recently wrote here at ProVideo Coalition about Imerge Pro, from FXhome, a compositing tool which is the world’s first non-destructive RAW image compositor, available for both PC and Mac. I reviewed the program too, and more recently noted that Imerge Pro 2 is already available, with some new options included.

Background Removal Tool
In this article I look at something else, the background removal options present in CyberLink’s PhotoDirector 10, which I also reviewed recently. While trying some of the new features, I also checked the tools to remove backgrounds, and while playing with them decided it made sense to use the software to comment on the evolution of these tools.
PhotoDirector 10 has a series of new features, including clipping masks, layer grouping and the ability to add new empty layers to projects, and the Background Removal function is not even new, but as these tools are always evolving, offering more refined results, I decided to try it in a simple project, but one with elements that has always been complex to solve in the past: removing the background from one photo with flyway or wispy hair.
Removing wispy hair
Removing the background detail behind hair is one of the most difficult tasks in photo editing… or it used to be. In fact, it still is, in some situations, but we’ve come a long way since the early days of photo editing, when you had to do it all by hand, in a process similar, to a certain extent, to what film retouchers did in the past. Those coming from the early days of digital photography have learned how to use layers through a complex process to get the intended result, but with the help of technology we’ve come a long way.
Although I do not need to use the process for most of the things I do, I am always curious about the technology behind the “magic”, and like to try the different approaches available. That’s the reason why I wrote, back in 2015, about Topaz Labs ReMask, a software that works, as the company says, ”as easy as digital scissors” and allows you to create precise selections effortlessly. The same curiosity made me try Imerge Pro, more recently. It’s exciting to see how the technology has evolved in the last decade or so, and how the introduction of “intelligent” tools has made this technique, and others, accessible to more people.
All the tools in a single app
ReMask uses simple 3-colour tri-map technology — green, red and blue — to enable users to quickly and easily extract even the toughest elements — hair, foliage, and transparent materials — in their photos. The interface is simple and the logic too. You use the blue brush to outline the area you want to protect, then fill with red the area to cut and with green the area to keep (in normal mode the green is already active, so you just use blue and red). Then you ask the computer to… compute. Topaz ReMask will make its calculations and will give you a final cutout and a mask for it, depending on how you set your preferences.
Topaz ReMask is one example of the apps available now and it works standalone and as a plugin to both Photoshop and Lightroom. The Background Removal tool in CyberLink PhotoDirector 10 is different, but it aims to offer users the same functionality. I did not compare them to see which is more powerful, so don’t ask me which to choose. But as more and more people like to have all the tools they need in one single editor, PhotoDirector 10 seems like the way to go. It’s Background Removal tool may be – let me say this again: “may be” – less versatile, but for most uses it will get the job done.
The “intelligent” option
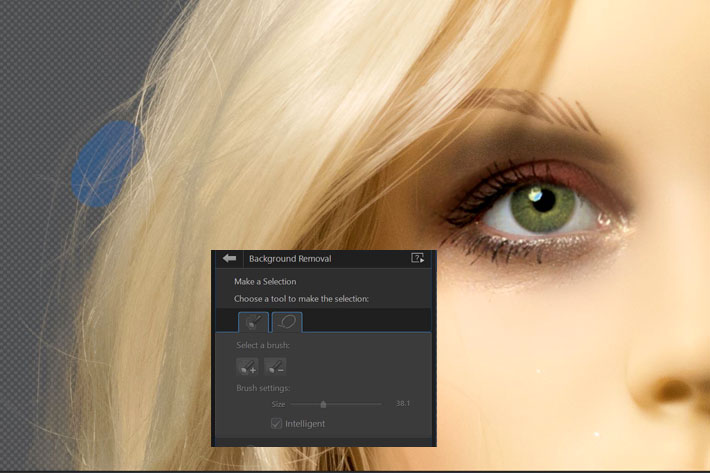
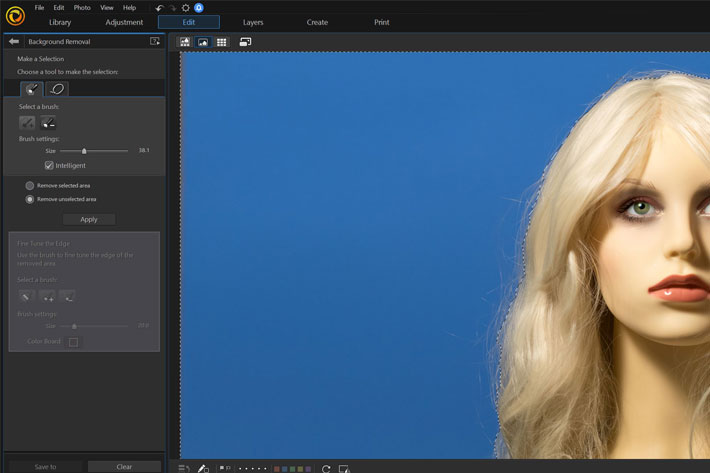
The Background Removal tool in PowerDirector 10 appears under the Edit menu, in the Extract or Compose section. Once there, you’ve two options: use the smart lasso or the magic selection brush. The brush is the “modern” way of doing things. You choose the size of the brush and then paint along the edges of the area you want to select, in a process similar to almost all other software of this type available these days. The “intelligent” option – which you should activate – makes the app assist you by selecting all the pixels with similar properties when you make a brush stroke. To quickly erase areas you simply use the Alt key, instead of selecting the “Remove selected area” or “Remove unselected area” buttons on the side panel.
A brush to fine tune the edges is present too, and in its menu it is also possible to select a new background colour to the removed part of the photo, using the Color Board button. But as you’ll probably want to have a transparent background, just leave it alone. It’s good to know it is there, though. When you’re finished, save the image, which will be added to the Background Removal Gallery and can later be used in Photo Composer and in layers.
Good results without much effort
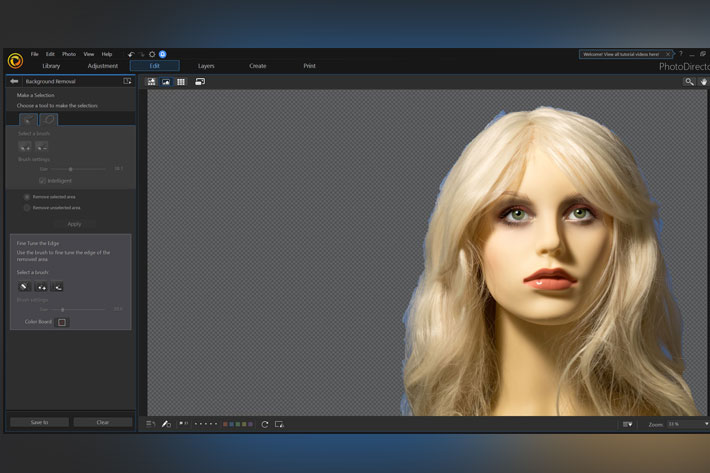
The simple project published here was used to confirm how well the Background Removal tool worked with hair, which can be a pain in the neck to get right. With a few strokes of the “intelligent” brush in the original image I was able to get a result that can be added to different backgrounds without any problem. While the first strokes of the brush removed some of the wispy hair, it was easy to recover those, simply painting over again to get them. Although it looks like magic, what the
The wispy hair on the original image was kept with a transparent background that allowed me to place the image over different new backgrounds. I was not trying to get a perfectly matched final composite, rather checking that the transparent area and the wispy hair would work seamlessly with different backgrounds, in layers. I chose four for the final image, just to show how the image resulting from a single operation could be mixed, with good results, in different ways.
If you’re curious about the options available in CyberLink’s PhotoDirector 10, download the trial version and try these and other tools of the program for a period of 30 days.

